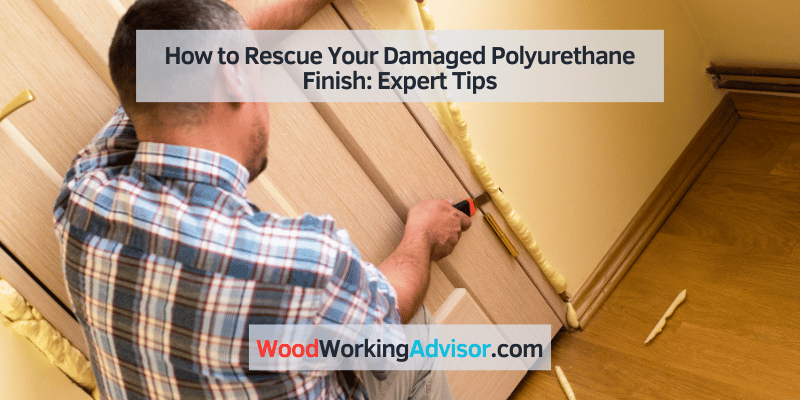
How to Rescue Your Damaged Polyurethane Finish: Expert Tips
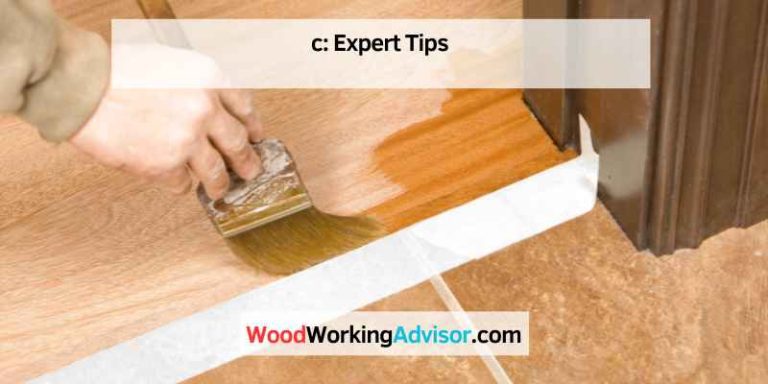
To repair a damaged polyurethane finish, start by sanding the damaged area with fine grit sandpaper, then clean it thoroughly. Next, apply a new coat of polyurethane using a foam brush, and allow it to dry completely before gently buffing the surface with a soft cloth.
Understanding Polyurethane Finishes: A Beginner’S Guide
Learn the essentials of repairing damaged polyurethane finishes with this beginner’s guide. Discover step-by-step instructions and expert tips to restore the beauty of your furniture and surfaces.
What Is Polyurethane?
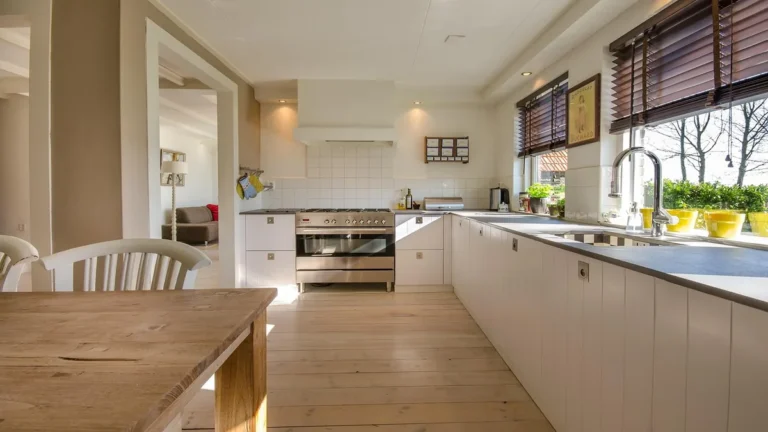
Polyurethane is a popular type of finish used on various surfaces, including wood, metal, and plastic. It is a protective coating that provides durability and enhances the appearance of the material it is applied to. Polyurethane finishes are available in different forms, such as oil-based and water-based options, each with its own characteristics and advantages.
Understanding the basics of polyurethane finishes is essential before you embark on repairing any damage.
Different Types Of Polyurethane Finishes
There are two main types of polyurethane finishes: oil-based and water-based. Here are the key differences between the two:
Oil-based polyurethane:
- Provides a rich and amber-like appearance, enhancing the natural color of the material.
- Offers a high level of durability and resistance to moisture and chemicals.
- Requires longer drying time, typically around 8-24 hours.
- Emit strong odors and require proper ventilation when applied.
Water-based polyurethane:
- Dries clear and does not alter the color of the material significantly.
- Has quick drying time, usually within 2-4 hours.
- Offers good durability and resistance to wear and tear.
- Has a low odor and easy cleanup with water.
Choosing the right type of polyurethane finish depends on your specific needs and preferences. Now, let’s explore the pros and cons of using polyurethane finishes.
Pros And Cons Of Using Polyurethane Finishes
Before you decide to repair or apply a polyurethane finish, it’s important to consider the advantages and disadvantages it offers. Here are some pros and cons to help you make an informed decision:
Pros:
- Provides a protective barrier against scratches, stains, and water damage.
- Enhances the natural beauty of the material by adding a glossy or satin sheen.
- Offers excellent durability, making it suitable for high-traffic areas.
- Can be applied to various surfaces, including wood furniture, floors, and cabinetry.
- Easy to clean and maintain, prolonging the lifespan of the material.
Cons:
- Requires proper ventilation and precautions due to the strong odors and potential toxicity of oil-based polyurethane.
- Drying time can be relatively long, causing inconvenience during the application process.
- The initial cost of purchasing polyurethane finishes can be higher compared to other types of finishes.
- May require periodic maintenance and reapplication over time to maintain its protective qualities.
Understanding the pros and cons of polyurethane finishes will help you decide whether it is the right choice for your repair project. Keep in mind your specific requirements and the nature of the material when making your decision.

Signs Of Damaged Polyurethane Finishes: How To Spot Them
Polyurethane finishes on surfaces can be prone to damage over time. Knowing the signs of damage is crucial in order to repair them effectively. By paying attention to factors such as discoloration, peeling, or scratches, you can restore the polyurethane finish to its former glory.
Are you noticing some wear and tear on your polyurethane finishes? Don’t worry, we’ve got you covered! Identifying the signs of damaged polyurethane finishes is the first step towards repairing them effectively. In this section, we’ll walk you through the common signs of damage and help you assess the extent of the problem.
Common Signs Of Damage:
- Scratches and scuffs: These are often caused by regular use, dragging furniture, or even pet claws. They can be superficial or deep, depending on the intensity.
- Faded or discolored areas: Over time, prolonged exposure to sunlight or cleaning products can cause the polyurethane finish to lose its luster and appear dull or discolored.
- Peeling or flaking: If you notice that the polyurethane finish is peeling or flaking off, it indicates that the adhesion has been compromised, leading to serious damage.
Now, let’s move on to assessing the extent of the damage.
Assessing The Extent Of The Damage:
To determine whether repairs are necessary, it’s crucial to evaluate the extent of the damage. By doing so, you can decide whether a minor touch-up or a major restoration is required.
Identifying Minor And Major Damage:
- Minor damage: Minor scratches, scuffs, and small areas of discoloration can usually be remedied with minor touch-ups. These repairs involve sanding and refinishing the affected area only.
- Major damage: Peeling or flaking finishes, deep scratches, and large faded areas are examples of major damage. Addressing major damage typically requires more extensive repairs, such as stripping the old finish, repairing the wood underneath, and applying a completely new polyurethane coating.
Finally, it’s time to determine whether repairs are necessary.
Determining If Repairs Are Necessary:
To decide if repairs are required, consider the following factors:
- Severity of the damage: Assess the depth and extent of the scratches, peeling, or fading to determine if they are affecting the functionality or aesthetics of the surface.
- Personal preference: If you value perfection or want to restore the original beauty of the piece, repairs may be necessary, regardless of the severity of the damage.
Remember, it’s essential to address signs of damage promptly to prevent further deterioration of your polyurethane finishes. Now that you can spot the signs of damage, let’s move on to the next section to explore the steps involved in repairing damaged polyurethane finishes.
Preparing The Surface: Necessary Steps Before Repairing The Finish
Preparing the surface is a crucial step before repairing a damaged polyurethane finish. Ensure the surface is clean, smooth, and free from any debris or previous finishes. Sanding, cleaning with mineral spirits, and applying a bonding agent are necessary to ensure a successful repair.
Whether your polyurethane finish is damaged due to wear and tear or accidental spills, it’s important to properly prepare the surface before repairing it. By following these necessary steps, you can ensure a smooth and successful restoration process.
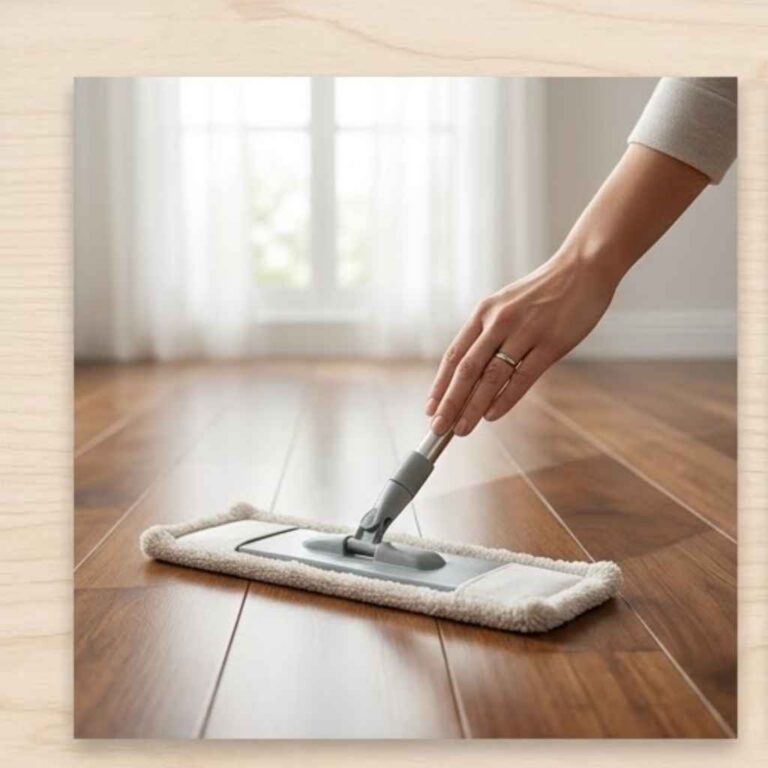
Clean The Damaged Area Effectively:
Before you can repair the damaged polyurethane finish, it’s crucial to clean the area thoroughly. This will remove any dirt, grime, or residue that may hinder the repair process. Here are some cleaning tips to help you achieve an effective clean:
- Start by wiping the damaged area with a soft, lint-free cloth to remove loose debris.
- If any sticky or stubborn residue remains, dampen a cloth with warm water and a mild dish soap. Gently scrub the affected area in a circular motion.
- Rinse the cloth and wring it out to remove excess soap. Wipe the area again to remove any soap residue.
- Finally, use a clean, dry cloth to ensure the surface is completely dry.
Choosing The Right Cleaning Agent:
When selecting a cleaning agent for the damaged polyurethane finish, it’s essential to choose a product that won’t cause further harm. Consider the following factors:
- Opt for a cleaning agent that is specifically formulated for use on polyurethane finishes. This will ensure compatibility and minimize the risk of damage.
- Look for cleaning agents that are non-abrasive and gentle on the surface. Harsh chemicals can strip away the finish or cause discoloration.
- Always read the manufacturer’s instructions and follow them carefully. Some cleaning agents may require dilution or specific application techniques.
Proper Cleaning Techniques:
To achieve an effective clean, it’s important to use proper techniques. Here are some tips to help you clean the damaged area effectively:
- Avoid excessive scrubbing or rubbing, as this can further damage the finish.
- Use gentle, circular motions when cleaning to prevent streaks or marks.
- Work in small sections to ensure thorough cleaning without spreading dirt or residue.
- Test the cleaning agent on a small, inconspicuous area before applying it to the damaged surface. This will help you assess its compatibility and ensure it doesn’t cause any unwanted effects.
Sanding The Damaged Surface:
Once the surface is clean, you may need to sand the damaged area to remove imperfections and create a smooth surface for the repair. Follow these steps for successful sanding:
- Start by selecting the appropriate sandpaper grit for the job. The level of damage will determine the grit you should use.
- Begin with a coarser grit to remove the damaged layers of polyurethane. As you progress, gradually switch to finer grits for a smoother finish.
- Always sand in the direction of the wood grain to avoid creating visible scratches or marks on the surface.
- Use light to moderate pressure while sanding. Let the sandpaper do the work and avoid pressing too hard, which can lead to uneven results.
- Keep a close eye on your progress to ensure you achieve the desired level of smoothness while avoiding over-sanding.
By following these necessary steps to prepare the surface before repairing the polyurethane finish, you’ll set yourself up for a successful restoration process. Remember to clean the damaged area effectively, choose the right cleaning agent, employ proper cleaning techniques, and sand the surface with care.

Repairing Minor Damage: Easy DIY Fixes For Polyurethane Finishes
Discover simple do-it-yourself fixes to repair minor damage on polyurethane finishes. This comprehensive guide offers easy solutions to restore your damaged polyurethane finish without the need for professional help.
Wood furniture and surfaces with a polyurethane finish can sometimes endure minor scratches, scuffs, or fading over time. Luckily, repairing these types of damages can be a simple DIY project, allowing you to restore the beauty of your polyurethane finish.
Here are some easy fixes to address minor damage:
Filling In Minor Scratches And Scuffs:
- Apply a small amount of wood filler or putty that matches the color of your polyurethane finish to the scratched or scuffed area.
- Smooth the filler or putty using a putty knife or your finger, ensuring it is level with the surrounding surface.
- Let it dry completely before moving on to the next step.
Application And Blending Techniques:
- Gently sand the filled area using fine-grit sandpaper to achieve a smooth surface.
- Clean away any dust with a soft cloth or tack cloth.
- Apply a thin coat of polyurethane over the repaired area using a brush or foam applicator.
- Blend the edges of the new coating with the existing finish by feathering the brush strokes outward.
- Allow the polyurethane to dry according to the manufacturer’s instructions before proceeding.
Touching Up Faded Or Discolored Areas:
- Clean the faded or discolored area with a mild cleaner and a soft cloth to remove any dirt or residue.
- Lightly sand the affected area with fine-grit sandpaper to prepare it for refinishing.
- Apply a fresh coat of polyurethane using a brush or foam applicator, ensuring even coverage.
- Allow the polyurethane to dry completely before assessing if additional touch-ups are needed.
Matching The Color Of The Original Finish:
- If the repaired area does not match the color of the original finish, you can use a color-matching stain or dye.
- Test the stain or dye on a small, inconspicuous area to ensure a good color match.
- Apply the stain or dye to the repaired area using a clean cloth or brush, blending it carefully with the surrounding finish.
- Allow the stain or dye to dry completely before proceeding.
Reapplying Polyurethane To Small Damaged Sections:
- Carefully remove any flaking or damaged polyurethane using fine-grit sandpaper.
- Clean the area with a mild cleaner and a soft cloth to remove any debris.
- Apply a thin coat of polyurethane to the damaged area, feathering the edges for seamless integration.
- Let the polyurethane dry according to the manufacturer’s instructions before assessing if additional coats are necessary.
Preparing The Damaged Area For Reapplication:
- Lightly sand the damaged area with fine-grit sandpaper to create a smooth surface.
- Clean the area with a mild cleaner and a soft cloth to remove any dust or dirt.
- Ensure the surface is completely dry before proceeding with the reapplication of polyurethane.
Applying The Polyurethane Evenly For Seamless Integration:
- Start by applying a thin coat of polyurethane to the damaged area using a brush or foam applicator.
- Feather the edges of the new coat by blending brush strokes outward for a seamless finish.
- Allow the polyurethane to dry completely before assessing if additional coats are needed for optimal results.
By following these easy DIY fixes, you can effectively repair minor damage to your polyurethane finish, rejuvenating the appearance of your wood furniture or surfaces. Remember to take your time, follow the manufacturer’s instructions, and be patient throughout the repair process to achieve the best results.
Seeking Professional Help: When And How To Hire An Expert
When it comes to repairing a damaged polyurethane finish, seeking professional help is essential. Hiring an expert ensures that the job is done effectively and efficiently, saving you time and effort in the process. Professional help is the best way to restore the beauty of your polyurethane finish without any hassle.
If you find yourself facing extensive or severe damage to your polyurethane finish or lacking the necessary DIY skills or time to tackle the repair process on your own, seeking professional assistance can be a wise decision. However, choosing the right expert for the job requires careful consideration and research.
Here are some important factors to keep in mind when hiring a professional for repairing your damaged polyurethane finish:
When To Consider Professional Assistance:
- Extensive or severe damage: If your polyurethane finish is significantly damaged or requires extensive repairs, it is best to hire a professional who has the expertise and experience to handle such complex tasks.
- Lack of DIY skills or time: If you are unfamiliar with the repair process or simply don’t have the time to undertake it yourself, entrusting the job to a professional can save you time, effort, and potential frustration.
Choosing A Reliable Professional:
- Checking references and reviews: Before hiring an expert, take the time to research and read reviews about their services. Reach out to previous clients or check online platforms for feedback to ensure their reliability and proficiency.
- Getting multiple quotes for comparison: Obtain quotes from multiple professionals to compare their pricing, services, and approach. This will help you make an informed decision and ensure you get the best value for your money.
Collaboration With The Expert During The Repair Process:
- Understanding their recommendations and suggestions: It is essential to have a clear understanding of the expert’s recommendations and suggestions for the repair process. Ask questions and seek clarification to ensure you are on the same page.
- Communicating your expectations clearly: Clearly communicate your expectations, desired outcomes, and any specific requirements to the professional. This will help them tailor their approach to meet your needs and deliver satisfactory results.
By carefully considering these factors and following a systematic approach, you can hire a reliable professional to repair your damaged polyurethane finish. Remember, a skilled expert can not only restore your finish but also minimize the chances of future damage, ensuring your furniture or flooring remains in top condition for years to come.
Preventing Future Damage: Maintenance Tips For Polyurethane Finishes
To prevent future damage, it’s important to properly maintain polyurethane finishes. Follow these maintenance tips to repair any damaged polyurethane finish and keep your surfaces looking their best.
Regular cleaning and maintenance routines:
- Clean your polyurethane finish regularly to prevent dirt and grime buildup.
- Wipe the surface with a soft, dry cloth to remove dust and debris.
- Use a mild soap solution or a pH-neutral cleaner to gently clean the surface when necessary.
Using gentle cleaning products:
- Avoid using harsh chemicals or abrasive cleaners that can damage the polyurethane finish.
- Opt for gentle cleaning products specifically formulated for wood surfaces.
- Read and follow the manufacturer’s instructions when selecting cleaning agents.
Avoiding abrasive materials:
- Scratches and abrasions can weaken the polyurethane finish over time.
- Use soft-bristled brushes or microfiber cloths for cleaning.
- Avoid abrasive scrub pads or rough materials that can cause scratches.
Applying protective measures:
- Apply a protective layer of furniture wax or polish to enhance the durability of the polyurethane finish.
- Follow the product instructions for proper application.
- Repeat the process periodically to maintain the protective layer.
Using coasters and mats:
- Place coasters under glasses and mats under objects that may scratch or damage the polyurethane finish.
- Prevent moisture from seeping into the wood by using coasters for beverages.
- Use mats to protect the surface from hot dishes, sharp utensils, or heavy objects.
Using felt pads on furniture:
- Attach felt pads to the bottom of furniture legs to prevent scratches.
- Felt pads create a protective barrier between the furniture and the floor.
- Change the pads when necessary to ensure optimal protection.
Periodic inspections and touch-ups:
- Regularly inspect the polyurethane finish for signs of wear, discoloration, or damage.
- Address any minor issues promptly to prevent further damage.
- Perform periodic touch-ups to maintain the appearance and integrity of the finish.
Identifying potential damage early on:
- Look out for signs of peeling, cracking, or fading on the polyurethane finish.
- Discoloration or dullness may indicate the need for maintenance or repair.
- Pay attention to high-traffic areas or places prone to spills or impact.
Addressing minor issues promptly:
- Fix minor damages, such as small scratches or chips, as soon as possible.
- Use touch-up solutions that match the color of the finish.
- Follow the instructions provided with the touch-up kit for best results.
Remember, by following these maintenance tips, you can keep your polyurethane finish looking beautiful and extend its lifespan. Regular cleaning, gentle products, and protective measures will help prevent future damage and ensure the longevity of your polyurethane finish.
Best Product for Polyurethane Repair

Minwax Polycrylic Water-Based Protective Finish
Fast-drying, non-yellowing topcoat for touch-up and repair coats over existing water-based polyurethane. Dries in 2 hours, recoat in 2 hours. Excellent adhesion when applied over a scuffed, clean surface.
- Best for: Touch-up coats, scratches, and minor repairs on cabinets and furniture
- Why we picked it: Fast dry time, non-yellowing, water cleanup, compatible with existing water-based finishes
- Main drawback: Not compatible over oil-based polyurethane — can delaminate
More repair options
|
Option 1 Varathane Oil-Based Polyurethane
|
Option 2 3M Fine Sanding Sponge
|
Option 3 Minwax Wood Finish Touch-Up Marker
|
As an Amazon Associate we earn from qualifying purchases.
Conclusion: Reviving And Preserving The Beauty Of Polyurethane Finishes
Repairing damaged polyurethane finishes is crucial for preserving their beauty. With the right techniques and products, you can revive your polyurethane finishes, ensuring they remain durable and visually appealing for years to come.
Polyurethane finishes can be a beautiful addition to any woodwork or furniture. However, over time, these finishes can become damaged and lose their luster. In this section, we will recap the key points we discussed about reviving and preserving the beauty of polyurethane finishes.
We will emphasize the importance of regular maintenance and care, as well as the actions you can take to rescue and restore damaged finishes.
Recap Of The Key Points Discussed:
- Polyurethane finishes can become damaged due to various factors, including scratches, water damage, and sun exposure.
- Regular cleaning and maintenance can help prevent damage and maintain the finish’s appearance.
- Surface-level scratches can often be repaired with simple solutions like furniture polish or rubbing compound.
- For deeper scratches or gouges, sanding the damaged area and applying a fresh coat of polyurethane can help restore the finish.
- Water damage can cause the finish to bubble or peel. To repair this, you’ll need to remove the damaged finish, sand the area, and apply a new coat of polyurethane.
- Sun exposure can cause the finish to fade over time. Applying a new coat of polyurethane with UV protection can help prevent further damage.
Importance Of Regular Maintenance And Care:
- Regularly dusting and cleaning the surface of polyurethane finishes can help prevent scratches and damage.
- Avoid using abrasive cleaners or tools that can scratch the finish.
- Use coasters or protective pads to prevent water damage from cups or other liquids.
- Keep furniture away from direct sunlight or use UV protective coatings to minimize the effects of sun exposure.
Taking Action To Rescue And Restore Damaged Finishes:
- Assess the extent of the damage and determine the appropriate solution based on the severity.
- For minor scratches or scuff marks, try using furniture polish or rubbing compound to buff out the damage.
- For deeper scratches or gouges, sanding the area and applying a fresh coat of polyurethane can help restore the finish.
- In cases of water damage or peeling finishes, it may be necessary to remove the damaged layers, sand the area, and apply a new coat of polyurethane.
- Consider using a polyurethane finish with UV protection to prevent future damage caused by sun exposure.
By following these steps, you can rescue and restore damaged polyurethane finishes, preserving their beauty and extending their lifespan. Regular maintenance and care are crucial in preventing damage and ensuring that your polyurethane finishes remain looking their best for years to come.

Frequently Asked Questions Of How To Repair Damaged Polyurethane Finish
Can Polyurethane Finish Be Repaired?
Yes, polyurethane finish can be repaired.
How Do You Fix Messed Up Polyurethane?
To fix messed up polyurethane, lightly sand the surface, wipe off dust, apply a new coat, and allow it to dry completely.
How Do You Repair Damaged Wood Varnish?
To repair damaged wood varnish:
1. Start by sanding the damaged area gently.
2. Apply a matching stain or varnish to the sanded spot.
3. Let it dry completely, then lightly sand and apply another coat if needed.
4. Finally, buff the area with a soft cloth for a smooth finish.
How Do You Repair Damaged Polyurethane Finish?
To repair a damaged polyurethane finish, start by cleaning the surface with a mild detergent. Then, sand the area gently with fine-grit sandpaper to remove any roughness. After that, apply a new coat of polyurethane using a brush or a spray.
Allow it to dry completely before using the furniture or walking on the floor.
Conclusion
Restoring a damaged polyurethane finish doesn’t have to be a daunting task. By following the steps outlined in this blog post, you can easily repair any chips, scratches, or discoloration that may have occurred. Start by assessing the damage and determining the appropriate course of action.
Then, gather the necessary supplies and prepare the surface for repair. Apply the appropriate filler, stain, or varnish as needed and allow sufficient drying time. Finish off the process by sanding and buffing the repaired area to restore a smooth and seamless finish.
The key to a successful repair is taking your time, following the instructions carefully, and being patient throughout the process. With a little effort and know-how, you can have your polyurethane finish looking as good as new in no time.