How to Easily Remove Scratches on Vinyl Plank Flooring: Expert Tips
To get rid of scratches on vinyl plank flooring, you can use a few simple techniques.
Understanding Vinyl Plank Flooring
Vinyl plank flooring is a popular choice due to its durability, but scratches can be a common issue. To get rid of them, consider using a vinyl floor repair kit, applying a vinyl floor sealer, or using a mixture of baking soda and water to gently buff out the scratches.
What Is Vinyl Plank Flooring?
Before we dive into the topic of how to get rid of scratches on vinyl plank flooring, let’s take a moment to understand what vinyl plank flooring actually is.
Characteristics Of Vinyl Plank Flooring
Vinyl plank flooring is a popular choice among homeowners for several reasons. Let’s explore its key characteristics:
- Durable: Vinyl plank flooring is known for its durability, making it a great option for high-traffic areas of your home.
- Water-resistant: Vinyl plank flooring is designed to be resistant to water, making it ideal for areas prone to moisture, such as bathrooms and kitchens.
- Easy to clean: Thanks to its smooth and seamless surface, vinyl plank flooring is easy to clean and maintain, requiring minimal effort.
- Variety of styles and designs: Vinyl plank flooring comes in a wide range of styles, designs, and colors, allowing homeowners to find the perfect match for their interior décor.
- Cost-effective: Compared to other flooring options, vinyl plank flooring is often more affordable, making it an attractive choice for budget-conscious individuals.
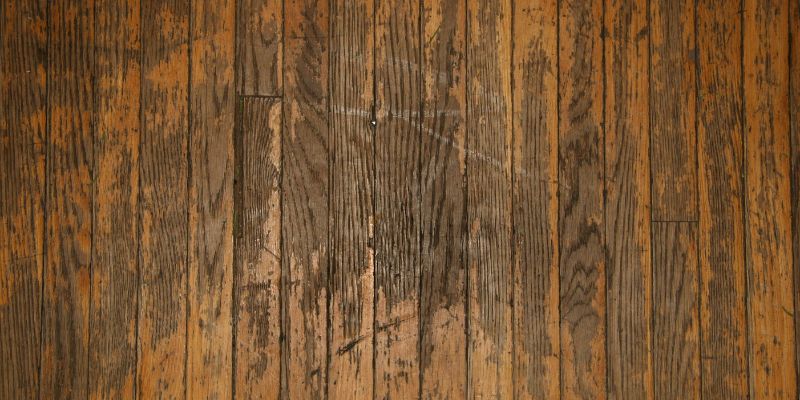
Common Causes Of Scratches On Vinyl Plank Flooring
Despite its durability, vinyl plank flooring can still be susceptible to scratches. Understanding the common causes can help you prevent them and keep your flooring looking pristine:
- Furniture: Moving heavy furniture across vinyl plank flooring without proper padding or using abrasive materials can leave unsightly scratches.
- Sharp objects: Accidentally dropping or dragging sharp objects like knives or tools can result in scratches on the surface of the flooring.
- Pets: Pet claws can inadvertently cause scratches, especially if they are not regularly trimmed.
- Grit and debris: Sand, dirt, and other abrasive particles can act as sandpaper, causing scratches when walked upon or moved around.
- Inadequate cleaning tools: Using harsh scrub brushes or abrasive cleaning tools can damage the surface of vinyl plank flooring, leading to scratches.
Now that we have a clear understanding of vinyl plank flooring and the common causes of scratches, let’s delve into effective methods to get rid of these pesky scratches and restore the beauty of your vinyl flooring. Stay tuned!
Preparing The Flooring For Repair
If you have noticed scratches on your vinyl plank flooring, don’t worry! With a few simple steps, you can easily get rid of those scratches and restore the beauty of your flooring. Before you start the repair process, it’s important to prepare the flooring properly. This involves cleaning the damaged area, inspecting the scratch depth, and gathering the necessary tools and materials. Let’s dive into each step to ensure a successful repair.
Cleaning The Damaged Area
The first step in preparing your vinyl plank flooring for repair is to clean the damaged area. Make sure to remove any dirt, dust, or debris that could interfere with the repair process. You can use a damp cloth or mop to gently clean the area. Avoid using abrasive cleaners or scrub brushes, as they can potentially worsen the scratch or damage the surface of the flooring.
Inspecting The Scratch Depth
Once you have cleaned the damaged area, it’s important to inspect the scratch depth. This will help you determine the appropriate repair method and ensure a long-lasting fix. Gently run your finger over the scratch to assess its depth. If the scratch is superficial and hasn’t penetrated the protective layer of the vinyl plank flooring, you can proceed with a simple repair. However, if the scratch is deep or has exposed the core layer of the flooring, you may need to consider more extensive repair options or even replacing the plank.
Gathering The Necessary Tools And Materials
Before you start the repair process, it’s essential to gather all the necessary tools and materials. This will save you time and ensure a smoother repair experience. Here’s a list of what you’ll need:
| Tools | Materials |
|---|---|
|
|
Once you have gathered all the necessary tools and materials, you are ready to begin the repair process.
Repairing Minor Scratches
Vinyl plank flooring can be prone to minor scratches, but you can easily repair them. Use a mixture of baking soda and water to gently buff away the scratch, then finish with a vinyl floor polish for a seamless surface.
Using A Vinyl Plank Repair Kit
One effective way to repair minor scratches on your vinyl plank flooring is by using a vinyl plank repair kit. These kits usually contain all the necessary tools and materials to restore the appearance of your flooring. Here are the step-by-step instructions on how to use a vinyl plank repair kit:
- Clean the scratched area: Start by cleaning the scratched area using a mild cleaner and a soft cloth. Make sure the surface is free from any dirt or debris to ensure a proper repair.
- Prepare the repair kit: Read the instructions on the vinyl plank repair kit carefully. Most kits include colored markers or putty that match the color of your flooring. Select the appropriate color and place it on a clean surface.
- Apply the marker or putty: Using the provided marker or putty, carefully fill the scratch with the color that matches your vinyl plank flooring. Apply the marker or putty generously to ensure complete coverage of the scratch.
- Smooth the repair: After applying the marker or putty, use a clean cloth or your finger to smooth out the repair. Make sure the surface is level with the surrounding flooring for a seamless finish.
- Let it dry: Allow the repaired area to dry completely according to the instructions provided with the repair kit. This may take a few hours, so be patient and avoid placing any objects or furniture on the repaired area during this time.
Applying A Vinyl Scratch Remover
If you don’t have a vinyl plank repair kit, another option to repair minor scratches is by using a vinyl scratch remover. Here’s how you can use a vinyl scratch remover to fix the marks on your vinyl plank flooring:
- Clean the scratched area: Begin by cleaning the scratched area with a mild cleaner and a soft cloth. Make sure the surface is free from any dirt or debris.
- Apply the vinyl scratch remover: Using a clean cloth or a sponge, apply the vinyl scratch remover to the scratched area. Follow the directions provided on the product to ensure you’re applying the correct amount.
- Buff the scratch: After applying the vinyl scratch remover, use a clean, dry cloth to gently buff the scratch in a circular motion. Apply light pressure and continue buffing until the scratch starts to fade.
- Clean the area again: Once you’re satisfied with the results, clean the repaired area one more time using a mild cleaner and a soft cloth. This will help remove any residue from the vinyl scratch remover.
Buffing Out The Scratch
Buffing out the scratch is another technique you can use to repair minor scratches on your vinyl plank flooring. Here’s how you can easily buff out the scratch:
- Clean the scratched area: Start by cleaning the scratched area using a mild cleaner and a soft cloth. Ensure that the surface is free from any dirt or debris.
- Prepare the buffing tool: Choose a buffing tool suitable for vinyl flooring, such as a soft-bristled brush or a buffing pad. Attach the tool to a floor buffer or use it manually.
- Buff the scratch: Using the buffing tool, gently buff the scratched area in a circular motion. Apply light pressure and continue buffing until the scratch becomes less visible. Be careful not to over-buff or damage the surrounding flooring.
- Clean the area again: Once you’ve buffed out the scratch, clean the area one more time using a mild cleaner and a soft cloth. This will remove any residue left from the buffing process and reveal the repaired section.
By following these methods to repair minor scratches on vinyl plank flooring, you can restore the appearance of your flooring and ensure it looks as good as new. Remember to always read and follow the instructions provided with any repair kit or scratch remover you use for the best results.
Addressing Deep Scratches
Remove deep scratches from vinyl plank flooring with these easy tips. Revitalize your vinyl plank flooring by addressing deep scratches with these helpful techniques.
Filling The Scratch With Putty
To address deep scratches on your vinyl plank flooring, one effective method is to fill the scratch with putty. Start by selecting a putty color that matches the shade of your flooring. This will help in achieving a seamless, unnoticeable repair. Next, using a putty knife or a spatula, apply the putty directly into the scratch, making sure to fill it completely. Smooth out the excess putty with the knife, ensuring a level surface. Let the putty dry completely before moving on to the next step.
Sanding And Smoothing The Area
Once the putty has dried, it’s time to sand and smooth the repaired area. Start by using fine-grit sandpaper, typically between 180-220 grit, to gently sand the filled scratch. Sand in the direction of the grain to avoid causing further damage. As you sand, be sure to periodically wipe away the dust with a clean cloth to assess the progress. Continue sanding until the surface feels smooth and the repaired section is level with the rest of the floor.
Matching The Repaired Section With The Rest Of The Floor
After sanding, it’s important to ensure that the repaired section blends seamlessly with the rest of the floor. To achieve this, you’ll need to match the repaired section’s appearance with the surrounding vinyl planks. Start by cleaning the floor thoroughly to remove any dust or debris that may have accumulated during the earlier steps. Next, take a close look at the color and pattern of the surrounding planks. Try to mimic the pattern and shade as closely as possible using vinyl plank stickers or temporary floor treatments. Make adjustments as necessary to achieve a consistent look throughout the floor.
In conclusion, addressing deep scratches on vinyl plank flooring involves filling the scratch with putty, sanding and smoothing the area, and matching the repaired section with the rest of the floor. By following these steps, you can restore the appearance of your flooring and maintain its overall beauty.
Preventive Measures And Maintenance
Vinyl plank flooring can easily get scratched, but there are preventive measures and maintenance steps you can take to keep it looking new. To remove scratches, use a vinyl scratch repair kit or try a mixture of baking soda and water.
Always test a small area first and follow the manufacturer’s instructions.
Using Furniture Pads And Rugs
One way to prevent scratches on your vinyl plank flooring is by using furniture pads and rugs. These protective accessories act as a cushion between your furniture and the floor, reducing the risk of scratches caused by everyday movements.
Specially designed furniture pads, made from felt or rubber, can easily be attached to the bottom of chairs, tables, and other heavy furniture pieces. This creates a buffer zone that prevents direct contact between the furniture and the flooring. Additionally, using rugs in high-traffic areas can provide an extra layer of protection.
When selecting furniture pads for your vinyl plank flooring, opt for ones that are thick and durable. They should be able to withstand the weight of the furniture without wearing out quickly. It’s also important to regularly check and replace worn-out pads to maintain their effectiveness in preventing scratches.
Regular Sweeping And Cleaning
Maintaining the cleanliness of your vinyl plank flooring is crucial in preventing scratches. Regular sweeping and gentle cleaning can help remove dirt, dust, and debris that may act as abrasive particles and cause scratches over time.
For daily cleaning, use a soft broom or a dry microfiber mop to sweep away loose dirt. This ensures that the particles do not remain on the surface, which can potentially create scratches when walked upon. Avoid using brooms with stiff bristles, as they may cause more harm than good by scratching the floor.
When it comes to deep cleaning, be cautious in choosing the right cleaning products. Avoid abrasive cleaners that contain harsh chemicals, as they can cause discoloration or damage to the flooring. Instead, opt for mild, pH-neutral cleaners specially formulated for vinyl plank floors. Always follow the manufacturer’s instructions when using any cleaning products.
As an additional preventive measure, consider placing doormats at entrances to trap dirt and moisture before it reaches your vinyl plank flooring. This reduces the risk of particles getting inside and causing scratches.
Avoiding Abrasive Cleaners And Tools
To maintain the integrity of your vinyl plank flooring, avoid using abrasive cleaners and tools that can potentially scratch the surface. This includes rough scrub brushes, steel wool, or abrasive scrubbing pads.
If you encounter tough stains or sticky residues that require more intensive cleaning, try using a soft cloth or sponge dipped in a mixture of warm water and mild dish soap. Gently scrub the affected area in a circular motion until the stain is removed. Rinse the floor with clean water and pat dry with a soft towel.
Remember, prevention is key when it comes to keeping your vinyl plank flooring scratch-free. By incorporating these preventive measures and maintenance tips into your cleaning routine, you can enjoy a beautiful and long-lasting floor that remains free from unsightly scratches.
Conclusion
Taking care of scratches on vinyl plank flooring is a manageable task that can be accomplished using simple DIY methods. By assessing the severity of the scratch, using appropriate tools and techniques, and following the recommended steps, you can restore the beauty of your flooring.
Remember to always seek professional advice if needed and maintain regular cleaning and maintenance routines to prevent future scratches. With these tips, your vinyl plank flooring will remain in top shape for years to come.