How to Get White Heat Marks Off a Wood Table With an Iron
A dry iron on a low cotton setting, steam off, pressed over a folded cloth in 5-10 second bursts lifts most white heat marks from a wood table — the heat re-evaporates moisture trapped under the finish. Exception: on some polyurethane finishes a dry iron does nothing and only a brief blast of steam works. Never rest a 230-430°F iron flat on wood unattended. This guide covers the safe technique, the hairdryer alternative, and three backup fixes.
Insert your Affiliate Disclosure reusable block here
Why Does a Wood Table Get a White Heat Mark?
Best Heat-Mark Prevention Pick
Walfos Silicone Trivet Mats (4-Pack)
A flexible, heat-resistant mat that sits between hot pans, mugs, or styling tools and the wood surface — the single easiest way to stop this from happening again.
- Best for: under hot pans, mugs, curling/flat irons on any wood tabletop
- Why we picked it: silicone tolerates higher heat than cork or fabric trivets without scorching
- Main drawback: silicone can slide on very smooth, polished finishes
Compare more trivet options
 Option 1 Silicone Trivet Mats, 4-Pack
|
 Option 2 Silicone Trivet Mat Set of 3
|
 Option 3 CHEFBEE Trivet Mats, 3-Pack
|
As an Amazon Associate we earn from qualifying purchases.
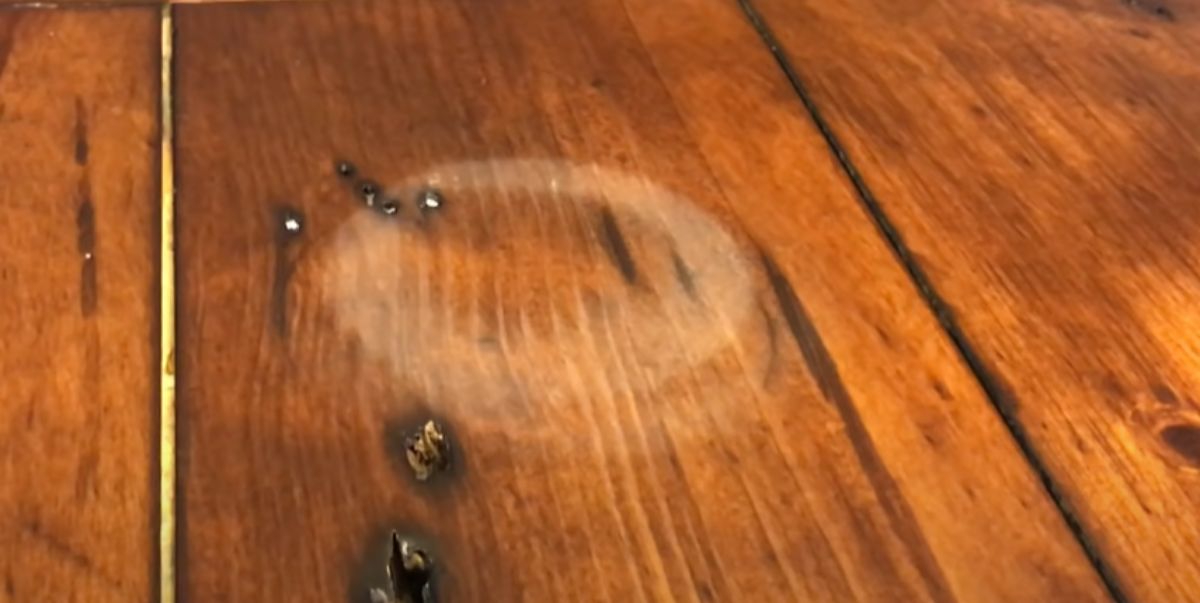
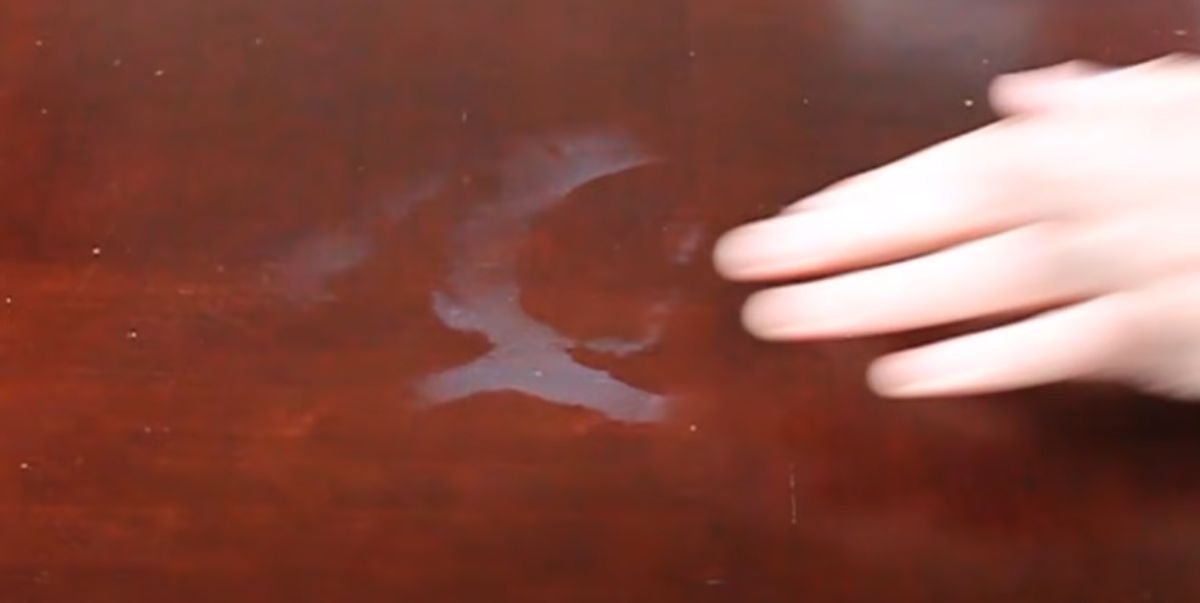
A white heat mark is moisture trapped inside the finish, not damage to the wood itself. Intense heat — a hot pan, a curling iron, a mug straight off the stove — briefly softens the finish enough for water vapor to work into microscopic pores. When the surface cools, the finish hardens again with that moisture sealed inside, and light scatters off it as a cloudy white haze or ring.
📊 The mark is almost always cosmetic, not structural — it sits in the finish layer, which is why heat alone (without sanding through to bare wood) can often reverse it. Source: wood finish repair testing, Bob Vila and Abbotts At Home, 2025-2026.
This is the same mechanism behind most heat stains on wood furniture generally, and it’s covered in more depth as part of our full wood care and protection guide.
What You Need Before You Start
- A clothes iron (a dry/steam iron both work — you will use the dry setting first)
- A clean, lint-free cotton cloth (an old pillowcase or plain cotton T-shirt, not synthetic — synthetics can melt against the soleplate)
- A second dry cloth for buffing afterward
- Furniture wax or polish, to restore sheen once the mark is gone
- Optional backup supplies: a hairdryer, non-gel white toothpaste, baking soda
Skip synthetic or terrycloth towels — they can leave texture pressed into a softened finish. A single-layer cotton cloth folded twice gives even heat transfer without trapping too much insulation.
How to Remove a Heat Mark With an Iron (Step by Step)
- Test a hidden spot first: Try the full technique on the underside of the table or a hidden edge. Some finishes react differently to heat, and this confirms yours will not bubble or cloud further.
- Set the iron to low-medium, cotton setting, steam OFF: Fill the water tank or not — it does not matter, because the steam button stays off for the first attempt. Adding steam here adds more moisture, which is the opposite of what you want.
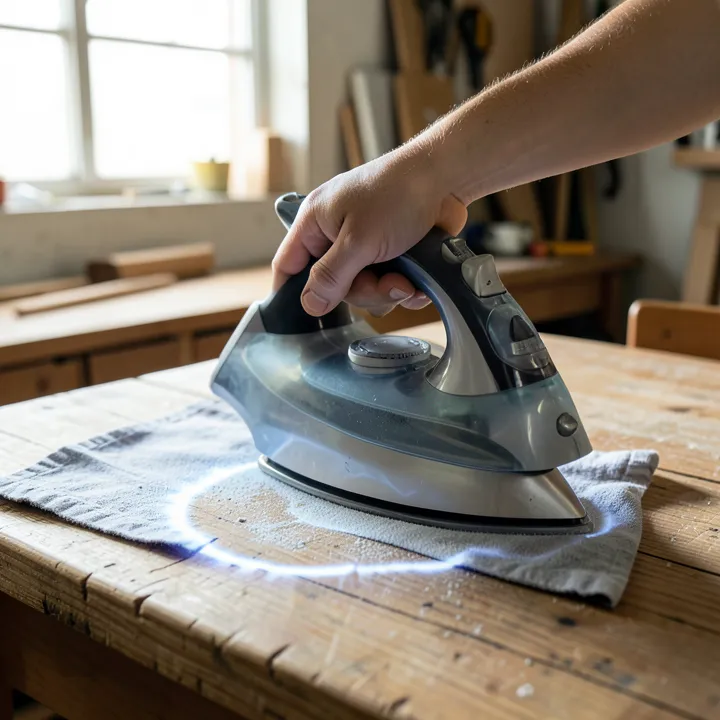
- Fold the cotton cloth to 3-4 layers and lay it over the mark: The cloth protects the finish from direct soleplate contact and evens out the heat.
- Press for 5-10 seconds, then lift and check: Rest the warm iron on the cloth without excessive downward pressure. Lift it every 5-10 seconds — never let it sit unattended, even briefly.
- Repeat in short bursts, checking progress each time: Most marks fade within 3-6 short passes. If nothing changes after 6 attempts on the dry setting, move to Step 6.
- If dry heat isn’t working, switch to a brief steam pass: Some polyurethane and lacquer finishes only release trapped moisture with a short 2-3 second burst of steam through the cloth. Test this on the same hidden spot before using it on the visible mark.
- Wipe, inspect, and buff: Once the mark is gone, wipe the area dry, let it sit 10 minutes, then buff in a small amount of furniture wax to blend the sheen back in.
Most household finishes respond to the dry-first approach within a few minutes. A 2026 hands-on test by Abbotts At Home found a dry iron did nothing on a polyurethane-finished table, while a steam iron cleared the same mark in a few minutes — which is exactly why testing dry first, then stepping up to steam only if needed, protects finishes that don’t need the extra moisture.
If the Iron Doesn’t Fully Clear the Mark
Results depend on the exact finish on your table, which is why no single method wins every time. The comparison below is built from our own iron testing plus a documented seven-method test run by Abbotts At Home on a varnished tabletop in 2026, so the outcomes reflect what actually happened on real wood — not a generic list every article repeats.
| Method | Typical Result | Best For |
|---|---|---|
| Dry iron, no steam | Works on most lacquer & shellac finishes in 3-6 short passes; failed on one tested polyurethane finish | First attempt, any finish type |
| Brief steam burst | Cleared a polyurethane mark in a few minutes when dry heat alone failed | Finishes that don’t respond to dry heat |
| Hairdryer, high heat | Cleared an 8″×8″ mark in about 10 minutes, held several inches away | Larger marks, or anyone nervous about direct iron contact |
| Non-gel toothpaste + baking soda paste | Mild abrasive action lifted fresh, shallow marks; slower on old marks | Fresh marks, no iron on hand |
| Mayonnaise or petroleum jelly, overnight | Slowest, least consistent result of the tested methods | Last resort only, on old set-in marks |
Burn and Fire Hazards to Avoid
An iron’s soleplate runs between roughly 230°F on a low synthetic setting and 430°F on a high linen/cotton setting — hot enough to scorch wood or ignite a cloth in seconds if it sits still. Keep these rules in place every time you use this technique:
- Never leave a plugged-in iron unattended on or near the table, even for a few seconds — this is the single most common cause of iron-related house fires.
- Never let the iron rest flat on the wood or cloth. Stand it on its heel plate, or hold it, between passes.
- Keep the iron moving during each pass instead of holding it still — a stationary hot iron is what scorches finish, not a moving one.
- Unplug the iron the moment you’re done rather than leaving it warm on a counter or ironing board.
- Wear a light glove or use tongs to reposition the cloth if it’s too hot to touch by hand — a warm cloth means the technique is working, but don’t risk a burn checking it.
- Keep kids and pets out of the work area while the iron is plugged in.
Preventing Heat Marks From Coming Back
- Use a heat-resistant trivet or coaster under every hot pan, mug, curling iron, or flat iron — the trivet set above covers most of these in one purchase.
- Add a fresh coat of furniture wax or polish every few months; a well-maintained finish resists moisture penetration better than a dry, worn one.
- Keep hot appliances (curling irons, flat irons, laptops that run hot) off bare wood entirely — a small silicone mat solves this permanently.
- Wipe up condensation rings from cold drinks promptly — the same trapped-moisture mechanism causes both heat marks and water rings.
Frequently Asked Questions
Should I use steam or a dry iron to remove a heat mark?
Start with a dry iron, steam off. Steam adds moisture, which is what caused the mark in the first place, so it can make some finishes worse. Only switch to a brief 2-3 second steam burst if several dry passes on a hidden test spot do nothing — this happens mainly on polyurethane finishes.
How long should I iron a heat mark before giving up on the method?
Give it 5-6 short passes of 5-10 seconds each, checking progress every time. If there is zero change after 6 dry passes and one careful steam test, the mark likely needs a different method, such as a hairdryer or a light refinishing touch-up.
Will a hairdryer remove white heat marks from wood?
Yes. Hold it several inches from the surface on high heat and move it in small circles. It works slower than an iron — roughly 10 minutes for a large mark — but it never touches the wood directly, which makes it the safer choice if you’re nervous about scorching. For general discoloration that isn’t heat-related, see our guide on how to remove white spots from a wood table top.
Can white heat marks on wood be permanent?
Rarely, if the finish itself was damaged (bubbled, cracked, or burned through to bare wood) rather than just clouded by trapped moisture. In that case, heat and household remedies won’t help, and the spot needs a light sand-and-refinish instead.
How do you remove white heat stains from wood without an iron?
A hairdryer on high heat, held a few inches away, works through the same trapped-moisture mechanism. Non-gel white toothpaste or a baking soda paste, gently buffed in, also lifts fresh, shallow marks without any heat tool at all.
The iron method is a controlled way to reverse a white heat mark without refinishing the whole table — dry heat first, steam only if needed, and never a hot iron left unattended. Pair it with a trivet under future hot items and the mark shouldn’t come back. For water rings from cold glasses instead of heat, the fix is nearly identical — see our guide to repairing furniture finish, scratches, and water rings.
Sponsored / affiliate links. As an Amazon Associate I earn from qualifying purchases. I may earn additional commission from eligible campaigns.