How to Glue Rocks Together for Landscaping
To glue rocks together for landscaping, use a construction adhesive specifically designed for outdoor use. Additionally, ensure that the rocks are clean and dry before applying the adhesive.
Planning Your Rock Landscape Design
Discover practical tips and techniques for gluing rocks together to create a captivating rock landscape design. Learn how to achieve a seamless bond between rocks for a stunning and durable landscaping project.
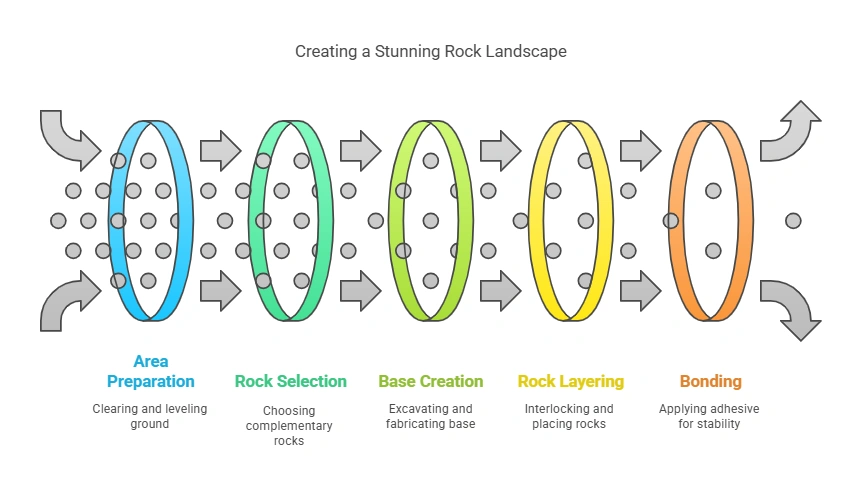
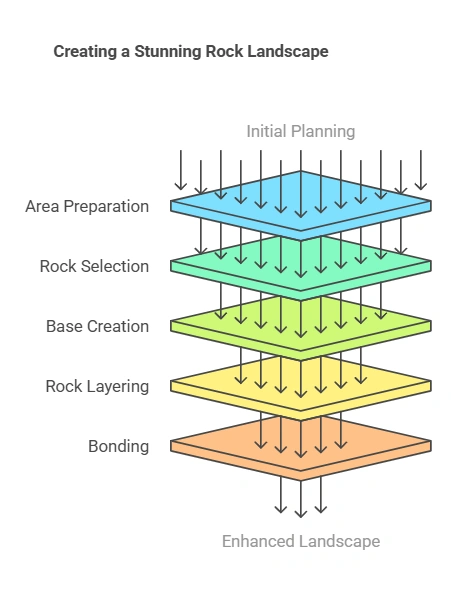
When it comes to creating a stunning rock landscape, proper planning is essential. Taking the time to research different rock types and styles, sketch out your desired layout, and calculate the amount of rocks and materials needed will help ensure a successful project.
Here’s how you can plan your rock landscape design:
Researching Different Rock Types And Styles:
- Begin by exploring various rock types available for landscaping, such as limestone, sandstone, and granite.
- Consider the different colors, textures, and shapes of rocks, along with their durability and weather resistance.
- Look for inspiration online or in magazines to get an idea of the different styles and arrangements you can achieve with rocks.
Creating A Rough Sketch Of Your Desired Landscape:
- Grab a pen and paper and sketch out a rough design of your dream rock landscape.
- Consider factors like the overall shape and size of the area, the distribution of rocks, and any additional elements you want to incorporate, such as plants or water features.
- Don’t worry about making it perfect at this stage; the goal is to have a visual representation to work with.
Calculating The Amount Of Rocks And Materials Needed:
- Start by measuring the dimensions of your designed landscape area, including the length, width, and depth.
- Use these measurements to calculate the volume of rocks needed, taking into account any slopes or irregularities in the terrain.
- Consider the recommended depth of rocks for different applications, whether it’s a pathway, border, or decorative feature.
- Estimate the quantity of other materials required, such as landscaping fabric or adhesive to glue the rocks together.
Remember, proper planning will save you time and effort in the long run. By researching different rock types and styles, creating a rough sketch of your desired landscape, and calculating the amount of rocks and materials needed, you’ll be well-prepared to bring your rock landscape vision to life.
So grab your pen and paper and start planning your beautiful rock oasis!
Preparing The Area For Installation
To properly glue rocks together for landscaping, it is essential to prepare the area before installation. This includes clearing debris, leveling the ground, and applying a sturdy adhesive to ensure strong bonding between the rocks.
Clearing The Site Of Any Existing Vegetation Or Debris
Before starting your rock landscaping project, it’s essential to clear the area of any existing vegetation or debris. This will ensure a clean and stable foundation for your rocks. Here’s how you can go about it:
- Begin by removing any grass, weeds, or other plants that are already present in the area. Use a shovel or a garden rake to dig them out, making sure to remove all roots.
- Remove any rocks, branches, or other debris that might be scattered across the site. This will help prevent any unwanted obstacles when laying down your rocks.
- If necessary, trim or remove any tree branches that may obstruct the rock landscape. This will help create a more open and visually appealing space.
By clearing the site of vegetation and debris, you’ll have a blank canvas on which to build your rock landscaping.
Leveling The Ground For A Smooth Foundation
Achieving a level ground is crucial for the success of your rock landscaping project. It not only ensures the stability of the rocks but also provides an aesthetically pleasing appearance. Follow these steps to level the ground effectively:
- Begin by using a shovel or a garden rake to remove any large bumps or uneven areas on the surface. Smooth out the ground as much as possible.
- Use a leveling tool, such as a long board or a bubble level, to check for any remaining unevenness. Adjust the ground’s surface accordingly using a shovel or rake.
- Pay attention to the drainage of the area. Ensure that the ground slopes away from structures or areas where water might accumulate. This will prevent potential water damage and maintain the longevity of your rock landscape.
Remember, a smooth and level foundation will provide a stable base for your rocks and enhance the overall appearance of your landscaping project.
Marking The Boundaries For The Rock Landscape
Defining the boundaries of your rock landscape is essential to ensure a cohesive and organized design. Here’s how you can mark the boundaries effectively:
- Start by envisioning the shape and size of your desired rock landscape. Consider the existing features of your outdoor space and plan accordingly.
- Use garden stakes or spray paint to mark the boundaries, outlining the precise areas where you want to place your rocks. This will help you visualize the final result and avoid any guesswork.
- Make sure to measure and verify the marked boundaries, ensuring they align with your design and preferences. Adjust as needed until you’re satisfied with the layout.
By marking the boundaries of your rock landscape, you’ll have a clear guide to follow during the installation process, ensuring a cohesive and visually appealing end result.
Choosing The Right Rocks For Your Landscape
Choosing the right rocks for your landscape is crucial in creating an appealing outdoor space. Learn how to effectively glue rocks together for landscaping to enhance the durability and aesthetic appeal of your garden or yard.
Understanding The Different Rock Types And Their Characteristics
- Sedimentary rocks: These rocks are formed by layers of sediment being compacted and hardened over time. They are usually easy to work with and have a variety of colors and textures.
- Igneous rocks: Formed by the cooling and solidification of molten rock, igneous rocks are hard and durable. They come in a range of colors, from dark and dense to light and porous.
- Metamorphic rocks: These rocks are created when existing rocks undergo intense heat and pressure. They are known for their unique textures and patterns.
Selecting Rocks That Complement Your Overall Design
- Consider the color scheme: Choose rocks that match or complement the colors in your landscape design. This can help create a harmonious and visually appealing look.
- Think about texture: Smooth rocks can add a calming and polished feel to your landscape, whereas rough or jagged rocks can create a more rugged and natural appearance.
- Evaluate the size and shape: Select rocks that vary in size and shape to add visual interest and depth. Mix larger boulders with smaller pebbles for a dynamic and balanced look.
Ensuring Proper Sizing And Weight For Easy Installation
- Determine the scale of your project: Assess the size of your landscape and the intended purpose of the rocks. Consider factors such as walkways, focal points, or accents.
- Consider weight and accessibility: Opt for rocks that are manageable to transport and install. Heavy rocks may require additional equipment or assistance during the installation process.
- Plan for stability: Ensure that the rocks you choose are stable and won’t shift or become a hazard. Consider the weight distribution and how they will integrate into the existing landscape.
Credit: www.etsy.com
Creating A Solid Base For Your Rocks
Create a sturdy foundation for your landscaping rocks by learning how to effectively glue them together. Follow these step-by-step guidelines to successfully bond your rocks and enhance the overall aesthetic of your outdoor space.
Excavating The Area To The Proper Depth
To create a solid base for your rocks in landscaping, you need to start by excavating the area to the appropriate depth. This will ensure stability and durability for your rock arrangement. Here’s how you can go about it:
- Begin by marking the desired area for your rock landscaping project. Use stakes and string to outline the boundaries.
- Start digging within the marked area, removing any turf, grass, or vegetation present. This will create a clear space for your rocks.
- The depth of the excavation will depend on the size and type of rocks you plan to use. Generally, a depth of around 4-6 inches should be sufficient for small to medium-sized rocks.
- Use a shovel, pickaxe, or excavator to dig out the soil, ensuring a level surface.
Adding A Layer Of Landscape Fabric To Prevent Weed Growth
Weed growth can be a nuisance in landscaping projects. To prevent weeds from sprouting and disrupting the appearance of your rock arrangement, it’s essential to add a layer of landscape fabric. Here’s what you need to do:
- Once the area is excavated, remove any loose debris and ensure it’s level.
- Roll out the landscape fabric over the excavated area, covering the entire surface. The fabric should overlap the edges of the excavated area.
- Cut the landscape fabric as needed to fit within the boundaries of your rock arrangement.
- Use landscape fabric pins or staples to secure the fabric in place, ensuring it stays taut and prevents weed growth.
Installing A Compacted Base Material For Stability And Drainage
To provide stability and proper drainage for your rocks, it’s crucial to install a compacted base material. This will ensure that your rock arrangement remains intact over time, even in varying weather conditions. Here’s how you can achieve this:
- Once the landscape fabric is in place, add a layer of crushed stone or gravel to the excavated area. This base material should be compacted to create a firm and solid foundation.
- Use a plate compactor or a hand tamper to compress the base material, ensuring it becomes tightly packed.
- Continue adding and compacting the base material until you reach the desired height. A depth of around 2-4 inches is generally sufficient.
- Check for proper drainage by pouring water onto the compacted base material. It should flow away from the area without pooling or causing erosion.
By following these steps, you’ll be able to create a solid base for your rocks in landscaping, ensuring durability, stability, and a visually pleasing result.
Building Up The Rock Layers
Learn how to effectively glue rocks together for landscaping in order to create stunning rock layers. This guide provides step-by-step instructions for building up rock layers, ensuring a strong and long-lasting result for your outdoor space.
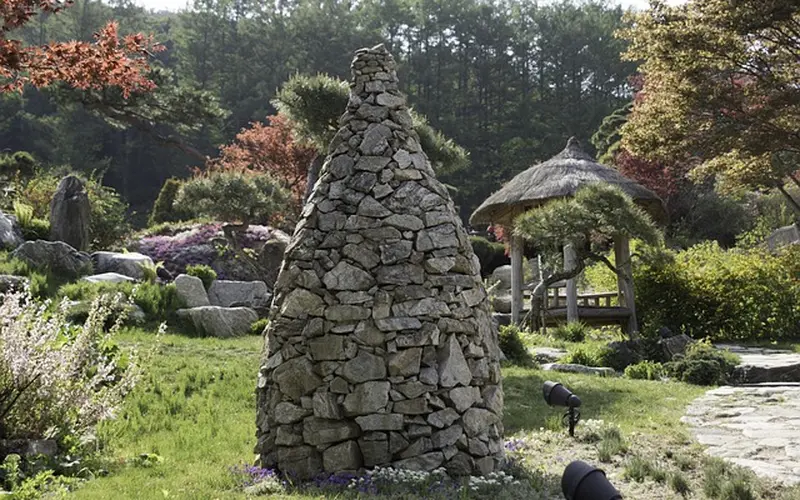
In landscaping, the art of creating a visually appealing rock structure lies in the careful process of building up the rock layers. By following these steps, you can ensure stability and longevity of your creation while adding a touch of artistry to your landscape.
Starting With Larger Rocks As The Foundation:
- Begin the process by selecting large rocks to serve as the base of your structure. These rocks will provide stability and support for the layers above.
- Position the larger rocks in a way that creates a solid foundation, ensuring they are stable and level.
- Keep in mind that the size and shape of the rocks you choose for the foundation will influence the overall stability of your structure.
Choosing Rocks Of Varying Shapes And Sizes For Visual Interest:
- When selecting rocks for the subsequent layers, aim for variety in both shape and size. This will add visual interest and create texture within your landscape.
- Mix round, oval, and angular rocks to achieve a natural and organic appearance.
- Incorporate a range of sizes, including smaller rocks, to fill gaps and provide a more layered and textured look.
Ensuring Proper Placement And Interlocking For Stability And Longevity:
- To ensure stability, carefully consider the placement of each rock. Avoid placing rocks in a way that creates weak points or causes the structure to become unbalanced.
- For added stability, aim to interlock the rocks by nesting them together. This can be achieved by finding rocks with complementary shapes and fitting them snugly together.
- Take your time during the placement process, as a well-constructed structure will enhance the overall longevity of your landscaping project.
Remember, creating a visually appealing and functional rock structure takes patience and attention to detail. By starting with a solid foundation, using rocks of different shapes and sizes for visual interest, and ensuring proper placement and interlocking, you can achieve a beautiful and long-lasting addition to your landscape.
Achieving Perfectly Bonded Rocks
Learn how to achieve perfectly bonded rocks for your landscaping projects with this comprehensive guide. Discover the best techniques and materials to glue rocks together effectively, creating stunning and durable landscape features.
When creating a stunning landscape design, one key element is ensuring that your rocks are securely bonded together. This not only enhances the visual appeal but also ensures long-lasting durability. To achieve perfectly bonded rocks, follow these steps:
Using A High-Quality Landscape Adhesive For Secure Bonding
- Choose a high-quality landscape adhesive that is specially formulated for bonding rocks. This will provide a strong, resilient bond that can withstand environmental factors.
- Opt for an adhesive that is waterproof and weatherproof to ensure it can withstand the elements without deteriorating.
- Look for an adhesive that is specifically designed for landscaping purposes, as it will have the necessary properties for adhering rocks.
Applying The Adhesive To The Contact Points Of The Rocks
- Begin by thoroughly cleaning the contact points of the rocks to remove any dirt, dust, or debris. This will ensure optimal adhesion.
- Apply a generous amount of adhesive to the contact points of the rocks. Be sure to cover the entire surface that will come into contact with the other rock.
- Use a brush or trowel to spread the adhesive evenly and create a smooth surface.
- Press the rocks firmly together, making sure the adhesive is evenly distributed between them.
- Hold the rocks in place for a few minutes to allow the adhesive to begin bonding.
Allowing Sufficient Drying Time Before Moving On To The Next Layer
- After bonding two rocks together, allow sufficient drying time before adding additional layers. This will ensure that each layer is securely bonded and prevents any shifting or movement.
- Check the drying time recommended by the adhesive manufacturer, as this can vary depending on the product.
- Avoid putting excessive weight or pressure on the bonded rocks until the adhesive is fully cured. This can take anywhere from a few hours to a few days, depending on the adhesive and environmental conditions.
By following these steps, you can achieve perfectly bonded rocks for your landscaping project. Remember to choose a high-quality adhesive, apply it to the contact points of the rocks, and allow sufficient drying time for each layer. This will result in a visually stunning and long-lasting landscape design that will be the envy of your neighbors.

Adding Finishing Touches To Enhance Your Landscape
Enhance your landscape with the art of gluing rocks together for a stunning finishing touch. Our expert tips will help you create a unique and visually appealing outdoor space.
Incorporating Plants, Shrubs, Or Flowers For A Pop Of Color:
- Adding greenery and vibrant blooms can bring life to your rock features and enhance the overall look of your landscape.
Consider the following tips when incorporating plants, shrubs, or flowers:
- Choose plants that thrive in your climate and are low-maintenance to ensure they stay healthy and vibrant.
- Place plants strategically around your rock formations to create focal points and add visual interest.
- Opt for a mix of textures, heights, and colors to create a dynamic and visually captivating display.
- Use native plants to attract local wildlife and promote a balanced ecosystem.
- Consider the seasons when planning your landscape design, and choose plants that will bloom at different times to ensure year-round color.
Installing Lighting To Highlight Your Rock Features At Night:
- Well-placed lighting can transform your landscape at night, creating a stunning ambiance and emphasizing the beauty of your rock formations.
Consider the following tips when installing lighting:
- Use soft and warm-toned lights to create a cozy and inviting atmosphere in your outdoor space.
- Install lights at different angles to highlight the texture and shape of your rocks.
- Place lights strategically to illuminate pathways, accentuate water features, or draw attention to specific areas of your landscaped rocks.
- Experiment with different lighting techniques such as uplighting, downlighting, or backlighting for varied effects.
- Opt for energy-efficient LED lights to conserve energy and reduce maintenance costs.
Adding Decorative Elements Such As Water Features Or Seating Areas:
- To create a truly captivating landscape, consider incorporating additional decorative elements that complement your rock features and provide functionality.
Consider the following tips when adding decorative elements:
- Install a water feature, such as a fountain or pond, to add movement and create a soothing ambiance in your outdoor space.
- Incorporate seating areas with comfortable chairs, benches, or even a cozy outdoor sofa to provide a place for relaxation and enjoyment.
- Use decorative gravel or pebbles to line pathways or create borders, enhancing the overall aesthetic appeal.
- Incorporate sculptures or statues that complement the natural beauty of your rock formations.
- Add decorative pots or planters to showcase colorful flowers or unique foliage, adding visual interest to your landscape.
These finishing touches will take your rock landscaping to the next level, creating a visually stunning and inviting outdoor space that you can enjoy day or night. Incorporating plants, adding lighting, and including decorative elements will enhance the natural beauty of your rocks and transform your landscape into a true masterpiece.
So, get creative and let your imagination guide you as you design your dream outdoor sanctuary.
Maintaining Your Rock Landscape For Longevity
Maintaining your rock landscape for longevity involves using the right techniques to glue rocks together for landscaping. By following these methods, you can ensure that your rocks stay in place and withstand the test of time, creating a beautiful and durable rock landscape for your outdoor space.
Regularly Inspecting For Any Loose Or Damaged Rocks:
- Inspect your rock landscape for loose or damaged rocks on a regular basis to ensure its longevity.
- Gently tap on each rock to check for any signs of instability or looseness.
- Pay close attention to areas where rocks are joined together or where the adhesive has been applied.
- If you notice any rocks that are loose or damaged, take immediate action to fix or replace them.
- Promptly addressing any issues will prevent further damage and maintain the overall stability of your rock landscape.
Cleaning The Rocks To Remove Dirt And Debris:
- Periodically clean your rocks to keep them looking their best and prevent the buildup of dirt and debris.
- Use a soft-bristle brush or a broom to sweep away loose dirt and leaves.
- For stubborn dirt or stains, mix a mild detergent with water and gently scrub the affected areas.
- Rinse the rocks thoroughly with water to remove any cleaning residue.
- Regular cleaning will enhance the visual appeal of your rock landscape and help prolong its lifespan.
Reapplying Adhesive As Necessary For Ongoing Stability:
- Over time, the adhesive used to glue rocks together may wear off or lose its effectiveness.
- Inspect the joints between rocks and look for any signs of deteriorating adhesive.
- If necessary, carefully remove any old adhesive using a scraper or putty knife.
- Apply a fresh layer of adhesive to the cleaned surface and press the rocks firmly together.
- Follow the manufacturer’s instructions for the specific adhesive you are using to ensure proper application and curing.
Pro Tips:
- Take your time during the planning and design phase to ensure a cohesive and visually pleasing result.
- Consider the overall theme and style of your property when selecting rock types and colors.
- Seek professional assistance if you’re unsure about any step of the process.
With proper planning and execution, you can create stunning rock landscapes that will enhance the beauty and value of your outdoor space for years to come.
Frequently Asked Questions Of How To Glue Rocks Together For Landscaping
What Is The Glue To Hold Landscape Rocks Together?
The ideal adhesive for holding landscape rocks together is rock epoxy or construction adhesive.
What Is The Best Glue To Stick Stones Together?
The best glue for sticking stones together is epoxy adhesive. It provides strong bonding and durability.
How Do You Make Landscape Rocks Stay In Place?
To keep landscape rocks in place, use landscape fabric and edging, and compact the ground around the rocks.
Can You Use Gorilla Glue On Rocks?
Yes, Gorilla Glue can be used on rocks for bonding and repairing purposes.
Does Gluing Landscape Rocks Together Stop Water From Draining Into The Ground?
Gluing rocks together does reduce the natural gaps that let water pass through a loose rock bed, since adhesive fills some of the spacing that would otherwise drain freely. That said, it doesn’t have to ruin drainage if you prep the base correctly. Water still finds its way around and between rocks that aren’t glued on every contact point, and a properly compacted base with landscape fabric underneath keeps water moving down and away rather than pooling on the surface.
The two things that actually control drainage here are the ground slope and the base prep, not the glue itself. Landscape fabric under the rock bed lets air and water through while blocking weeds, and it also keeps the rocks from sinking into the soil over time. If the area already has poor drainage or a flat, low spot, glued rocks can make standing water more noticeable — grade the base with a slight slope before you start bonding rocks in place.
Editor’s Pick
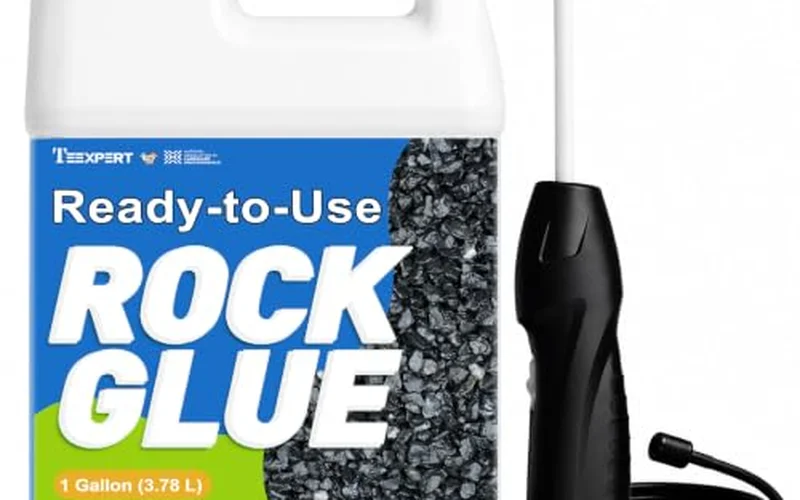
Ready-To-Use Landscape Rock Glue With Sprayer
Purpose-built for landscaping rock beds — the sprayer applicator covers large areas faster than brushing on epoxy rock by rock.
Check on Amazon
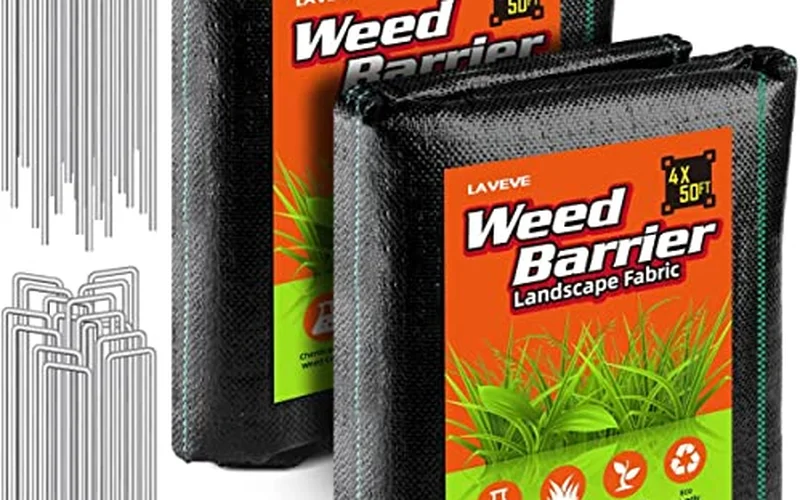
Option 1 Weed Barrier Landscape Fabric
|
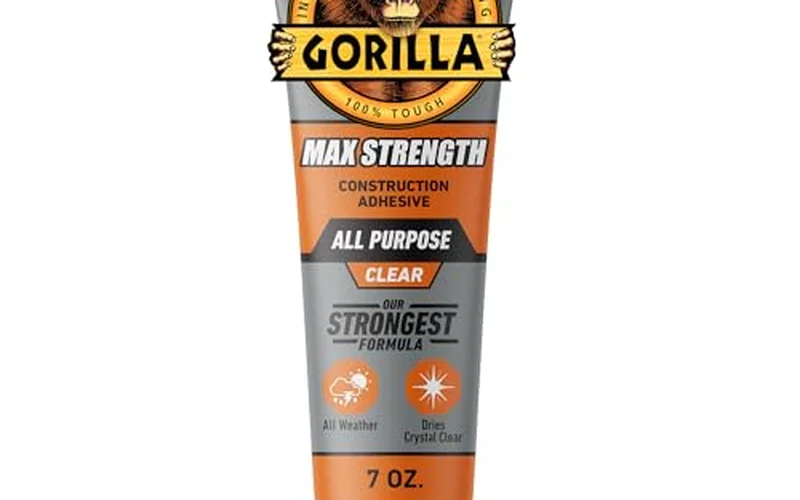
Option 2 Waterproof Construction Adhesive
|
Option 3 Spare Bottle Of Rock Glue
|
As an Amazon Associate we earn from qualifying purchases.
Does Gluing Landscape Rocks Stop Water From Draining Into The Ground?
Gluing reduces some of the natural gaps between rocks, but it does not stop drainage on its own. Water still moves through the bed as long as the base has landscape fabric and a slight slope; a flat, poorly graded base is what actually causes standing water, not the adhesive.
Conclusion
Gluing rocks together for landscaping is an effective way to create stunning outdoor spaces. By following the steps outlined in this guide, you can achieve a durable and long-lasting bond between rocks, ensuring that your landscaping project stands the test of time.
Whether you’re building a garden wall, constructing a pathway, or designing a water feature, the right adhesive can make all the difference. Remember to choose an adhesive that is specifically formulated for outdoor use and compatible with the type of rocks you are working with.
Additionally, take the time to properly prepare the surfaces, allowing for maximum adhesion. With a bit of patience and attention to detail, you can transform your outdoor space into a beautiful oasis that will be enjoyed for years to come.
Happy landscaping!