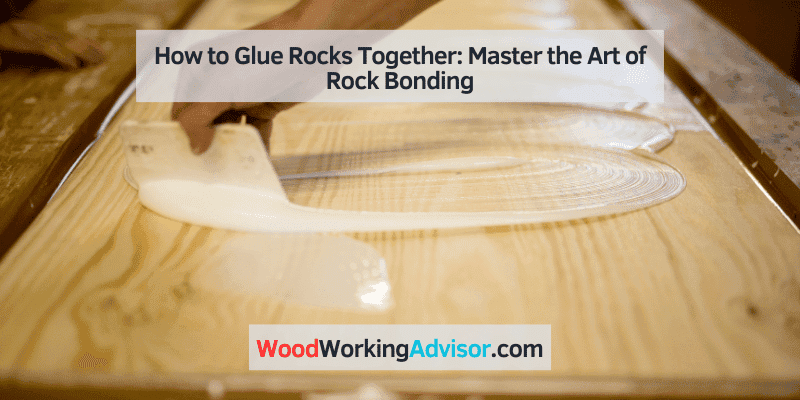
How to Glue Rocks Together: Master the Art of Rock Bonding
To glue rocks together, apply a strong adhesive designed for stone surfaces and press them firmly.
Choosing The Right Adhesive For Rock Bonding
Choosing the right adhesive for rock bonding is crucial when it comes to effectively gluing rocks together. With a variety of options available, it’s important to consider factors such as the type of rocks being bonded, the strength needed, and the durability required.
Different Types Of Adhesives For Rock Bonding:
There are several different types of adhesives that can be used for bonding rocks together. Each type has its own advantages and disadvantages, so it’s important to choose the right one for your specific project. Here are some common types of adhesives used for rock bonding:
- Epoxy adhesive: Epoxy adhesives are known for their strong bond and durability. They are often used for bonding rocks together because they provide a permanent bond that can withstand outdoor conditions. Epoxy adhesives are available in various formulations, including fast-curing options for quick projects.
- Polyurethane adhesive: Polyurethane adhesives are another popular choice for rock bonding. They offer excellent flexibility and resistance to moisture, making them suitable for both indoor and outdoor applications. Polyurethane adhesives are typically easy to use and provide a strong bond.
- Construction adhesive: Construction adhesives are commonly used in various applications, including rock bonding. They are known for their high strength and versatility. Construction adhesives come in different formulations, such as polyurethane-based or epoxy-based options, allowing you to choose the one that best suits your needs.
- Silicone adhesive: Silicone adhesives are known for their excellent flexibility and resistance to extreme temperatures. They work well for bonding rocks together, especially if the project requires flexibility or high-temperature resistance. Silicone adhesives are typically easy to apply and provide a long-lasting bond.
Factors To Consider When Selecting An Adhesive:
Choosing the right adhesive for bonding rocks is crucial for a successful and long-lasting result. Several factors should be taken into consideration when selecting an adhesive. Here are some key factors to keep in mind:
- Strength: Consider the strength requirements of your specific project. Some adhesives provide a stronger bond than others, so it’s important to choose an adhesive that can withstand the weight and stress your rocks will endure.
- Durability: Depending on the environment where your rocks will be placed, durability may be a key factor. Consider factors such as moisture, temperature changes, and exposure to UV rays. Choose an adhesive that is specifically designed to withstand these conditions.
- Ease of use: Think about how easy the adhesive is to use. Some adhesives require mixing before application, while others come in pre-mixed tubes or cartridges. Consider your level of experience and the available application methods when selecting an adhesive.
- Drying time: Different adhesives have varying drying times. If you have time constraints or need quick results, opt for adhesives that offer fast drying or curing times.
- Safety: Always consider the safety precautions associated with the adhesive. Ensure that it is non-toxic, low odor, and suitable for your specific application.
Testing Adhesives For Rock Bonding:
Before committing to bonding rocks together with a specific adhesive, it’s recommended to perform a test to ensure the adhesive will meet your expectations. Here’s a step-by-step process for testing adhesives for rock bonding:
- Clean the surfaces: Ensure that the surfaces to be bonded are clean and free of dirt, oil, or any other contaminants.
- Prepare the adhesive: Follow the manufacturer’s instructions on how to prepare the adhesive. This may include mixing components or preparing the applicator.
- Apply the adhesive: Apply a small amount of the adhesive to one surface of the rocks. Use a spatula or a brush to evenly distribute the adhesive.
- Join the surfaces: Press the two surfaces together, applying even pressure. Make sure the rocks are properly aligned and that the adhesive spreads between them.
- Cure time: Allow the adhesive to cure according to the manufacturer’s instructions. This may take several hours or even days, depending on the adhesive used.
- Test the bond: Once fully cured, carefully test the strength of the bond by applying pressure or attempting to separate the rocks. Evaluate the bond’s durability and strength.
By following these steps, you can ensure that the adhesive you choose for rock bonding will deliver the desired results. Remember to always read and follow the manufacturer’s instructions for the best outcome.
Epoxy Adhesives For Rock Bonding
Discover the perfect solution to glue rocks together with epoxy adhesives for rock bonding. Achieve a strong and long-lasting bond with this effective method.
Advantages Of Using Epoxy Adhesives:
- Strong bond: Epoxy adhesives are known for their exceptional bonding strength, making them highly effective for gluing rocks together. When properly applied, the adhesive forms a durable and long-lasting bond that can withstand various environmental conditions.
- Versatility: Epoxy adhesives work well with a wide range of rock materials, including granite, marble, limestone, and quartz. This versatility allows you to create beautiful and unique rock structures or repair broken pieces with ease.
- Waterproof: One of the major advantages of epoxy adhesives is their waterproof nature. Once the adhesive cures, it becomes water-resistant, ensuring that your bonded rocks will hold up even in damp or aquatic settings.
- Chemical resistance: Epoxy adhesives are highly resistant to chemicals, making them suitable for bonding rocks that may come into contact with substances like oils or solvents. This resistance ensures the longevity and stability of the bond.
- Easy application: With epoxy adhesives, the application process is straightforward. Simply mix the adhesive components as per the manufacturer’s instructions, apply it to the rocks, and hold them together until the bond sets. This simplicity makes it a convenient option for DIY enthusiasts and professionals alike.
Step-By-Step Guide For Using Epoxy Adhesives:
- Clean the rocks: Ensure that the surfaces to be bonded are clean and free from dust, debris, or grease. Use a scrub brush and mild detergent to gently clean each rock, and let them dry completely.
- Prepare the adhesive: Follow the instructions provided by the epoxy adhesive manufacturer to prepare the adhesive mixture. Typically, this involves combining a resin and a hardener in the specified ratio and stirring it thoroughly.
- Apply the adhesive: Using a small brush or spatula, apply a thin layer of epoxy adhesive to one of the surfaces to be bonded. Make sure to cover the entire area evenly.
- Press the rocks together: Carefully align the rocks and firmly press them together, ensuring that the adhesive spreads evenly between the surfaces. Hold them in place for the recommended curing time as indicated by the adhesive manufacturer.
- Remove excess adhesive: Before the epoxy fully cures, use a clean cloth or a scraper to remove any excess adhesive that may have squeezed out from the bonding area.
- Allow curing: Leave the bonded rocks undisturbed for the complete curing period specified on the epoxy adhesive packaging. Avoid subjecting the bond to any stress or movement during this time.
Tips For Achieving A Strong Bond With Epoxy Adhesives:
- Surface preparation: Thoroughly clean and dry the surfaces to be bonded to ensure maximum adhesion.
- Roughen the surfaces: If the rocks have smooth or polished surfaces, lightly sandpaper or score them to create a more textured surface for the adhesive to grip.
- Proper mixing: Follow the adhesive manufacturer’s instructions precisely to achieve the correct resin-to-hardener ratio. Proper mixing ensures optimal bonding strength.
- Work in small sections: Apply the adhesive to a manageable area at a time to prevent it from drying before you can press the rocks together.
- Clamp or brace if needed: For larger or heavier rocks, consider using clamps or braces to hold the bonded pieces in place during the curing process for added stability.
- Temperature and humidity: Take into account the recommended temperature and humidity conditions specified by the adhesive manufacturer. Both factors can affect the cure time and bond strength.
- Test before final application: If unsure about the adhesive’s compatibility with a particular rock material, perform a small test bond on a less visible area before proceeding with the complete project.
Remember, by following these steps and tips, you can confidently create strong and visually appealing rock structures using epoxy adhesives.

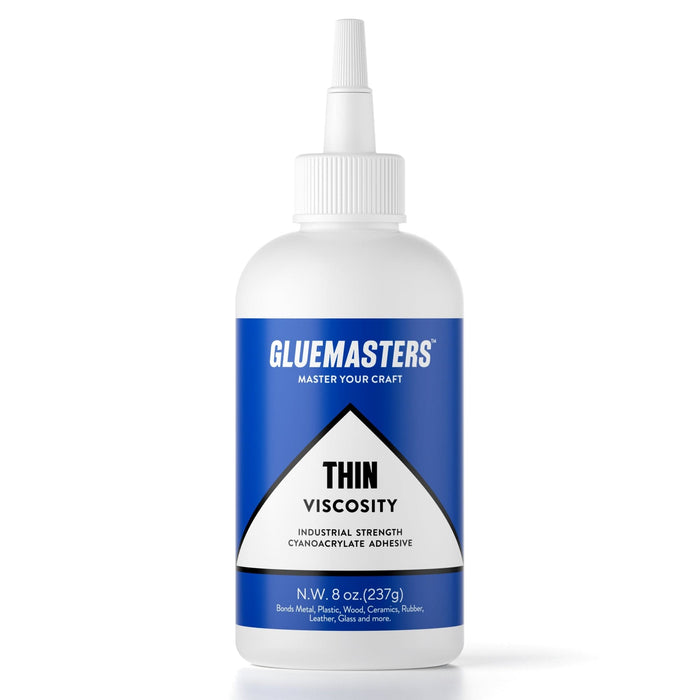
Cyanoacrylate Adhesives For Rock Bonding
Cyanoacrylate adhesives provide a strong bond for gluing rocks together, making them ideal for rock bonding projects. These adhesives are easy to use and can withstand the challenges of outdoor environments, ensuring a durable and long-lasting hold.
Cyanoacrylate adhesives, commonly known as super glue, can be an excellent option for bonding rocks together. These adhesives offer several benefits, along with a few limitations to consider. Before using cyanoacrylate adhesives for rock bonding, it’s essential to know how to prepare surfaces properly and apply the adhesive effectively.
Benefits And Limitations Of Using Cyanoacrylate Adhesives:
- Quick bonding time: Cyanoacrylate adhesives have a fast curing time, allowing rocks to be securely bonded within minutes.
- Strong and durable bond: Once cured, cyanoacrylate adhesives create a strong bond that can withstand environmental factors and everyday use.
- Versatile application: These adhesives can be used on various rock types, including porous and non-porous surfaces.
- Clear and invisible bond: Cyanoacrylate adhesives dry transparent, ensuring that the bonded area won’t stand out or detract from the natural beauty of the rocks.
However, it’s important to consider the limitations of using cyanoacrylate adhesives for rock bonding:
- Limited gap-filling ability: Cyanoacrylate adhesives work best when there is a tight fit between the rocks. They are not suitable for bonding rocks with significant gaps or uneven surfaces.
- Sensitivity to moisture: Moisture can affect the bonding strength of cyanoacrylate adhesives. It is crucial to ensure that the rocks and the bonding area are dry before applying the adhesive.
Preparing Surfaces For Cyanoacrylate Adhesives:
To ensure optimal bonding strength, take the following steps to prepare the surfaces before using cyanoacrylate adhesives for rock bonding:
- Clean the surfaces: Thoroughly clean the rocks to remove any dirt, dust, or debris that may interfere with the adhesive’s bonding ability.
- Sand the surfaces: Use sandpaper to roughen the bonding areas of both rocks. This step helps improve the adhesive’s grip on the surfaces.
- Remove oil and grease: Wipe the bonding surfaces with isopropyl alcohol or acetone to remove any oils or grease residues, which can hinder the effectiveness of the adhesive.
Techniques For Using Cyanoacrylate Adhesives Effectively:
Follow these techniques to ensure successful bonding when working with cyanoacrylate adhesives:
- Apply a thin, even layer of adhesive to one of the bonding surfaces.
- Press the rocks firmly together, aligning them as desired.
- Hold the rocks in place for a few minutes to allow the adhesive to cure.
- Avoid excessive handling or movement of the bonded rocks immediately after gluing to prevent weakening the bond.
- If necessary, use clamps or tape for additional support while the adhesive fully cures.
When using cyanoacrylate adhesives for rock bonding, it’s crucial to follow the manufacturer’s instructions and take appropriate safety precautions, such as working in a well-ventilated area and wearing protective gloves. With proper surface preparation and application techniques, cyanoacrylate adhesives can provide a reliable and long-lasting bond for your rock projects.
Silicone Adhesives For Rock Bonding
Silicone adhesives are an effective solution for bonding rocks together securely. With their strong adhesive properties, they provide a reliable and long-lasting bond, making it easy to create impressive rock formations or repair damaged stone structures.
Overview Of :
- Silicone adhesives are an excellent choice for bonding rocks together due to their strong and durable properties.
- They create a reliable and long-lasting bond that can withstand various weather conditions and prevent the rocks from separating.
- Silicone adhesives are available in different formulations such as high-temperature resistant, waterproof, and UV-resistant, allowing you to choose the one that best suits your specific rock bonding needs.
- These adhesives are versatile and can be used on various types of rocks, including granite, limestone, sandstone, and more.
Application Tips For Using Silicone Adhesives On Rocks:
- Clean the rocks thoroughly before applying the adhesive to ensure a strong bond. Use a brush or cloth to remove any dirt, dust, or debris from the surface.
- If the rocks have uneven surfaces or gaps, consider using a putty knife or spatula to apply the adhesive evenly. This will help fill any uneven areas and create a seamless bond between the rocks.
- Apply a generous amount of adhesive to both surfaces of the rocks that you want to bond together. Make sure to spread it evenly to ensure a strong connection.
- Gently press the rocks together, applying slight pressure to help the adhesive spread and create a firm grip.
- Allow the adhesive to cure according to the manufacturer’s instructions. This typically takes a few hours to a day, depending on the specific adhesive used.
- If needed, use clamps or supports to hold the rocks in place while the adhesive cures. This will help ensure a secure bond and prevent any movement during the drying process.
Curing And Drying Time Considerations For Silicone Adhesives:
The curing and drying time of silicone adhesives may vary depending on the specific product and environmental conditions. Here are some general considerations to keep in mind:
- Most silicone adhesives require at least 24 hours to fully cure and reach their maximum bonding strength. However, some fast-drying formulations may have shorter curing times.
- Factors such as temperature, humidity, and the thickness of the adhesive layer can affect the curing time. Warmer temperatures and low humidity can speed up the process, while colder temperatures and high humidity may extend the drying time.
- It’s important to follow the manufacturer’s instructions regarding the recommended curing and drying times for the specific adhesive you are using. This will ensure optimal bonding performance and long-term durability.
- Avoid exposing the bonded rocks to excessive moisture or physical stress during the curing period. This could compromise the adhesive’s effectiveness and weaken the bond.
- Once the adhesive is fully cured, the rocks should be securely bonded together and ready for their intended purpose. However, it’s still advisable to handle them with care to maintain the longevity of the bond.
By following these application tips and considering the curing and drying time of silicone adhesives, you can ensure a successful rock bonding project. Whether you’re creating a stunning garden feature or repairing a broken stone structure, silicone adhesives offer a reliable solution for gluing rocks together.
Preparing The Rocks For Bonding
To prepare rocks for bonding and achieve a strong hold, follow these easy steps. Clean the surfaces, sand them down, apply a bonding agent, align the rocks, and let them cure. This guide will help you achieve a seamless bond between rocks.
Cleaning The Surfaces Of The Rocks:
Before bonding the rocks together, it is crucial to ensure that the surfaces are clean and free from any dirt, dust, or debris. Here are the steps to clean the rocks effectively:
- Use a brush or cloth to remove loose dirt and dust from the surface of the rocks.
- If there are stubborn stains or residues, you can wash the rocks with mild soap and water. Rinse thoroughly afterward.
- For stubborn stains that do not come off easily, you can try using a toothbrush or a soft-bristle brush to scrub gently.
- Make sure to dry the rocks completely before proceeding to the next step.
Sanding And Roughening The Surfaces For Better Adhesion:
To ensure a strong bond between the rocks, it is essential to create a rough surface that allows the glue to adhere more effectively. Follow these steps to sand and roughen the surfaces:
- Start by selecting the appropriate sandpaper grit. Coarse sandpaper with a lower grit number (around 80-120) is suitable for roughening the surfaces.
- Hold the sandpaper firmly and rub it against the rocks in a circular motion. Apply even pressure and make sure to cover the entire surface area.
- Be careful not to sand too aggressively, as it may damage the rocks or create uneven surfaces.
- Once you have sanded the rocks, wipe away any dust or debris using a clean cloth.
Ensuring Proper Alignment And Fit Before Bonding:
Before applying the glue, it is essential to ensure that the rocks are properly aligned and fit together. Follow these steps for a successful bonding process:
- Carefully analyze the rocks and determine the best position for bonding, taking into consideration the shapes, sizes, and desired outcome.
- Test the alignment by placing the rocks together and making any necessary adjustments.
- Once you are satisfied with the alignment, use masking tape or clamps to hold the rocks in place temporarily.
- Check for any gaps or uneven surfaces and make the necessary adjustments before proceeding with the bonding process.
- It is crucial to ensure a proper fit between the rocks to achieve a strong and secure bond.
Now that you have successfully prepared the rocks for bonding by cleaning the surfaces, sanding and roughening them, and ensuring proper alignment and fit, you are ready to proceed with gluing the rocks together. Keep in mind that following these steps will result in a more durable and long-lasting bond.
So, let’s move on to the exciting part of actually gluing rocks together!
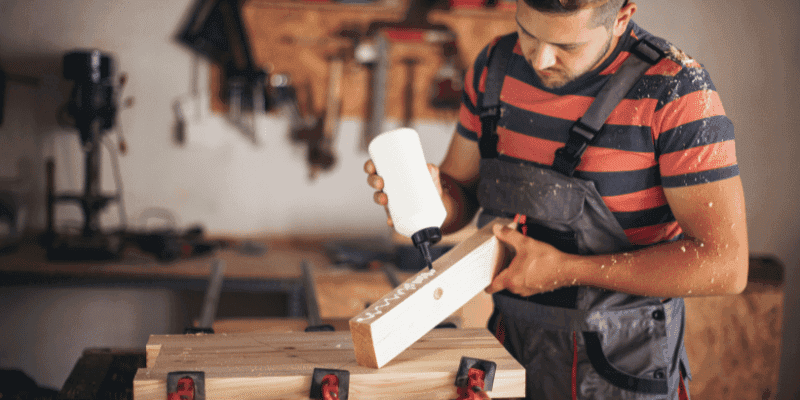
Credit: gluemasters.com
Techniques For Rock Bonding
Discover effective techniques for bonding rocks together with this comprehensive guide. Learn how to properly glue rocks together for long-lasting and durable results.
Applying the adhesive to the rocks:
- Before starting, ensure that the surfaces of the rocks are clean and free from dirt or debris.
- Choose an adhesive suitable for bonding rocks, such as epoxy or construction adhesive.
- Apply the adhesive to one of the rocks, using a brush, spreader, or nozzle depending on the consistency of the adhesive.
- Make sure to apply an even layer of adhesive, ensuring it covers the entire surface that will be bonded.
- If using a two-part epoxy, mix the adhesive according to the instructions provided before application.
Joining the rocks together securely:
- Align the rocks carefully, ensuring they fit together smoothly and securely.
- Press the rocks firmly together, applying even pressure to ensure a strong bond.
- Hold the rocks in place for a few minutes to allow the adhesive to set.
- If necessary, use clamps or heavy objects to hold the rocks in position while the adhesive cures.
- Double-check that the rocks remain aligned as the adhesive dries to prevent any shifting or sliding.
Removing excess adhesive for a clean finish:
- Once the adhesive has fully cured, inspect the bond for any excess adhesive.
- Gently scrape away any excess adhesive using a plastic scraper or razor blade.
- Be careful not to damage the rocks or the bond while removing the excess adhesive.
- If the adhesive has hardened and cannot be easily removed, try using a solvent recommended for the specific adhesive type.
- Clean the rocks and the bonded area with a damp cloth to remove any remaining adhesive residue.
Remember, following these techniques will help ensure a secure and long-lasting bond between rocks. Whether you are creating rock crafts, building a rock wall, or repairing a natural rock formation, proper rock bonding techniques will ensure your project’s success.
Clamping And Curing
Clamping and curing are essential when it comes to gluing rocks together. With careful application and proper techniques, you can create sturdy bonds between rocks, allowing you to create beautiful and durable structures for your garden or indoor decor.
Importance Of Clamping During The Curing Process
Proper clamping is essential for achieving a strong and durable bond when gluing rocks together. Clamping ensures that the rocks remain in close contact with each other during the curing process, allowing the adhesive to dry properly and create a sturdy bond.
Without adequate clamping, the rocks may shift or separate, resulting in a weak bond that can easily break.
Here are some key points to keep in mind when clamping rocks for bonding:
- Select the appropriate clamping method: Use clamps that are strong enough to hold the rocks securely in place without damaging them. Different clamping techniques may be required depending on the size, shape, and weight of the rocks.
- Apply even pressure: Ensure that the clamps apply equal pressure across the entire surface of the rocks. This promotes uniform adhesion and prevents any gaps or air bubbles from forming between the rocks and the adhesive.
- Protect the surfaces: To avoid leaving marks or indentations on the rocks, place protective pads or materials between the clamps and the rock surfaces. This will help prevent any damage or uneven pressure distribution.
- Avoid excessive clamping force: While it is important to apply enough pressure to hold the rocks together firmly, excessive force can lead to the adhesive being squeezed out or the rocks cracking. Find the balance between a tight hold and avoiding unnecessary stress on the rocks.
- Allow for airflow: If using clamps with adjustable pressure, leave room for a small gap between the rocks and the clamps to allow for some airflow. This promotes better curing by allowing moisture to escape and fresh air to reach the adhesive.
Curing Time And Considerations For Different Adhesives
The curing time and considerations for different adhesives used to glue rocks together can vary. It is crucial to choose the right adhesive for the type of rocks being bonded and to follow the manufacturer’s instructions for curing. Here are some important factors to consider:
- Adhesive type: Different adhesives have varying curing times and properties, so it is essential to select the appropriate adhesive for the job. Common types of adhesives for rock bonding include epoxy, cyanoacrylate (super glue), and construction adhesives.
- Manufacturer’s instructions: Always read and follow the manufacturer’s guidelines for curing time and application. These instructions provide specific recommendations based on the adhesive’s formulation and intended use.
- Ambient conditions: The temperature and humidity of the surrounding environment can affect the curing time of the adhesive. Higher temperatures generally promote faster curing, while cold or humid conditions may slow down the process. Ensure that the curing area is within the recommended range specified by the adhesive manufacturer.
- Rock porosity: The porosity of the rocks being bonded can impact curing time. Porous rocks may absorb more adhesive, requiring additional curing time to fully dry and harden. Take this into account when estimating the overall curing time.
- Curing duration: Depending on the adhesive, the curing process may take anywhere from a few minutes to several hours or even overnight. Avoid disturbing the clamped rocks during the curing period to ensure a strong bond.
- Testing and evaluation: After the recommended curing time has elapsed, it is advisable to test the strength of the bond before subjecting the rocks to heavy stress or load. This can help ensure that the adhesive has fully cured and the bond is secure.
Remember to always refer to the adhesive manufacturer’s instructions for the most accurate curing time and specific considerations for bonding rocks. Proper clamping and allowing sufficient curing time are vital steps for achieving a successful and durable bond between rocks.
Tips For Achieving Strong And Durable Bonds
Looking to glue rocks together? Follow these tips for achieving strong and durable bonds. With careful application and the right adhesive, you can create sturdy rock structures that will withstand the test of time.
Creating a lasting bond when gluing rocks together requires proper surface preparation, using the right amount of adhesive, and allowing sufficient curing time. Follow these tips to ensure strong and durable bonds that will stand the test of time:
Proper Surface Preparation:
- Clean the rocks: Before gluing, make sure the surfaces of the rocks are clean and free from dirt, dust, and debris. Use a cloth or brush to remove any loose particles.
- Dry the rocks: It’s crucial to ensure that both rocks are completely dry before applying any adhesive. Moisture can weaken the bond, so allow the rocks to air dry or use a hairdryer to speed up the process.
- Roughen the surfaces: To enhance adhesion, lightly sand or roughen the contact areas of the rocks. This helps the adhesive grip the surfaces better, promoting a stronger bond.
Using The Right Amount Of Adhesive:
- Apply an even layer: Use a high-quality adhesive suitable for bonding rocks and apply an even layer onto one of the surfaces. Be careful not to apply too much or too little adhesive, as this can affect the bond’s strength.
- Use a recommended adhesive type: Epoxy or construction adhesives are commonly used for bonding rocks. Follow the manufacturer’s instructions to determine the appropriate adhesive type for your specific rock material.
- Spread the adhesive evenly: Once the adhesive is applied, use a spatula or a small brush to spread it evenly over the contact area. This ensures a good distribution of adhesive and improves the bonding effectiveness.
Allowing Sufficient Curing Time For Maximum Strength:
- Follow manufacturer’s instructions: Different adhesives require varying curing times. Consult the manufacturer’s instructions to determine the recommended curing time for the adhesive you are using.
- Avoid disturbing the bond: After gluing the rocks together, ensure they remain undisturbed during the curing process. Movement or stress on the bond can compromise its strength, so allow the adhesive to cure thoroughly before handling or moving the rocks.
- Opt for longer curing times: While some adhesives may claim fast curing, it is often beneficial to allow for longer curing times for maximum bond strength. Patience during the curing process will result in a more durable bond.
By following these tips for proper surface preparation, using the right amount of adhesive, and allowing sufficient curing time, you can achieve strong and durable bonds when gluing rocks together. Remember to choose the appropriate adhesive for your rock material and carefully follow the manufacturer’s instructions for optimal results.
Enhancing The Bond With Mechanical Fasteners
When it comes to bonding rocks together, mechanical fasteners are the best option. Gluing rocks together can be challenging, but with the right technique and adhesive, a strong bond can be achieved for a variety of projects.
When it comes to gluing rocks together, sometimes adhesive alone may not provide the desired strength and durability. That’s where incorporating mechanical fasteners can come in handy. By combining the strength of adhesive with the reinforcement of screws or dowels, you can enhance the bond between the rocks and ensure a long-lasting connection.
In this section, we will explore techniques for using mechanical fasteners alongside adhesive, as well as how to balance aesthetics and functionality when utilizing these methods.
Incorporating Screws Or Dowels For Added Reinforcement:
Screws:
- Use screws specifically designed for masonry or stone applications.
- Pre-drill holes in both rocks to prevent cracking.
- Insert screws into the pre-drilled holes and tighten them securely using a screwdriver or drill.
- The screws should be chosen based on their length and diameter to provide sufficient support.
Dowels:
- Select dowels made of strong and durable materials, such as stainless steel or brass.
- Drill holes in the rocks where you want to join them, ensuring the holes are of the appropriate size for the dowels.
- Apply adhesive to the holes and insert the dowels securely.
- Allow the adhesive to dry and cure completely before handling or applying any external pressure.
Techniques For Using Mechanical Fasteners Alongside Adhesive:
Combination method:
- Apply adhesive to the surface area where the rocks will be joined, ensuring an even and generous amount.
- Place the rocks together and align them properly.
- Use screws or dowels to secure the rocks in place, providing additional reinforcement.
- Tighten the screws or insert the dowels carefully, making sure not to disturb the adhesive.
- Allow the adhesive to dry completely, following the manufacturer’s instructions.
Alternating method:
- Apply adhesive to the first rock and press it against the second rock.
- Secure the rocks temporarily with clamps or tape to hold them together while the adhesive sets.
- Once the adhesive has partly dried, remove the clamps or tape and drill pilot holes for screws or dowels.
- Insert the screws or dowels into the pilot holes and tighten them snugly to enhance the bond further.
- Allow the adhesive to fully cure before applying any external pressure.
Reinforcement positioning:
- Identify weak points or areas that may be prone to stress and strain.
- Mark these areas on the rocks using a pencil or marker.
- Utilize mechanical fasteners such as screws or dowels strategically in these marked positions.
- Ensure that the fasteners are positioned in a way that provides maximum reinforcement and stability to the bond.
Balancing Aesthetics And Functionality With Mechanical Fasteners:
Concealing the fasteners:
- Use screws or dowels that match the color or texture of the rocks, minimizing their visibility.
- Consider embedding the fasteners slightly below the surface of the rocks to make them less conspicuous.
- Use touch-up paint or a suitable sealant to camouflage the fasteners further.
Choosing decorative fasteners:
- Opt for decorative screws or dowels that add visual appeal to the overall design.
- Select fasteners with unique shapes or finishes that complement the rocks and enhance the aesthetic value.
Ensuring functionality:
- Prioritize the structural integrity of the bond over aesthetics, especially for load-bearing applications.
- Evaluate the strength and the weight-bearing capacity of both the adhesive and the mechanical fasteners.
- Strike a balance between aesthetics and functionality by choosing fasteners that maintain a secure bond while fulfilling desired visual requirements.
Remember, when incorporating mechanical fasteners, it is essential to consider the specific needs of your project, the properties of the rocks being joined, and the desired outcome. By carefully selecting and implementing the right combination of adhesive and mechanical reinforcement, you can achieve a strong and visually pleasing bond that will endure the test of time.

Troubleshooting Common Issues
Looking to glue rocks together? Learn essential troubleshooting tips for common issues encountered during the process. Discover effective techniques and avoid pitfalls with our expert guidance.
Whether you’re working on a DIY project or crafting a beautiful centerpiece, gluing rocks together can be a handy technique. However, like any adhesive, there can be some common issues that arise. In this section, we will address troubleshooting tips for two common problems you may encounter: incomplete bonding and weak joints, as well as adhesive residue or visible seams.
Incomplete Bonding And Weak Joints:
- Check the surface: Ensure that the rocks you are bonding together are clean and free from any dirt, debris, or oils. Use a brush or cloth to wipe away any contaminants before applying the adhesive.
- Roughen the surfaces: Smooth or shiny rocks may not provide enough surface area for the adhesive to bond properly. Consider roughening the contact areas using sandpaper or a file to create more texture.
- Apply pressure: Once you have applied the adhesive, firmly press the rocks together and hold them in place for the recommended curing time. Consider using clamps or heavy objects to maintain pressure during the bonding process.
- Allow sufficient curing time: Different adhesives have varying curing times, so make sure to follow the manufacturer’s instructions. Trying to test the bond too soon can result in weak joints.
Adhesive Residue Or Visible Seams:
- Choose the right adhesive: Certain adhesives create a more transparent and seamless bond than others. Opt for a clear or color-matching adhesive to minimize any visible seams.
- Apply adhesive sparingly: Using too much adhesive can result in excess glue squeezing out from the rocks and creating a messy appearance. Apply a thin, even layer of adhesive to avoid excessive residue.
- Clean excess glue immediately: If adhesive does squeeze out during the bonding process, wipe it away with a damp cloth or a q-tip as soon as possible. Once the glue dries, it can become much more difficult to remove.
- Use a filler material: In cases where there are gaps or uneven surfaces between rocks, consider using a filler material like epoxy putty or clay to fill in the spaces before applying the adhesive. This can help create a smoother and more seamless bond.
Repairing And Troubleshooting Failed Bonds:
- Reevaluate the adhesive: If you notice a failed bond, the adhesive you used may not have been suitable for the type of rocks or surfaces you are working with. Research and choose an adhesive that is specifically designed for bonding rocks.
- Clean and prepare the surfaces: Before attempting to repair the bond, thoroughly clean and prepare the surfaces, following the same steps as mentioned earlier. This ensures that the new bond has the best chances of success.
- Apply fresh adhesive: Once the surfaces are ready, apply a fresh layer of adhesive, using the correct amount for a strong bond. Press the rocks together firmly and allow sufficient curing time.
By troubleshooting these common issues and following the tips mentioned above, you can ensure a successful and durable bond when gluing rocks together. So, whether you’re creating stunning rock art or repairing a broken stone structure, these troubleshooting techniques will help you achieve the desired results.
Safety Precautions For Rock Bonding
Learn how to safely glue rocks together with these essential safety precautions. Follow these guidelines for a secure bond and avoid common mistakes.
Before embarking on any project involving glueing rocks together, it is crucial to prioritize safety. Follow these safety precautions to ensure a smooth and risk-free bonding process:
Protecting Yourself From Harmful Fumes And Chemicals:
- Wear protective gloves, safety goggles, and a mask to shield yourself from potential contact with adhesive and harmful fumes.
- Avoid direct skin contact with the adhesive by wearing long sleeves and pants.
- Ensure adequate ventilation in the workspace to minimize the inhalation of fumes.
Working In A Well-Ventilated Area:
- Choose a well-ventilated space, whether indoors or outdoors, to carry out rock bonding projects.
- If working indoors, open windows and doors to facilitate air circulation.
- When working outdoors, be mindful of wind conditions to prevent adhesive fumes from affecting nearby individuals.
Proper Disposal Of Adhesive-Related Waste:
- Adhere to local regulations regarding the disposal of adhesive bottles, applicators, and any other related waste.
- Avoid pouring adhesive remnants down the drain; instead, dispose of them in sealed containers.
- Check if there are specialized disposal facilities available for adhesive-related waste in your area.
Remember, safety should be your utmost priority when working with adhesives and rocks. By following these precautions, you can ensure a safe and enjoyable bonding process.
Frequently Asked Questions For How To Glue Rocks Together
What Is The Best Glue For Rocks And Stones?
The best glue for rocks and stones is the Rockite Expansion Cement, which provides strong and durable adhesion.
Will Gorilla Glue Hold Rocks Together?
Yes, Gorilla Glue can effectively hold rocks together by forming a strong and durable bond.
How Do You Glue Landscape Rocks Together?
To glue landscape rocks together, follow these steps:
1. Clean the surfaces of the rocks to remove any dirt or debris.
2. Use a strong adhesive specifically designed for outdoor use, such as an epoxy or construction adhesive.
3. Apply the adhesive to one of the rocks, spreading it evenly.
4. Press the second rock firmly onto the adhesive, making sure the surfaces are aligned.
5. Allow the adhesive to dry and cure according to the manufacturer’s instructions.
6. Once fully cured, the rocks will be securely bonded together.
Note: Avoid using regular household glue as it may not withstand outdoor conditions.
Can Rocks Be Hot Glued?
Yes, rocks can be hot glued. Hot glue can securely bond rocks together for various craft or DIY projects.
Conclusion
To sum it up, gluing rocks together can be an enjoyable and rewarding DIY project. By following the right steps, using the appropriate adhesive, and ensuring proper curing time, you can create unique and durable rock formations. Whether you’re creating garden decorations, art pieces, or simply looking to bond rocks together for practical purposes, this guide has equipped you with the necessary knowledge to achieve success.
Remember to consider the type of rocks you are working with, as well as the environment in which your project will be placed, to ensure long-lasting results. So, gather your materials, embrace your creative side, and get ready to bring those rocks together in a strong and beautiful union.
Happy gluing!