How to Install a Shower Base on a Wooden Floor
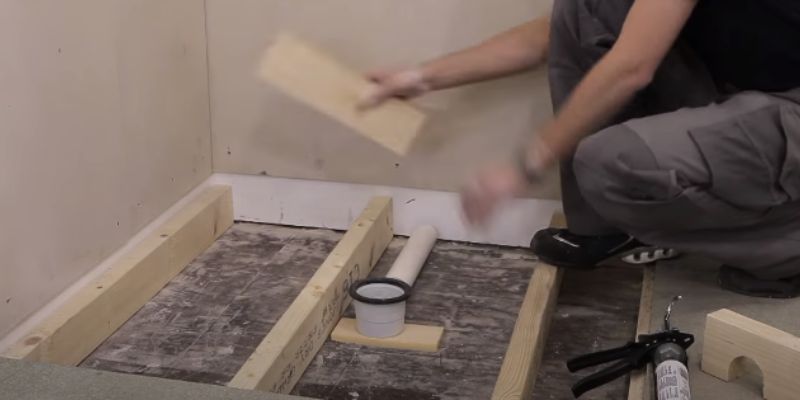
To install a shower base on a wooden floor, begin by measuring and marking the position of the base on the floor, ensuring it is level. Then, apply a layer of waterproofing membrane to the wooden floor to protect it from water damage.
Next, apply a mortar mix and spread it evenly using a trowel before placing the shower base on top. Secure the base with screws or adhesive, and then connect the drain pipe. Finally, seal the edges of the base with silicone caulk to prevent any leakage.
Take note that proper installation procedures may vary depending on the specific shower base and manufacturer’s instructions.
Preparing The Wooden Floor
Before installing a shower base on a wooden floor, it is important to properly prepare the floor to ensure a stable and secure installation. This involves assessing the floor condition, repairing any damage, and reinforcing weak areas. By taking these steps, you can create a solid foundation for your shower base.
Assessing The Floor Condition
The first step in preparing the wooden floor is to assess its condition. Inspect the floor for any signs of rot, water damage, or structural issues that could affect the installation of the shower base.
If you notice any soft spots, sagging, or signs of water damage, it is important to address these issues before proceeding with the installation. Ignoring these problems can lead to a compromised installation and potential future damage.
Repairing And Reinforcing The Floor
If you find any areas that require repair or reinforcement, it is essential to address them to ensure the stability of the shower base. Here are some steps to follow:
- Repair any rot or water damage: Use a chisel or utility knife to remove any rotted or damaged wood. Replace the damaged section with a new piece of plywood, making sure to secure it firmly to the subfloor.
- Reinforce weak areas: If you come across any weak areas that flex or feel unstable, reinforce them by adding additional support. This can be done by installing additional floor joists or using bracing techniques recommended by a structural engineer.
- Ensure the floor is level: It is crucial for the floor to be level before installing the shower base. Use a long level and shims to adjust any uneven areas.
- Apply a waterproofing membrane: To protect the wooden floor from water damage, apply a waterproofing membrane. This will help prevent moisture from seeping into the wood and causing rot or mold.
By thoroughly assessing the floor condition, making necessary repairs, and reinforcing weak areas, you can ensure a stable and long-lasting installation of your shower base on a wooden floor.
Choosing The Right Shower Base
Looking to install a shower base on a wooden floor? Discover our guide to choosing the right shower base for your needs. Find out how to ensure a secure and reliable installation that will stand the test of time.
When it comes to installing a shower base on a wooden floor, choosing the right one is crucial. Not only will it ensure a sturdy and leak-proof installation, but it will also contribute to the overall aesthetics of your bathroom. In this section, we will discuss the key factors to consider when selecting a shower base.
Considering The Measurements
Before you start shopping for a shower base, it’s important to measure your available space accurately. Take note of the length, width, and depth of your shower area. Keep in mind that the shower base should fit securely within the designated space without any gaps or overhangs. Consider the layout of your bathroom and the placement of other fixtures to determine the ideal size and shape for your shower base.
Selecting The Material
The material of the shower base plays a significant role in both its durability and appearance. Here are some popular options to consider:
- Acrylic: Acrylic shower bases are lightweight, easy to install, and available in various colors and designs. They offer good resistance to stains and scratches.
- Fiberglass: Fiberglass shower bases are cost-effective and lightweight. They are also easy to clean and resistant to stains and fading.
- Enamel-coated Steel: Steel shower bases are known for their strength and durability. The enamel coating provides a smooth and easy-to-clean surface.
- Solid Surface: Solid surface shower bases are made of a blend of minerals and resins. They are highly durable, resistant to stains, and can be custom-made to fit any size or shape.
- Tile: Tile shower bases offer a classic and customizable option. They require professional installation and proper waterproofing to ensure a long-lasting and leak-free shower.
Consider your budget, maintenance preferences, and the overall style of your bathroom when selecting the material for your shower base. Each option has its own advantages, so choose the one that best matches your needs and preferences.
Installing The Shower Base
Installing a shower base on a wooden floor is a simple process that can be done with a few tools and some basic knowledge. By following the steps carefully, you can ensure a sturdy and water-tight foundation for your shower.
Installing a shower base on a wooden floor requires careful preparation and precise installation to ensure a sturdy, leak-free foundation for your shower. In this guide, we will walk you through the steps to install a shower base, from positioning it correctly to securing it to the floor and completing the installation.
Positioning The Base
Properly positioning the shower base is crucial to ensure a comfortable and functional shower space. Follow these steps to position the base correctly:
- Clean the wooden floor thoroughly to remove any dirt, dust, or debris that could affect the base’s stability.
- Measure the dimensions of the shower base and mark the positions on the floor, ensuring the corners are square and align with the walls.
- Use a level tool to check if the floor is level. If not, make necessary adjustments to ensure a level surface for the base.
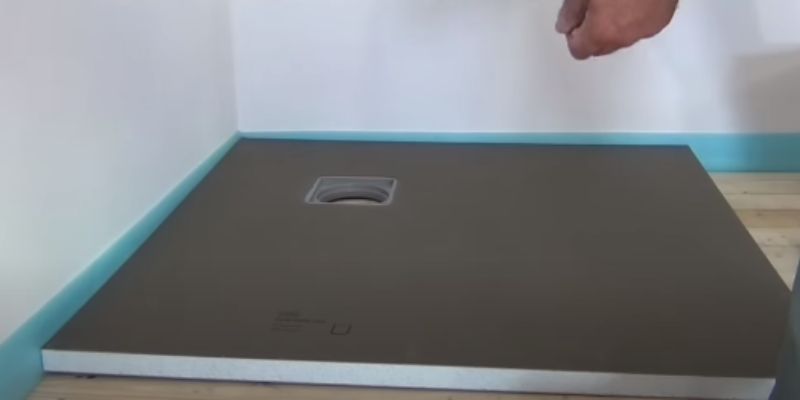
- Place the shower base on the marked positions, ensuring it fits snugly into the available space.
- Double-check the alignment and adjust if needed.
Securing The Base To The Floor
Securing the shower base to the wooden floor is essential to prevent any movement or shifting. Follow these steps to secure the base properly:
- Drill holes through the shower base and into the wooden floor at marked locations.
- Insert anchor plugs into the drilled holes.
- Place a rubber gasket or silicone sealant around each hole to create a watertight seal.
- Align the base with the drilled holes and insert screws through the base into the anchor plugs.
- Tighten the screws evenly to secure the base firmly to the floor.
Completing The Installation
Once the base is securely positioned and fastened to the floor, you are ready to complete the installation. Follow these final steps:
- Apply a waterproof membrane or sealant around the edges of the base to ensure a watertight seal.
- Connect the drain to the base according to the manufacturer’s instructions.
- Test the shower base for any leaks by running water into the drain and observing if there is any water seepage.
- If there are any leaks, apply additional sealant to the problematic areas and retest until the base is watertight.
- Once you’re confident that the shower base is watertight and secure, you can proceed with the rest of your shower installation, such as tiling the walls or installing the shower door.
By following these steps, you can successfully install a shower base on a wooden floor, creating a sturdy foundation and ensuring a functional and enjoyable shower experience.
Conclusion
Installing a shower base on a wooden floor is a simple yet important task that requires careful planning and execution. By following the steps outlined in this guide, you can ensure a successful installation that will provide a sturdy and leak-proof foundation for your shower.
Remember to prepare the wooden floor, choose the right shower base, and securely attach it to the floor. With proper maintenance, your new shower base will last for years to come, providing you with a comfortable and enjoyable showering experience.