How to Install Hardwood Flooring on Cement
To install hardwood flooring on cement, you need to start with a clean, dry and level surface. In this guide, we will walk you through the steps required, from preparing the concrete to laying the hardwood boards, ensuring a professional and long-lasting result.
Whether you are tackling a DIY project or hiring a professional, understanding the process is crucial for a successful installation. By following these steps, you can transform your space with the timeless beauty and durability of hardwood flooring. So, let’s get started on the journey to a stunning hardwood floor on your cement subfloor.
1. Preparing The Cement Floor
Before installing hardwood flooring on a cement floor, it is crucial to properly prepare the surface to ensure a long-lasting and sturdy installation. This process involves cleaning the surface and repairing any cracks or damages present.
1.1 Cleaning The Surface
To begin, thoroughly clean the cement floor to remove any dirt, dust, or debris that may hinder the installation process. Follow these steps:
- Sweep the floor using a broom to eliminate loose dirt and debris.
- Use a vacuum cleaner with a brush attachment to remove finer particles and dust.
- Mix a mild cleaner with warm water in a bucket according to the manufacturer’s instructions.
- Dampen a mop or sponge with the cleaner solution and thoroughly mop the entire surface.
- Allow the floor to dry completely before proceeding to the next step.
1.2 Repairing Cracks And Damages
Even minor cracks and damages in the cement floor can compromise the integrity of the hardwood flooring installation. Follow these steps to repair any imperfections:
- Inspect the floor for cracks, chips, or other damages.
- Use a wire brush or scraper to remove any loose debris or crumbling material from the damaged area.
- If necessary, use a vacuum cleaner to ensure the area is clean and free from any loose particles.
- Apply a concrete patching compound to fill the cracks or damaged areas, following the manufacturer’s instructions.
- Smooth out the patched areas using a trowel or putty knife.
- Allow the compound to dry completely before moving on to the next step.
By thoroughly cleaning the surface and repairing any cracks or damages, you are ensuring a solid foundation for your hardwood flooring installation on the cement floor.

2. Choosing The Right Hardwood Flooring
Installing hardwood flooring on cement involves careful consideration of various factors. One of the most important steps in this process is choosing the right hardwood flooring. By selecting the appropriate type, species, thickness, and width, you can ensure a successful and long-lasting installation. In this section, we will discuss the different aspects you should keep in mind when selecting hardwood flooring for your cement subfloor.
2.1 Solid Hardwood Vs. Engineered Hardwood
When it comes to installing hardwood flooring on cement, you have two main options: solid hardwood and engineered hardwood. Each type has its own advantages and considerations.
While solid hardwood is made entirely from a single piece of wood, engineered hardwood consists of multiple layers of wood with a hardwood veneer on top. This construction makes engineered hardwood more resistant to moisture and changes in temperature, which is particularly important when installing on cement.
| Types of Hardwood Flooring | Advantages | Considerations |
|---|---|---|
| Solid Hardwood | Classic, natural look Durable and can be refinished multiple times |
Prone to expansion and contraction due to moisture Not recommended for below-grade installations |
| Engineered Hardwood | More stable and resistant to moisture Suitable for below-grade installations |
A limited number of refinishing |
2.2 Selecting The Wood Species
Wood species play a significant role in the overall aesthetics and durability of hardwood flooring. Different species have distinct grain patterns, color variations, and hardness levels. It’s essential to choose a wood species that aligns with your desired style and can withstand the wear and tear of your specific environment.
Popular wood species for hardwood flooring include oak, maple, cherry, and walnut. While oak tends to be more traditional and durable, maple offers a lighter and more contemporary look. Cherry and walnut, on the other hand, provide a richer and more luxurious appearance.
2.3 Considering The Thickness And Width
The thickness and width of the hardwood planks can affect not only the installation process but also the overall look and feel of your flooring. Thicker planks generally offer better stability, while wider planks provide a more spacious and visually appealing look.
Before deciding on the thickness and width, consider factors such as the subfloor condition, the style you want to achieve, and the size of your space. It’s important to strike a balance between functionality and aesthetics to create a flooring solution that suits your needs and preferences.
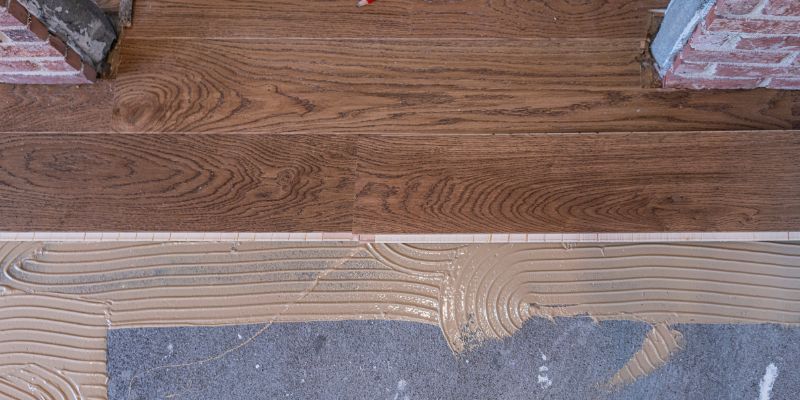
3. Installing Hardwood Flooring On Cement
Installing hardwood flooring on a cement subfloor can be a great way to add warmth and beauty to your space. However, it requires careful preparation and attention to detail to ensure a successful installation. In this section, we will walk you through the necessary steps to install hardwood flooring on cement, from preparing the subfloor to laying the actual hardwood floor.
3.1 Preparing The Subfloor
Before you start the installation process, it’s crucial to properly prepare the cement subfloor. Here are the steps you should follow:
- Clean the subfloor thoroughly to remove any dirt, dust, or debris.
- Repair any cracks, uneven areas, or damage in the cement subfloor. Fill the cracks with a cement patching compound and level any uneven areas using a self-leveling compound.
- Ensure the subfloor is dry and moisture-free. Use a moisture meter to check the moisture content, and make sure it is within the acceptable range for hardwood flooring installation.
3.2 Applying A Moisture Barrier
To protect your hardwood flooring from moisture, it’s essential to apply a moisture barrier. Follow these steps:
- Carefully measure and cut the moisture barrier material to fit the dimensions of the room.
- Overlap the seams of the moisture barrier by at least 8 inches and secure them with moisture-resistant tape.
- Extend the moisture barrier up the walls by a few inches to create a complete moisture barrier enclosure.
- Check the manufacturer’s instructions for any additional steps or recommendations specific to the moisture barrier product you are using.
3.3 Installing The Underlayment
An underlayment helps provide cushioning and sound insulation for your hardwood floor. Here’s how to install it:
- Roll out the underlayment material across the entire subfloor, ensuring it covers the floor’s entire surface.
- Trim the excess underlayment using a utility knife, leaving a small gap around the perimeter of the room to allow for proper expansion of the hardwood flooring.
- Secure the underlayment in place using adhesive or staples, following the manufacturer’s instructions.
3.4 Laying The Hardwood Floor
Now comes the exciting part – laying the hardwood floor! Here’s how:
- Start in one corner of the room and lay the first row of hardwood flooring along the longest straight wall, leaving a 1/2-inch expansion gap between the flooring and the wall.
- Use a flooring nailer or adhesive to secure the flooring in place, following the manufacturer’s instructions.
- Continue laying the hardwood flooring row by row, making sure to stagger the joints for a more visually appealing and stable installation.
- Remember to leave the necessary expansion gaps around the perimeter of the room and at doorways.
- Once you’ve completed the installation, give the hardwood flooring time to acclimate to the room’s temperature and humidity before adding any finish coating or walking on it.
Follow these steps carefully, and you’ll be enjoying your beautiful hardwood flooring on a cement subfloor in no time!
4. Sanding And Finishing The Hardwood Floor
Transform your cement floors with beautiful hardwoods. Learn how to properly sand and finish your hardwood floor to achieve a stunning, durable result.
Before you can fully enjoy your newly installed hardwood floor, it’s essential to go through the sanding and finishing process. This step will not only enhance the floor’s appearance but also protect it from wear and tear.
4.1 Sanding The Floor
Sanding the hardwood floor is a crucial step to achieve a smooth and even surface. It removes any imperfections, such as rough spots or unevenness caused during installation. Here’s how to sand your floor:
- Start by renting a drum sander from your local home improvement store.
- Equip yourself with safety gear, including goggles, a dust mask, and ear protection.
- Begin sanding the floor using the drum sander, following the grain of the wood. Start with a rough-grit sandpaper and gradually move to finer grits.
- Be sure to sand the entire floor evenly, paying extra attention to any high spots or damaged areas.
- After sanding, clean the floor thoroughly to remove any dust or debris. A vacuum cleaner or broom will do the job.
4.2 Filling Gaps And Nail Holes
To achieve a flawless and seamless look, it’s important to fill in any gaps or nail holes in the hardwood floor. Here’s how to fill them:
- Prepare a wood filler that matches the color of your floor.
- Using a putty knife, apply the wood filler to the gaps and nail holes, ensuring to fill them completely.
- Smooth out the filled areas with the putty knife and remove any excess filler.
- Allow the filler to dry according to the manufacturer’s instructions.
- Once dry, lightly sand the filled areas to ensure they are flush with the floor.
4.3 Applying Stain And Sealer
Applying stain and sealer to your hardwood floor not only enhances its natural beauty but also adds an extra layer of protection. Here’s how to do it:
- Choose a stain color that complements your interior design aesthetic.
- Apply the stain using a brush or cloth, following the manufacturer’s instructions.
- Work in small sections, going along the grain of the wood.
- Allow the stain to dry completely before applying a sealer.
- Apply the sealer evenly across the entire floor, using a brush or roller.
4.4 Adding A Protective Finish
To ensure your hardwood floor stands the test of time, it’s crucial to add a protective finish. Here’s what you need to do:
- Select an appropriate protective finish, such as polyurethane or varnish.
- Apply the protective finish in thin, even coats, using a brush or roller.
- Allow each coat to dry completely before applying the next one.
- After the final coat, allow the floor to dry thoroughly before walking on it or placing furniture.
- Regularly maintain and clean your hardwood floor to preserve its beauty and longevity.
By following these steps, you can achieve a stunning and long-lasting hardwood floor in your home. Sanding, filling gaps, applying stain and sealer, and adding a protective finish are essential for ensuring the beauty and durability of your hardwood floor.
5. Maintaining Your Hardwood Floor
Once your hardwood floor installation is complete, it’s important to take proper care of it to ensure its longevity and beauty. Regular cleaning, preventing scratches and damage, and refinishing as needed are key aspects of maintaining your hardwood floor.
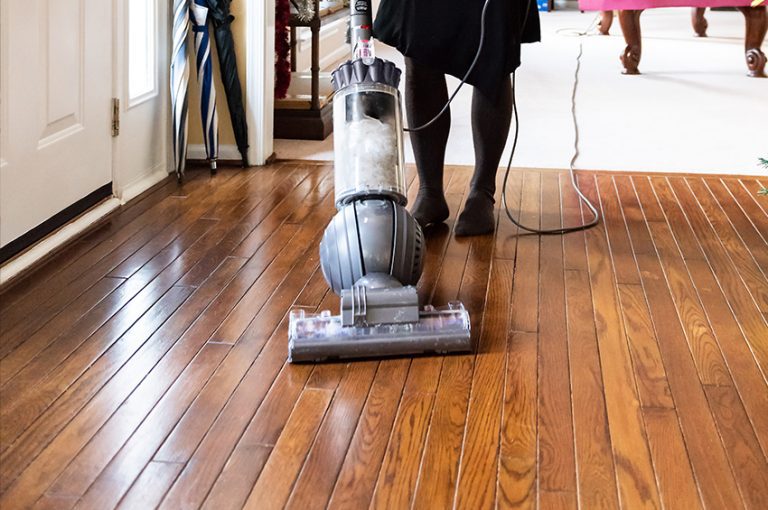
5.1 Regular Cleaning
To keep your hardwood floor looking its best, regular cleaning is essential. Here are some tips for effective cleaning:
- Sweep or vacuum: Remove dust and dirt particles from the floor using a broom or vacuum cleaner with a soft brush attachment. This prevents scratches from debris.
- Mop with care: Use a damp mop or cloth to clean the surface, avoiding excessive moisture that may damage the wood. Dry the floor immediately after mopping.
- Use appropriate cleaning solutions: Choose cleaning products specifically designed for hardwood floors. Avoid using harsh chemicals or abrasive cleaners that can harm the wood.
- Wipe up spills promptly: Accidental spills should be wiped up immediately to prevent staining and warping. Be gentle when cleaning to avoid scraping the floor.
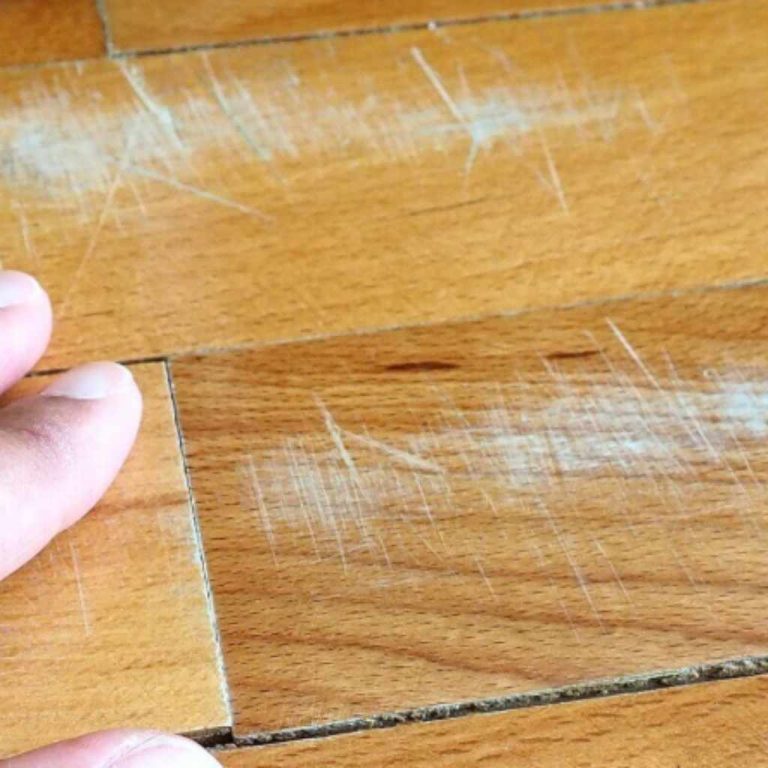
5.2 Preventing Scratches And Damage
Protecting your hardwood floor from scratches and damage is crucial for maintaining its appearance. Follow these preventive measures:
- Use felt pads: Attach felt pads to the legs of furniture to prevent scratches when moving or rearranging items.
- Place doormats at entrances: Place doormats both inside and outside your home to trap dirt and prevent it from being tracked onto the floor.
- Avoid high heels and heavy shoes: Ask family members and guests to remove high heels or heavy shoes before walking on the hardwood floor, as they can cause dents and scratches.
- Trim pet nails: Regularly trim your pets’ nails to avoid scratches. Place protective mats under pet food and water dishes to catch spills.
5.3 Refinishing As Needed
Over time, your hardwood floor may show signs of wear and tear. Refinishing the floor can bring it back to its former glory. Look out for these indications that refinishing is required:
| Signs of refinishing need | Course of action |
|---|---|
| Deep scratches or gouges | Lightly sand the affected areas and apply a new coat of finish. |
| Worn-out finish | Strip the old finish, sand the floor, and apply a fresh coat of finish. |
| Discoloration or fading | Sand the floor and apply a new stain and finish to restore its color. |
Refinishing your hardwood floor is a task best left to professionals, as they have the expertise and proper equipment to achieve optimal results.
6. Enhancing The Look Of Your Hardwood Floor
Installing hardwood flooring on cement can transform your space, adding warmth and elegance to any room. But don’t stop there! Enhancing the look of your hardwood floor goes beyond just the installation process. In this section, we will explore three important factors that can truly elevate the overall aesthetics of your flooring.
6.1 Using Area Rugs And Mats
Adding area rugs and mats to your hardwood floor can serve multiple purposes. Not only do they provide a stylish touch, but they also protect the hardwood surface from foot traffic and furniture marks. Place area rugs strategically in high-traffic areas, such as entryways or hallways, to prevent wear and tear. You can also use mats near doors to keep moisture and dirt from reaching your floors.
When selecting area rugs, ensure that the colors and patterns complement your hardwood flooring. Opt for rugs with non-slip backing to prevent accidents and maintain stability. By incorporating area rugs and mats into your hardwood floor design, you can showcase your personal style while enhancing both the look and durability of your flooring.
6.2 Furniture Placement And Pads
The placement of furniture on your hardwood floor can make a significant difference in its overall look. Properly arranging your furniture not only creates a harmonious layout but also helps protect your floor. Before placing heavy items, like sofas or tables, consider using furniture pads. These pads act as a protective barrier, preventing scratches and dents caused by furniture movement.
Moreover, furniture pads also minimize the noise and vibration that can occur when moving furniture around the room. Aim to distribute the weight of your furniture evenly, avoiding concentrated pressure on specific areas. By doing so, you can maintain the integrity of your hardwood floor and ensure its long-lasting beauty.
6.3 Styling With Décor And Accents
Adding well-chosen décor and accents can truly make your hardwood floor stand out. A room with hardwood flooring offers countless opportunities to enhance its elegance and charm. Consider adding decorative elements such as plants, art pieces, or decorative vases to create focal points within your space.
Pay attention to the color palette and style of the room when choosing décor. For example, incorporating colors found in your hardwood floor into your decorative items can create a cohesive and visually appealing aesthetic. Experiment with different textures, materials, and finishes to add depth and personality to your space.
By thoughtfully styling your room with décor and accents, you can showcase the beauty of your hardwood flooring and create a space that reflects your unique taste and style.
Conclusion
To conclude, installing hardwood flooring on cement may seem like a daunting task, but with the right tools and techniques, it can be accomplished successfully. By following the step-by-step instructions provided in this blog post, you can transform your space into a beautiful and durable hardwood floor.
Remember to prepare the cement surface properly, use the correct adhesive, and take your time during the installation process. With patience and careful attention to detail, you can achieve a stunning hardwood floor that will enhance the aesthetic appeal of your home.