
How to Make 60 Degree Cut on Miter Saw
To make a 60-degree cut on a miter saw, you’ll need to use a blade with at least 60 teeth. Using a 10″ knife, you’ll also need a fence. Set the edge to 60 degrees and the wall to 6-5/8″. Place the workpiece against the wall and align it with the blade.
Cut along the length of the workpiece.
How To Make 60, 70, Or Even 85-Degree Angle Cuts On Your Miter Saw!
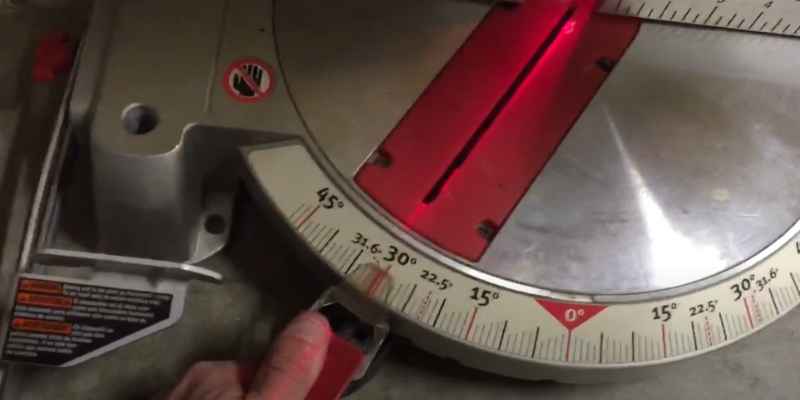
- Set your miter saw to 60 degrees
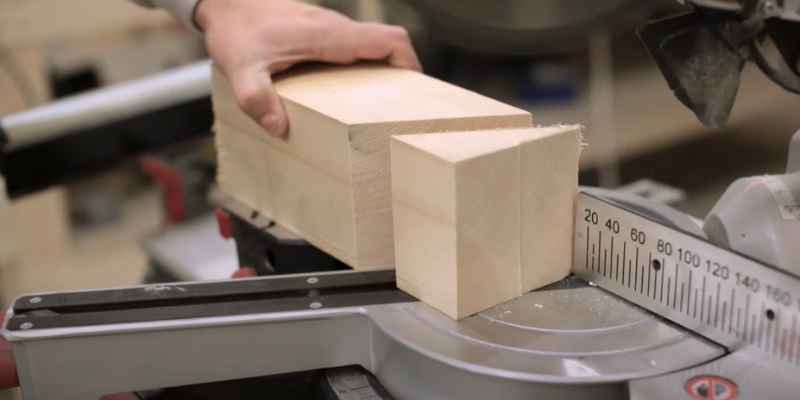
- Place your workpiece against the saw’s fence, ensuring it’s flush with the blade.
- Slowly and carefully push the workpiece through the blade, letting it make contact with both sides of the blade.
- Once the workpiece is all the way through, please turn off the saw and let it come to a complete stop before removing your piece.
How to Make a 60 Degree Bevel Cut
Using a reliable and sharp saw blade is most important when making bevel cuts. A dull blade will not only make it difficult to get a clean cut, but it can also be dangerous. With that said, here’s how to make a 60-degree bevel cut:
1. Mark your cutting line on the workpiece. Make sure that the line is perpendicular to the grain of the wood.
2. Set your saw blade to an angle of 60 degrees using a protractor or combination square.
3. Cut along the marked line with steady, even strokes, following the direction of the grain as much as possible. Use a push stick if necessary to keep your fingers away from the blade.
How to Cut a 60 Degree Bevel With a Circular Saw
Assuming you don’t have a miter saw and need to cut a 60-degree angle with a circular saw, here’s how to do it:
- Set the depth of cut on your circular saw. The blade should only protrude about 1/8 inch from the saw’s baseplate.
This will ensure that you don’t overcut the bevel.
2. Place the piece of wood you’ll bevel flat on your work surface—measure and mark where you want the angle to start and stop.
Draw a line connecting these two marks. This will be your cutting line.
3. Place the baseplate of your circular saw on the wood, so the blade is lined up with your cutting line.
Slowly lower the blade until it barely touches the wood (you may need to adjust the depth of cut at this point).
4. Hold down the front end of the baseplate (the part closest to the blade) with one hand.
Cut 60 Degree Angle Table Saw
If you’re looking to cut a 60-degree angle on a table, saw, there are a few things you need to keep in mind. First, make sure the blade is at the correct angle. You can adjust your blade’s bevel angle to 60 degrees.
Second, use a push stick or similar device to help safely guide the workpiece through the blade. Third, make sure the fence is aligned correctly before making your cut. Fourth, take your time and be careful – a lousy amount here could ruin your project.
With these tips in mind, cutting a 60-degree angle on a table saw can be easy and safe!
How to Cut a 60 Degree Angle Without a Miter Saw
If you’re looking to cut a 60-degree angle and don’t have a miter saw on hand, there’s no need to worry. You can easily accomplish this task with patience and the right tools.
Here’s what you’ll need:
-A handsaw or circular saw -A jigsaw -A drill
-A screwdriver -An adjustable square or T-bevel -Sandpaper (optional)
First, use your handsaw or circular saw to make a rough cut along your desired line. Next, switch to your jigsaw and create a more precise amount, following the line as closely as possible. If necessary, use sandpaper to clean up any rough edges.
Finally, use your drill to create pilot holes at the corners of your angle. Use the screwdriver to drive screws into these holes, securing the two pieces of wood together. And that’s it!
You’ve now successfully cut a 60-degree angle without a miter saw.
How to Cut a 55 Degree Angle on a Miter Saw
If you’re looking to cut a 55-degree angle on a miter or saw, there are a few things you need to know. First, most miter saws have stops at 0, 22.5, 45, and 90 degrees. To cut a 55-degree angle, you’ll need to adjust the finish on your miter saw accordingly.
Next, you’ll need to ensure your workpiece is securely fastened to the miter saw table. Once everything is set up and ready to go, align the blade with your mark on the workpiece and cut. And that’s all there is to it!
You can easily cut angles of any degree on a miter saw with just a few simple steps.
How Do You Do a 60 Degree Cut?
When cutting wood, the degree of the cut is determined by the angle of the blade about the wood. A 60-degree amount means the edge is at a 60-degree angle to the wood. There are a few different ways to make a 60-degree cut.
One way is to use a miter saw. First, set the miter saw to 60 degrees. Then, place the board you will cut against the fence of the saw so that it is flush with the blade.
Make sure that your hands are clear of the blade, and then turn on the saw and let it come up to full speed before slowly pushing it through the wood. Another way to make a 60-degree cut is with a circular saw. First, find an edge of your board that you can use as a reference point and draw a line across it at your desired measurement using a pencil, ruler, or measuring tape.
Then, set your circular saw blade to cut at 60 degrees by loosening or tightening its bevel adjustment knob until the indicator lines up with “60” on its bevel scale gauge. After that, hold your circular saw so that its baseplate rests flush against your reference line. In contrast, its cutting edge points toward the waste side of the line—you’ll know you have it positioned correctly when looking down at the shoe from above; you see that the footplate is lined up evenly with both sides of your pencil line (left). With one hand on top of the handle and the other holding then soothes the circular saw against the surface of the wood, start their cut by pulling back on the saw’s trigger(right).
How Do You Cut Angles Greater Than 50 Degrees on a Miter Saw?
You’ll need to use a jig if you’re looking to cut angles greater than 50 degrees on a miter saw. A jig is simply a guide that helps you make precise cuts. There are many different types of jigs available, but for this particular application, you’ll want to use a miter saw jig.
Miter saw jigs typically come with adjustable fences that allow you to set the angle of your cut. Once the wall is placed, all you need to do is line up the blade of your miter saw with the marked line on the jig and make your cut. Making perfect cuts every time can be tricky, so it’s always best to practice on some scrap wood before cutting into your final piece.
With a bit of practice, you should be able to cut any angle accurately and efficiently using a miter saw jig.
How Do You Cut a 65 Degree Angle With a Miter Saw?
You can cut a 65-degree angle with a miter saw in a few different ways. The first way is by using a protractor to find the correct measurement. Place the protractor on the wood and ensure that the zero mark is lined up with the wood’s edge.
Then, rotate the protractor until the 65-degree mark lines up with the other edge of the wood. Once you have found the measurement, you can use a pencil to draw the line at the 65-degree angle. Another way that you can cut a 65-degree tip with a miter saw is by using a bevel gauge.
Set the bevel gauge to 65 degrees and then place it on the wood so that one arm rests on each side of the board. Once you have done this, you can draw a line along each component of the bevel gauge to create your cutting line. The last way you can cut a 65-degree angle with a miter saw is by using an adjustable square.
Place one leg of the square flush against one side of the board and then adjust the other leg until it reaches 65 degrees. Once you have done this, you can draw a line along both legs of the square to create your cutting line.
How Do You Cut a 70 Angle on a Miter Saw?
If you’re looking to cut a 70-angle on a miter or saw, there are a few things you’ll need to keep in mind. First, you’ll need to ensure that your miter saw is calibrated correctly. If it’s not, your cuts won’t be accurate.
Second, you’ll need to use the right blade for the job. A standard blade won’t be able to handle such a precise cut. Finally, you’ll need to take time and be careful when cutting.
Set your miter saw up according to the manufacturer’s instructions. Once it’s properly calibrated, select a blade that is designed for precision cutting. Be sure to install the edge correctly and tighten all screws securely.
Now it’s time to cut. Start by slowly feeding the workpiece into the blade. As you get closer to the end of the cut, slow down even more so that you don’t overshoot your mark.
When done correctly, this will result in a perfect 70-angle cut!
Conclusion
If you need to make a 60-degree cut on your miter or saw, there are a few things you need to do. First, set the blade of your saw to 30 degrees. Next, mark the piece of wood you’re cutting at the 60-degree point.
Then, align the blade with the mark and cut along the line. Finally, flip the piece of wood over and cut along the same line from the other direction.