How to Build a Miter Saw Table With Sliding Fences and Dust Collection
To make a miter saw table, first, gather the necessary materials and tools. Then, build the frame and tabletop, adding features such as sliding fences and dust collection.
Making a miter saw table is an essential project for woodworkers and DIY enthusiasts looking to improve the precision and efficiency of their cuts. By creating a dedicated station for the miter saw, it provides stability and support for longer workpieces while ensuring accurate angle cuts.
Whether for a professional workshop or a home garage, a custom-made miter saw table can greatly enhance the functionality of a miter saw. In this guide, we will outline the step-by-step process of constructing a miter saw table, including the materials and tools required, the construction of the frame and tabletop, as well as the addition of useful features such as sliding fences and dust collection.
Assessing Space And Materials
Before diving into building a miter saw table, it’s important to carefully assess the available workspace and determine the materials needed to ensure a sturdy and durable table. Let’s explore the essential considerations for this step: Do a little bit of investigation to avoid any frustration down the road. These considerations include workshop space limitations and selecting durable materials for the table.
Consider The Workshop Space Limitations
Working within the available space is crucial to ensure the miter saw table fits seamlessly into your workshop. Measure the dimensions of the area where the table will be placed, taking into account any potential obstructions or restrictions that need to be worked around. Create a clear plan for the table’s placement, ensuring it allows ample space for maneuvering and accommodates the workflow without hindrance.
Select Durable Materials For The Table
When crafting a miter saw table, it’s vital to opt for materials that are not only robust but also suitable for the tasks it will undertake. Choose high-quality wood or other robust materials to construct the table, ensuring they are capable of withstanding the constant pressure and vibrations produced by the miter saw. Additionally, consider the weight the table will need to support and select materials that can adequately bear the load, promoting stability and safety during use.

Designing For Functionality
When designing a miter saw table, functionality should be a top priority. A well-designed table can greatly enhance the performance and precision of your miter saw, making your woodworking projects more efficient and enjoyable. Let’s explore key elements that contribute to the functionality of a miter saw table, including the importance of ergonomic height and essential features to incorporate.
Importance Of Ergonomic Height
Creating a miter saw table at the right ergonomic height is crucial for optimal user experience. A table that is too low or too high can lead to discomfort and fatigue during extended use. To determine the ideal height, consider the user’s height and posture, ensuring that the miter saw is positioned at a comfortable working level. A well-designed miter saw table will promote proper body mechanics and reduce the risk of strain or injury.
Features To Include (fence, Clamps, Etc.)
When constructing a miter saw table, be sure to incorporate essential features that enhance its functionality. Key components to consider include:
- Fence: Installing a precise and sturdy fence enables accurate alignment and support for workpieces, facilitating repeatable cuts and enhancing overall accuracy.
- Clamps: Incorporating clamps or hold-downs provides security and stability for the workpiece, preventing unexpected movement during cutting operations.
- Dust collection system: A proper dust collection system helps maintain a clean workspace and reduces airborne particles, promoting a healthier working environment.
- Extension wings: Including adjustable extension wings can accommodate larger workpieces and enhance the versatility of the miter saw table.
This HTML content is structured to feature engaging information about designing a miter saw table for functionality with SEO-friendly key phrases and semantically related content. The use of bullet points, bold text, and heading tags follows HTML syntax and ensures the content is well-optimized for the avid woodworker seeking guidance on miter saw table design.
Cutting And Assembling The Base
To make a miter saw table, start by cutting and assembling the base using plywood and screws. Ensure the measurements are accurate for a sturdy base to support the miter saw. Sand the edges for a smooth finish before attaching the tabletop.
Making a miter saw table is a great project for woodworkers looking to upgrade their workspace. A well-designed miter saw table provides a stable and accurate cutting platform, making it easier to tackle various woodworking projects. One of the essential steps in making a miter saw table is cutting and assembling the base. This involves measuring and cutting the wood to the appropriate dimensions and step-by-step base assembly process to ensure structural integrity.
Measuring And Cutting The Wood
Before beginning the base assembly, it’s crucial to measure and cut the wood accurately to fit the dimensions of your miter saw and workspace. Follow these steps to prepare the wood for the base:
- Measure the dimensions of your miter saw and plan the size of the base accordingly.
- Cut the plywood or MDF boards to the required dimensions using a circular saw or table saw. Ensure that the cuts are precise to achieve a sturdy and reliable base.
- Create notches or cutouts in the boards where the miter saw will be positioned to provide a snug fit.
Step-by-step Base Assembly Process
Once the wood has been accurately measured and cut, follow this step-by-step process to assemble the base of your miter saw table:
- Attach the legs: Position the pre-cut legs at each corner of the base and secure them using screws or wood glue. Ensure the legs are straight and level for stability.
- Attach the support beams: Cut and attach support beams between the legs to reinforce the base structure. Use wood screws or brackets to secure the beams in place.
- Install the lower shelf: If desired, add a lower shelf to the base for storing tools and accessories. Secure the shelf to the support beams using screws.
- Attach the top surface: Place the pre-cut top surface over the assembled base and secure it using screws from the underside. Ensure the top surface is level and secure for a stable work surface.
Essential Tips For Diyers: Saw Platform
Making a miter saw table requires attention to detail, especially when it comes to ensuring a stable and secure platform for the saw. Here are some essential tips to consider when building the saw platform.
Ensuring A Level And Secured Platform
One of the crucial aspects of a miter saw table is ensuring a level and secured platform. Use a level to ensure that the table and its extensions are even. Secure the table to the floor or workbench using screws or clamps to prevent any movement during operation, providing a stable and safe working environment.
Perfecting Saw Attachment And Clearance
Proper saw attachment and clearance are paramount to the functionality of a miter saw table. Ensure that the saw is securely attached to the table and that it is positioned at the appropriate height. Consider the clearance around the saw blade to allow for smooth and accurate cuts. This will optimize the performance of the saw and ensure safety.
Custom Features For Efficiency
Building In-storage Solutions
When constructing a miter saw table, it’s essential to prioritize organization and accessibility for your tools and accessories. Building in-storage solutions can enhance the efficiency of your work area by keeping everything neatly organized and within arm’s reach. Consider incorporating drawers, shelves, or custom-fit compartments for storing extra saw blades, measuring tools, and safety equipment. This strategic approach not only optimizes workflow but also helps maintain a clutter-free workspace, allowing you to focus on your projects without rummaging around for essential items.
Outfeed Support And Dust Collection
Efficient sawing operations require adequate outfeed support and efficient dust collection to maintain a clean and safe workspace. Outfeed support is crucial for handling long workpieces, preventing them from sagging or causing safety hazards during cutting. Incorporating a sturdy outfeed table or roller system can significantly contribute to precision and stability when working with extended material lengths.
Moreover, effective dust collection is essential for maintaining a clean and healthy workshop environment. Consider integrating a dust collection system into your miter saw table design, such as a dust hood or specialized attachments, to capture and contain sawdust and debris. This not only minimizes airborne particles but also prolongs the lifespan of your equipment and ensures a more efficient workflow.
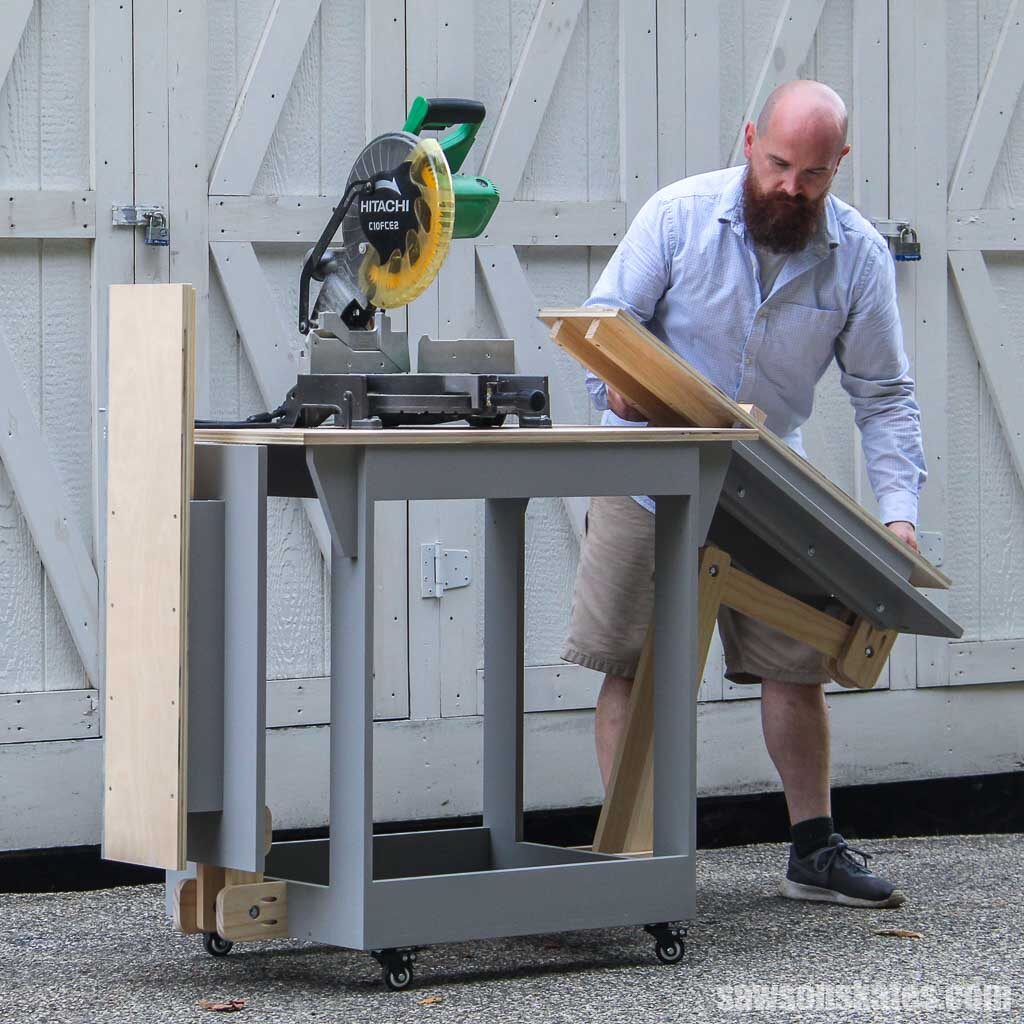
Credit: sawsonskates.com
Safety Measures On Your DIY Table
Making a miter saw table for your DIY projects is an excellent way to enhance safety and improve the accuracy of your cuts. However, ensuring safety measures are in place on your DIY table is crucial to avoid any potential accidents. In this post, we’ll cover the essential safety measures you should consider integrating into your miter saw table, focusing on proper guardrails and push stick usage as well as regular maintenance and safety checks.
Proper Guardrails And Push Stick Usage
When creating or using a miter saw table, the inclusion of proper guardrails and push stick usage is vital for personal safety. Guardrails help prevent accidental contact with the saw blade, reducing the risk of injuries. Additionally, using push sticks allows for safe and controlled processing of smaller workpieces, keeping your hands at a safe distance from the blade.
Regular Maintenance And Safety Checks
Regular maintenance and safety checks play a significant role in ensuring the long-term safety and functionality of your miter saw table. Performing routine inspections, blade alignments, and ensuring the stability of the table reduces the risk of potential accidents and maintains optimal operation. This step is essential for preventing malfunctions and injuries caused by worn or damaged components.
Frequently Asked Questions On How To Make A Miter Saw Table
What Materials Are Needed To Make A Miter Saw Table?
To construct a miter saw table, you will need plywood, screws, wood glue, measuring tape, and a saw. Ensure to have safety goggles, ear protection, and a workshop area for the project.
How Do I Make Precise Cuts Using A Miter Saw Table?
To achieve accurate cuts, measure and mark your wood precisely before cutting. Secure the wood tightly against the miter saw fence and use the appropriate blade. Ensure the miter saw is set at the correct angle for the desired cut.
Can A Beginner Create A Miter Saw Table?
Absolutely! Building a miter saw table is a great starting project for beginners. With the right guidance and safety precautions, anyone can successfully construct a functional and reliable miter saw table. Start with the right tools and take your time with each step.
Conclusion
Creating a miter saw table is an excellent way to enhance the efficiency and accuracy of your woodworking projects. By following the step-by-step guide outlined in this blog post, you can customize a functional and sturdy table according to your specific needs.
With the valuable tips and techniques provided, you can now embark on this DIY project with confidence and enjoy the benefits of a reliable miter saw table in your workshop.