How to Make a Template of a Curved Surface
To make a template of a curved surface, you can use a flexible material like paper or cardboard to trace the shape of the surface. Then, cut out the traced shape and use it as a template for future reference or to create duplicates.
By following this method, it becomes easier to replicate the curved surface accurately. Creating templates is a valuable technique that allows for consistency and efficiency in various crafts and designs. When it comes to curved surfaces, having a template can be particularly useful in ensuring accuracy and precision.
Whether you are a woodworker, a sculptor, or working on any project that involves curved surfaces, having a template can save time and effort. We will explore a simple yet effective method of making a template for a curved surface. By following the steps outlined, you will be able to accurately replicate the curved surface as many times as you need without any guesswork.
Understanding The Curved Surface
Understanding how to create a template for a curved surface is essential for accurate measurements and precise design. Discover the step-by-step process to ensure a perfect fit for your project.
Different Types Of Curved Surfaces
Understanding the curved surface is essential when it comes to designing and creating templates for curved surfaces. Curved surfaces can add a touch of elegance and uniqueness to various objects, such as furniture, architectural structures, and even product packaging. However, it is important to note that not all curved surfaces are the same. There are several types of curved surfaces that you should be aware of when creating templates.
- Cylindrical Curved Surfaces: These surfaces have a constant curve along a single axis and can be found in objects like pipes, tubes, and columns.
- Spherical Curved Surfaces: As the name suggests, these surfaces are shaped like a portion of a sphere and can be seen in objects like domes and globes.
- Conical Curved Surfaces: These surfaces taper towards a point and can be found in objects like ice cream cones and party hats.
Challenges In Creating Templates For Curved Surfaces
Creating templates for curved surfaces is not without its challenges. The nature of curved surfaces often makes it difficult to create accurate and precise templates. Let’s take a look at some of the challenges you might encounter:
- Complex Geometry: Curved surfaces can have intricate and complex geometries, making it challenging to measure and replicate accurately. The combination of curves, slopes, and angles requires careful attention to detail.
- Unpredictable Shrinkage: Materials used for templates, such as fabric or wood, can shrink or stretch when exposed to certain conditions, affecting the accuracy of the template. This unpredictability makes it essential to consider potential shrinkage when creating templates for curved surfaces.
- Flexibility and Durability: Templates need to be flexible enough to fit the curved surface they are designed for, while also being durable to withstand repeated use. Balancing flexibility and durability can be a challenge.
- Seam Placement: If the curved surface requires stitching or joining multiple pieces together, determining the placement of seams becomes crucial. Incorrect seam placement can affect the overall appearance and functionality of the finished object.
Understanding the different types of curved surfaces and the challenges associated with creating templates for them is key to successfully designing and manufacturing objects with curved surfaces. By carefully considering the complexities and limitations, you can ensure that your templates are accurate and functional, resulting in beautifully crafted curved objects.
Step-by-step Guide To Creating A Stunning Template
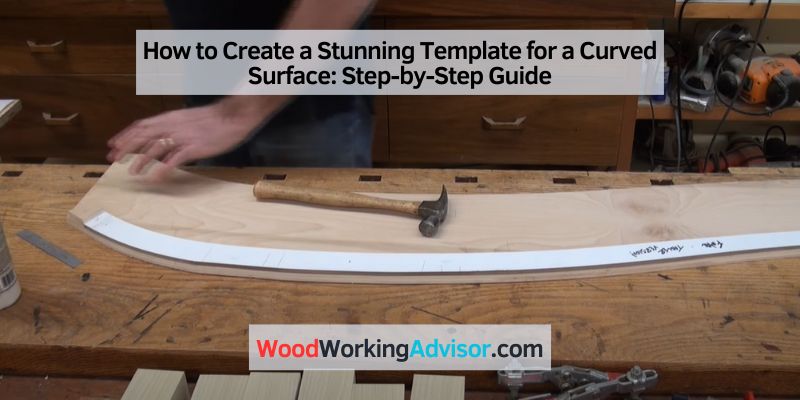
Creating a template for a curved surface can be a challenging task, but with the right approach and attention to detail, you can achieve stunning results. In this step-by-step guide, we will walk you through the process of creating a template for a curved surface, from taking measurements to adding intricate details. So, let’s dive in and create a template that will leave a lasting impression.
Step 1: Measurements And Visualization
Before you start creating the template, it is crucial to take accurate measurements of the curved surface. Use a measuring tape to measure the length, height, and width of the surface. It’s also essential to visualize how the template will look and fit on the curved surface. This will give you a clear idea of where the template needs to curve and what adjustments may be required.
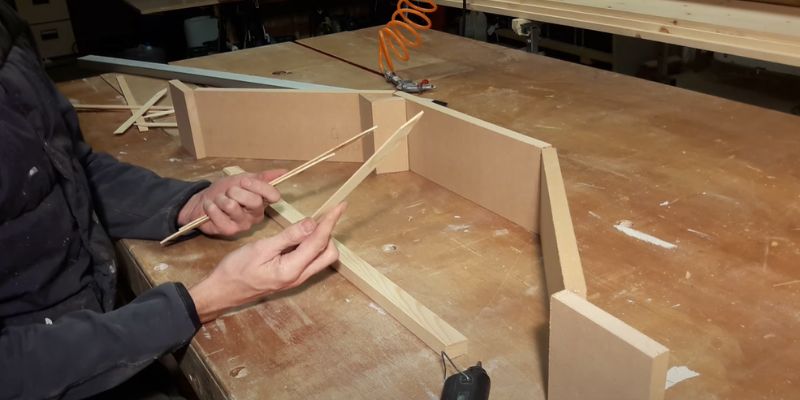
Step 2: Creating The Base Template
Once you have the measurements and a visual representation in mind, it’s time to create the base template. Start by sketching the shape of the curved surface on a piece of paper or using software. Then, transfer the sketch onto a sturdy material like cardboard or foam board. Cut out the shape carefully, ensuring that it matches the measurements and the curvature of the surface.
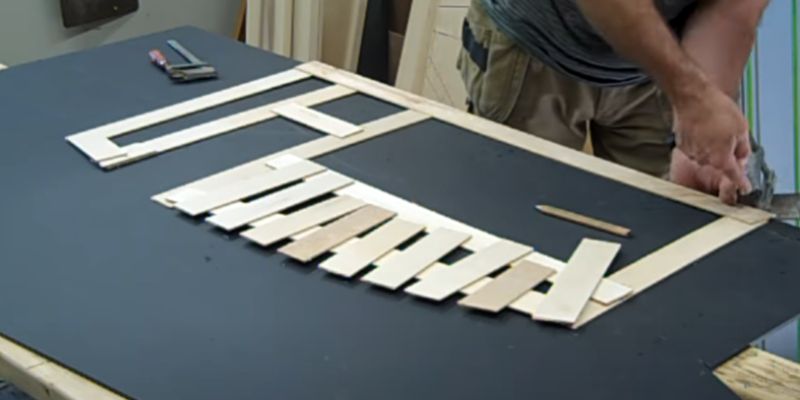
Step 3: Fine-tuning The Template
After creating the base template, it’s time to fine-tune it to ensure a perfect fit. Place the template on the curved surface and make any necessary adjustments. Use a pencil or marker to mark the areas that require trimming or reshaping. Once you’re satisfied with the fit, trim the template accordingly. Remember, precision is key to creating an accurate template.
Step 4: Adding Intricate Details
Now that you have a well-fitted template, it’s time to add intricate details. Depending on the purpose of the template, this could involve adding decorative patterns, cutouts, or other design elements. Use a craft knife or a laser cutter to carefully cut and shape the template, incorporating the desired details. Take your time and pay attention to small details to ensure that the final template is visually appealing.
Step 5: Ensuring Accuracy And Precision
Before finalizing the template, it’s crucial to ensure accuracy and precision. Double-check the measurements, the fit, and the details to make sure everything is in order. Take a step back and examine the template from different angles to ensure it looks seamless on the curved surface. Make any necessary adjustments until you achieve the desired accuracy and precision.
By following this step-by-step guide, you can create a stunning template for a curved surface that perfectly matches your vision. Remember to take accurate measurements, focus on precision, and pay attention to intricate details. With a little patience and effort, you’ll be able to create a template that enhances the beauty of any curved surface.
Frequently Asked Questions For How To Make A Template Of A Curved Surface
How Can I Make A Template Of A Curved Surface?
To make a template of a curved surface, start by tracing the shape onto a piece of paper or cardboard. Cut along the traced lines and check the fit on the curved surface. Adjust as needed and transfer the final template to a more durable material like plywood or plastic.
What Tools Do I Need To Make A Template Of A Curved Surface?
To make a template of a curved surface, you will need a material to trace the shape onto (paper, cardboard), scissors or a cutting tool to cut the template, and a marker or pen to mark any adjustments. A ruler or measuring tape may also be helpful for accuracy.
Can I Use A 3d Printer To Create A Template Of A Curved Surface?
Yes, you can use a 3D printer to create a template of a curved surface. Design the template using 3D modeling software, and then print it using a 3D printer. This method allows for precise and accurate replication of complex curved surfaces.
Conclusion
To sum up, creating a template for a curved surface may seem daunting at first, but with the right techniques, it can be achieved. By following the steps outlined in this blog post, you can ensure accurate measurements, precise cutting, and an efficient process.
Remember to take your time, be patient, and adapt as necessary. With practice, you’ll be able to make templates for curved surfaces with ease, enhancing your projects and craftsmanship.