How to Join Plywood Together: Expert Tips for Seamless Bonding
The strongest way to join plywood is with a waterproof PVA glue like Titebond III and bar or pipe clamps: spread an even layer on both edges, clamp, and let it cure fully before loading the joint. Skipping clamps or using interior-grade glue on an outdoor or wet-use project leaves the bond weaker than the plywood itself. This guide covers glue selection, clamp technique, and stronger joinery options like finger joints for higher-load builds.
Understanding Adhesives And Their Applications
Types Of Adhesives For Plywood Bonding
When it comes to joining plywood together, selecting the right adhesive is crucial for creating strong and durable bonds. There are several types of adhesives commonly used for plywood bonding, each with its own unique properties and applications. Here are some of the most popular options:
Titebond III Ultimate Wood Glue
- Waterproof Type III glue — passes ANSI/HPVA Type I water-resistance test
- Longer open time (8–10 min) allows positioning of large plywood panels before clamping
- Stronger than wood when fully cured — creates permanent bonds that don’t creep
| Check current price on Amazon |
As an Amazon Associate we earn from qualifying purchases.
- Phenol-formaldehyde (PF): Known for its excellent water resistance and high bonding strength, PF adhesives are often used in exterior and marine applications where the plywood will be exposed to moisture.
- Melamine-formaldehyde (MF): MF adhesives offer good heat resistance and are commonly used in applications where the plywood will be exposed to high temperatures, such as kitchen cabinets and countertops.
- Urea-formaldehyde (UF): UF adhesives are suitable for interior applications and provide good bonding strength at a lower cost than PF and MF adhesives.
- Phenol-resorcinol-formaldehyde (PRF): PRF adhesives offer exceptional water and heat resistance, making them ideal for exterior and marine applications where high durability is required.
Factors To Consider When Choosing Adhesives
Choosing the right adhesive for plywood bonding involves considering various factors to ensure optimal performance and longevity of the joint. Some crucial factors to take into account include:
- Bonding environment: Determine whether the plywood will be used in interior or exterior settings, as this will dictate the level of moisture and temperature resistance required.
- Application method: Consider the application method and equipment available, as some adhesives may require specific application techniques for optimal bonding results.
- Budget constraints: Evaluate the project budget to determine the feasibility of higher-cost adhesives with superior performance characteristics versus more economical options.
- Regulatory requirements: Ensure compliance with relevant regulations and standards for adhesive usage, particularly in sensitive environments such as food processing or healthcare facilities.
For a head-to-head breakdown of popular adhesive options, see our Gorilla Glue vs wood glue comparison.

Surface Preparation For Seamless Bonding
Surface preparation plays a crucial role in ensuring a strong and seamless bond when joining plywood together. By properly prepping the surface, you can achieve better adhesion and a more professional finish. This section delves into the importance of surface cleanliness and outlines sanding and priming techniques for plywood to ensure a flawless bonding process.
Importance Of Surface Cleanliness
A clean surface is essential for a successful bond between plywood sheets. Dust, debris, and contaminants can inhibit the adhesive’s ability to adhere effectively, leading to weak joints and potential failure. Therefore, thoroughly cleaning the surface is the primary step in surface preparation before joining plywood together.
Sanding And Priming Techniques For Plywood
Sanding: Before bonding plywood, it’s crucial to sand the surfaces to ensure an optimal bond. Sanding creates a roughened surface, providing more grip for the adhesive to adhere to. Start by using coarse-grit sandpaper to remove any uneven areas and achieve a smooth and even surface. Finish with fine-grit sandpaper for a polished finish. Ensure that the sanding is uniform across the entire surface for consistent adhesion.
Priming: Applying a primer to the sanded plywood surfaces further enhances the bonding process. The primer helps seal the surface, creating an ideal foundation for the adhesive to bond with. Additionally, it provides added protection against moisture and improves the overall durability of the bond. Choose a primer specifically formulated for wood surfaces and follow the manufacturer’s instructions for application and drying times.
Techniques For Joining Plywood Together
When it comes to woodworking, plywood is a popular material due to its versatility and strength. Joining plywood together requires precision and the right techniques to ensure a sturdy and durable bond. There are several methods for joining plywood, each with its own unique benefits and considerations. In this guide, we will explore the various techniques for joining plywood together, including tips for edge gluing plywood and best practices for biscuit joining.
| Joining Method | Strength | Tools Needed | Best For | Skill Level |
|---|---|---|---|---|
| Wood glue (PVA) | High (grain-to-grain) | Clamps, spreader | Face lamination, panel glue-ups | Beginner |
| Biscuit join | Moderate–High | Biscuit joiner | Edge joining flat panels | Intermediate |
| Pocket screws | High | Pocket jig (Kreg) | Cabinet boxes, face frames, right angles | Beginner |
| Dowel join | High | Dowel jig, drill | Edge-to-edge, frame joins | Intermediate |
| Dado & rabbet | Very High | Router or table saw | Cabinet shelves, box corners | Intermediate |
| Spline joint | High | Router or table saw | Long edge joins, decorative panels | Intermediate |
| Dovetail / box joint | Very High | Router table or hand chisels | Drawers, decorative joinery | Advanced |
| Construction adhesive + screws | Very High | Drill, caulk gun | Structural subfloor, sheathing | Beginner |
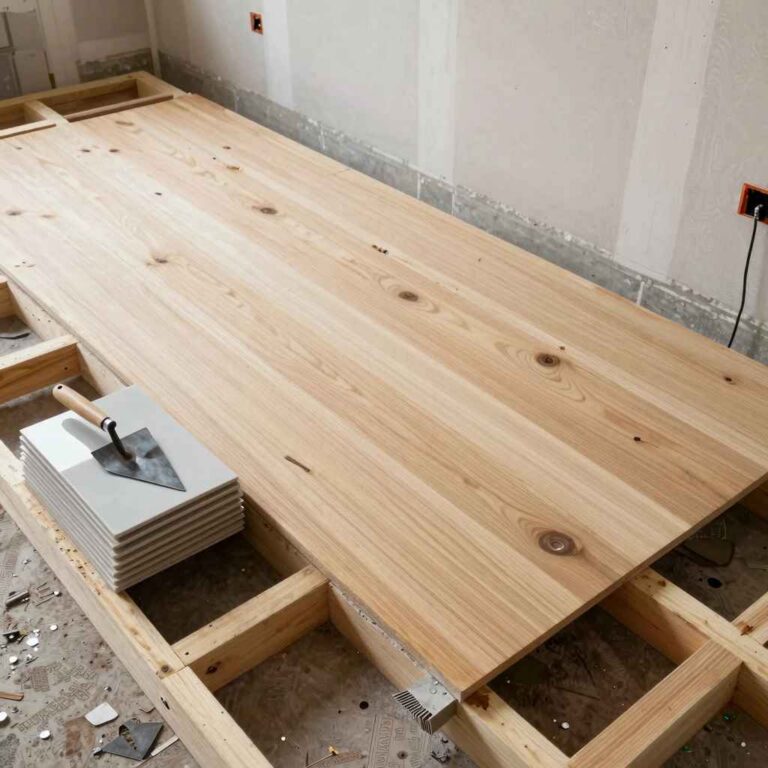
Tips For Edge Gluing Plywood
Edge gluing is a common method used to join plywood together, particularly when creating large panels or tabletops. To achieve a strong and seamless joint, consider the following tips:
- Surface Preparation: Ensure that the edges of the plywood are clean, smooth, and free from any debris or imperfections that could affect the bond.
- Even Application: Apply a consistent and even layer of wood glue to both edges of the plywood, spreading it with a brush or roller to ensure full coverage.
- Clamping: Use clamps to press the glued edges firmly together, ensuring that the joints are aligned and allowing sufficient time for the glue to cure.
- Excess Glue Removal: After the glue has dried, carefully remove any excess using a chisel or scraper, taking care not to damage the plywood surface.
Best Practices For Biscuit Joining
Biscuit joining is a technique that involves inserting small wooden biscuits into slots cut into the edges of the plywood, creating a strong and precise alignment. Here are some best practices to consider when using biscuit joining:
- Accurate Slot Cutting: Use a biscuit joiner to cut slots in the edges of the plywood with precision, ensuring that the biscuits fit snugly without any gaps.
- Glue Application: Apply wood glue to the slots and biscuits before assembling the pieces, ensuring that the glue is distributed evenly for a secure bond.
- Clamping and Alignment: Use clamps to hold the pieces together during assembly, ensuring that the biscuits aid in aligning the plywood edges for a flush and seamless joint.
- Cleanup and Finishing: After the glue has dried, sand the joints to remove any excess glue and ensure a smooth, uniform surface that is ready for finishing.
Advanced Joinery Methods For Plywood
When it comes to working with plywood, mastering advanced joinery methods can elevate the quality and durability of your woodworking projects. Advanced joinery allows for stronger, more seamless connections, ensuring a professional finish. In this post, we’ll delve into two advanced joinery methods for plywood that can enhance the strength and appearance of your woodworking projects.
Exploring Dado And Rabbet Joints
Dado and rabbet joints are popular advanced joinery methods for plywood due to their simplicity and effectiveness. These joints provide a strong connection and clean appearance, making them ideal for assembling cabinet carcasses, shelves, and other pieces of furniture.
A dado joint involves cutting a groove across the grain of one piece of plywood and fitting the edge of another piece into it. This creates a secure and flush connection. On the other hand, a rabbet joint involves cutting a step along the edge of the plywood, allowing it to fit into the corresponding step in the adjoining piece. This creates a seamless joint with increased surface area for adhesion.
Incorporating Dovetail And Box Joints
Dovetail and box joints are advanced methods of joinery that offer exceptional strength and visual appeal. These joints are often used in high-quality furniture and cabinetmaking due to their durability and aesthetic value.
Dovetail joints are created by interlocking trapezoidal-shaped projections, resembling the shape of a dove’s tail. This type of joint provides a strong mechanical connection, preventing the plywood from pulling apart. Box joints are formed by cutting interlocking rectangular fingers on the edges of the plywood, creating a sturdy and visually striking connection.

Finishing Touches For Bonded Plywood
After successfully joining plywood together, it’s crucial to ensure that the finished product is both visually appealing and durable. This involves meticulous sanding and the application of wood finish. These steps not only enhance the aesthetics of the plywood but also contribute to its longevity.
Sanding And Smoothing Techniques For Seamless Surfaces
Once the plywood pieces are bonded together, the next step is to sand and smooth the surface to achieve a seamless finish. Here are the essential techniques to achieve this:
- Use fine-grit sandpaper to even out any rough edges or imperfections in the plywood surface.
- Employ a random orbital sander for larger surface areas, ensuring an even and consistent finish.
- Utilize a sandpaper block for detailed or intricate areas that are difficult to reach with a power sander.
- Check the surface regularly by running your hand over the plywood to feel for any remaining rough patches.
Application Of Wood Finish For Durability And Aesthetics
Applying a wood finish serves multiple purposes, including enhancing the natural beauty of the plywood while providing protection against wear and tear. Here’s how to ensure an optimal finish:
- Clean the surface thoroughly to remove any dust or debris using a tack cloth.
- Choose a high-quality wood finish that complements the desired look and provides the necessary level of protection.
- Apply the wood finish using a high-quality brush or spray gun to achieve an even coat across the entire surface.
- Allow the finish to dry completely according to the manufacturer’s instructions before handling the plywood.
Frequently Asked Questions On How To Join Plywood Together
How Do You Join Plywood Without Screws?
Join plywood without screws using wood glue, dowels, or tongue and groove joints. Additionally, you can use pocket hole joinery or rabbet joints for seamless assembly. Apply clamps for pressure and let the adhesive set for a sturdy bond.
How Do You Join Plywood At 90 Degrees?
To join plywood at 90 degrees, use wood glue and screws for a strong bond. Align the edges flush and apply glue. Then, secure the pieces together with screws. Clamp the pieces while the glue dries for a sturdy joint.
Sand the excess glue for a smooth finish.
What Sticks Plywood Together?
Plywood is stuck together with adhesive. The adhesive helps bond the layers of wood, creating a strong and durable material.
What Is The Best Glue For Plywood?
The best glue for plywood is polyurethane adhesive. It provides strong bond and is water-resistant, making it ideal for plywood projects.
Conclusion
Joining plywood together requires attention to detail and proper technique. By following the steps and using the right tools, anyone can achieve strong and durable connections. Remember to measure accurately, use quality adhesives, and apply pressure evenly. With practice, you can master the art of joining plywood for your woodworking projects.