How to Make a Wooden Sign Stand Up: 4 Stand Methods That Work
To make a wooden sign stand up, pick a stand method that matches the sign’s weight and footprint: a hinged easel-back brace, a wide slotted base, a weighted box base, or a simple angled cleat. The right choice depends less on which method you pick and more on whether the base is wide and heavy enough for the sign’s size — here’s how to choose and build each one.
Quick answer: Small, light signs (under about 2 ft tall) usually stand fine on a simple angled cleat or a narrow slotted base. Taller or heavier signs need either a hinged easel-back brace with a wide foot, or a weighted base — because stability comes from the base’s footprint and weight relative to the sign, not from the stand style alone.
Choosing The Right Wooden Sign
When it comes to displaying your wooden sign, selecting the right one is crucial. The choice of wood material, size, and shape can greatly influence how your sign stands up and captivates attention. In this section, we will guide you through the process of choosing the ideal wooden sign for your needs.
Selecting The Wood Material
Choosing the appropriate wood material is the first step in ensuring your wooden sign stands up securely. Various wood types offer different levels of durability and aesthetics. Here are some popular wood materials to consider:
| Wood Material | Features |
|---|---|
| 1. Pine | Affordable, lightweight, easy to work with. |
| 2. Cedar | Naturally resistant to decay and insects, durable. |
| 3. Oak | Strong, heavy, and long-lasting. Ideal for outdoor signs. |
| 4. Birch | Smooth surface, great for painting or staining. |
Consider the environment in which your sign will be displayed. If it will be exposed to the elements, opt for a wood material that can withstand weather conditions. On the other hand, if your sign will be indoors, you have more flexibility in selecting the wood type based on your desired aesthetics.
Determining The Size And Shape
The size and shape of your wooden sign not only determine how it stands up, but also how it catches people’s attention. Here are some factors to consider:
- Visibility: Ensure your sign is large enough to be seen from a distance, so passersby can easily notice it. Avoid making the sign too small, as it may go unnoticed.
- Space: Consider the available space where you plan to place the sign. Measure the area and choose a size that fits well without overpowering other elements.
- Design: Choose a shape that complements your message or branding. Rectangular signs are versatile and commonly used, while custom shapes can add uniqueness and creativity.
By carefully determining the size and shape of your wooden sign, you can ensure its stability and visibility, making a lasting impression on your audience. Before you cut, it helps to know roughly how much your finished sign will weigh — the wood weight calculator gives you a quick estimate based on species, dimensions, and thickness.

Preparing The Wooden Sign
Before you can make your wooden sign stand up, it’s important to properly prepare the wood. This involves sanding the surface, priming, and painting. By following these steps, you can ensure that your wooden sign not only stands up but also looks professional and visually appealing.
Sanding The Surface
Sanding the surface of your wooden sign is essential for creating a smooth and even base for painting. Start by using rough-grit sandpaper to remove any rough patches, splinters, or imperfections. Remember to wear protective goggles and a dust mask to keep yourself safe from flying debris.
Once you’ve removed the roughness, switch to finer-grit sandpaper to further smooth the surface. Sand in the direction of the wood grain to prevent any scratches or marks. This step might seem tedious, but it’s crucial for achieving a polished final product.
Priming And Painting
Priming your wooden sign is an important step that should not be skipped. Primer helps seal the wood, provides a consistent surface for the paint to adhere to, and prevents any bleeding or discoloration. Apply a thin and even layer of primer using a brush or roller, making sure to cover the entire surface.
Once the primer has completely dried, it’s time to paint your wooden sign. Choose a high-quality paint that is suitable for outdoor use, especially if you plan on displaying your sign outside. Apply thin coats of paint, allowing each layer to dry before adding another. This will ensure that your sign has a smooth and even finish.
If you want to add some visual interest to your wooden sign, consider using stencils or creating your design with painter’s tape. This will allow you to achieve crisp lines and precise detailing.
Remember, patience is key throughout this process. Allow the primer and paint to fully dry and cure before handling or displaying your sign. This will ensure that your sign not only stands up but also lasts for a long time.
4 Real Ways To Make A Wooden Sign Stand Up
There are four methods woodworkers actually use to get a sign standing on its own: a hinged easel-back brace, a mortise or kerf-cut slot base, a weighted base, and a simple angled cleat. None of them is automatically “the best” — the right pick depends on your sign’s weight and height versus the footprint of the base. A tall, heavy oak sign on a narrow base will topple no matter which stand style you use, while even a plain cleat will hold up a small, light sign. If you’re not sure how heavy your finished sign or base will be, run the numbers through the wood load capacity calculator before you commit to a design.
| Method | Stability | Build Complexity | Best Use |
|---|---|---|---|
| Easel-back hinged brace | Good to very good, if the brace foot is wide | Moderate (needs hinges + angle stop) | Medium signs that need to fold flat for storage/transport |
| Mortise/kerf-cut slot base | Good, scales with base width and slot depth | Moderate to high (precise cut required) | Signs that need a clean, removable, furniture-grade look |
| Weighted base | Very good to excellent, especially outdoors/wind | Low to moderate (box build + fill material) | Tall, top-heavy, or outdoor signs exposed to wind |
| Angled cleat | Fair, best on small/light signs against a wall or surface | Low (simplest option) | Small tabletop or leaning signs, quick builds |
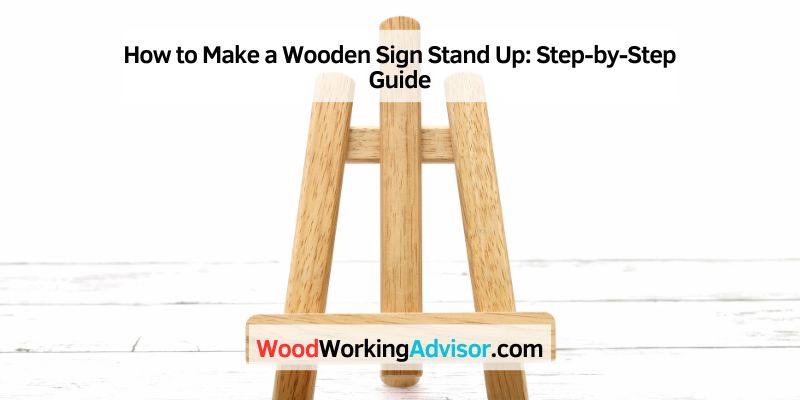
1. Easel-Back Kickstand Brace (Hinged)
This is the classic artist’s easel setup adapted for signage: a wood strut is attached to the back of the sign with a hinge so it swings out and props the sign at an angle, then folds flat when not in use.
- Cut a support strut from the same or a similar wood, roughly two-thirds the height of the sign.
- Attach one end of the strut to the back of the sign using a small hinge, positioned a few inches down from the top.
- Add a fabric strap, a small chain, or a wood cross-bar between the sign and the strut to stop it from over-swinging and set a fixed angle (15–25 degrees usually looks and balances best).
- Widen the foot of the strut, or add a small crossbar at its base, so the brace’s own footprint is wide enough to resist tipping sideways — a narrow single-leg strut is the most common reason this method fails on taller signs.
Because the brace folds flat, this method is a good fit for signs you need to store or transport, such as event and wedding signage.
2. Mortise Or Kerf-Cut Slot Base
Instead of attaching hardware to the sign, this method cuts a slot into a separate base block that the sign simply slides into.
- Build or buy a wide, flat base block thick enough to hold a slot (at least 1.5–2 inches thick for most sign weights).
- Mark the slot to match the exact thickness of your sign’s bottom edge, then cut it with a router, a table saw (multiple passes), or a drill-and-chisel mortise.
- Test the fit on scrap material first — saw kerf width varies by blade, so cutting the slot at the sign’s exact thickness usually leaves it too tight.
- Glue the sign into the slot for a permanent stand, or leave it dry-fit if you want to swap signs in and out of the same base.
The wider the base relative to the sign’s height, the more resistant this method is to tipping, since all the stability comes from the base’s footprint rather than any bracing.
3. Weighted Base (Sand Or Gravel-Filled Box)
A weighted base trades a wide footprint for added mass, which is why it’s the standard approach for tall or outdoor signs exposed to wind. Commercial sidewalk-sign bases are commonly built as fillable plastic or wood boxes holding up to roughly 75 lbs of sand, gravel, or water, and spring-mounted versions are rated by suppliers to withstand winds in the 30–50 mph range (source: eSigns sign-display guide).
- Build a simple open-top box from wood, sized to hold the base of your sign or its post.
- Fill the box with sand, pea gravel, or dry concrete mix once the sign is positioned.
- Fill evenly on all sides if the box is symmetrical around the sign, so the weight doesn’t pull it off balance.
- For posts rather than flat panels, sink the post into the fill material a few inches for extra lateral resistance.
This is the method to reach for if your sign will regularly face wind, foot traffic, or uneven ground, since added weight is more forgiving of a narrower footprint than the other three methods.
4. Angled Cleat (Simple Back Brace)
The angled cleat is the simplest of the four: a short strip of wood is screwed or glued to the back of the sign at a slight backward angle, letting the sign lean against a wall, table edge, or the ground.
- Cut a cleat strip roughly one-third to one-half the height of the sign.
- Attach it to the back of the sign with screws, angling it so the sign leans back 10–15 degrees when the cleat’s bottom edge touches the surface.
- Reinforce the joint with a small corner brace if the sign is heavier than a few pounds, so the cleat doesn’t shear off under load.
This method works best for small, light signs propped against something else; it’s not a freestanding solution on its own for larger signs, since a cleat has almost no independent footprint.
Hardware & Materials For These Stand Methods
12-Pc Small Hinge Set (with Screws)
Our pick for the easel-back brace method: small, strong hinges that let the kickstand fold flat when the sign isn’t in use.
Gorilla Ultimate Waterproof Wood Glue
Bonds base, cleat, and brace joints; rated waterproof for outdoor sign stands.
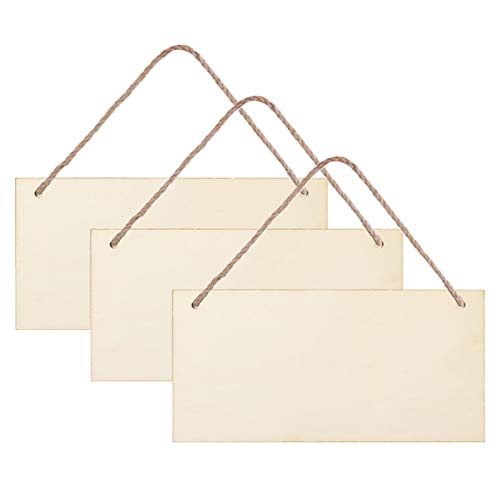
Unfinished Wood Sign Blanks (3-Pack)
Handy for test-fitting a kerf-cut slot before cutting into your finished sign.

Stainless L-Brace Corner Brackets (6-Pack)
Reinforces an angled cleat mount where it meets the back of the sign, the simplest of the four methods.
Finishing Touches
Sealing The Wood
Once you have completed the construction of your wooden sign, it’s time to apply a protective seal on the wood. This step is crucial as it helps to prevent the wood from absorbing moisture, which can lead to warping or rotting. Sealing the wood also enhances its appearance and allows the natural beauty of the grain to shine through. To seal the wood effectively, follow these steps:
- Clean the wood surface: Use a damp cloth to remove any dust or debris from the wood. Ensure that the surface is dry before moving on to the next step.
- Choose the right sealant: There are various types of sealants available, such as polyurethane, varnish, or wood oil. Consider the look you want to achieve and the protection needed for your wooden sign.
- Apply the sealant: Using a brush or a cloth, evenly apply the sealant to the entire surface of the wood. Make sure to follow the manufacturer’s instructions for the best results.
- Allow it to dry: Give the sealant enough time to dry completely. This may take a few hours or even overnight, depending on the product used.
Decorative Embellishments
Now that your wooden sign is sealed and protected, it’s time to add some decorative embellishments to make it truly stand out. There are countless ways to personalize and beautify your sign, so let your creativity flow. Consider the following ideas to add that special touch:
- Painting and staining: Use acrylic paints or wood stains to add color to your sign. Experiment with different techniques like stenciling, hand-painting, or distressing for a unique look.
- Wood burning: If you have a steady hand, try wood burning to create intricate designs or patterns on the surface of your sign. This technique adds a rustic and artistic touch.
- Add-ons: Attach decorative elements such as metal accents, seashells, beads, or buttons to bring extra character and charm to your wooden sign.
- Lettering and carving: Whether you prefer hand-painted lettering, vinyl decals, or carved inscriptions, adding words or quotes to your sign can give it a personalized and meaningful touch.
Remember, the finishing touches can make a world of difference in the overall appearance and durability of your wooden sign. By properly sealing the wood and adding decorative embellishments, you can create a stunning and long-lasting piece that will stand tall for years to come.
Tips For Maintenance And Display
Once you have created your beautiful wooden sign and it is standing up proudly, it’s important to know how to properly maintain and display it for maximum visibility. Proper cleaning and care will help preserve the sign’s appearance and ensure it stands tall for years to come. Additionally, positioning the sign in the right location will make it easily visible to anyone passing by. Here are some essential tips for maintenance and display:
Cleaning And Care
To maintain the pristine appearance of your wooden sign, regular cleaning and care are essential. Keep the following tips in mind:
- Use a soft cloth or sponge to wipe away dirt and dust from the surface of the sign. Avoid using abrasive materials that could scratch the wood.
- If your sign has accumulated stains or grime, mix a mild solution of warm water and dish soap. Gently scrub the affected area with a soft brush or cloth, then rinse with clean water and pat dry.
- Apply a thin coat of wood polish or wax to protect the sign’s finish. Buff the polish into the wood using a clean, soft cloth. This will help enhance the shine and extend the life of the sign.
- Inspect the sign regularly for any signs of damage or wear. If you notice any cracks, splintering, or fading, take action immediately to prevent further deterioration.
Positioning For Visibility
The placement of your wooden sign plays a crucial role in its visibility and impact. Consider the following tips when positioning your sign:
- Choose a location where the sign will be easily visible to passersby. This could be near a busy street, entrance, or any area with high foot traffic.
- Avoid positioning the sign in direct sunlight, as prolonged exposure to UV rays can cause the wood to fade or warp.
- If your sign is placed outdoors, make sure it is protected from rain and excessive moisture. Consider applying a weatherproof sealant to shield the wood from the elements.
- Ensure that the sign is at eye level for optimal visibility. If it’s too high or too low, it may not attract the attention it deserves.
By following these maintenance and display tips, you can ensure that your wooden sign remains in top-notch condition and effectively captures the attention of all who pass by.
Frequently Asked Questions Of How To Make A Wooden Sign Stand Up
How Do You Make A Wooden Sign Stand?
To make a wooden sign stand, follow these steps:
1. Begin by measuring and cutting the wooden board to the desired size.
2. Sand down the edges and surface of the wood for a smooth finish.
3. Apply a coat of primer and paint for added durability and aesthetic appeal.
4. Attach a hinged easel-back brace, a slotted base, a weighted box, or an angled cleat, matching the method to the sign’s weight and size.
5. Finally, place the wooden sign stand on a flat surface and test its stability before display.
How Do You Make A Wooden Sign Post?
To make a wooden signpost, follow these steps:
1. Choose a suitable wooden plank.
2. Cut the plank to the desired length.
3. Shape one end of the plank into a pointed tip.
4. Dig a hole in the ground for the post.
5. Insert the post into the hole and secure it with concrete or soil.
How Do You Make A Table Sign Holder?
To make a table sign holder, you can use materials like wood or acrylic. Cut the material to the desired size, and create a slot for the sign. You can also add a base for stability. Decorate the holder as desired and place the sign in the slot.
What Can I Use As A Sign Holder?
You can use various items as sign holders, such as wire stakes, A-frame signs, tabletop easels, poster stands, or adhesive wall mounts. These options can help you display signs effectively and securely.
What’s The Best Way To Keep A Wooden Sign From Falling Over?
Match the base’s width and weight to the sign’s height and weight. A tall or heavy sign needs either a wide slotted base, a wide-footed easel-back brace, or a weighted box; a small, light sign can get away with a simple angled cleat. The base’s footprint and mass matter more than which stand style you choose.
Do I Need Hinges For An Easel-Back Sign Stand?
Yes, if you want the brace to fold flat for storage or transport. A small hinge attaches the support strut to the back of the sign, and a strap, chain, or crossbar sets a fixed angle so the brace doesn’t over-swing.
Conclusion
Making a wooden sign stand up comes down to matching the stand method to the sign’s weight and footprint: a hinged easel-back brace, a slotted base, a weighted box, or a simple angled cleat. Whether for a business, event, or personal use, the process allows for personalization and creativity. By following the steps outlined in this guide, you can create a sturdy, eye-catching wooden sign that stands out and lasts.