Grain Raising: Mastering Techniques to Prevent & Fix Raised Wood Grain
Grain raising happens when wood fibers absorb moisture (from a water-based finish, humidity, or dull cutting tools) and swell into a rough, fuzzy surface — sanding alone won’t permanently fix it if you then apply another water-based coat. Wet the wood on purpose before finishing, sand it smooth at 320 grit once dry, and the grain won’t raise again when the real finish goes on. This guide covers the two proven methods for water-based finishes, what actually causes it beyond just moisture, and when a wood conditioner is worth using instead.
Causes Of Raised Wood Grain
Grain-Raising Prep Essentials
3M Wetordry 320 Grit Sandpaper, 5 Sheets
The exact grit finishing pros use for the final sand between coats and after raising the grain.
- Best for: the final smoothing pass before or between finish coats
- Why we picked it: waterproof paper works for both the wet-raise step and dry sanding after
- Main drawback: only 5 sheets per pack — buy 2-3 for a full project
Also worth having on hand
|
Option 1 Minwax Pre-Stain Wood Conditioner, 1 Quart
|
As an Amazon Associate we earn from qualifying purchases.
There are several factors that can cause raised wood grain, leading to an unsightly and rough surface. By understanding these causes, you can take proactive steps to prevent and fix this issue, ensuring your wood surfaces remain smooth and polished.
Humidity And Moisture
High humidity levels can wreak havoc on wood surfaces, causing the grain to raise and creating a rough texture. When wood absorbs moisture from the environment, it expands, leading to the raised grain. Similarly, excessive moisture exposure, such as spills or leaks, can cause the wood to swell and the grain to become uneven.
To prevent raised wood grain due to humidity and moisture, it is essential to maintain a well-ventilated space and ensure effective moisture control. Using dehumidifiers or air conditioners can help regulate the humidity levels, thereby reducing the likelihood of raised grain.
Improper Sanding Techniques
The way you sand your wood surfaces can also contribute to the occurrence of raised grain. If the sanding technique is too aggressive or uneven, it can cause the wood fibers to become uneven, resulting in raised grain. Additionally, using a grit that is too coarse or skipping grits during sanding can exacerbate the problem.
To prevent raised wood grain caused by improper sanding techniques, make sure to sand in the direction of the wood grain using smooth and consistent movements. Start with a coarse grit sandpaper to remove any imperfections, then gradually move to finer grits for a polished finish. It is important to sand evenly and avoid applying too much pressure, allowing the wood fibers to remain smooth and intact.
Preventing Raised Wood Grain
Prevent and fix raised wood grain by following these simple steps. With careful treatment, you can eliminate grain raising for a smooth finish on wood surfaces.
Controlling Humidity Levels
One of the primary causes of raised wood grain is fluctuating humidity levels. When the humidity is high, wood absorbs moisture and swells, causing the grain to rise. Conversely, when the humidity is low, the moisture in the wood evaporates, leading to shrinkage and again, raised grain. To prevent this issue, it is essential to maintain consistent humidity levels in your home or workspace.
To control humidity levels, you can:
- Use a dehumidifier in areas with high humidity, especially during humid seasons.
- Install a humidifier in drier environments, especially during winter months when heating systems tend to dry out the air.
- Avoid placing wood furniture or items near sources of high humidity, such as bathrooms or kitchens.
- Keep doors and windows closed during periods of high humidity.
- Use a hygrometer to monitor humidity levels and make necessary adjustments to maintain an optimal environment for your wood.
Proper Sanding And Preparation
Another crucial aspect of preventing raised wood grain is proper sanding and preparation. Before applying any finishes or stains, it is vital to prepare the wood surface adequately. This ensures a smooth finish and minimizes the risk of raised grain. Here are some tips to follow:
- Start by choosing the right sandpaper grit for the task. Coarse sandpaper helps in removing imperfections, while finer grits create a smooth surface.
- Sand with the grain to avoid roughing up the wood fibers, which can lead to raised grain.
- Remove any existing finishes, paints, or sealants that may interfere with proper adhesion and cause raised grain.
- After sanding, use a tack cloth or a vacuum to remove all dust particles. Any dust left on the surface can become trapped under the finish and result in an inconsistent appearance.
- If necessary, apply a wood conditioner before staining or finishing. This helps seal the wood and prevents excessive absorption of the finish, reducing the risk of raised grain.
Fixing Raised Wood Grain
Fixing raised wood grain is an important step in maintaining the beauty and longevity of your wooden furniture or surfaces. Whether you are working with hardwood floors, cabinets, or even a wooden tabletop, raised wood grain can make the surface rough and unattractive. If left untreated, it may even lead to more serious issues such as cracking or splitting. In this section, we will discuss how to identify raised wood grain and explore effective methods for fixing this common problem.
Identifying Raised Wood Grain
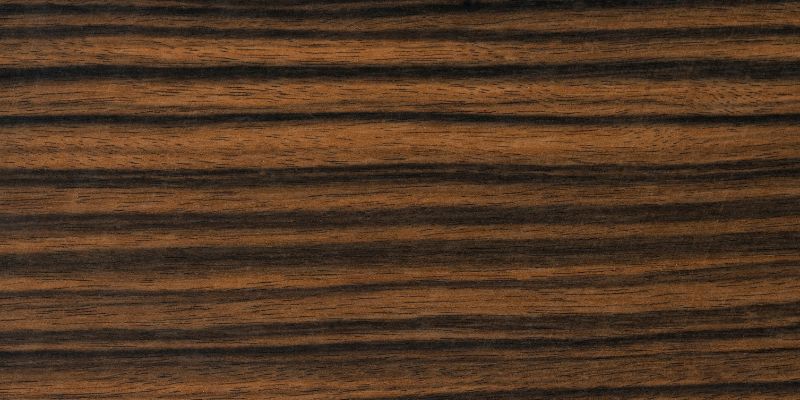
Identifying raised wood grain is the first step toward fixing the issue. Although it may seem obvious, it’s important to closely examine the surface to determine if the grain is indeed raised. Raised wood grain commonly appears as a rough or bumpy texture that deviates from the smoothness of the rest of the surface. Additionally, you may notice that the affected area absorbs more finish or stain compared to the surrounding wood, resulting in an uneven appearance.
Methods For Fixing Raised Wood Grain
Once you have identified raised wood grain, there are several methods you can employ to restore the smoothness of the surface. These methods are relatively simple and can be done with basic tools and materials.
| Method | Description |
|---|---|
| Sanding | Sanding is the most common and effective method for fixing raised wood grain. Start by using a fine-grit sandpaper to gently sand the raised area, following the direction of the grain. Gradually move to finer grit sandpaper until the surface is smooth and the raised grain is no longer noticeable. |
| Moisture Application | If the raised wood grain is minor, you can try using a moisture-based method. Apply a damp cloth or sponge to the affected area, making sure it is damp but not soaking wet. Allow the moisture to penetrate the wood for a few minutes before drying the surface with a clean cloth. This method can help the wood fibers expand and even out, reducing the appearance of raised grain. |
| Applying Wood Grain Filler | If sanding or moisture application doesn’t fully resolve the issue, you can consider using wood grain filler. This product is specifically designed to fill in the pores and gaps in wood grain. Apply the filler using a putty knife or scraper, making sure to follow the manufacturer’s instructions. Once the filler has dried, sand the surface again to achieve a smooth finish. |
Remember, maintaining a smooth and even surface is crucial for the aesthetic appeal and durability of your wooden surfaces. By identifying and addressing raised wood grain promptly, you can ensure they remain beautiful and protected for years to come.
The Cause Most Guides Skip: Dull Tools, Not Just Moisture
Moisture gets all the blame, but dull saw blades, jointer knives, planer knives, or worn sandpaper cause raised grain too — a dull edge crushes and tears wood fibers instead of cutting them cleanly, pressing them down into the surface where they later spring back up when they contact any moisture at all. If a board feels rough right after milling, before any finish has touched it, check your tooling before blaming humidity.
Two Real Methods for Water-Based Finishes
| Method | How It Works | Best For |
|---|---|---|
| Pre-raise & sand (de-whiskering) | Wet the bare wood with a damp rag or spray bottle, let it dry fully, then sand smooth at 320 grit before any finish touches it | Furniture and any surface where a perfectly smooth first coat matters |
| Bury the grain | Apply the first coat of finish as-is, let it raise the grain, then sand that first coat smooth with 220 grit before the second coat | Faster projects where one extra prep step isn’t worth the time |
Either method works — pre-raising gives a marginally smoother final result since the raised fibers are removed before any finish locks them in place, while burying is faster since it uses a coat you’re applying anyway.
“Switching from a single wet-sand pass to the full pre-raise-and-sand cycle on a water-based tabletop finish cut the fuzzy, peach-fuzz feel almost entirely — it’s one extra hour on a weekend project, worth it every time for a piece that’ll get handled a lot.”
Frequently Asked Questions
Does Raised Wood Grain Go Away On Its Own?
No. Once fibers swell from moisture, they stay raised until sanded smooth. Applying more finish over raised grain without sanding just locks the rough texture in permanently.
What Grit Should I Use to Sand Raised Grain?
320 grit for the final pre-finish sand after wetting and drying the wood, or 220 grit if you are sanding the raised first coat of finish smooth (the “bury” method).
Can Dull Sandpaper Cause Grain Raising?
Yes. Dull abrasive grains tear wood fibers instead of cutting them cleanly, pressing them down into the surface where they spring back up on contact with any moisture, including humid air.
Conclusion
To prevent and fix raised wood grain, proper moisture management is crucial. By ensuring the wood is properly sealed and protected, you can minimize the risk of grain raising. Regular sanding and using a quality finish will also help to maintain the smoothness of your wood surfaces.
Remember, staying proactive in preventing grain raising will save you time and effort in the long run. Say goodbye to raised wood grain and hello to a flawless finish!
Sponsored / affiliate links. As an Amazon Associate I earn from qualifying purchases. I may earn additional commission from eligible campaigns.
 Deuvuo Wood Filler, Wood Putty Filler White - Our Wood Grain Filler Offers a Quick and Lasting Fix for Any Damage or Flaw - Paintable, Stainable, Sandable & Quick Drying - 9.87 Ounce
 Deuvuo Natual Wood Putty, Wood Putty Filler - Our Wood Grain Filler Offers a Quick and Lasting Fix for Any Damage or Flaw - Paintable, Stainable, Sandable & Quick Drying - 9.87 Ounce