How to Make Box Dividers: A Step-by-Step Guide
To make box dividers, you can follow these simple steps. Cut cardboard strips to desired length and height.
Score the strips with a knife for easy folding. Insert the dividers into the box, creating compartments.
Supplies You’Ll Need
To make box dividers, gather these essential supplies: a sturdy cardboard box, a ruler or measuring tape, a pencil or marker for marking measurements, a utility knife or scissors for cutting the cardboard, and adhesive or tape for securing the dividers in place.
With these tools, creating custom compartments inside a box becomes a breeze.
To make box dividers, you’ll need a few essential supplies. Here’s a list of everything you’ll need to get started:
- Cardboard or Foamboard: Choose either cardboard or foamboard as the base material for your dividers. Both options are sturdy and provide excellent support for organizing your boxes.
- Ruler or Measuring Tape: Use a ruler or measuring tape to accurately measure the dimensions of your dividers. This step ensures that your dividers fit perfectly within the box.
- Utility Knife: A utility knife is a must-have tool for cutting through the cardboard or foamboard. Make sure to choose a sharp blade for precise cuts.
- Cutting Mat: Place a cutting mat underneath your material to protect your work surface and prevent any damage. It also provides stability while cutting.
- Pencil or Marker: Use a pencil or marker to mark the measurements on the cardboard or foamboard before cutting. This step helps you follow the guidelines and achieve accurate results.
With these supplies in hand, you’ll be ready to create sturdy and functional box dividers for all your organizing needs. Whether you’re storing delicate items or organizing office supplies, box dividers are an efficient solution for keeping things in order.
So, let’s dive in and learn how to make them!
Measure And Mark The Dividers
To make box dividers, start by measuring and marking the dividers, ensuring precise dimensions for a neat and organized result. This step is crucial and will help you achieve a professional-looking outcome.
When it comes to making box dividers, an essential step is to measure and mark the dividers accurately. This will ensure that the dividers fit perfectly and serve their purpose effectively. Here are the steps to measure and mark the dividers using either cardboard or foamboard:
Measure The Length And Width Of The Box Interior
To begin, measure the length and width of the interior space of the box. Use a measuring tape or ruler to get precise measurements. Make sure to measure from the inner walls of the box to ensure an accurate fit for the dividers.
Mark The Measurements On The Cardboard Or Foamboard
Once you have the measurements, transfer them to the cardboard or foamboard. Use a pencil or marker to mark the dimensions on the material. Ensure that the markings are clear and visible for easy reference during the next step.
Divide The Length And Width Into Equal Sections For The Dividers
Divide the length and width of the box interior into equal sections to create the dividers. This step is crucial for organizing the contents of the box effectively. Consider the overall size and quantity of the items you plan to store in the box to determine the number of sections needed.
To divide the length and width, follow these steps:
- Determine the desired width of each section. This will depend on the size of the items you need to separate.
- Measure and mark the width sections along one side of the cardboard or foamboard. Ensure that the spacing between the marks is consistent and equal.
- Repeat the process for the length sections, marking the desired width from the previous step.
By dividing the length and width of the box interior into equal sections, you’ll create compartments that can keep your items organized and prevent them from shifting during transportation or storage.
Remember, accuracy and precision are key when measuring and marking the dividers. Take your time and double-check the measurements to ensure the best results. Now that you have marked the dividers, it’s time to move on to the next step in creating box dividers.
Cut Out The Dividers
Learn how to make box dividers by cutting out the dividers. Follow these simple steps and create customized compartments for your boxes.
To start creating box dividers, follow these steps:
- Use a ruler and utility knife to cut along the marked lines.
- Place the ruler along the marked lines and carefully cut through the cardboard or material using the utility knife.
- Ensure that the cuts are straight and follow the measured lines accurately.
- Place a cutting mat underneath for safety.
- Lay down a cutting mat or any thick surface to protect your work area and prevent the knife from causing damage.
- The mat will also provide a stable surface for precise cutting.
- Cut out all the dividers according to your measurements.
- Double-check your measurements and ensure they match the dimensions required for the dividers.
- Cut out the dividers one by one, following the marked lines and using the ruler as a guide.
Remember, precision is key when cutting out the dividers. Take your time and be careful with the utility knife to avoid any mishaps.
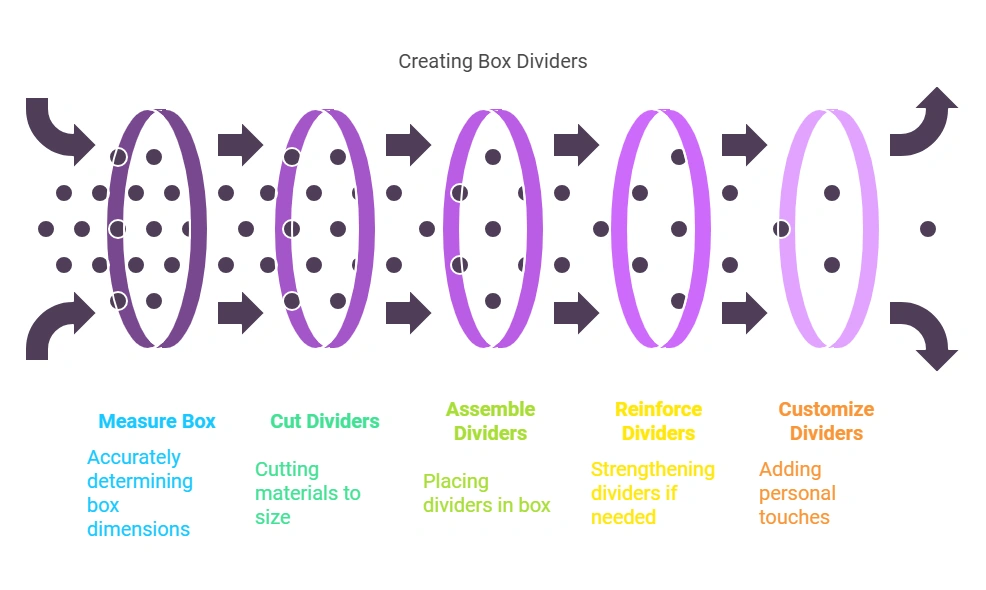
Assemble The Dividers
Learn how to make box dividers by following these step-by-step instructions. Assemble the dividers to create compartments for organized storage.
Slide The Dividers Into The Box In The Desired Configuration
To assemble the dividers, start by sliding them into the box in the configuration you want. This step is crucial in creating compartments that will effectively organize your items.
Here’s how you can slide the dividers into the box:
- Place the dividers at the bottom of the box, positioning them according to the desired layout.
- Ensure that the dividers fit snugly into the box by pressing them firmly against the sides.
- Slide the dividers all the way down until they reach the bottom of the box.
- Continue adding dividers until you’ve achieved the desired number of compartments.
Remember, the configuration of the dividers will depend on the items you intend to store. Take into consideration the sizes and shapes of the objects you want to separate.
Make Sure They Fit Snugly And Stand Upright
Once the dividers are in place, it’s important to ensure that they fit snugly and stand upright. By doing so, you can prevent the dividers from shifting and ensure the durability of your box dividers.
Here’s how you can make sure the dividers fit snugly and stand upright:
- Apply gentle pressure to the dividers against the sides of the box. This will ensure that they are secure and won’t move easily.
- Check that the dividers are standing upright and not leaning to one side. Adjust them if needed to ensure they are vertical and stable.
- Pay attention to any gaps between the dividers and the sides of the box. If necessary, add small wedges or padding to fill these spaces, ensuring a tight fit.
Properly fitting and standing dividers will create stable compartments, preventing items from shifting or getting damaged during transportation or storage. Adjust the dividers as needed to achieve the desired size of each compartment.
Reinforce The Dividers (Optional)
To add extra strength to your box dividers, consider reinforcing them. This optional step can help prevent damage and ensure your dividers last longer. Follow these simple instructions to reinforce your dividers and enjoy sturdy organization.
If desired, reinforce the dividers with adhesive or tape:
- Apply adhesive or tape along the edges of the dividers for added stability.
- This extra step can prevent the dividers from shifting or bending under the weight of the items inside the box.
- By reinforcing the dividers, you can ensure the longevity of your box and its contents.
- Allow the adhesive to dry or the tape to set before using the dividers, as this will ensure a secure bond.
- Make sure to apply the adhesive or tape evenly along the edges to provide consistent reinforcement.
- Reinforcing the dividers can be especially beneficial if you plan to transport the box or store it for an extended period.
- Keep in mind that this step is optional, and the box dividers can still be effective without reinforcement.
- However, if you want to ensure maximum stability and durability, reinforcing is a recommended option.
Remember, take the necessary time for the adhesive to dry or the tape to set before using the dividers. This way, you can enjoy the full benefits of the reinforced dividers without any issues.
Customize The Dividers (Optional)
Customizing the dividers for your box is a simple process that allows you to create compartments tailored to your needs. By following our step-by-step guide, you can easily make box dividers that will keep your items organized and protected.
Do you want to take your box dividers to the next level? Personalize them to reflect your style or theme. Here are some creative ideas to customize your dividers:
Decorate The Dividers With Paint, Markers, Or Decorative Paper:
- Paint the dividers with vibrant colors to add a pop of personality to your storage box.
- Use markers to create unique patterns or designs on the dividers.
- Apply decorative paper onto the dividers for a stylish touch.
Use Labels Or Tags To Identify The Contents Of Each Compartment:
- Attach labels or tags to the dividers, making it easy to identify what items are stored in each section of your box.
- Write clear and descriptive labels for quick and convenient access.
- Use different colors or shapes for the labels to make them visually appealing.
Get Creative And Design The Dividers To Suit Your Personal Style Or Theme:
- Experiment with different shapes and sizes for your dividers. Think outside the box!
- Incorporate patterns or themes that reflect your personality or the purpose of the box.
- Explore various materials like fabric, washi tape, or stickers to create a unique look.
Remember, the customization options for your dividers are limitless. Let your imagination run wild and have fun while making your storage box truly one-of-a-kind!
Tips For Using Box Dividers
Learn how to make box dividers with these helpful tips. Discover the best techniques to efficiently organize your items and maximize the use of your storage space.
Use dividers to organize your closet, kitchen, or office supplies:
- Divide your closet space by adding box dividers. This will help you keep different types of clothing or accessories neatly separated and easily accessible.
- In the kitchen, box dividers can be used to organize your pots, pans, and lids. This will make it easier to locate the right cooking utensils when you need them.
- In your office, box dividers can help you arrange documents, stationery, and other office supplies efficiently. This will save you time searching for items and enhance your productivity.
Adjust the size and layout of the dividers based on your needs:
- Measure the dimensions of the box or storage space where you plan to use the dividers. This will help you determine the appropriate size and number of dividers required.
- Consider the items you want to store and their respective sizes. Determine the best layout to maximize the use of space and ensure that each item fits comfortably within the divided sections.
Consider using dividers in shipping boxes to protect delicate items:
- When shipping fragile or delicate items, box dividers can provide added protection. They create individual sections and prevent items from shifting or colliding during transit.
- Use cushioning materials, such as packing peanuts or bubble wrap, within each divided section to further safeguard your delicate items.
- Consider using dividers made of sturdy materials, such as cardboard or foam, to ensure the dividers remain intact and provide adequate support.
By following these tips for using box dividers, you can efficiently organize your belongings, protect fragile items, and maximize your storage space. Whether it’s your closet, kitchen, or office, box dividers are versatile tools that can make a significant difference in keeping your items tidy and easily accessible.
Frequently Asked Questions On How To Make Box Dividers
How Do I Create A Partition In Box?
To create a partition in Box, follow these steps:
1. Open Box and sign in to your account.
2. Locate the file or folder you want to partition.
3. Right-click on the file or folder and select “Create new partition. ”
4. Specify the desired settings for the partition, such as the partition size and access permissions.
5. Click “Create” to successfully create the partition in Box.
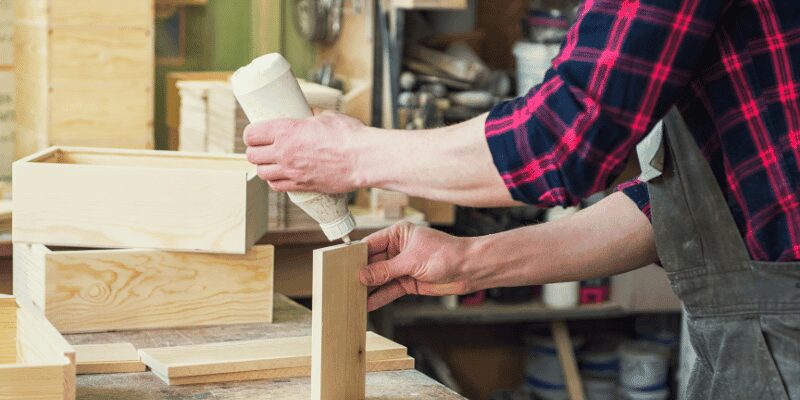
How Do You Make Wooden Box Dividers?
To make wooden box dividers, measure and cut pieces of wood to fit the box’s dimensions. Then, assemble the pieces using glue or nails.
How Do You Make An Organizer Divider?
To make an organizer divider, follow these steps:
1. Measure and cut your divider material.
2. Fold and crease the material to create sections.
3. Use adhesive or clips to secure the sections in place.
4. Label each section for easy organization.
What Material Is Used For Drawer Dividers?
Drawer dividers are commonly made from materials like plastic, wood, acrylic, and metal.
Conclusion
To sum up, creating box dividers can be a useful and practical skill for organizing belongings in a neat and efficient manner. By following the step-by-step instructions provided in this blog post, you can easily make your own dividers at home.
Remember to gather the necessary materials, measure and cut the cardboard or foam board accurately, and assemble the dividers securely. Experiment with different divider arrangements to suit your specific needs. The benefits of using box dividers include protecting fragile items, maximizing storage space, and simplifying the organization process.
With a little creativity and patience, you can transform ordinary boxes into customized storage solutions. So, why not give it a try and enjoy the benefits of a well-organized space with box dividers? Happy crafting!