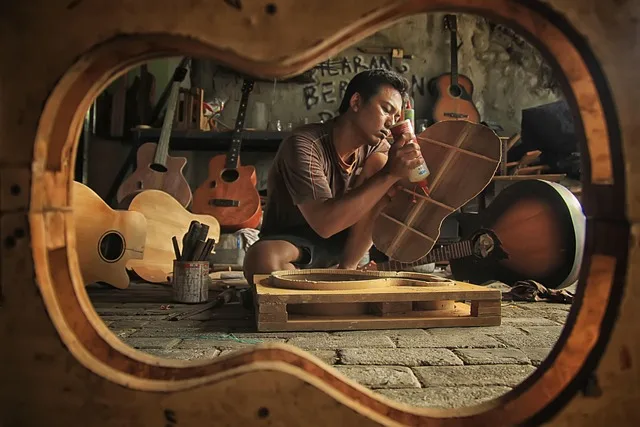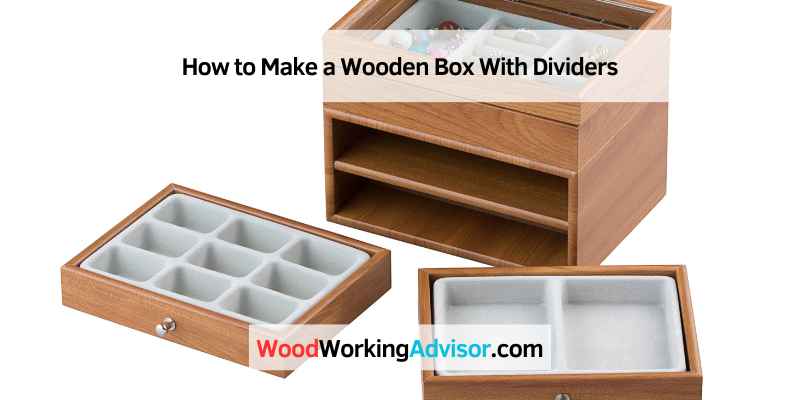
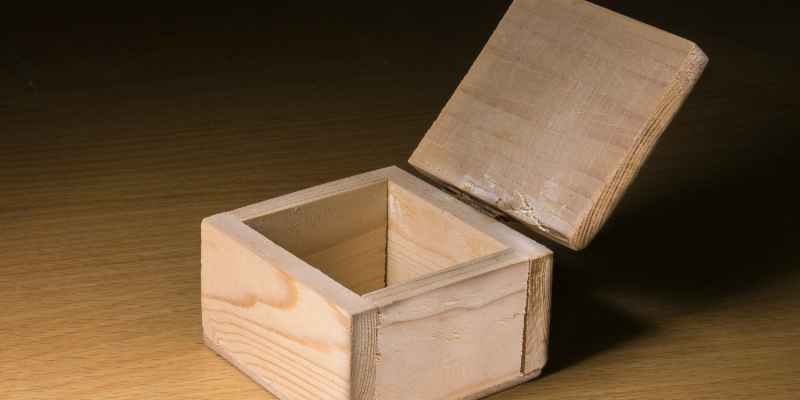
How to Make a Wooden Box With Dividers
A wooden box is a great way to store small items; adding dividers can help keep everything organized. Here’s a quick and easy tutorial on how to make your wooden box with walls. Before you get started, you’ll need a few supplies: wood glue, clamps, a saw (either a hand saw or power tool), sandpaper, and paint or stain (optional).
Once you have your supplies gathered, cut your wood pieces to size according to the dimensions of the box you want to make. Then, use wood glue to attach the sides of the box, clamping them until the glue dries. After the sides of the box are glued together, you can add dividers by measuring and cutting pieces of wood to fit.
Again, use wood glue to attach the dividers in place. Once everything is dry, sand down any rough edges and finish with paint or stain if desired.
- Decide on the dimensions of your box.
- Cut six pieces of wood to those dimensions – three for the sides and three for the dividers.
- Assemble the sides of the box using wood glue and either clamps or weights to hold the pieces in place until the glue dries
- Once the sides are dry, measure and cut the divider pieces to fit snugly inside your box (they should be a tight fit, so they don’t fall out easily)
- Insert your dividers into the box, again using wood glue and clamps or weights to hold them in place until dry 6 Finish off your chest by sanding down any rough edges and adding a finish of your choice (stain, paint, etc
Wooden Box With Dividers And Lid
Organizing your home can be daunting, but it doesn’t have to be! Wooden boxes with dividers and lids are a great way to keep your space tidy and stylish.
Here are some tips on how to use wooden boxes with dividers and lids:
1. Use them in the kitchen to organize spices, utensils, or dry goods.
2. Keep bathroom essentials like toiletries and towels neatly stored away.
3. Organize craft supplies, office supplies, or children’s toys.
4. Store clothing items like socks, underwear, or t-shirts in them.
5. Use them as gift boxes – they make great presents for friends and family!
How to Design a Wooden Box
For many people, the idea of designing and building a wooden box is a daunting task. However, with careful planning and execution, it is possible to create a beautiful and functional wooden box.
Here are some tips on how to design a wooden box:
1. Decide on the purpose of the box. Is it going to be used for storage? Display?
Transportation? The purpose of the box will dictate its size and shape.
2. Choose the wood you will use for your project.
Many different types of wood are available, each with its unique grain and character. You may want to experiment with other woods to find the one that best suits your needs and aesthetic preferences.
3. Draw up a plan for your box.
This doesn’t have to be fancy or complicated – a simple sketch will do. But having a plan will help you stay on track as you build your box.
4. Cut out the pieces for your box according to your plan using a saw or other appropriate cutting tool.
If you’re not confident in your ability to cut straight lines, plenty of online tutorials or books can show you how. Assemble your pieces by nailing or screwing them together. Be sure to predrill holes first to avoid splitting the wood.
Fill any gaps or cracks with wood putty, then sand everything smooth once dry. Finish as desired – stain, paint, etc. Your finished product should be sturdy and beautiful!
How to Make Drawer Dividers from Shoe Boxes
If you’re anything like me, your drawers are constantly in disarray. Shoes seem to multiply and take over every nook and cranny, no matter how often you purge your closet. But there is hope!
With some creativity (and help from shoeboxes), you can create simple drawer dividers that keep your shoes organized and tidy. Here’s what you’ll need: -Shoeboxes (I used two for this project)
-Scissors -Tape -Wrapping paper or contact paper (optional)
First, cut the top off of each shoebox. You’ll want to ensure that the opening is wide enough to fit your shoes through easily. Next, line up the shoeboxes and tape them together at the seams.
If you’re using wrapping or contact paper, now is the time to cover the outside of your drawer divider. Once that’s done, you must slide it into your drawer and start filling it with shoes!
DIY Box Dividers
Do you need some storage containers but don’t want to spend much money? Well, you can make your box dividers with just a few supplies! Here’s what you’ll need:
– Cardboard boxes (any size will do) – A sharp knife or box cutter – Tape ( duct tape or packing tape will work)
– Marker – Ruler or measuring tape first; decide how many compartments you want in your box.
Then, use your ruler or measuring tape to mark out evenly spaced lines on the top and bottom of the box. Next, cut along those lines using your knife or box cutter. Be careful not to cut yourself!
Once you have all your pieces cut out, start taping them together. I like to use duct tape because it’s solid and easy to work with. But packing tape will also work fine.
Make sure all the seams are securely taped so that nothing falls out. And that’s it! You now have a custom storage container that costs almost nothing to make!
These are great for organizing clothes, shoes, crafts supplies, and more. So get creative and see what uses you can come up with for your new DIY box dividers!
How to Make Cardboard Box Dividers
Organizing your home can be daunting, especially when you don’t have a lot of space to work with. But with creativity, you can make the most of what you have – including those pesky cardboard boxes. With some simple DIY dividers, you can transform an ordinary TV into a versatile storage solution that will help keep your home neat.
Here’s what you’ll need:
– Cardboard boxes (any size will do)
– A sharp knife or box cutter
– Tape (duct tape or packing tape works well)
– A ruler or measuring tape Start by cutting your cardboard boxes down to size.
If you’re using multiple boxes, ensure they’re all the same height. Then, use your ruler or measuring tape to mark evenly spaced lines across the box’s width.
– this is where you’ll make your cuts to create the dividers. Use your knife or box cutter to carefully cut along these lines carefully, being careful not to cut yourself in the process!
Once your cuts are made, it’s time to start assembling the dividers. Line up each cut’s edges and secure them with tape. That’s it!
Your cardboard box divider is now complete and ready to use.
Cardboard Box Divider Inserts
If you’re looking for a way to organize your home or office, cardboard box divider inserts are a great option. These inserts fit into standard cardboard boxes and help to divide the space inside into smaller compartments. This can allow storing items in separate sections or keeping track of inventory.
Cardboard box divider inserts are also relatively inexpensive and easy to find. You can purchase them online or at many office supply stores.
Making Drawer Dividers
If you’re anything like me, your drawers are constantly in disarray. No matter how often I try to keep them tidy, they always end up a jumbled mess. But there is hope!
Drawer dividers are a great way to organize your space and keep your belongings sorted. There are a few different ways that you can make drawer dividers. You can purchase them premade from a store or DIY them using things like cardboard or foam core board.
If you’re feeling particularly crafty, you could even repurpose an old shoe box! Whichever route you choose, the goal is to create compartments that will help keep your items sorted. For example, if you have a drawer for clothes, you might want to divide it into sections for tops, bottoms, and underwear.
Or, if you have a catch-all drawer for miscellaneous items, you could use dividers to sort by type (e.g., office supplies, tools, etc.). Drawer dividers are an easy and inexpensive to bring order to your space. So next time your drawers start looking like a disaster zone, consider giving them some divisions!
How Do You Make a Box Divider?
Assuming you want to make a box divider for organization, there are a few different ways you can do this. One option is to use pre-made walls that you can insert into the box. These are usually made of cardboard or plastic and have cut-outs that allow them to fit snugly into the box.
Another option is making your dividers out of materials like cardboard, foam board, or fabric. This will require some measuring and cutting on your part, but it will also allow you to customize the dividers to fit your needs better. Whichever route you choose, making box dividers is a quick and easy way to get your belongings more organized.
How Do You Make Wood Drawer Dividers?
Assuming you would like tips on creating wood drawer dividers for an already existing drawer:
- Decide what items will go in the drawer and how you would like them to be divided. This will help you determine the number and size of the dividers you need.
2. Cut pieces of scrap wood or doweling rods to create your desired number of dividers. Using scrap wood, ensure all details are uniform in thickness, so they fit snugly in the drawer.
3. Place the dividers into the drawer, dividing the space as evenly as possible.
Use a level to ensure each divider is vertical and perpendicular to the sides of the drawer.
4. Once satisfied with the placement, mark where each divider meets the side of the drawer with a pencil. This will be where you attach the walls to the sides of the drawer, so they don’t move around when opening and closing it.
5.) Remove each divider and drill pilot holes at your marked locations (one spot per side per divider). Be sure not to drill too close to either end of each division, or it may split when attaching screws later.
6.) Screw or nail each divider into place at its marked location on both sides of the drawer using 1-inch screws or nails long enough to go through both thicknesses of wood (divider plus side panel).
Ensure not to over-tighten these fasteners, or else you could strip out their holes or break off one end of a narrow divider.
What are Box Dividers Called?
In the packaging industry, box dividers are commonly referred to as partitions. Partitions are used to create compartments within a box, which can be used to protect and organize products during shipping and storage. Many types of cells are available on the market, made from various materials such as cardboard, plastic, or metal.
One of the most popular types of partitions is the corrugated partition. Corrugated partitions are made from layers of cardboard that have been glued together. They offer strength and durability, making them ideal for protecting products during shipping.
Another popular type of partition is the plastic partition. Plastic enclosures are lightweight and easy to clean, making them ideal for food-grade applications. No matter what type of product you need to ship or store, there is a box divider solution that will fit your needs.
Contact a packaging expert today to learn more about your options!

How Do You Make a Storage Box Step by Step?
Assuming you would like a step-by-step guide on how to create a basic storage box:
- Gather your supplies. You will need a piece of cardboard, scissors, duct tape, and markers.
2. Cut your cardboard. Cut two pieces that are the same size for the top and bottom of the box and two smaller parts for the sides. Make sure to cut slits into the side pieces so they can fit snugly around the top and bottom.
3a. Decorate! If you want, use markers or paint to make your box more fun.
Let dry before moving on to the next step.
3b. OR keep it simple – no need to decorate if you don’t want to!
4. Tape it up. Place duct tape along all the seams – this will help reinforce your box and make it sturdy.
5. Fill ‘er up!
Your box is now ready to be filled with whatever you’d like – clothes, toys, books…get creative!
Conclusion
Suppose you’re looking for a unique and stylish way to store your belongings; look no further than this tutorial on making a wooden box with dividers. This guide walks you through the entire process, from gathering materials to finishing your one-of-a-kind piece.