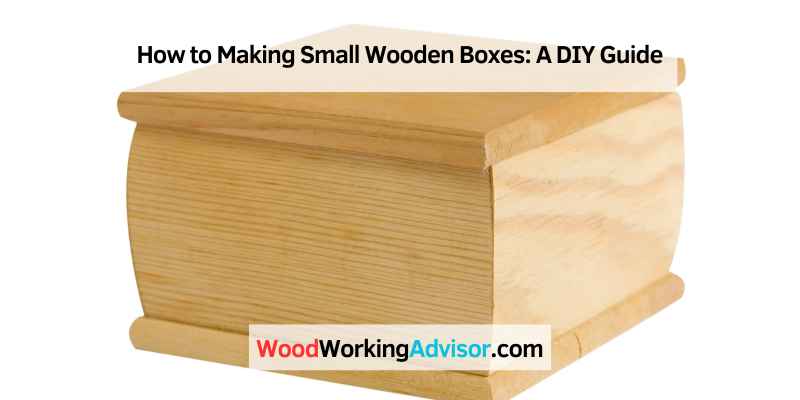
How to Make Small Wooden Boxes: Step-by-Step DIY Guide
Making a small wooden box is one of the best first projects for any woodworker — it teaches measuring, cutting, joinery, and finishing in a single build that takes just a few hours. The simplest version requires nothing beyond a miter saw, wood glue, clamps, and sandpaper. Use ⅜”-thick pine for the sides and a ¼” plywood bottom, cut your pieces, glue and clamp overnight, sand to 220-grit, and apply a wipe-on poly finish. You end up with something functional and genuinely useful — a keepsake box, a desk organizer, or a personalized gift.
Quick Answer
Cut ⅜”-thick pine to your desired dimensions, making side panels ½” shorter than front and back. Assemble with wood glue and clamps — no nails needed for a clean look. Sand through 80→120→220-grit, then finish with two coats of wipe-on polyurethane. A simple 6″×4″×3″ box takes about 2–3 hours to build and dry.
Introduction To Small Wooden Box Crafting
Crafting small wooden boxes can be a fulfilling and enjoyable experience. Learning the basics, such as measuring and cutting the wood, assembling the pieces, and adding finishing touches, can help you create unique and beautiful boxes that can be used for storage or decoration.
The Appeal Of DIY Woodworking
Woodworking has always held a special allure for DIY enthusiasts. There’s something incredibly satisfying about taking a raw piece of wood and transforming it into a beautiful and functional object. Small wooden box crafting is a perfect entry point into the world of DIY woodworking. It allows you to hone your skills while creating useful and aesthetically pleasing items.
Uses For Small Wooden Boxes
Small wooden boxes have a myriad of practical uses. Whether you need a stylish storage solution or a unique gift idea, small wooden boxes are versatile and customizable. Here are a few common uses for these charming creations:
- Organization: Small wooden boxes are perfect for keeping your desk, kitchen, or bathroom tidy. Use them to store stationery, jewelry, spices, or any small items that tend to clutter your space.
- Home Decor: Small wooden boxes can add a touch of rustic elegance to any room. Display them on shelves, mantels, or coffee tables to hold trinkets, keys, or even small plants.
- Gifts: Handcrafted small wooden boxes make thoughtful and unique gifts. Personalize them by engraving names or adding decorative elements. They are ideal for presenting jewelry, small accessories, or sentimental keepsakes.
With their practicality and charm, small wooden boxes offer endless possibilities. Whether you’re a beginner or an experienced woodworker, crafting these boxes allows you to unleash your creativity and create something truly special.
Selecting The Right Wood
When it comes to making small wooden boxes, selecting the right wood is a crucial step that can greatly impact the final product. The type of wood you choose will determine the box’s strength, appearance, and overall quality. Consider the following factors when selecting the right wood for your project.
Types Of Wood For Box Making
Several types of wood are suitable for making small wooden boxes. Some popular choices include pine, cedar, oak, and maple. Each type of wood offers unique characteristics in terms of color, grain pattern, and workability. When selecting wood for your box, consider the final aesthetic you want to achieve and the woodworking techniques you plan to use.
Considering Wood Grain And Hardness
Wood grain and hardness are important considerations when selecting wood for box making. Hardwoods such as oak and maple are known for their durability and strength, making them ideal for boxes that will endure frequent use. On the other hand, softwoods like pine and cedar are easier to work with and can provide a more rustic appearance. Additionally, consider the direction of the wood grain, as this can affect the box’s stability and overall look.
Essential Tools And Materials
When it comes to making small wooden boxes, having the right tools and materials is essential. Whether you’re a beginner or a seasoned woodworker, having the necessary supplies and safety gear is crucial for a successful and enjoyable woodworking experience. Below, we’ll explore the essential tools and materials needed for crafting small wooden boxes.
Basic Woodworking Tools
Basic woodworking tools are the foundation of any woodworking project. Here’s a list of the most essential tools:
- Saw
- Chisel
- Hammer
- Clamps
- Wood glue
Supplies And Safety Gear
When working with wood, ensuring safety and having the right supplies is paramount. Here’s a list of essential supplies and safety gear:
- Wood of choice (e.g., pine, oak, cedar)
- Sandpaper in various grits
- Protective eyewear
- Ear protection
- Dust mask
Designing Your Wooden Box
Designing your wooden box is a crucial step towards creating the perfect final product. Determining the dimensions and sketching the design are two essential aspects of designing your wooden box. In this article, we’ll discuss these two aspects in detail to help you create a beautiful and functional wooden box.
Determining Dimensions
The dimensions depend on what you’ll store in the box. Side panels must be ½” shorter than front and back panels — that extra ½” accounts for the thickness of the front and back boards at each corner. The bottom panel sits inside and should be ½” smaller in both length and width than the overall box footprint.
📊 Beginner-friendly starter dimensions: Keepsake box: 6″L × 4″W × 3″H | Desk organizer: 10″L × 6″W × 4″H | Jewelry box: 8″L × 5″W × 3″H. Use ⅜” boards for sides and ¼” plywood for the bottom. These sizes fit a standard miter saw capacity and don’t require a table saw.
Once you have your dimensions set, sketch a cut list showing every piece — front, back, left side, right side, and bottom — with exact measurements before cutting any wood.
Sketching The Design
Sketching the design of your wooden box is an important step because it helps you visualize the final product. Here are a few things to keep in mind when sketching the design:
- Consider the dimensions you determined earlier
- Think about the type of wood you want to use
- Consider any additional features you want to add, such as handles or hinges
You can sketch the design by hand or use a computer program. Once you have the design sketched out, you can begin the process of creating your wooden box.
Cutting And Assembling The Pieces
Creating small wooden boxes can be a rewarding craft project. One of the crucial steps in making these boxes is cutting and assembling the pieces. This process involves precise measurements and skilled joinery techniques to ensure a sturdy and aesthetically pleasing final product.
Measuring And Cutting The Wood
- Measure the wood accurately using a ruler or measuring tape.
- Mark the measurements using a pencil for precise cutting.
- Cut the wood pieces using a saw or a cutting tool.
Joinery Techniques For Box Assembly
- Use techniques like dovetail joints for strong and decorative corners.
- Consider using box joints or miter joints for a simpler assembly process.
- Apply wood glue along the joints for a secure bond.
Sanding And Finishing
Achieving a smooth finish on small wooden boxes involves careful sanding and attention to detail. Start with coarse-grit sandpaper to remove any imperfections, then progress to finer grits for a polished look. Seal the wood with a clear varnish or lacquer for a professional finish.
After cutting and assembling the wooden pieces for your small box, the next step is sanding and finishing. This is a crucial step in ensuring that your small wooden box looks polished and professional. In this section, we’ll discuss the best practices for sanding and choosing the right finish.
Smooth Sanding Practices
Sanding is the process of smoothing out rough surfaces on the wood. It’s important to start with rough sandpaper and gradually move to finer grit sandpaper for a smooth finish. Here are some tips for smooth sanding practices:
- Start with 80-grit sandpaper and gradually move up to 220-grit sandpaper.
- Sand in the direction of the wood grain to avoid scratches.
- Remove all dust and debris before moving on to the next grit sandpaper.
- Use a sanding block to ensure even sanding.
- Avoid over-sanding as it can damage the wood.
Choosing The Right Finish
Choosing the right finish is important in bringing out the natural beauty of the wood and protecting it from damage. There are many types of finishes to choose from, including oil-based, water-based, and wax-based finishes. Here are some factors to consider when choosing the right finish:
| Finish Type | Pros | Cons |
|---|---|---|
| Oil-based | Durable, brings out natural wood grain | Takes longer to dry, requires ventilation |
| Water-based | Quick drying, low odor, easy cleanup | Less durable than oil-based |
| Wax-based | Easy to apply, gives a soft sheen | Not as durable as other finishes, requires reapplication |
Once you’ve chosen your finish, apply it in a well-ventilated area and follow the manufacturer’s instructions for best results. Allow the finish to dry completely before handling or using your small wooden box.
By following these smooth sanding practices and choosing the right finish, you can ensure that your small wooden box looks polished and professional.
Adding Decorative Elements
Enhance small wooden boxes by adding decorative elements such as intricate carvings, vibrant paint, or elegant wood burning designs. These details can elevate the boxes from simple storage to stylish decor pieces, perfect for gifting or displaying in your home.
Incorporating Inlays And Carvings
Decorative elements like inlays and carvings add elegance and uniqueness.
Choose wood types that complement the design.
Inlays can be intricate designs using contrasting wood materials.
Carvings can range from simple patterns to intricate motifs.
Hardware Selection For Function And Style
Select hardware that complements the box style and purpose.
Consider hinges, latches, and handles for functionality and aesthetics.
Brass, copper, or antique finishes can enhance the overall look.
Ensure hardware is secure and aligns with the box’s design.
Final Assembly And Quality Check

When it comes to making small wooden boxes, the final assembly and quality check are crucial steps in ensuring a well-crafted and sturdy finished product. Let’s dive into the process of securing the components and inspecting the completed box.
Securing The Components
1. Gather all the wooden pieces needed for assembly.
2. Apply wood glue along the edges for a strong bond.
3. Carefully align the pieces before clamping them together.
4. Use a nail gun or hammer and nails to reinforce the joints.
Inspecting The Completed Box
1. Check for any gaps or misalignments in the corners.
2. Ensure the lid fits snugly and opens smoothly.
3. Inspect the finish for any scratches or imperfections.
4. Test the box’s strength by applying gentle pressure on the sides.
Maintenance And Care Tips
Discover essential maintenance and care tips for making small wooden boxes. Learn how to keep your wooden boxes in top condition with proper cleaning, polishing, and protection techniques. Preserve the beauty and longevity of your creations with these helpful tips.
When it comes to making small wooden boxes, it is essential to take proper care and maintenance to ensure they last for a long time. Whether you use them for storage or as decor, here are some maintenance and care tips to keep your wooden boxes in excellent condition.
Cleaning And Preserving Wood
Proper cleaning and preservation of wood are essential to maintain the natural beauty of the wooden boxes. Here are some tips to clean and preserve your wooden boxes:
- Use a soft-bristled brush to remove dust and dirt from the surface of the box.
- Mix warm water and mild dish soap to clean the wooden box. Use a soft cloth to apply the solution and wipe off with a clean, damp cloth.
- Avoid using abrasive cleaners or harsh chemicals as they can damage the wood.
- Apply a coat of wood wax or polish to preserve the natural shine and protect the wood from moisture and scratches.
Long-term Storage Advice
If you plan to store your wooden boxes for an extended period, follow these tips to keep them in good condition:
- Store the wooden boxes in a cool, dry place away from direct sunlight to prevent fading and warping.
- Avoid storing the wooden boxes in damp or humid areas as it can cause the wood to expand and contract, leading to cracks or splits.
- Wrap the wooden boxes in a soft cloth or bubble wrap to prevent dust and scratches during storage.
- Check the wooden boxes periodically for any signs of damage or pests.
By following these maintenance and care tips, you can ensure your small wooden boxes last for years and maintain their natural beauty.
Inspiration For Future Projects
Discover the art of making small wooden boxes for your future projects. Unleash your creativity and craftsmanship with simple woodworking techniques. Embrace the inspiration to design unique and functional boxes for storage or gifting purposes.
Exploring Advanced Techniques
When creating small wooden boxes, consider exploring advanced techniques to enhance your skills.
Experiment with intricate designs and unique finishes to push your creativity.
Community Resources For Woodworkers
Joining online forums and local woodworking clubs can provide valuable resources and support.
Connect with experienced woodworkers to gain insights and tips for your projects.

Frequently Asked Questions
How Can I Make A Small Wooden Box?
To make a small wooden box, start by cutting the wood to size, then assemble the pieces using wood glue and nails. Sand the box to smooth the surfaces, and finish with a protective coat of varnish or paint for a polished look.
What Tools Do I Need For Making Small Wooden Boxes?
You will need basic woodworking tools such as a saw, hammer, sandpaper, wood glue, nails, and a measuring tape. Optional tools include a wood stain or varnish for finishing, and decorative elements like hinges and clasps for added flair.
What Types Of Wood Are Suitable For Small Wooden Boxes?
Softwoods like pine, cedar, or redwood are ideal for small wooden boxes due to their ease of cutting and affordability. Hardwoods like oak, cherry, or walnut offer durability and a more refined look, but may require more advanced woodworking skills to manipulate.
How Can I Personalize Small Wooden Boxes As Gifts?
Personalize small wooden boxes by adding custom engravings, decorative accents, or a unique paint or stain finish. Consider incorporating meaningful designs or messages to create a personalized and heartfelt gift for your loved ones.
Conclusion
Crafting small wooden boxes is a rewarding hobby that unleashes your creativity. By following these steps, you can create beautiful and functional pieces. Remember to select quality materials and tools for best results. With practice and patience, your woodworking skills will flourish, opening up a world of possibilities.
Start crafting today!