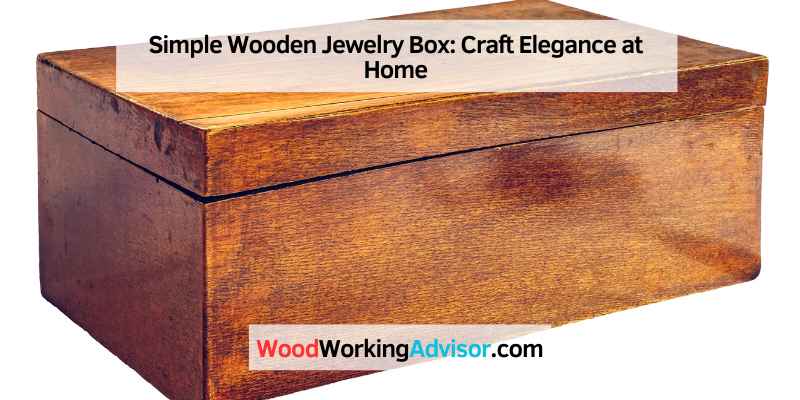
Simple Wooden Jewelry Box: Craft Elegance at Home
A simple wooden jewelry box is a minimalist storage solution for your favorite trinkets. It can be purchased or built at home using various materials such as cherry wood or walnut wood.
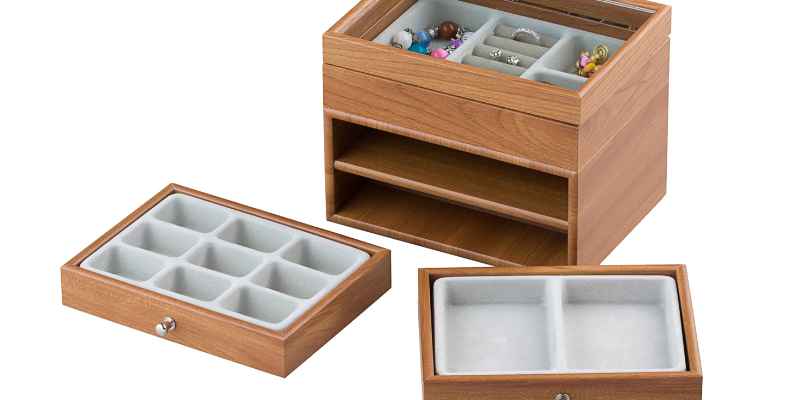
Some wooden jewelry boxes come with a mirror inside the lid, while others have multiple drawers for organization. The possibilities are endless when it comes to designing a personalized jewelry box that fits your unique style. A wooden jewelry box is not only functional, but it also serves as a beautiful decor piece for your dressing table or nightstand.
Introduction To Crafting Your Own Wooden Jewelry Box
Creating your own wooden jewelry box is a rewarding and enjoyable craft that allows you to customize a beautiful storage solution for your precious accessories. Whether you’re a seasoned woodworker or a novice looking for a new project, crafting a wooden jewelry box is a delightful endeavor that combines creativity and functionality. In this guide, we’ll explore the essential steps and considerations for crafting your own unique wooden jewelry box.
Choosing The Right Wood
When embarking on the journey of crafting a wooden jewelry box, selecting the right type of wood is crucial for achieving a durable and visually appealing result. Opt for hardwoods such as oak, cherry, or walnut for their strength and natural beauty. These woods are ideal for crafting jewelry boxes as they are less prone to warping and offer a luxurious finish.
Tools And Materials Needed
Before diving into the crafting process, it’s essential to gather the necessary tools and materials. Here’s a list of items you’ll need to get started:
- Hardwood boards
- Saw (circular saw or table saw)
- Sandpaper (varying grits)
- Wood glue
- Clamps
- Hinges
- Latch or closure mechanism
- Wood stain or finish
- Brushes or cloths for applying finish
- Measuring tape
- Pencil
- Protective gear (safety goggles, gloves)
By gathering these tools and materials, you’ll be well-prepared to embark on the crafting journey and create a stunning wooden jewelry box that perfectly suits your style and storage needs.
Design Inspirations For Your Jewelry Box
Discover elegant simplicity with our collection of simple wooden jewelry boxes. Crafted from fine wood, these boxes offer a minimalist design that showcases the natural beauty of the material, making them perfect for storing your precious jewelry pieces.
Classic Vs. Modern Designs
Classic designs exude elegance and timelessness, while modern designs offer a sleek and contemporary appeal.
Incorporating Personal Touches
Add a personal touch with custom engravings, unique paint finishes, or even a special compartment for sentimental items.
Step-by-step Guide To Building A Simple Wooden Jewelry Box
If you’re a fan of woodworking and looking to create a beautiful and functional piece, building a simple wooden jewelry box can be a rewarding project. This step-by-step guide will walk you through the process of cutting the wood, assembling the pieces, and sanding and finishing the box to perfection.
Cutting The Wood
Before you begin, gather the necessary materials including wood, saw, measuring tape, and safety goggles. Follow these steps to cut the wood:
- Measure and mark the dimensions for the base, sides, and lid of the jewelry box.
- Secure the wood to a work surface and use a saw to carefully cut along the marked lines.
- Double-check the measurements to ensure accuracy before proceeding to the next step.
Assembling The Pieces
Once the wood is cut to the appropriate dimensions, it’s time to assemble the pieces. Here’s how to do it:
- Apply wood glue to the edges of the base and attach the sides to form the box’s structure.
- Use clamps to hold the pieces together firmly and allow the glue to dry completely.
- Add the lid to the assembled box, ensuring a snug and secure fit.
Sanding And Finishing
After the box is assembled, it’s important to sand and finish the wood to enhance its appearance and durability. Follow these steps:
- Start with coarse-grit sandpaper to smooth any rough edges and surfaces.
- Gradually transition to finer-grit sandpaper for a polished finish.
- Apply a wood finish or stain of your choice to protect the wood and enhance its natural beauty.
Customization Ideas For Your Jewelry Box
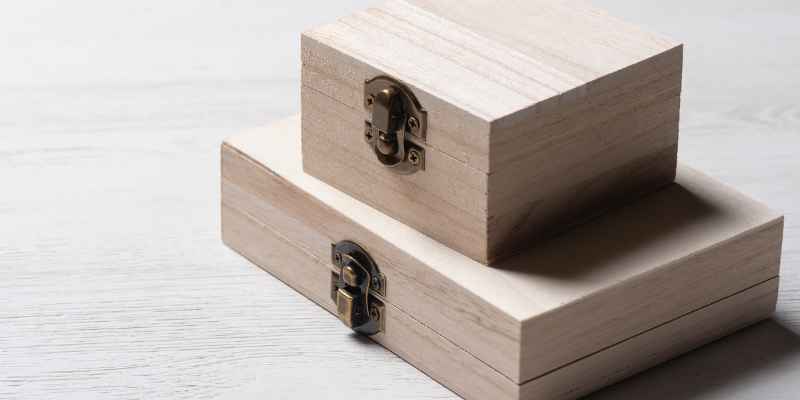
Enhance the beauty of your jewelry collection with a simple wooden jewelry box. Explore various customization ideas to make your box truly unique and personalized. From adding compartments to incorporating a mirror or a lock, let your creativity shine through and make your jewelry box a reflection of your style.
A wooden jewelry box is a classic and timeless way to store your precious jewelry. Not only do they provide a safe and secure place for your jewelry, but they also add a touch of elegance to any room. However, you can make your jewelry box even more special by customizing it to fit your personal style. Here are some customization ideas for your jewelry box.
Adding Dividers for Organization
To keep your jewelry organized, consider adding dividers to your jewelry box. This will help you keep your necklaces, bracelets, and earrings separate and tangle-free. You can create dividers using wood or fabric, depending on your preference. If you’re not sure how to create dividers, there are plenty of tutorials available online.
Decorative Techniques: Carving and Inlay
Carving and inlay are decorative techniques that can add a unique touch to your jewelry box. You can carve intricate designs into the wood or inlay contrasting wood or metal into the lid or sides of the box. These techniques require some skill and patience, but the result is a one-of-a-kind piece that you’ll cherish for years to come.
Choosing the Right Finish
Choosing the right finish for your jewelry box is important to protect the wood and enhance its natural beauty. There are many finishes available, including wax, oil, and varnish. Each finish has its own advantages and disadvantages, so it’s important to choose the one that fits your needs. For example, wax provides a soft, natural finish but requires frequent reapplication, while varnish provides a durable, glossy finish but can be difficult to remove.
In conclusion, customizing your wooden jewelry box is a great way to make it unique and personal. Adding dividers for organization, using decorative techniques like carving and inlay, and choosing the right finish are just a few ways to customize your jewelry box. With a little creativity and patience, you can create a beautiful and functional piece that will last for years to come.
Common Mistakes To Avoid When Making A Jewelry Box
When making a simple wooden jewelry box, there are some common mistakes to avoid. These include not measuring accurately, using the wrong type of wood, not sanding properly, and not finishing the box with a protective coating. By avoiding these mistakes, you can create a beautiful and functional jewelry box that will last for years to come.
When it comes to crafting a simple wooden jewelry box, there are a few common mistakes that beginners often make. These mistakes can lead to a less-than-perfect finished product or even cause the box to be unusable. To ensure that your jewelry box turns out exactly as you envision, it is important to avoid these common errors.
Incorrect Measurements
One of the most crucial aspects of making a jewelry box is getting the measurements right. Incorrect measurements can result in a box that is either too small to hold your jewelry or too large and bulky. To avoid this mistake, take the time to carefully measure the dimensions of your box and double-check your calculations before cutting the wood.
Choosing The Wrong Type Of Wood
The type of wood you choose for your jewelry box can greatly impact its durability and appearance. Some woods are more prone to warping or cracking over time, while others may not have the desired aesthetic appeal. It is important to research and select the right type of wood for your project. Consider factors such as durability, grain pattern, and the overall look you want to achieve.
Skipping The Sanding Process
Skipping the sanding process is a common mistake that can result in a rough, uneven finish on your jewelry box. Sanding not only smoothens the surface of the wood but also helps to remove any imperfections or rough edges. Make sure to sand your wooden pieces thoroughly, starting with a coarse grit sandpaper and gradually moving to finer grits for a polished and professional look.
Maintenance Tips For Your Wooden Jewelry Box
Here are some maintenance tips for your simple wooden jewelry box. Keep it away from direct sunlight and moisture, regularly dust it, and polish it with a wood-friendly polish to maintain its natural beauty and durability. Regular care will keep your jewelry box looking as good as new for years to come.
Regular Cleaning
Regular cleaning is essential for preserving the beauty of your wooden jewelry box. Use a soft, dry cloth to wipe away dust and dirt from the surface. For stubborn grime, slightly dampen the cloth with a mild wood cleaner, ensuring it is not excessively wet. Gently wipe the affected areas and promptly dry with a clean, dry cloth. Avoid using harsh chemicals or abrasive cleaners that can damage the wood finish.
Dealing With Scratches
To address minor scratches on your wooden jewelry box, begin by gently rubbing the affected area with a soft cloth to remove any surface dirt. Then, apply a small amount of wood polish or wax to the scratch, following the wood grain pattern. Use another clean, soft cloth to buff the area until the scratch is less noticeable. For deeper scratches, seek professional wood restoration services to ensure the box retains its original luster.
Long-term Wood Care
Long-term care for your wooden jewelry box involves protecting it from direct sunlight and extreme temperature changes, as these can cause the wood to warp or fade. Additionally, consider applying a thin layer of wood conditioner or polish every few months to maintain the box’s natural sheen and prevent it from drying out. Remember to keep the box in a dry environment to prevent moisture damage, and store it away from sources of heat to avoid warping or cracking. Regularly inspect the box for any signs of wear and address them promptly to ensure its longevity.
By following these maintenance tips, you can preserve the beauty and functionality of your wooden jewelry box for years to come.
Expanding Your Skills: More Advanced Projects
As you progress in your woodworking journey, you may want to challenge yourself with more intricate projects that showcase your growing skills. Moving on from simple designs, you can explore creating more complex and sophisticated wooden jewelry boxes.
Creating A Multi-tiered Jewelry Box
Building a multi-tiered jewelry box involves designing and constructing multiple compartments or layers within the box. This advanced project allows you to organize different types of jewelry efficiently while adding a visually appealing element to your creation.
Incorporating A Lock And Key Mechanism
Enhance the security and elegance of your wooden jewelry box by integrating a lock and key mechanism. This feature not only provides a functional aspect by safeguarding your precious items but also adds a touch of sophistication to your craftsmanship.
Where To Find More Resources And Inspiration
Discover a wealth of resources and inspiration for crafting a simple wooden jewelry box in Austin, Texas. Explore YouTube tutorials, Etsy for minimalist designs, and Amazon for cherry wood boxes with mirrors. Unleash your creativity with DIY plans and stylish options for organizing your jewelry collection.
Online Communities And Forums
Join online communities and forums dedicated to woodworking and jewelry making.
Workshops And Classes
Explore local workshops and classes that offer training in woodworking and jewelry box making.
Books And Magazines
Discover a wealth of knowledge in books and magazines that focus on wooden crafts and jewelry box design.
Frequently Asked Questions
How To Make A Jewellery Box Out Of Wood?
To make a wooden jewelry box, measure and cut the wood, assemble the pieces, and add a lid. Sand and finish for a polished look.
What Type Of Wood Is Best For A Jewelry Box?
The best type of wood for a jewelry box is solid walnut wood. It provides a beautiful and durable material for protecting and storing your jewelry.
Can I Store Jewelry In A Wooden Box?
Yes, you can store jewelry in a wooden box. Just ensure the wood is untreated and lined to prevent tarnishing.
What Can I Use Instead Of A Jewelry Box?
There are many alternatives to a traditional jewelry box. You can use a hanging organizer, a decorative tray, a small dish, or even a drawer organizer. These options can be just as functional and stylish, and can also help you save space.
Conclusion
In crafting a simple wooden jewelry box, you can create a timeless piece with personal flair. Whether for yourself or as a gift, the process offers a creative and rewarding experience. Embrace the beauty of woodworking and enjoy the charm of a handmade jewelry box.
Start your project today!