How to Cut Miter Joints
To cut miter joints, measure and mark the desired angle on the workpiece, then use a miter saw or a miter box and handsaw to make the cuts. When it comes to cutting miter joints, having accurate and precise cuts is essential for a professional finish.
Miter joints are commonly used in woodworking for creating clean and seamless corners, such as in picture frames, molding, or furniture. By following a few simple steps, you can easily achieve perfect miter joints. Start by measuring and marking the desired angle on the workpiece.
Then, using a miter saw or a miter box and handsaw, carefully make the cuts. Taking your time and ensuring accuracy will result in tight-fitting joints that are both visually appealing and structurally sound. Mastering the art of cutting miter joints will open up endless possibilities for your woodworking projects.
Basics Of Miter Joints
Miter joints are created by cutting two pieces of material at an angle to form a corner. To cut miter joints, use a miter saw or a miter box with a handsaw. Always measure accurately and set the cutting angle correctly for a precise fit.
What Are Miter Joints?
A miter joint is a type of joint where two pieces of material are cut at an angle and joined together to form a seamless 90-degree corner. This joint is commonly used in woodworking, especially for projects that require precise angles and clean finishes. Miter joints are often used in the construction of frames, molding, and furniture.
Common Uses
Miter joints are widely used in various woodworking projects due to their versatility and aesthetic appeal. Some common uses of miter joints include:
- Picture frames: Miter joints are commonly used to create clean and seamless corners in picture frames. This adds a professional touch to the finished piece.
- Trim and molding: Miter joints are essential in achieving seamless corners and tight joints in trim work and molding installation.
- Furniture making: Miter joints are often used in furniture making, particularly for constructing corners in cabinets, tables, and other pieces of furniture with angled edges.
- Decorative accents: Miter joints are also employed in creating decorative accents such as cornices, crown moldings, and baseboards, where clean and precise angles are desired.
By understanding the basics of miter joints and their common uses, you can confidently incorporate this technique into your woodworking projects. Whether you’re building your own picture frames, adding elegant trim to your home, or constructing custom furniture, miter joints offer a versatile and visually appealing solution.

Tools And Materials
Cutting miter joints requires the use of specialized tools and materials like a miter saw, measuring tape, and clamps. Proper techniques and careful measurements are essential for achieving precise and seamless joints in woodworking projects.
Cutting miter joints with precision requires the right tools and materials. Whether you’re a beginner or a seasoned woodworker, having the essential tools for the job is crucial. Additionally, using quality materials will ensure a strong and durable joint that stands the test of time.
Essential Tools
To achieve accurate miter joints, you’ll need the following essential tools:
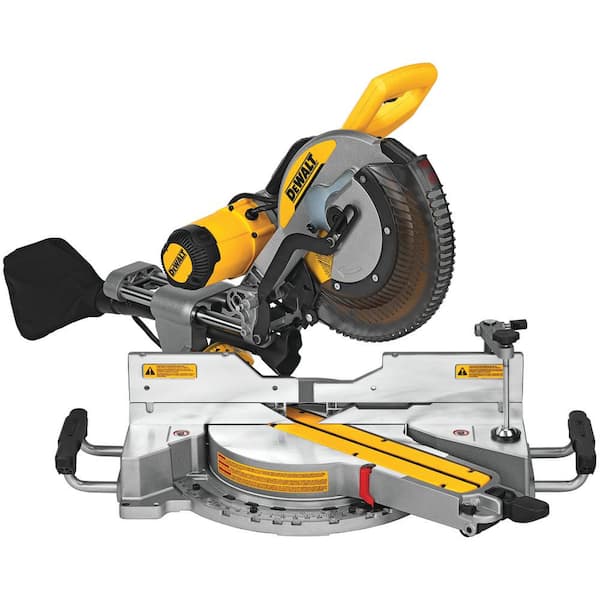
- A miter saw: This power tool is the cornerstone of any miter joint cutting project. It allows you to make precise angled cuts effortlessly.
- A miter box and backsaw: If you don’t have access to a miter saw, a miter box and backsaw combination can do the job. The miter box guides the saw to ensure accurate cuts.
- A measuring tape: Accurate measurements are crucial when cutting miter joints. Using a measuring tape enables you to mark the correct angles and lengths for a seamless fit.
- A drafting square: This tool helps ensure your miter cuts are perfectly square, resulting in tight and seamless joints.
- A pencil or marking knife: Marking the angles and lengths on your workpieces is essential for precise miter cuts.
- A clamp: A clamp is useful to hold your workpieces securely in place while cutting the miter joints.
- Safety equipment: Always prioritize safety when working with power tools. Wear safety goggles, ear protection, and a dust mask to protect yourself from any possible harm.
Recommended Materials
Choosing the right materials for your miter joints can significantly impact the overall quality and longevity of your project. Here are some recommended materials to consider:
- Wood: Selecting high-quality wood is paramount for achieving strong and durable miter joints. Hardwoods like oak, maple, and walnut are often preferred for their stability and strength.
- Wood glue: Using wood glue in combination with your miter joints provides additional strength and stability to the joint. Look for a reliable wood glue that is designed for furniture and woodworking projects.
- Screws or nails: Depending on the project, you may choose to reinforce your miter joints with screws or nails. Ensure they are the appropriate size and type for the wood you’re working with.
- Sanding materials: After cutting your miter joints, sanding the edges and surfaces will give your project a smooth and professional finish. Use sandpaper or a sanding block to achieve the desired result.
- Finish: Applying a finish to your miter joint project not only enhances its appearance but also adds another layer of protection. Consider using varnish, stain, or paint to suit your desired aesthetic.
With the right tools and materials on hand, you’re well-equipped to embark on your miter joint cutting journey. Remember to prioritize accuracy, take your time, and enjoy the process of creating beautiful and structurally sound miter joints.
Understanding Angles
Understanding angles is crucial when it comes to cutting miter joints. To achieve a precise fit, it’s essential to grasp the concept of angles and how it applies to this woodworking technique. Let’s explore the importance of accuracy and how to calculate angles for immaculate miter joints.
Importance Of Accuracy
In woodworking, precision is paramount. Miter joints demand exactness to ensure a seamless connection. Even the slightest inaccuracy can lead to gaps or misalignments, compromising the joint’s strength and aesthetic appeal.
Calculating Angles
When cutting miter joints, understanding how to calculate angles is pivotal. It’s crucial to measure and cut the angles accurately to achieve a perfect fit. Here’s a simplified process to calculate miter angles:
- Measure the angle for the joint.
- Divide the angle by 2 to determine the miter angle for each piece.
- Set your miter saw to the calculated angle and make your cuts.
Cutting Techniques
When it comes to cutting miter joints, there are a few different techniques you can use. The method you choose will depend on your tools and personal preference. In this section, we will explore two popular techniques: using a miter saw and hand-cutting methods.
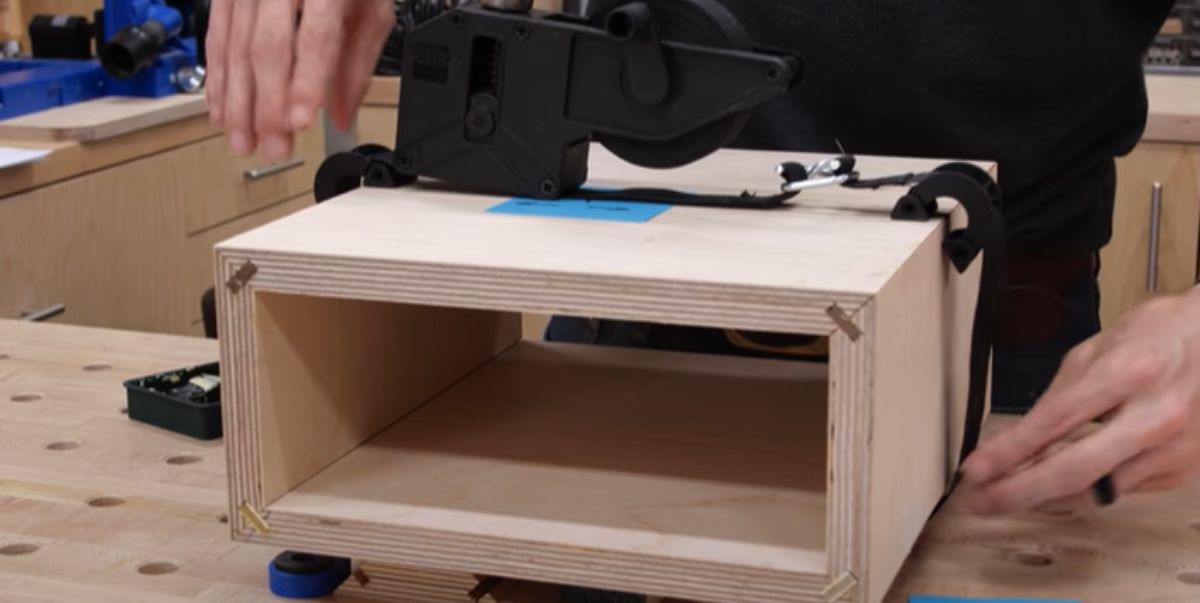
Using A Miter Saw
If you have access to a miter saw, it can be a quick and efficient way to cut miter joints. Here’s how to do it:
- Measure and mark: First, measure and mark the angles of your miter joint using a protractor or a miter gauge. Make sure to mark the correct angles on both pieces of wood.
- Set up the saw: Set the miter saw to the desired angle. Most miter saws have pre-set stops for common angles like 45 degrees.
- Position the wood: Place the first piece of wood flat on the saw’s base against the fence, making sure the marked angle aligns with the blade.
- Make the cut: Lower the saw’s blade and make a smooth, steady cut through the wood. Repeat this step for the second piece of wood, making sure the angles align correctly.
- Check the fit: Once you have made the cuts, test the fit of the two pieces together. They should create a tight, seamless joint.
Hand-cutting Methods
If you don’t have a miter saw or prefer a more traditional approach, there are hand-cutting methods you can use to achieve miter joints. Here are a couple of techniques:
- Backsaw and miter box: A backsaw and miter box is a simple and precise way to cut miter joints by hand. The miter box holds the wood securely while the backsaw cuts at the desired angle.
- Hand plane and shooting board: If you are skilled with a hand plane, you can use a shooting board to achieve perfectly square and accurate miter cuts. This method requires patience and practice.
These hand-cutting methods may take more time and practice to perfect, but they can yield excellent results. Whichever technique you choose, remember to measure carefully, use sharp tools, and practice on scrap wood before cutting your final pieces.
Troubleshooting And Tips
While cutting miter joints may seem challenging at first, with practice and the right techniques, you can achieve excellent results. However, it’s not uncommon to encounter some issues along the way. In this section, we will address common mistakes and provide pro tips for achieving perfection in your miter joints.
Common Mistakes
Creating flawless miter joints requires precision and attention to detail. Here are some common mistakes beginners may encounter and ways to avoid them:
- Not properly measuring the angles: Ensure that you accurately measure the angles for the miter joint. A slight deviation can lead to misaligned joints.
- Incorrect blade tilt: Make sure to set your saw blade at the correct angle before making any cuts. A misplaced tilt can result in uneven joints.
- Poor-quality blades: Investing in high-quality, sharp blades is essential for achieving clean, precise cuts. Dull blades can cause tear-out or uneven edges in your miter joints.
- Inadequate clamping: Failing to secure the pieces tightly together during cutting can result in distorted joints. Use clamps to hold the material firmly in place.
- Not checking for squareness: Before making your cuts, verify that your saw and workbench are properly squared. Ignoring squareness can lead to inaccurate angles and ill-fitting joints.
Pro Tips For Perfection
To ensure impeccable miter joints, consider the following expert tips:
- Double-check your measurements: Take the time to measure twice and cut once. Double-checking your angles and dimensions will save you from costly mistakes.
- Use a miter sled: A miter sled is a valuable tool that helps stabilize your workpiece and provides additional support during cutting. This reduces the chance of errors and produces better results.
- Use a zero-clearance insert: When cutting delicate materials, incorporating a zero-clearance insert on your saw table can minimize tear-out, resulting in neater miter joints.
- Practice on scrap pieces: Before tackling your actual project, practice cutting miter joints on scraps of the same material. This allows you to perfect your technique and make any necessary adjustments before moving to the final work.
- Perform test cuts: When adjusting your saw’s settings or trying out a new blade, always perform test cuts on sacrificial pieces. This ensures that you have the right setup and prevents mistakes on your final work.
By avoiding common mistakes and following these pro tips, you’ll be well on your way to creating impeccable miter joints. Remember to always prioritize accuracy and practice regularly to refine your skills.
Frequently Asked Questions For How To Cut Miter Joints
How Do You Cut A Mitre Joint?
To cut a mitre joint, follow these steps:
1. Measure and mark the angle you want on the workpiece.
2. Set your miter saw or table saw to the corresponding angle.
3. Position the workpiece against the saw fence and hold it securely.
4. Make the cut, ensuring a straight and clean edge.
5. Repeat the process for the second piece, ensuring a precise fit when joining the two together.
How Do You Cut A Perfect 45 Degree Angle?
To cut a perfect 45-degree angle, use a miter saw and adjust the angle to 45 degrees. Secure the board, make the cut, and double-check the angle for precision.
How Do You Find The Angle Of A Miter Cut?
To find the angle of a miter cut, measure the length of the piece you’re cutting and the width of the surface you’re joining it to. Use a miter saw or protractor to determine the angle that will create a tight joint between the two pieces.
How Do You Cut A Perfect Miter Joint On A Table Saw?
To cut a perfect miter joint on a table saw, follow these steps:
1. Set the miter gauge to the desired angle.
2. Position the workpiece securely against the fence.
3. Make sure the blade is aligned with the desired angle.
4. Slowly push the workpiece through the blade, keeping a steady hand.
5. Double-check for accuracy before removing the cut piece.
Conclusion
Mastering the art of cutting miter joints requires practice and patience. By following the proper steps and using the right tools, you can achieve seamless and precise miter joints for your woodworking projects. Incorporating these techniques will elevate the quality of your craftsmanship and bring your projects to the next level.
Practice, dedication, and attention to detail are key in perfecting this essential woodworking skill.