How to Measure 45 Degree Angle on Wood
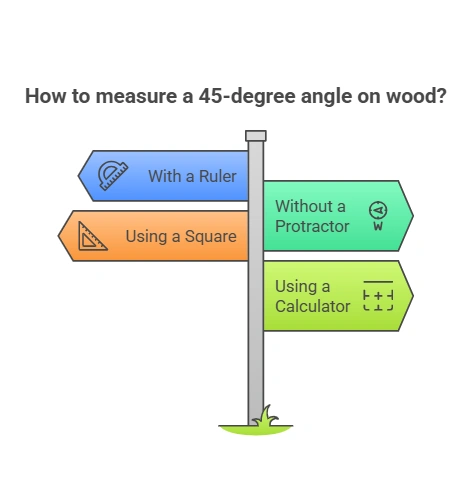
To make sure your woodworking project looks sharp, you need to be able to measure and cut angles with precision. This blog post will show you how to measure a 45-degree angle on wood using a few different methods. With a bit of practice, you’ll be able to get the perfect angle every time!
- Place the wood on a flat surface.
- Use a ruler or measuring tape to measure from the top corner of the wood down to the bottom corner.
- Double this measurement, and then use a protractor to find the 45-degree angle mark
- Line up the ruler or measuring tape with this mark, and then measure out from the top corner again to find the desired length
How to Measure 45-Degree Angle With a Ruler
To measure a 45-degree angle with a ruler, you will need to use the Pythagorean Theorem. This theorem states that in a right-angled triangle, the square of the length of the hypotenuse is equal to the sum of the courts of the other two sides. In this case, we can label the two shorter sides as “x” and “y” and the hypotenuse as “z.”
We know that z = √(x^2+y^2). Therefore, to find x and y, we can set up the equation: x^2+y^2=z^2. We know that z = 1 (since it is one side of a 45-degree angle), so our equation becomes: x^2+y^2=1
This means that either x = 1 or y = 1 since they are both squared. Therefore, we can conclude that to measure a 45-degree angle with a ruler, you need only measure one unit on each side!
How Many Inches Does a 45 Degree Angle Add
A 45-degree angle is equal to 1/8th of a circle. So if you were to take a 45-degree slice out of an 8-inch pie, the piece would be one inch thick.
How to Measure a 45 Degree Angle Without a Protractor
There are a few different ways that you can measure a 45-degree angle without using a protractor. One way is to use a level. Place the group against the surface that you want to measure the Angle off, then adjust the bubble until it is centered in the vial.
Once the bubble is centered, read off the measurement at the top or bottom of the level where it meets the edge of the surface. Another way to measure a 45-degree angle without a protractor is to use an angled ruler or square. Place one arm of the ruler or square against one side of the surface and ensure it is flush with the edge.
Then, align the other arm of the ruler or square so that it forms a perfect 90-degree angle concerning the first arm. The point where these two arms intersect will be your 45-degree mark.
Distance of a 45 Degree Angle
When trying to find the distance of a 45-degree angle, there are a few things that you will need to consider. First, you will need to determine what the hypotenuse is. The hypotenuse is the longest side of a right triangle and the side opposite of the 90-degree Angle.
To find the hypotenuse, you will use the Pythagorean theorem, which states that “the square of the length of the hypotenuse is equal to the sum of the squares of the lengths of the other two sides.” In other words, if you have a right triangle with sides A and B, then C (the length of the hypotenuse) will equal A squared plus B squared. Therefore, to find C (or, in our case, D), all you need to do is take A squared plus B squared and square root it.
Now that we know how to find D, let’s discuss how we can use this information. One way this can be useful is when trying to shoot an arrow at a target a certain distance away. If you know that your bow has a draw weight of 40 pounds and your hand has a mass of 30 grams, then using some simple physics calculations, we can figure out how far away your target needs to be for your shot to be accurate.
First, we need to calculate something called “energy density.” Energy density equals one-half times mass times velocity squared. In our case, the mass would be 0.03 kg (30 grams), and the rate would be 15 m/s (based on an average bow shooting speed).
This gives us an energy density of 0.135 Joules/cm3. Next, we need to calculate air resistance. For this calculation, we will assume that the drag coefficient (Cd) equals 0.47 and the cross-sectional area(A) equals 1 cm2.
With these values plugged in, our equation looks like this: R= 1/2 * Cd * A * v^2. R comes out top being0 .023 N*m^2 /kg, meaning it takes very little force to move through the air at low speeds but much more as speed increases, like the force required by archers drawing their bows back before releasing the arrow or an Olympic sprinter running down 100-meter track.
Finally, we arrive at our last calculation, combining both previous analyses into one final equation: E=(R+1/2mv^2)/D. E represents efficiency or work done over distance traveled, so the more efficiently something is said: The less work is required for a given result or output. Our value for E turns out to be 940 Joules/meter, which isn’t too bad! This means it would take the archer mentioned above 940 Joules of energy inputted into their shot for their arrow to reach a target 100 meters away, assuming they had perfect accuracy. That’s everything! Now go forth and amaze your friends with your new-found knowledge on distance and angles…or shoot some arrows yourself!
45-Degree Cut Calculator
If you’re a contractor, carpenter, or even a DIYer, making angled cuts can be one of the most challenging aspects of a project. There are a lot of factors to consider when making these types of cuts, and it’s essential to get them right to ensure the success of your project. Luckily, a tool can take the guesswork out of calculating cut angles – the 45-Degree Cut Calculator.
This handy online tool allows you to input the dimensions of your project and then calculate the precise Angle needed for your cut. Whether you’re working with wood, metal, or any other material, the 45-Degree Cut Calculator is a valuable resource that can help you make perfect cuts every time. Give it a try on your next project!
How to Rip a Board at a 45-Degree Angle
Ripping a board at a 45-degree angle is a relatively simple process that can be completed with just a few tools. The most important tool you will need is a table saw, but you will also need a miter gauge, push stick, and safety glasses. To begin, set your table saw to rip at a 45-degree angle and position your board on the saw so that the end you want to rip is flush with the blade.
Then, slowly push the board through the blade using your miter gauge as a guide. Use your push stick to keep your fingers away from the blade! Once you have ripped the entire length of the board, you can use a sanding block or hand sander to smooth out any rough edges.
And that’s it – you’ve now successfully ripped a board at a 45-degree angle!
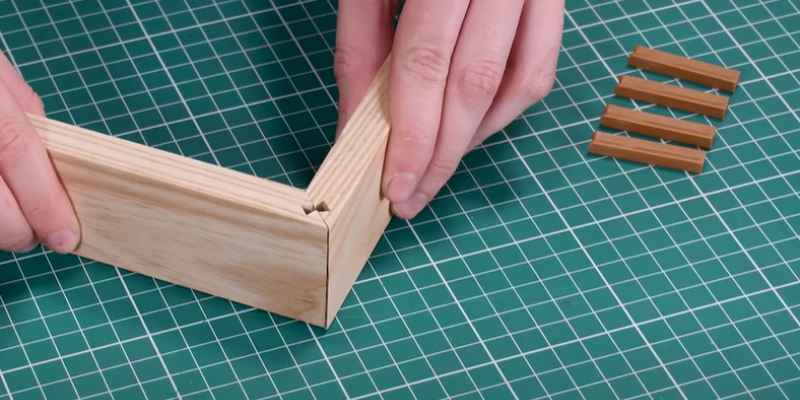
Cutting 45-Degree Angle Trim
One of the most basic cuts you can make with a miter saw is a 45-degree angle cut. This is a very versatile cut that can be used for various projects. Whether you’re working on trim work, framing, or anything else, making a clean and precise 45-degree amount will come in handy.
Making a 45-degree angle cut is quite simple. First, you’ll need to adjust the blade on your miter saw to the appropriate setting. Most miter saws have an adjustable stop set to create a 45-degree angle.
Once the blade is positioned correctly, you must make your cut the usual way. One thing to keep in mind when making any miter cut is always to use a sharp blade. A dull knife will not only produce subpar results, but it can also be dangerous.
Always take the time to change your blade if it’s dull or damaged. Cutting perfect 45-degree angles will become second nature with a bit of practice. Just remember to use caution and take your time for the best results!
How to Measure a 45-Degree Angle With a Square
If you need to measure a 45-degree angle, there are a few different ways that you can do it. One way is to use a square. First, find the center point of one of the Angle’s sides.
Then, place the square so that one corner is at the center point and the other corner is on the endpoint of the side. Make sure that the court is lined up so that the two lines on the court form a 90-degree angle with the line of the side (see image). Once you have done this, draw a line along the side of the square from one corner to the other.
This line will be your reference line for measuring. Now, take a measuring tape and measure from your reference line to the endpoint of the other side of the Angle. The distance that you estimate will be the length of your 45-degree Angle!
There are several ways to measure a 45-degree angle, but using a square is one of the easiest methods. With just a few simple steps, you’ll be able to accurately determine how long your45 degree angle is!
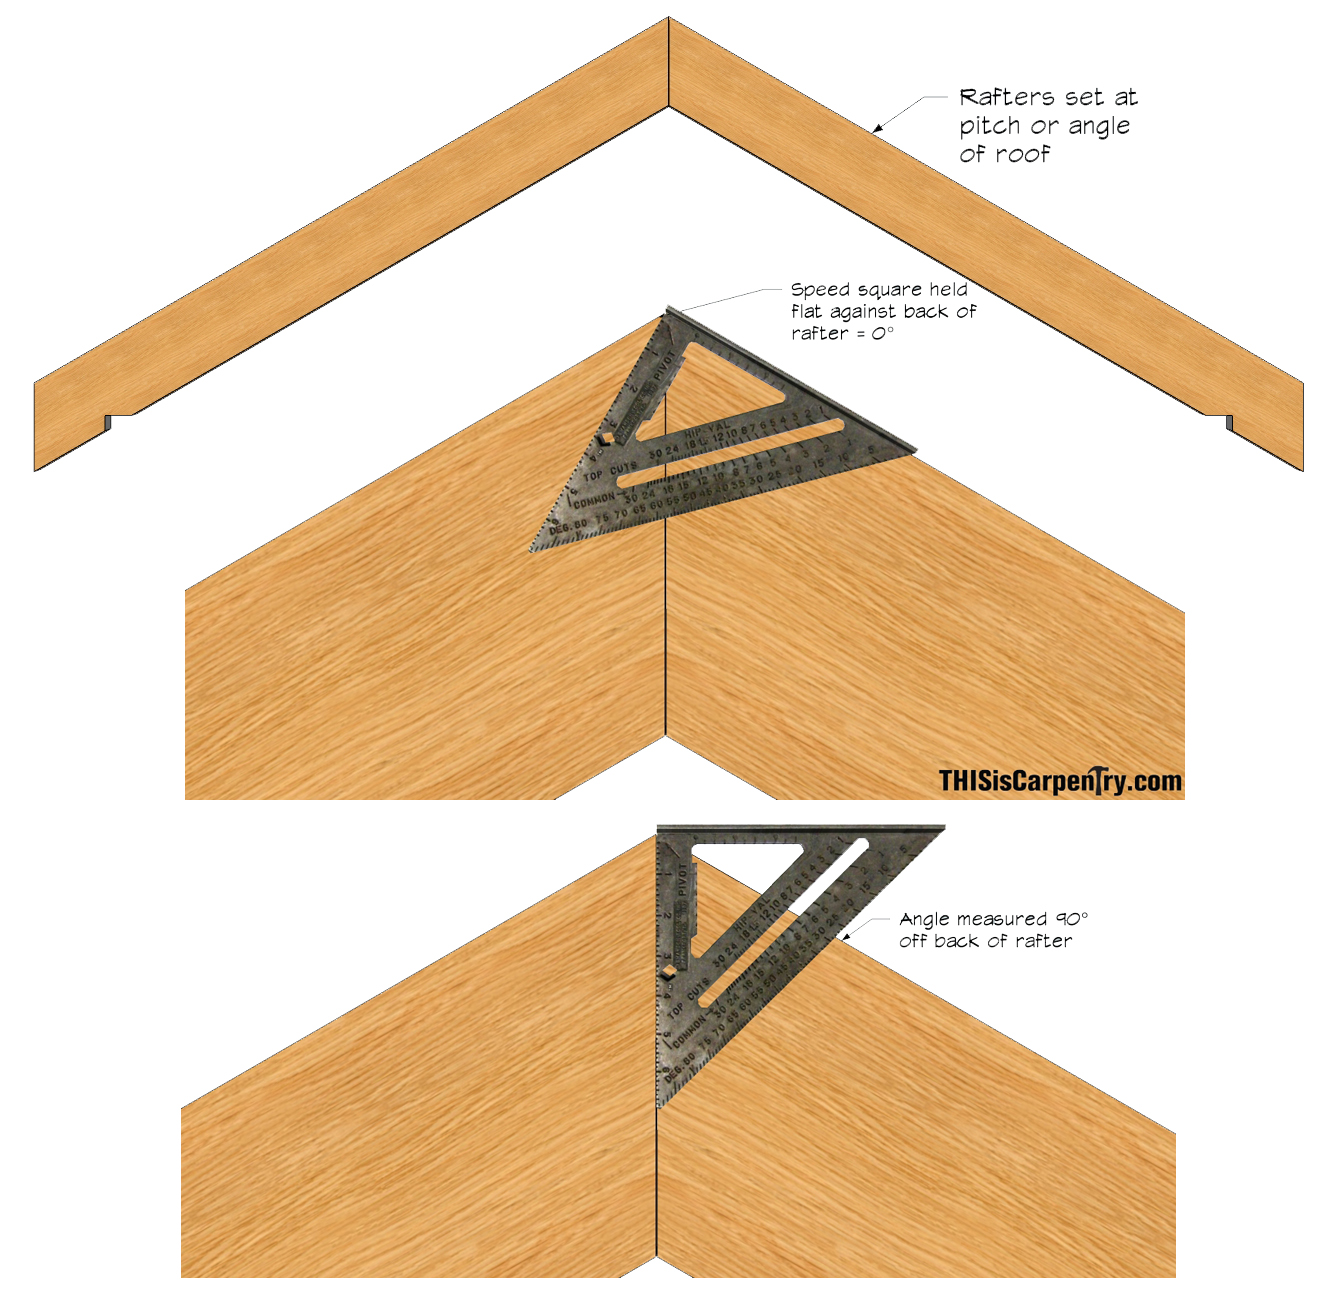
Credit: www.thisiscarpentry.com
How Do You Measure 45 Degrees on Wood?
You can measure 45 degrees on wood in a few different ways. One way is to use a protractor and calculate the Angle. Another way is to use a combination square set at 45 degrees.
Finally, you can mark out the 45-degree Angle with a pencil and then cut along the line with a saw.
How Do You Measure a 45 Degree Bevel Cut?
A 45-degree bevel cut is usually measured with a protractor or an angle finder. Calculate the Angle; you would need to find where the two lines of the slope meet and then measure the angle between those two lines.
How Do You Measure 45-Degree Angles?
There are a few ways that you can measure 45-degree angles. One way is to use a protractor. Place the center of the protractor on the vertex of the Angle and then line up one of the arms with one of the sides of the Angle.
Then, read off the measurement where the other arm meets the other side of the Angle. Another way to measure 45-degree angles is to cut out a piece of paper 8.5 inches by 11 inches. Fold it in half so that it is 4.25 inches by 11 inches and then fold it in half again so that it is 4.25 inches by 5.5 inches.
This will give you a right triangle with two 45-degree angles and one 90-degree Angle. You can then use a ruler or tape measure from the vertex of each Angle to the hypotenuse (the long side).
How Do You Measure 45 Degrees Without a Protractor?
You can measure 45 degrees without a protractor in a few different ways. One way is to use an angle finder tool. Another way is to use a level or inclinometer.
Finally, you could also use an angle-measuring app on your smartphone. An angle finder tool is a small, handheld device with two arms with angle measurements. To use it, you line up one component of the device with the edge of the object you’re trying to measure and then read the size off the other arm.
Angle finders are inexpensive and can be found at most hardware stores. A level or inclinometer is another option for measuring angles without a protractor. This method works best if you have someone else to help you hold the level in place while you take the reading.
First, find a straight edge against the object you’re measuring (a yardstick or ruler works well for this). Then, position the level, so its bubble is centered and zeroed out. Finally, have your helper hold the story while you read the measurement at the top – this will be your angle measurement.
Levels and inclinometers can also be found at most hardware stores, although they may be more expensive than an angle finder tool. If you have a smartphone, several apps allow you to measure angles using just your phone’s camera! These apps work by taking advantage of augmented reality technology – basically, they superimpose measurements over whatever your camera is pointed at.
Once activated, point your camera at the object whose Angle you want to measure and follow instructions onscreen until you have your answer!
Conclusion
You will need a protractor to measure a 45-degree angle on wood. First, find the center of the board by measuring from one end to the other. Then, place the center point of the protractor at this center mark and align one of the arms with an edge of the board.
Make sure that the other arm is lined up with the opposite edge. Finally, read off the measurement where these two arms intersect – this will be your 45-degree Angle!