
How to Easily Measure Length for a Perfect 45-Degree Cut
A 45-degree miter cut length equals the perpendicular measurement multiplied by 1.414 (or divided by √2) — not the flat board width you started with. Skip this math and a picture-frame or baseboard corner comes up short by as much as a quarter inch on a 10-inch span. This guide gives the formula, a worked example, kerf allowance, and the tools that make marking it foolproof.
Choosing The Right Tools
When it comes to measuring length for a 45 degree cut, having the right tools is essential. With precise measurements, you can achieve accurate cuts that fit seamlessly together. In this section, we will explore two tools that are crucial for measuring length accurately: selecting the correct measuring tape and utilizing a speed square.
Selecting The Correct Measuring Tape
When selecting a measuring tape, you want to ensure it is reliable and easy to use. Look for a tape with clear and visible markings, preferably in both inches and centimeters. A tape with a locking mechanism is also handy to keep your measurement in place.
Consider the length of the measuring tape as well. For most woodworking projects, a tape that extends up to 25 feet or 7.5 meters should be sufficient. However, if you frequently work on larger projects, investing in a longer tape may be beneficial.
Utilizing A Speed Square
A speed square, also known as a tri-square or rafter square, is a versatile tool that can assist in measuring and marking 45-degree angles accurately. It consists of a 90-degree angle and a 45-degree angle, making it perfect for various woodworking tasks. It pairs well with a combination square if you also need to transfer straight 90-degree reference lines.
When using a speed square to measure length for a 45-degree cut, place the long side of the square along the edge of the material. Ensure it is straight and firmly held in place. Then, align the 45-degree angle of the square with the line you want to cut at. The long side of the square will now guide your saw along the correct angle, resulting in the desired cut.
Make sure to double-check all measurements and angles before making any cuts. Accuracy is key in achieving precise and well-fitted joints.

The 45-Degree Cut Length Formula (With a Worked Example)
The cut length along a 45-degree miter face is the perpendicular measurement — the flat width or span you actually need to fill — divided by sin(45°). Since 1 ÷ sin(45°) ≈ 1.414, that’s the same as multiplying by 1.414. In plain terms: cut length = perpendicular measurement × 1.414 (or, using the exact ratio, perpendicular measurement ÷ √2 gives you the adjacent-side relationship for the reverse calculation).
Worked Example: Measuring A 10-Inch Span
Say a picture frame or baseboard return needs to span 10 inches at a 45-degree angle. Multiply 10 by 1.414: 10 × 1.414 ≈ 14.14 inches. That 14.14-inch measurement — not the original 10 inches — is the length you mark along the angled face before you cut. This is the same math behind cutting baseboard corners cleanly: get the miter-face length right first, and the corner closes without gaps.
Use this quick-reference table for other common spans:
| Span You Need To Fill | Cut Length Along The 45° Miter (× 1.414) |
|---|---|
| 6 in | 8.48 in |
| 8 in | 11.31 in |
| 10 in | 14.14 in |
| 12 in | 16.97 in |
| 16 in | 22.62 in |
| 24 in | 33.94 in |
Don’t Forget: Saw Blade Kerf
Every cut removes a sliver of material equal to the saw blade’s kerf — typically 1/8 inch (0.125″) for a standard circular or miter saw blade, thinner for a fine-tooth blade. Mark your calculated length, then position the blade so the entire kerf falls on the waste side of that line, not centered on it. Cut through the center of the line instead, and you lose roughly half the kerf width — about 1/16 inch — from your finished piece, which is enough to open a visible gap on a mitered corner.
“In our shop, the kerf is the mistake that catches people who’ve already nailed the 1.414 math but still come up short. Mark the line, then slide the blade over so the full kerf sits in the waste — never split the line down the middle.”
Best Miter Saw Pick
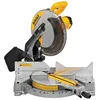
DEWALT 12-Inch Miter Saw, Single Bevel Compound (DWS715)
Locks in a true 45° stop so the piece you cut matches the length you just calculated, not whatever the blade drifted to.
- Best for: repeat, accurate 45-degree crosscuts on trim, baseboard, and framing stock
- Why we picked it: a true 45° detent means you’re cutting the exact length you calculated, not fighting blade drift
- Main drawback: single bevel only — you’ll flip the board for the opposite miter instead of tilting the saw
Compare more 45-degree marking and cutting tools
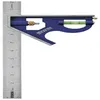 Option 1 IRWIN Combination Square, 12″, 45-90 Degree Marking
|
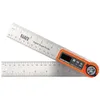 Option 2 Klein Tools 935DAF Digital Angle Finder
|
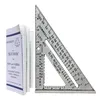 Option 3 SWANSON Tool Co S0101 7 Inch Speed Square
|
As an Amazon Associate we earn from qualifying purchases.
Accurate Measurement Techniques
Accurate measurements are crucial when it comes to achieving precise 45-degree cuts. The ability to measure length correctly ensures that your cuts are clean and aligned, resulting in professional-looking finished pieces. In this article, we will explore two essential techniques for measuring accurately: mastering the use of measuring tape and understanding the speed square measurements.
Mastering The Use Of Measuring Tape
Measuring tape is an indispensable tool in any woodworker’s arsenal. By following these steps, you can enhance your measurement skills:
- Start by extending the tape measure along the length of the material you want to cut. Ensure the tape lies flat against the surface, without any kinks or bends.
- Hold the tape measure securely and align the zero mark with the edge of the material. Make sure the tape is taut for accurate measurements.
- Read the measurement at the point where the material ends. Take note of the exact length. If the measurement falls between two markings, note the fraction or measurement down to the nearest smaller increment.
- Double-check your measurement to avoid any errors before making your cut. Remember, even the smallest mistake in measurement can lead to significant inaccuracies in the final cut.
Following these steps will ensure accurate measurements with your measuring tape, giving you the confidence to make precise 45-degree cuts.
Understanding The Speed Square Measurements
The speed square is another valuable tool that can help you achieve accurate 45-degree cuts. Here’s how you can make the most of its measurements:
- Begin by placing the speed square’s shorter edge along the edge of the material you want to cut, ensuring it is flush and aligned.
- Locate the angle marking on the speed square that corresponds to a 45-degree angle. This marking is typically labeled “45.”
- Align your pencil or marking tool with the edge of the speed square that intersects with the angle marking.
- Draw a line along the edge of the speed square using your marking tool, extending it across the material. This line will guide your 45-degree cut.
- Ensure the line is straight and aligned with your intended cut. Double-check the alignment before proceeding to make the cut.
By understanding and utilizing the measurements on your speed square effectively, you can achieve accurate 45-degree cuts time and time again.
Marking And Cutting The Material
Achieving an accurate 45-degree cut requires precise marking and using the correct cutting tools. Below, we’ll discuss the essential steps for marking and cutting materials at a 45-degree angle.
Precise Marking For 45 Degree Cuts
Precision is crucial when marking materials for a 45-degree cut. Use a quality carpenter’s square to ensure accurate angles. Measure and mark exact points on the material to guide the cutting process.
Utilizing The Correct Cutting Tools
When cutting materials at a 45-degree angle, it’s vital to use the right tools. A miter saw is highly recommended for accurate and efficient cuts. Ensure the saw blade is sharp and in good condition to achieve clean and precise cuts. If you’re setting up a saw for the first time, it’s worth learning how to square a miter saw so the 45° stop is actually true before you rely on it.

Double-checking And Adjusting
When it comes to carpentry and woodworking, accuracy is paramount. You want to ensure that every cut you make is precise and exactly to the specifications you require. This is especially true when measuring lengths for a 45-degree cut. Even the smallest misalignment can throw off the entire project. That’s why double-checking and adjusting your measurements is a vital step in the process.
Verifying The Accuracy Of The Measurements
Before making any cuts, it’s essential to verify the accuracy of your measurements. This ensures that you start with a solid foundation and reduces the risk of errors. To do this, follow these steps:
- Using a tape measure, measure the length of the material you will be cutting. Make sure to hold the tape measure firmly against the surface to avoid any gaps.
- Double-check the measurement by measuring from the opposite end. This helps to eliminate any human error or inconsistencies.
- If the two measurements match, you can proceed with confidence. However, if there is any discrepancy, take additional measurements until you are confident in the accuracy of your measurement.
Making Minor Adjustments If Needed
If the measurements do not align perfectly, it may be necessary to make some minor adjustments to ensure a precise 45-degree cut. Here are some tips to help you make those adjustments:
- If the measurement is slightly too short, you can add a small amount of material to compensate. This can be achieved by using shims or layered tape to build up the length.
- Conversely, if the measurement is slightly too long, you can remove a small amount of material. This can be done by sanding or planing the material until it reaches the desired length.
- Remember to make these adjustments incrementally, checking the measurement after each modification. This allows you to achieve maximum precision without overcompensating.
By double-checking your measurements and making minor adjustments as needed, you can ensure that your 45-degree cuts are accurate and precise. This attention to detail will result in high-quality work and a finished project that meets your standards. Now that you know how to verify and adjust your measurements, you can approach your next carpentry or woodworking project with confidence.
Pro Tips For Perfect 45 Degree Cuts
When it comes to precision woodworking, achieving perfect 45-degree cuts is essential. Whether you’re working on a DIY project or a professional undertaking, having the right techniques and tools can make all the difference. In this section, we’ll explore some pro tips that will help you measure length for a 45-degree cut with accuracy and precision.
Maintaining A Clean Workspace
One of the first pro tips for ensuring perfect 45-degree cuts is to maintain a clean and clutter-free workspace. A cluttered workspace not only hampers your focus but also increases the chances of measurement errors. By keeping your work area tidy, you can easily access your tools and materials, minimizing the chances of accidents or mistakes.
A clean and organized workspace also means having a dedicated surface to work on. Investing in a sturdy workbench or table with a smooth surface can provide stability and ensure accurate cuts. Additionally, make sure you have adequate lighting to clearly see your measurements and markings.
Practicing Patience And Precision
When it comes to measuring length for a 45-degree cut, practicing patience and precision is key. Rushing through the process can lead to inaccurate measurements and uneven cuts. Take your time and follow these tips:
- Use a reliable measuring tool: Start by using a durable and accurate measuring tool, such as a tape measure or a combination square. Ensure that your measuring tool is properly calibrated to avoid any discrepancies in your measurements.
- Measure twice, cut once: This age-old carpenter’s adage holds true for 45-degree cuts as well. Double-check your measurements before making any cuts to prevent errors.
- Mark the cut area: Use a pencil or a marking knife to clearly mark the area where you intend to make the 45-degree cut. This will act as a visual guide and reduce the chances of making incorrect cuts.
- Secure your workpiece: Before making the cut, secure the workpiece firmly in place using clamps or a vice. This will prevent any unnecessary movement or slipping, ensuring a precise and accurate cut.
- Use a miter saw or miter gauge: To achieve a perfect 45-degree cut, using a miter saw or a miter gauge can be immensely helpful. These tools allow you to set the desired angle and make precise cuts with ease.
By following these pro tips and practicing patience and precision, you can achieve flawless 45-degree cuts that will enhance the quality and aesthetics of your woodworking projects. Remember, the key is to take your time, focus on accuracy, and maintain a clean workspace for optimal results.

Frequently Asked Questions On How To Measure Length For A 45 Degree Cut
How Do You Work Out The Length Of A 45 Degree Angle?
Use the formula length = perpendicular measurement × 1.414 (the same as dividing by sin 45°, or dividing by √2 for the reverse calculation). For example, a 10-inch span needs a cut length of 10 × 1.414 ≈ 14.14 inches along the 45-degree miter face.
How Do You Measure Miter Cut Length?
To measure the miter cut length, use a tape measure or ruler and place it along the length of the mitered cut. Measure from the starting point to the desired endpoint and record the measurement. This will give you the accurate length of the miter cut.
How Do You Measure An Angle Cut?
To measure an angle cut, use a protractor or angle finder tool. Place the tool on the angle’s vertex and align its base with one side of the angle. Read the measurement from the tool’s scale to determine the angle’s size accurately.
How Do You Measure And Cut A 45 Degree Angle For A Frame?
To measure and cut a 45-degree angle for a frame, use a miter saw for accuracy. Measure and mark the exact halfway point of the frame board, then set the miter saw to a 45-degree angle. Cut the board along the marked line for a precise angle, keeping the saw’s kerf on the waste side of the line.
Conclusion
Measuring length for a 45-degree cut requires precision and attention to detail. Following the correct techniques and using the right tools will ensure accurate results. Practice makes perfect, so don’t be discouraged if you don’t get it right the first time.
With these tips, you’ll soon be cutting with confidence.