How to Paint a Cardboard Box
To paint a cardboard box, start by preparing the surface with primer, then apply two coats of paint, allowing each coat to dry before applying the next. Introduction (127 words): Painting a cardboard box can be a simple and enjoyable DIY project that allows you to personalize and enhance its appearance.
Whether you want to create a decorative storage container, a customized gift box, or a unique piece of art, the process is relatively straightforward. Properly preparing the surface and using the right materials is crucial in achieving a desirable and long-lasting finish.
Applying a coat of primer helps the paint adhere to the cardboard and provides a smooth base for your artwork. Then, with the cardboard box ready, using two coats of paint in your chosen color or design is recommended, making sure to let each coat dry completely before moving on to the next. With just a few simple steps, you can transform a plain cardboard box into a vibrant and eye-catching addition to your home or special occasion.
Choosing The Right Materials
When painting a cardboard box, it is important to choose the right materials for optimal results. Selecting the appropriate paint and primer will ensure a smooth and lasting finish on the surface. Make sure to use materials that are suitable for cardboard and follow the necessary steps for preparation and application.
Selecting The Right Paint
When it comes to painting a cardboard box, selecting the right paint is crucial for achieving a vibrant and long-lasting finish. While there are several types of paint available in the market, not all of them are suitable for cardboard. Opt for acrylic or latex paint, as they adhere well to cardboard surfaces and dry quickly. Unlike oil-based paints, acrylic and latex paints are water-based, making cleanup a breeze. They also offer a wide range of colors to choose from, allowing you to unleash your creativity.
Essential Painting Tools
Having the right painting tools is equally important for a successful cardboard painting project. Here are some essential tools you’ll need:
- Paintbrushes: Invest in a range of paintbrushes with different sizes and bristle types. These brushes will help you achieve various techniques and details.
- Roller: A roller brush ensures smooth and even paint application on large surfaces. Select a roller appropriate for the size of your cardboard box.
- Palette: A palette is necessary for mixing and blending colors. You can use a traditional artist’s palette or a disposable palette pad for convenience.
- Painter’s Tape: Use painter’s tape to create clean edges and protect specific areas from paint.
- Drop cloth or Newspaper: Cover your work area with a drop cloth or old newspaper to prevent paint spills and splatters.
Remember, having the right tools will not only make the painting process easier but also help you achieve professional-looking results. Gather these essential painting tools before you begin your project to ensure a smooth and hassle-free experience.
Preparing The Surface
To paint a cardboard box, start by preparing the surface using primer to ensure optimal adhesion of the paint. Sand the cardboard lightly to create a smooth surface and remove any rough edges before proceeding with the painting process.
Cleaning The Cardboard Box
To ensure a smooth and even paint application, begin by thoroughly cleaning the cardboard box. Start by gently removing any dirt or dust with a soft cloth or brush. Pay extra attention to the corners and edges where debris may accumulate. If there are any stubborn stains or marks, use a mild detergent solution with water to gently scrub the surface clean. Remember to allow the cardboard to completely dry before moving on to the next step.
Applying Primer
Applying a primer is essential for better paint adhesion and to prevent the cardboard from absorbing too much paint. Choose a primer suitable for both cardboard and the type of paint you will be using. Start by laying the cardboard box on a protective sheet or working surface. Shake the primer well and apply it evenly using a brush or roller, making sure to get into all the nooks and crannies.
If you prefer using spray primer, hold the can about 10 to 12 inches away from the cardboard box and apply it in smooth, even strokes. Allow the primer to dry completely before proceeding to the next step. This usually takes around 30 minutes to an hour, depending on the brand and environmental conditions.
Table: Steps for Preparing the Surface of a Cardboard Box
| Step | Details |
| Cleaning the Cardboard Box | Gently remove dirt and dust with a soft cloth. Use mild detergent for stains. Allow to dry completely. |
| Applying Primer | Brush or roll primer evenly on the cardboard box surface. Alternatively, use spray primer in smooth, even strokes. Allow to dry completely before painting. |
Remember, properly preparing the surface is crucial for a successful paint job on a cardboard box. Taking the time to clean and apply primer ensures better paint adhesion, resulting in a longer-lasting and more professional-looking finish.
Adding Creativity With Colors
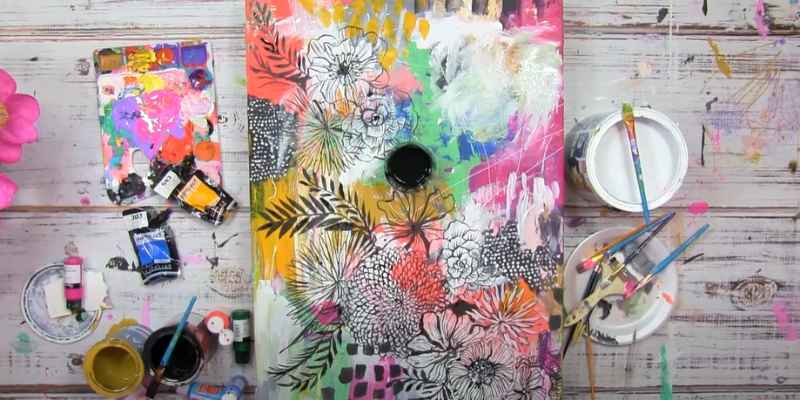
When it comes to painting cardboard boxes, adding creativity with colors can transform them into beautiful and vibrant storage solutions or decorative pieces. By experimenting with different color combinations, using stencils and patterns, you can create unique and personalized designs that will catch everyone’s eye.
Experimenting With Different Color Combinations
Experimenting with different color combinations allows you to unleash your creativity and add a personal touch to your cardboard box. With a wide range of paint colors available, you can mix and match hues to suit your style and preferences. Consider using complementary colors, such as blue and orange or purple and yellow, to create a visually striking contrast. Alternatively, you can opt for monochromatic schemes by using different shades of the same color for a subtle and harmonious look.
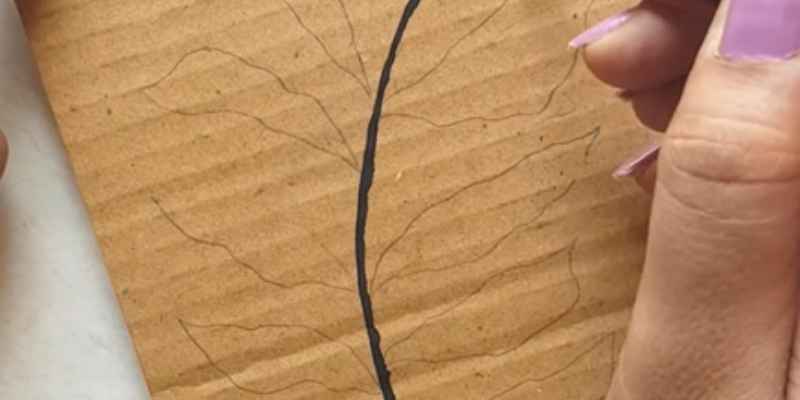
Using Stencils And Patterns
If you want to take your cardboard box painting to the next level, consider using stencils and patterns. Stencils make it easy to create intricate designs on your box without needing advanced artistic skills. Simply secure the stencil onto the box and apply the paint over it. You can find premade stencils at craft stores or create your own by tracing shapes onto cardstock or acetate sheets. Another option is to use patterns, such as stripes, polka dots, or chevron, to add visual interest to your box. You can achieve these patterns by using painter’s tape or stencils specifically designed for patterns.
Techniques For Texture
Adding texture to your painted cardboard box can elevate its appearance and make it stand out. Here are two simple techniques you can try:
Creating Texture With Sponges
One way to add texture to your cardboard box is by using sponges. Here’s how you can do it:
- Step 1: Dip a sponge into your desired paint color. Make sure to use a sponge with a rough texture for better results.
- Step 2: Gently press the sponge onto the surface of the cardboard box. Vary the pressure and direction to create a unique textured effect.
- Step 3: Continue dabbing the sponge across the box until you achieve the desired texture. Remember to let the paint dry completely before adding additional layers or details.
Using Different Brushstrokes
An alternative method to add texture to your cardboard box involves experimenting with different brushstrokes. Follow these steps:
- Step 1: Choose a brush that suits the texture you want to create. For instance, a bristle brush is suitable for rough textures, while a fan brush works well for creating softer textures.
- Step 2: Load the brush with paint and apply it to the cardboard surface. Try using various strokes such as stippling, cross-hatching, or dry brushing to achieve different texture effects.
- Step 3: Layer and experiment with different brushstrokes until you achieve your desired texture. Allow each layer to dry before applying a new one.
Finishing Touches
Get your cardboard box looking professional with these finishing touches for painting. Follow our step-by-step guide to achieve a flawless finish that will make your cardboard box look like a work of art.
Applying A Protective Coat
Once you have finished painting your cardboard box, it’s crucial to apply a protective coat to ensure its durability and longevity. This protective coat will safeguard your artwork from wear and tear, moisture, and other environmental factors. To apply the protective coat, follow these simple steps:
- Clean the painted surface with a soft cloth to remove any dust or debris.
- Choose a clear sealant or varnish suitable for use on cardboard.
- Using a foam brush or a soft paintbrush, apply a thin and even layer of the sealant over the entire painted area.
- Make sure to cover the edges and corners as well for complete protection.
- Allow the protective coat to dry thoroughly according to the manufacturer’s instructions.
By applying a protective coat, you not only enhance the appearance of your painted cardboard box but also increase its durability, allowing it to withstand daily use and potential damage.
Adding Decorative Elements
To truly make your painted cardboard box stand out, you can enhance it further by adding decorative elements. These creative touches will personalize your box and make it visually appealing. Here are a few ideas to get you started:
- Attach ribbons or bows to the edges or handles of the box.
- Use adhesive gems or stickers to create patterns or designs.
- Add a touch of sparkle with glitter or metallic paint.
- Wrap the box with patterned or decorative paper for a unique look.
- Apply stencils or use a paint marker to create intricate designs.
Remember to let your creativity shine and experiment with different decorative elements to achieve the desired look. These embellishments will transform your cardboard box into a visually stunning and personalized piece.
Conclusion
To wrap things up, painting a cardboard box can transform it into a creative and functional piece. By following these simple steps and tips, you can easily paint and customize your cardboard box to suit your needs. Remember to prepare the surface, choose the right type of paint, and apply a few coats for a smooth and lasting finish.
With a little creativity, your cardboard box can become a unique storage solution or a homemade gift box. So, let your imagination run wild and get started on your cardboard painting project today!