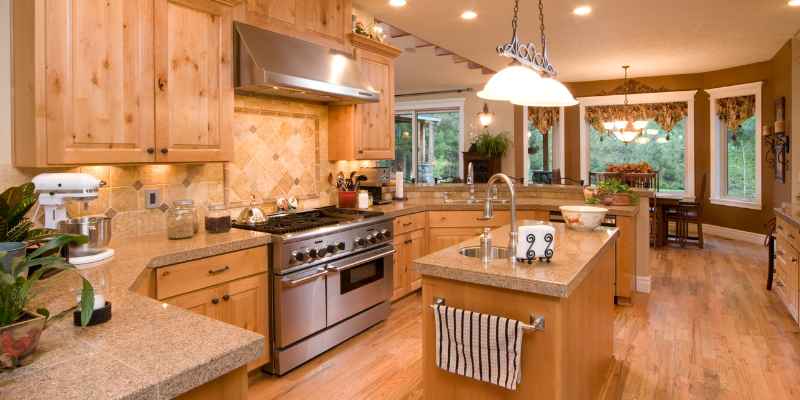
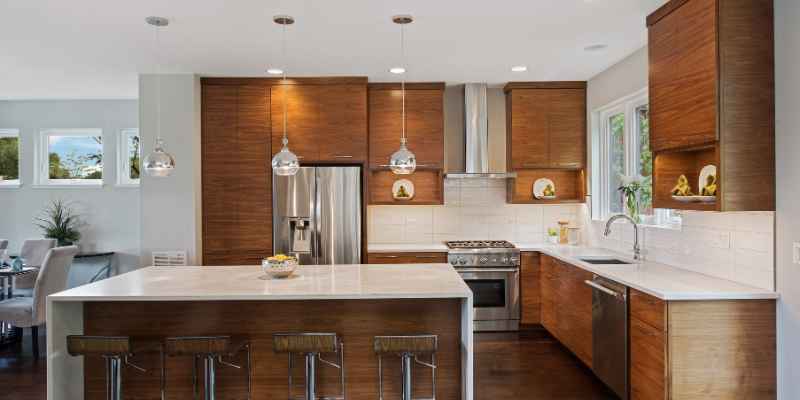
How To Paint Kitchen Cabinets: 7 Expert Tips for a Flawless Finish
To paint kitchen cabinets, start by removing the doors and hardware, cleaning and sanding the surfaces, applying a primer, and then painting with a roller or brush. Transforming the look of your kitchen can be as simple as giving your cabinets a fresh coat of paint.
Whether you want to update the color or revive worn-out cabinets, painting them can breathe new life into your kitchen space. This process involves several steps, including removing the doors and hardware, cleaning and sanding the surfaces, applying a quality primer for better adhesion, and finally, painting them with a roller or brush.
In this guide, we will walk you through the detailed process of painting your kitchen cabinets, from start to finish, so you can achieve a professional-looking result that will enhance the overall aesthetics of your kitchen.
Choosing The Right Paint And Supplies
When it comes to giving your kitchen cabinets a fresh new look, choosing the right paint and supplies is essential. Selecting the correct paint type and gathering necessary supplies will ensure a successful cabinet painting project that lasts for years to come.
Selecting The Right Paint Type
Before you begin painting your kitchen cabinets, it’s crucial to select the right paint type. Here are a few paint options to consider:
- Latex Paint: Latex paint is a popular choice for kitchen cabinets due to its durability and ease of cleaning. It dries quickly and is available in a wide range of colors.
- Oil-Based Paint: Oil-based paint provides a smooth, high-quality finish that resists stains and wear. However, it has a longer drying time and requires mineral spirits for cleanup.
It is recommended to consult with your local paint store or a paint professional to determine the best type of paint for your kitchen cabinets. They can help you choose a paint that is specifically formulated for cabinets and will adhere well to the surface.
Gathering Necessary Supplies
Once you have decided on the paint type, it’s time to gather the necessary supplies for your cabinet painting project. Here is a list of essential items you’ll need:
| SUPPLIES | DESCRIPTION |
|---|---|
| Painter’s Tape | Use painter’s tape to protect areas you don’t want to paint, such as walls, countertops, and hardware. |
| Sandpaper | Choose sandpaper with a grit appropriate for your cabinet’s material. This will help prepare the surface for painting. |
| Tack Cloth | A tack cloth is used to remove dust and particles after sanding, ensuring a smooth surface for painting. |
| Primer | Apply a high-quality primer to help the paint adhere to the cabinet surface and provide a durable finish. |
| Paint Brushes | Choose brushes specifically designed for painting cabinets. High-quality brushes ensure a smooth and even application of paint. |
| Roller and Tray | A roller and tray are useful for painting larger surfaces, such as cabinet doors and sides. |
| Paint | Purchase the chosen paint type in the desired color. Consider the amount of paint needed based on the size and number of cabinets. |
Gathering all the necessary supplies beforehand will save you time and ensure a seamless painting process. Make sure to have everything on hand before starting your project.
Preparing The Cabinets
Preparing the cabinets is an essential step in giving your kitchen a fresh new look. This involves removing cabinet hardware, cleaning and sanding the surfaces. By following these steps, you’ll ensure that the paint adheres well and the finish lasts.
Removing Cabinet Hardware
Before starting the painting process, it’s important to remove all cabinet hardware. This includes handles, knobs, hinges, and any other fixtures attached to the cabinet doors and drawers. Use a screwdriver or drill to carefully unscrew and remove these items. Keep them in a safe place so that they don’t get misplaced.
Cleaning And Sanding The Surfaces
Once the hardware is removed, it’s time to clean and prepare the surfaces. Start by cleaning the cabinets thoroughly to remove any grease, grime, or dust. Use mild soap and water or a non-abrasive cleaner for this task. Make sure to dry the cabinets completely before moving to the next step.
Next, you’ll need to sand the cabinet surfaces to create a smooth and even surface for the paint to adhere to. Grab a sanding block or sandpaper with a grit of 120 to 220 and gently sand the cabinets in the direction of the wood grain. This will help to remove any existing finish, roughen the surface, and create a good base for the paint.
If there are any imperfections, such as dents or scratches, you can use wood filler to fill them in. Follow the manufacturer’s instructions for the best results. After filling in any imperfections, sand the areas again to ensure a seamless finish.
You may also consider using a liquid deglosser to remove any remaining gloss or varnish from the cabinets. This will further promote paint adhesion and ensure a long-lasting finish. Apply the deglosser according to the product instructions, using a clean cloth or sponge. Allow it to dry completely before proceeding.
Now that you have successfully prepared the cabinets, you are ready to move on to the next step, which is applying the primer. Stay tuned for the next section in this series to learn more about how to achieve a professional-looking paint job for your kitchen cabinets!
Applying Primer
Applying primer is a crucial step in painting kitchen cabinets that can make or break the final result. In this section, we will discuss the importance of choosing the appropriate primer and share the step-by-step process of applying primer to achieve a smooth and durable finish.
Choosing The Appropriate Primer
Choosing the right primer is essential to ensure proper adhesion of the paint to your kitchen cabinets. There are several types of primers available, including oil-based, water-based, and shellac-based primers. Consider the following factors when selecting the appropriate primer:
- Surface material: Different surface materials require different types of primers. For example, if your cabinets are made of wood, an oil-based primer is generally recommended for better penetration and adhesion.
- Paint type: If you plan to use oil-based paint for your cabinets, choose a primer that is compatible with oil-based paints. Similarly, if you prefer water-based paint, opt for a water-based primer.
- Stain-blocking properties: If your cabinets have stains or discoloration, look for a primer with stain-blocking properties to prevent them from bleeding through the paint.
Applying Primer To The Cabinets
Once you have selected the appropriate primer, follow these steps to apply it onto your kitchen cabinets:
- Preparation: Start by preparing the cabinets by removing all hardware, such as handles and hinges. Clean the surfaces thoroughly to remove grease, dirt, and any previous coatings.
- Sanding: Lightly sand the cabinets with fine-grit sandpaper to create a smooth surface for the primer to adhere to. Wipe away any sanding dust with a clean cloth.
- Priming: Use a brush or roller to apply a thin and even coat of primer to the cabinet doors, drawers, and frames. Ensure that the primer covers the entire surface and corners.
- Drying: Allow the primer to dry according to the manufacturer’s instructions. This typically takes a few hours, but it’s best to let it dry overnight for optimal results.
- Sanding (optional): If you want an ultra-smooth finish, lightly sand the primed surface with fine-grit sandpaper after it has fully dried. Wipe away any sanding dust with a clean cloth.
By choosing the appropriate primer and following these steps, you are now one step closer to achieving beautifully painted kitchen cabinets.
Painting Techniques
Discover effective painting techniques for transforming your kitchen cabinets. Learn step-by-step instructions to achieve a flawless finish that will revitalize your space.
Using A Brush For Edges And Details
When it comes to painting kitchen cabinets, achieving a professional-looking finish often hinges on using the right techniques. One technique that can make a significant difference in the overall result is using a brush for edges and details. While a paint roller may be great for covering large areas quickly, its flat surface can’t reach into tight corners or intricate moldings. That’s where a high-quality brush comes in handy.
A brush allows you to easily navigate around cabinet hardware, like handles and hinges, without getting paint on them. The key to achieving clean lines and avoiding smudges is to choose a brush with quality bristles that are suitable for the type of paint you are using. Synthetic bristles work well with latex paint, while natural bristles are better for oil-based paints.
To use a brush effectively, start by dipping it about a third of the way into the paint, tapping off any excess. Apply the paint to the edges and details in smooth, even strokes, following the natural contours of the cabinet. Take care to blend the paint seamlessly with the surrounding areas.
Applying Paint With A Roller
While a brush is great for edges and details, a roller is the go-to tool for painting large, flat surfaces like cabinet doors and drawer fronts. Using a roller ensures even coverage and a consistent finish. Here are the steps to follow:
- Prepare the surface by sanding it lightly and wiping away any dust or debris.
- Choose a high-quality roller sleeve with the appropriate nap length for your cabinets. A shorter nap is ideal for smoother surfaces, while a longer nap is better for textured surfaces.
- Pour the paint into a roller tray, ensuring it is shallow enough to avoid overloading the roller.
- Dip the roller into the paint, rolling it back and forth to evenly distribute the paint on the sleeve.
- Starting at one corner of the cabinet, roll the paint onto the surface in a smooth, vertical motion. Work in small sections, overlapping each stroke slightly.
- After completing one coat, allow it to dry completely before applying additional coats, if desired.
Remember to periodically check for any drips or excess paint and remove them immediately to prevent unwanted texture or drips on your cabinets.
Achieving A Smooth Finish
When it comes to painting kitchen cabinets, achieving a smooth finish is essential for a professional-looking result. A smooth finish not only enhances the appearance of your cabinets but also ensures that they are durable and easy to clean. In this article, we will discuss two key factors that contribute to achieving a smooth finish: sanding between coats and using the proper painting technique.
Sanding Between Coats
Sanding between coats is a crucial step in achieving a smooth finish when painting kitchen cabinets. After each coat of paint dries, you should lightly sand the surface to remove any imperfections such as brush strokes, drips, or dust particles. This process creates a smooth and even surface for the next coat of paint to adhere to.
To sand between coats, follow these steps:
- Use a fine-grit sandpaper (typically 220-grit) to lightly sand the entire surface of the cabinet doors and drawers. Make sure to sand in the direction of the grain to avoid scratching the wood.
- Wipe away any dust or debris with a clean, damp cloth before applying the next coat of paint.
- Repeat this process between each coat of paint to achieve a smooth and flawless finish.
Using The Proper Painting Technique
Using the proper painting technique is equally important in achieving a smooth finish when painting kitchen cabinets. Here are some tips to ensure you get professional-looking results:
- Start by using a high-quality paintbrush or a foam roller specifically designed for cabinets. This will help you achieve a smooth and even application of paint.
- Apply thin coats of paint rather than thick layers. Thin coats dry faster and are less likely to show brushstrokes or drips.
- Always paint in the direction of the grain to create a uniform finish.
- Allow each coat of paint to dry completely before applying the next one. This will prevent smudging or smearing of the paint.
- Keep a wet edge while painting to avoid visible brush marks. Start at one end of the cabinet and work your way across, overlapping the paint slightly with each stroke.
- If necessary, use a small artist brush to touch up any areas that require extra attention.
By following these steps and using the proper painting technique, you can achieve a smooth finish when painting your kitchen cabinets. Take your time, be patient, and remember that preparation and attention to detail are key to obtaining professional results.
Drying And Curing
When it comes to painting kitchen cabinets, drying and curing are two crucial steps that can make all the difference between a successful project and one that falls short.
Allowing Sufficient Drying Time
In order to achieve a professional look, patience is key. Allowing sufficient drying time for each coat of paint applied to your kitchen cabinets is essential. Rushing this step can result in a less durable finish and may lead to unsightly blemishes or imperfections.
It is recommended to wait at least 24 hours between each coat of paint. This timeframe provides ample time for the paint to dry completely, allowing for a smoother and more professional-looking result.
Ensuring Proper Curing Of The Paint
Once the final coat of paint is applied, it is important to ensure proper curing to maximize the longevity and durability of the finish. Curing refers to the process of allowing the paint to fully harden and bond to the surface, creating a strong and resilient coating that can withstand daily wear and tear.
To ensure proper curing, follow these guidelines:
- Provide adequate ventilation in the painting area to allow for proper air circulation and ventilation. This helps speed up the curing process and reduces the risk of the paint becoming tacky or prone to damage.
- Avoid placing any objects or items on or near the freshly painted cabinets during the curing process. This includes avoiding contact with water or excessive humidity, as these factors can hinder the curing process and compromise the final finish.
- Wait at least 7 days before using your newly painted kitchen cabinets. This allows ample time for the paint to fully cure and harden, ensuring a durable and long-lasting finish.
By following these guidelines and allowing sufficient drying and curing time, you can achieve a flawless and professional-looking finish for your painted kitchen cabinets. Remember, patience and attention to detail are key in achieving the best results.
Reassembling And Maintenance
Learn how to reassemble and maintain your newly painted kitchen cabinets with these simple steps. Keep your cabinets looking fresh and beautiful for years to come.
Reinstalling Cabinet Hardware
After successfully painting your kitchen cabinets, it’s time to give them a fresh look by reinstalling the cabinet hardware. This final touch will not only enhance the overall appearance of your cabinets but also ensure their functionality. Follow these simple steps to reinstall the cabinet hardware seamlessly:
- Gather your tools: Before you begin, make sure you have the necessary tools handy, such as a screwdriver, drill, measuring tape, and a level.
- Remove old hardware: Start by removing the existing cabinet hardware carefully. Unscrew the old knobs or handles one by one and set them aside. Take note of any unique placement or orientation.
- Clean the surfaces: Before installing the new hardware, it’s important to clean the cabinet surfaces where the hardware will be attached. Use a mild cleaner or a mixture of warm water and dish soap to remove any residue or dirt. Dry the surfaces thoroughly.
- Measure and mark: Use a measuring tape and a level to determine the precise placement of the new hardware. Mark the positions lightly with a pencil to ensure accuracy.
- Drill pilot holes: If your new hardware requires screws, drill pilot holes at the marked positions. This step will prevent any potential damage to the cabinets when attaching the hardware.
- Attach the hardware: Carefully align the new knobs or handles with the pilot holes and screw them in using a screwdriver. Make sure they are securely fastened.
With these steps completed, your kitchen cabinets will regain their functionality and aesthetic appeal.
Maintaining The Painted Cabinets
Proper maintenance is crucial to preserve the beauty and longevity of your newly painted kitchen cabinets. Follow these tips to keep them looking fresh and polished:
- Regular cleaning: Dust and wipe the cabinets regularly using a soft cloth or a microfiber duster. This will prevent the buildup of dirt and grime, keeping your cabinets looking pristine.
- Avoid harsh cleaners: When cleaning the cabinets, opt for mild cleaning solutions, such as warm water and a gentle dish soap. Harsh chemicals can damage the paint finish.
- Deal with spills promptly: If any spills occur, quickly wipe them away to avoid staining the painted surface. Prompt action will prevent any long-term damage.
- Use gentle touch: Be mindful when handling the cabinet doors and drawers. Avoid slamming them shut and instead, close them gently to prevent chipping or scratching the paint.
- Protect from excessive moisture: Excessive moisture can be detrimental to painted cabinets. Ensure proper ventilation in your kitchen and wipe away any moisture or water promptly to prevent any damage.
By following these maintenance tips, you can enjoy your beautifully painted kitchen cabinets for years to come.
Conclusion
Learning how to paint kitchen cabinets can be a rewarding and cost-effective way to refresh the look of your kitchen. By following the step-by-step process outlined in this blog post, you can achieve professional-looking results. Remember to choose the right materials, prepare the cabinets properly, and use proper painting techniques for a durable and long-lasting finish.
With a little patience and effort, you’ll have beautifully painted kitchen cabinets that can transform your space. Happy painting!