
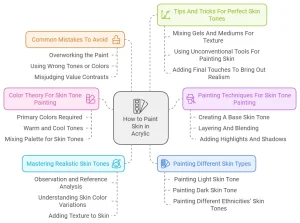
How to Paint Skin in Acrylic: Mastering Realistic Tones
To paint skin in acrylic, mix primary colors to create the base shade, modify it for tonal variation, add darker tones for contouring, and highlight areas with lighter shades. From there, add details like lips, nose bridge, and dress.
While mixing colors, focus on achieving a realistic skin tone by considering the skin color type (warm, cool, or neutral) and the subject’s ethnicity. It is also important to remember that acrylic paint is not safe to use on the body.
Therefore, if you wish to create body-paint, use appropriate paint types designed for such purposes. In the following sections, we will discuss how to paint skin in acrylic in more detail.
Color Theory For Skin Tone Painting
Learn how to paint skin in acrylic with color theory for skin tone painting. Discover different techniques on mixing darker skin tones, painting realistic skin textures, creating a base color, and adding body to acrylic paint. These tutorials are perfect for beginners looking to improve their portrait painting skills.
When it comes to acrylic painting, one of the most challenging aspects is painting skin tones. Skin colors have a wide range of hues and undertones, and the right selection of paint can make all the difference. The best way to begin is by understanding the color theory for skin tone painting. This will involve primary colors required, warm and cool tones, and mixing palettes for skin tones.
Primary Colors Required
The primary colors required for skin tone painting are red, yellow, and blue. These colors cannot be created by mixing any other colors, making them essential components of your paint palette. These primary colors are the foundation for creating all other colors, including skin tones.
Warm and Cool Tones
Warm and cool tones are important aspects to consider when mixing skin tones. Warm colors consist of red, yellow, and orange hues, while cool colors are characterized by blue, green, and purple hues. When painting skin tones, the use of warm and cool tones can create depth and realistic shades. Additions of complementary and contrasting shades of warm and cool colors give skin tone its vibrant dimension.
Mixing Palette for Skin Tones
When mixing skin tones, you need a palette that includes white and black paint along with the primary colors. For lighter skin tones, add more yellow and white. Darker skin tones need more red and blue pigments. Using a transparent paint medium, such as glazing and layering techniques, can help you create perfect seamless skin color. Here’s a table to help you mix a basic skin tone:
Skin Tone | Primary Color Mix
Fair Skin | Equal amounts of red, blue, and yellow with some white
Medium Skin | Equal amounts of red, blue, and yellow with a bit of brown and white
Dark Skin | Red, blue, and yellow with a bit of brown, black and white
Once you’ve mixed the essential undertone colors, adjusting and layering light and dark shades and complementary colors can for different skin tones. This method makes it easy to create depth and introduce contrast in your skin tone painting.
In conclusion, understanding color theory for skin tone painting is essential to creating an effective acrylic painting. Using primary colors, warm and cool tones, and a mixing palette for skin tones, will give your painting depth and vibrancy. Utilizing transparent painting techniques like glazing and layering can help create a realistic skin tone. With this information, you will have everything you need to create an acrylic painting that has beautiful and realistic skin tones.
Painting Techniques For Skin Tone Painting
Learn the basics of painting skin tones in acrylic with these helpful techniques! Watch as experts demonstrate how to create realistic skin texture, mix tones for light and dark skin, add shadows and highlights, and more. Perfect for artists looking to improve their portrait painting skills.
Creating a beautiful skin tone is an essential part of portrait painting with acrylics. Whether it’s a warm porcelain tone or a deep brown, getting the tone right can bring realism to your artwork. In this article, we focus on painting techniques for skin tone painting using acrylics. We’ll take a closer look at the three-step process of creating a base skin tone, layering and blending, and adding highlights and shadows. Let’s dive into each of these steps in detail.
Creating A Base Skin Tone
To begin, mix the primary colors to create a base tone for the skin. For lighter skin tones, use white as the base color and add a touch of red and yellow to create a warm, peach tone. For medium and olive skin tones, mix a base of yellow and red with a touch of blue and white. For darker skin tones, start with a base of burnt umber and add red, yellow, and blue as needed. Once you have a base skin tone, apply it to the canvas with a large brush or a sponge. Make sure to cover the canvas evenly and let it dry completely before moving on to the next step.
Layering And Blending
After the base layer has dried, it’s time to layer and blend other colors to create depth and texture. Start by adding a layer of a lighter shade of your base tone and blend it into the previous layer using a brush or a sponge. Keep layering different shades of skin tones, including pink, brown, and orange, until you get the desired skin tone. To avoid creating hard lines, blend the colors well together using a dry brush or a clean sponge. Make sure to observe the reference image and add shadows under the jawlines, eyes, and other areas where the skin has natural shadows.
Adding Highlights And Shadows
Now that the skin tone has been created, it’s time to add highlights and shadows to create more dimension and realism to the artwork. Use a lighter shade of your base color to highlight the areas where the light would hit the face, such as the forehead, cheekbones, and nose bridge. For shadows, use a darker shade of your base color to create natural shadows under the chin, hairline, and the sides of the nose. Make sure to blend the highlights and shadows well into the base color, so they appear soft and natural.
In conclusion, painting skin tones with acrylics requires patience, technique, and color mixing skills. By creating a base skin tone, layering and blending different shades, and adding highlights and shadows, you can create realistic portraits that capture the beauty of the subject’s skin. So, go ahead, grab your paints, and start experimenting with different skin tones!
Mastering Realistic Skin Tones
Learn the art of painting realistic skin tones with acrylics through various online tutorials and classes. Implement step-by-step instructions to master colour mixing, shading, texturing, and blending techniques to replicate different skin tones accurately.
INTRO: Mastering Realistic Skin Tones
Painting skin in acrylic is challenging, especially when trying to achieve realistic skin tones. However, with some observation and reference analysis, an understanding of skin color variations, and adding texture to the skin, you can master the art of painting skin tones in acrylics. In this blog post, we will explore these techniques in detail with HTML formatted headings and subheadings to make it easy to navigate through the content.
Observation and Reference Analysis
Observation and reference analysis is crucial when painting skin tones in acrylic. You need to understand how light and shadow interact with skin, the color variations of different skin types, etc. To observe these characteristics, study photographs, real-life subjects, and other references. While painting, look for highlights, mid-tones, and shadows, and keep in mind that skin reflects colors from the surroundings, so take your time to analyze and understand these factors.
Understanding Skin Color Variations
Skin colors vary based on factors such as genetics and ethnicity, age, health, and environmental factors. With acrylic paints, you must learn to create a range of skin tones for different shades and skin types. Mix primary colors in varying ratios to get different shades and hues of skin. For warm-toned skin, use peach and coral hues, while for cool-toned skin, use blue and purple hues. Try not to use a single color as they appear flat and unrealistic, and focus on creating a gradient of colors for a realistic look.
Adding Texture to Skin
Adding texture to skin is essential to achieve a realistic look. Skin has tiny pores, wrinkles, blemishes, and other imperfections that create roughness. To create texture in acrylic, use techniques that mimic the bumps and undulations of the skin, such as dry brushing, stippling, and crosshatching. These techniques create the illusion of texture without adding bulk to the painting.
In conclusion, mastering realistic skin tones in acrylic is a combination of observation, understanding skin color variations, and adding texture to the skin. Use the H3 headings and techniques mentioned above to create stunning and vibrant skin tones with acrylics.
Painting Different Skin Types
Learn how to paint different skin types with acrylics by mixing colors and applying basic techniques in realistic portrait painting. Follow various tutorials from artists on YouTube who teach how to create different shades of skin tones for light, dark, and brown skin, along with tips on adding texture and realism to your artwork.
One of the biggest challenges in painting portraits is to represent different skin types. Each skin has unique features, such as tone, texture, and pores, which need a different approach to painting. In acrylic painting, you can mix colors and create a smooth look to match different skin types. In this section, we will discuss the most common skin types that you might encounter while painting portraits.
Painting Light Skin Tone
Light skin tone is the most common type of skin tone that we see in many portraits. To paint light skin tone in acrylic, you need to mix the right color combination that suits your subject’s skin tone. First, create a base color using a mixture of white and yellow paint. Then, add a small amount of red paint to give the skin a hint of pink. Continue to mix small amounts of paint until you get the right skin tone. Remember that light skin tones need more warmth and pink pigments to look more natural.
Painting Dark Skin Tone
Dark skin tone is as equally important to represent as light skin tone in acrylic painting. To paint dark skin tone, you need to mix the right color that appears neither too light nor too dark to match your subject’s skin tone. Begin by mixing various shades of brown, including dark and light ones, with some black and white paint. Keep adding small amounts of each color to balance out the skin tone. It’s important to note that dark skin tones require more brown pigments and less pink or red pigments to look more natural.
Painting Different Ethnicities’ Skin Tones
Ethnicity plays a significant role in determining skin tone, and each ethnicity has unique skin color patterns. To paint different ethnicities’ skin tones, you need to understand their skin characteristics and adjust your palette accordingly. For example, East Asian skin tends to have a yellow undertone, while African skin tends to have more red and brown pigments.
In contrast, South Asian skin has a mixture of warm and cool tones. Additionally, some ethnicities, such as Indigenous and Pacific Islander, have very unique skin tones that require a different approach than usual. Therefore, research and practice are essential while trying to capture different ethnicities’ skin tones.
In conclusion, painting different skin types is a challenge but can also be a fulfilling experience. Remember to take your time, practice, and experiment with various colors and brush strokes. You will surely improve your acrylic painting skills soon.
Common Mistakes To Avoid
When painting skin in acrylic, it is important to avoid common mistakes such as using overused phrases and lengthy sentences. Keeping sentences brief, unique, and in active voice while using a variety of phrases can help maintain the reader’s interest.
Additionally, avoid including a conclusion paragraph and try to pass AI writing detection by writing like a human.
Common Mistakes to Avoid when Painting Skin in Acrylic
Painting skin tones can be a challenging task, especially for beginners. However, by avoiding common mistakes, you can elevate your painting skills and create realistic and impressive skin tone paintings. Here are some common mistakes to avoid when painting skin in acrylic:
Overworking the Paint
Overworking the paint is a common mistake that novice painters often make. Applying too much paint or repeatedly going over an area can result in the formation of visible brushmarks and a muddy appearance. Moreover, overworking the paint can make it challenging to blend the paints to achieve a smooth and realistic skin texture. Instead, use thin and even layers of paint, gradually building up the tones and colors.
Using Wrong Tones or Colors
Using the wrong tones or colors can make your painting look dull and unrealistic. Choosing the appropriate base color and then mixing the right colors can be the cornerstone for creating a realistic skin tone painting. To match the skin tone, you need to observe the subject closely, noting the highlights, shadows, and mid-tones. You will need a mix of reds, blues, yellows, and whites to create the right skin tone. A good tip is to add a tiny bit of complementary color to give a more natural and vibrant look to the skin.
Misjudging Value Contrasts
Misjudging value contrasts is a frequent error when painting skin tones. Value contrast is the difference between the highlights and shadows in the painting. Creating an appropriate value contrast ensures that the face has a three-dimensional and realistic look. To get the contrast correct, avoid making the shadows too dark or the highlights too bright. Gradually build up the layers to get the perfect balance.
In conclusion, painting skin in acrylic can be challenging but avoiding the common mistakes mentioned above can make the task much easier. By observing the right tones, avoiding overworking the paint and misjudging value contrasts, you can create natural and impressive skin tone paintings.
Tips And Tricks For Perfect Skin Tones
Learn how to paint perfect skin tones in acrylic with these helpful tips and tricks. From creating a base color to mixing darker tones, these tutorials provide step-by-step instructions to help you achieve realistic and beautiful skin in your artwork.
If you’re an acrylic artist, painting skin can be a challenge. The skin’s complex texture and range of tones require careful attention. However, with some tips and tricks, you can master the art of painting perfect skin tones. In this blog post, we’ll cover how to mix gels and mediums for texture, using unconventional tools for painting skin, and adding final touches to ensure a realistic effect.
Mixing Gels And Mediums For Texture
Mixing gels and mediums can add dimension and texture to your skin tones. Adding a small amount of modeling paste to your acrylic paint can create a thick, buttery texture that can be used to build up layers of skin. For a smoother texture, try mixing your acrylic paint with a glazing medium. This creates a transparent layer that can be used to add subtle shifts in color tone. Experiment with different types of gels and mediums to find a combination that works best for you.
Using Unconventional Tools For Painting Skin
There are a variety of unconventional tools you can use to paint skin tones. For example, a credit card can be used to create delicate lines and fine texture for skin pores. A toothbrush can be used to create a speckled texture that mimics the look of freckles or age spots. Using unconventional tools can add a unique and interesting touch to your paintings, so don’t be afraid to experiment.
Adding Final Touches To Bring Out Realism
Once you’ve mixed your colors and applied them to your canvas, it’s time to add final touches to bring out the realism of your skin tones. Add highlights to the nose, forehead, and cheeks to bring out the shine of the skin. Layer darker colors around the eyes and mouth to add depth and create a more natural appearance. Finally, use a dry brush to add subtle textures that mimic the slight imperfections in real skin. By paying attention to these small details, you can create a more realistic and engaging painting.
In conclusion, learning how to paint perfect skin tones can take some practice and experimentation, but with the tips and tricks in this blog post, you’ll be able to create more engaging and realistic artwork. Use different mediums and gels to create texture, experiment with unconventional tools, and add final touches to bring out the realism of your painting. Happy painting!

Frequently Asked Questions For How To Paint Skin In Acrylic
How Do You Make Acrylic Paint Look Like Skin?
To make acrylic paint look like skin, mix primary colors together. Warm-toned skin needs peach or coral hues, while cool-toned skin needs mint green or lilac. For a darker skin tone, start with a base color and modify it by mixing in additional colors bit by bit.
Adjust the paint color as necessary by adding light or dark shades. Do not use acrylic paint on skin as it is not safe.
Is It Safe To Paint On Skin With Acrylic?
No, it is not safe to paint on skin with acrylic paints. Acrylics, along with other paints like tempera, oil and spray paint, are not meant to be used on the body and can pose risks to a person’s health.
What Colors Do I Use For Skin Tones?
To mix skin tones in acrylic paint, warm-toned skin requires peach and coral hues, while cool-toned skin looks best in mint green or lilac. Neutral skin tones can wear any shade, from lavender to jade green. Experiment with different shades to find the right tone, and use specialized textured gels or make your own thickening gel to add body to the acrylic paint.
Remember, acrylic paints are not safe for painting directly onto the body.
How Do You Add Body To Acrylic Paint?
To add body to acrylic paint, use specialized thickening or textured gels designed for acrylic paint. Alternatively, make your own thickening gel by boiling water and cornstarch, and mixing the paste into your paint. This will produce a consistent result and give your acrylic paint a thicker consistency.
Conclusion
Learning how to paint skin in acrylic is an important skill for any artist. With the proper color mixing techniques and layering, you can create realistic and unique skin tones for your portraits. From creating a base color to modifying the skin tone and painting the finer details, the process can be both challenging and rewarding.
Remember to mix primary colors to create different shades and experiment with warm and cool hues for different skin tones. With practice and patience, you can create stunning works of art that showcase the beauty of human skin.