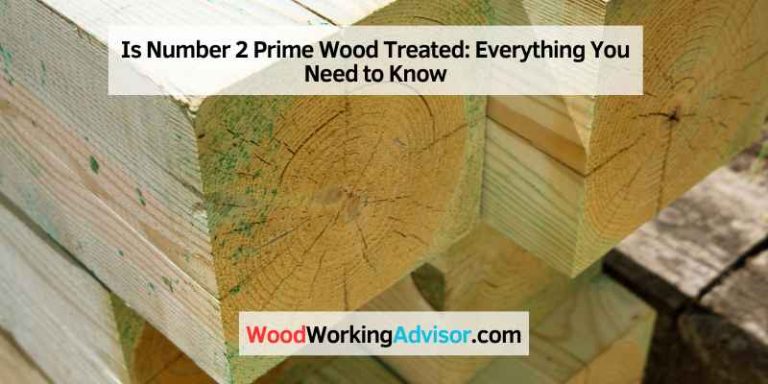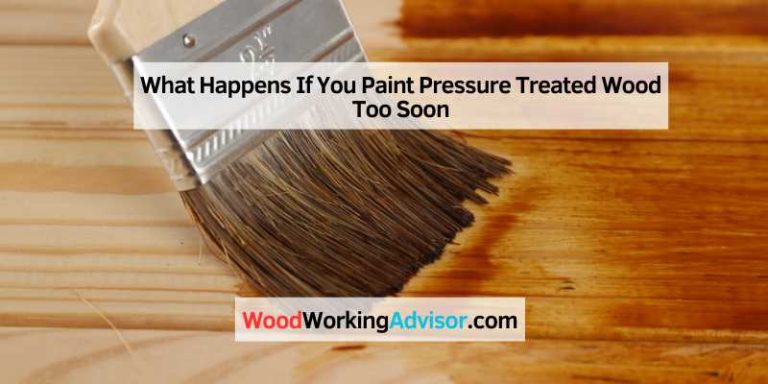
How to Pressure Treat Wood Yourself: DIY Methods, Chemicals & Safety Tips
To pressure treat wood yourself, apply a wood preservative — copper naphthenate for ground-contact outdoor use or borate for above-ground interior applications — by brushing, spraying, or soaking. True industrial pressure treatment requires large pressure vessels at 150+ PSI, but DIY preservative treatment gives significant protection against rot, insects, and moisture. This guide covers the best DIY methods, chemicals to use, safety gear, and step-by-step application instructions.
Quick Answer
Can you pressure treat wood yourself? Yes — brush or soak wood in copper naphthenate (for ground contact) or borate preservative (for above-ground use). Wear gloves, eye protection, and a respirator. Let the wood dry fully before use. True industrial pressure treatment requires specialized equipment, but DIY preservatives provide effective protection against rot and insects.
By using a pressure treatment machine, you can apply the chemicals deep into the wood, ensuring thorough penetration and maximum effectiveness. It is important to follow the necessary safety precautions and guidelines provided by the machine manufacturer and chemical supplier when pressure treating wood.
Understanding Wood Pressure Treatment
Wood pressure treatment is a method commonly used to enhance the durability and longevity of wood products. It involves subjecting the wood to high pressure to allow the preservatives to penetrate deep into the fibers, protecting the wood from decay, insects, and other damaging elements. Understanding the process and its significance can help you make informed decisions when it comes to pressure treating wood yourself.
Significance Of Pressure Treating Wood
Pressure treating wood is essential for various reasons:
- Increased durability: By impregnating preservatives deep into the wood, pressure treatment significantly improves its resistance to rot, decay, and insect infestation.
- Extended lifespan: Pressure-treated wood products last longer than untreated ones, making them ideal for outdoor applications like decks, fences, and landscaping.
- Cost-effective solution: Investing in pressure-treated wood initially may save you money in the long run, as it reduces the need for frequent replacements or repairs.
The Difference Between DIY And Professional Pressure Treatment
While professional pressure treatment services are available, you can also choose to undertake the process yourself. However, it’s important to understand the key differences between the two:
| DIY Pressure Treatment | Professional Pressure Treatment |
|---|---|
| You have control over the process and can customize the treatment according to your specific needs and preferences. | Experts with specialized knowledge and equipment perform the treatment, ensuring precise and consistent results. |
| Requires careful attention to safety measures and proper handling of chemicals. | Professionals follow strict safety protocols and handle the chemicals in a controlled environment. |
| Can be a cost-effective option for smaller projects or individuals who are experienced and knowledgeable in pressure treatment. | Recommended for larger-scale projects or when dealing with high-value wood items where precision and effectiveness are crucial. |
Common Types Of Wood That Benefit From Pressure Treating
While pressure-treated wood is suitable for various applications, certain types of wood particularly benefit from this treatment:
- Softwood: Softwood species such as pine, fir, and cedar are commonly used in outdoor projects. Pressure treating these woods helps protect against moisture damage and fungal decay.
- Hardwood: Hardwood species like oak, teak, and mahogany are naturally durable but can still benefit from additional protection through pressure treatment, enhancing their longevity.
- Timber for ground contact: Wood that comes into direct contact with the ground, such as fence posts or garden retaining walls, should always be pressure treated to prevent deterioration caused by moisture, insects, and soil organisms.
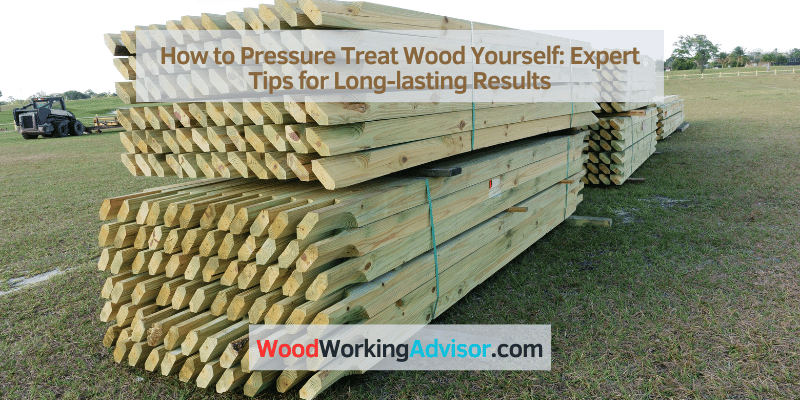
Preparing To Pressure Treat Wood Yourself
Learn how to pressure treat wood yourself with these simple steps. Follow these guidelines to ensure a successful DIY project. From choosing the right materials to applying the treatment, you’ll be able to protect and preserve your wood effectively.
Gathering Necessary Materials And Equipment
Before you dive into pressure treating your wood, it’s essential to gather all the necessary materials and equipment. By being prepared, you’ll make the process smoother and more efficient. Here’s a list of what you’ll need:
| Materials | Equipment |
|---|---|
| – Unfinished wood | – Pressure treatment tank |
| – Wood treatment chemicals | – Safety goggles |
| – Protective gloves | – Respirator mask |
| – Plastic sheeting or tarp | – Paintbrush or roller |
| – Measuring cup or container | – Safety guidelines & instructions |
Safety Precautions Before Starting The Process
One cannot stress the importance of safety precautions enough when it comes to handling chemicals and pressure treatment. Here are some safety measures you must follow before you begin:
- Put on safety goggles to protect your eyes from any potential spills or splashes.
- Wear protective gloves to prevent direct contact between your skin and the wood treatment chemicals.
- Use a respirator mask to avoid inhaling any harmful fumes or particles.
- Set up your workspace in a well-ventilated area or outdoors to ensure proper air circulation.
- Keep a fire extinguisher nearby as a precautionary measure.
Wood Selection And Preparation
Now that you have your materials and have taken the necessary safety precautions, it’s time to select and prepare your wood for pressure treatment. Ensure you follow these steps:
- Choose untreated wood: Pressure treatment is most effective on unfinished wood, so make sure your wood is free from any coatings or finishes.
- Check for moisture content: Ideally, the moisture content of the wood should be below 20% to achieve optimal results. Use a moisture meter to ensure the wood is within the recommended range.
- Cut and trim the wood: If needed, cut the wood into the desired sizes or shapes. Remove any bark, knots, or defects that might hinder the pressure treatment process.
- Ensure proper wood surface: Sand the wood lightly to create a smooth and even surface. This will allow the wood treatment chemicals to penetrate effectively.
By gathering the necessary materials and equipment, taking safety precautions, and carefully selecting and preparing your wood, you are now ready to move on to the next step in pressure treating wood yourself. Keep reading our blog to discover the step-by-step process and invaluable tips for ensuring your wood is properly pressure treated.
DIY Pressure Treating Process Demystified
Discover the secrets of pressure treating wood on your own with this DIY guide. Learn the step-by-step process to create durable and long-lasting wooden structures. Increase the lifespan of your projects with the power of pressure treating.
If you’re a DIY enthusiast or a woodworking enthusiast, the concept of pressure treating wood may sound intimidating at first. However, with the right guidance and knowledge, you can easily learn how to pressure treat wood yourself. In this section, we will demystify the DIY pressure treating process by providing you with a step-by-step guide, explaining how to apply the right pressure treating chemicals, and ensuring even distribution of treatment.
Step-by-step Guide To Pressure Treat Wood Yourself
To pressure treat wood effectively, it’s important to follow a systematic process that ensures maximum efficacy and longevity of the treatment. Here’s a step-by-step guide to help you navigate through the DIY pressure treating process:
1. Begin by selecting the right wood: Start by choosing a suitable type of wood that is receptive to pressure treating. Woods such as pine, cedar, and spruce are commonly used due to their porous nature.
2. Prepare the wood surface: Before applying any pressure treating chemicals, it’s crucial to prepare the wood surface. Remove any dirt, dust, or existing finishes using a mild detergent and a stiff brush. Rinse the wood thoroughly and allow it to dry completely.
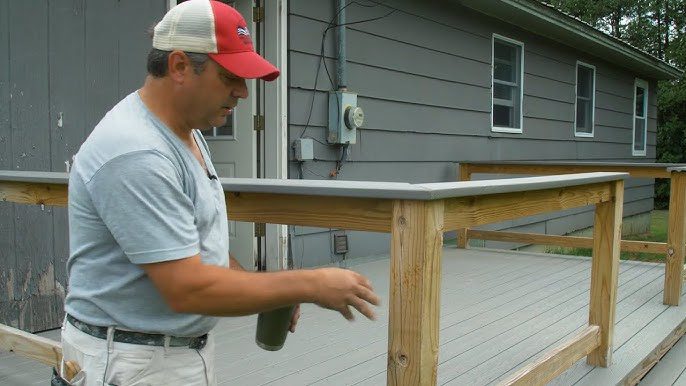
3. Safety first: Remember to prioritize safety throughout the process. Wear protective gloves, safety goggles, and a respiratory mask to avoid any potential hazards associated with the pressure treating chemicals.
4. Apply the right pressure treating chemicals: Next, select the appropriate pressure treating chemicals for your project. Research and choose chemicals that align with your intended use and desired level of protection. Some commonly used chemicals include copper-based compounds, chromated copper arsenate (CCA), and alkaline copper quaternary (ACQ).
5. Follow manufacturer guidelines: Once you have your chosen pressure treating chemicals, carefully follow the manufacturer’s guidelines for proper mixing and application. It’s essential to adhere to these instructions to achieve optimal results.
6. Treat the wood in a pressure-treating tank: Place the prepared wood pieces in a designated pressure-treating tank. Ensure the tank is sealed properly to facilitate the creation of a vacuum and subsequent pressure buildup. This process aids in the absorption of the treatment chemicals deep into the wood fibers.
7. Apply pressure: Now, it’s time to initiate the pressure treating process. Gradually increase the pressure inside the tank according to the manufacturer’s recommendations. The pressure forces the treatment chemicals into the wood, ensuring effective preservation against decay, insects, and other environmental factors.
8. Allow for sufficient treatment time: Once the desired pressure has been reached, maintain it for the specified treatment duration. This allows the wood to fully absorb the treatment chemicals. A typical treatment time can range from a few hours to several days, depending on the specific wood species and intended level of protection.
9. Release pressure and ventilate the tank: After the treatment period, release the pressure inside the tank slowly. Open the tank’s vents to allow any residual chemicals or fumes to dissipate in a well-ventilated area.
10. Allow wood to dry and cure: Once the pressure has been released, carefully remove the treated wood from the tank and allow it to dry thoroughly. This drying period allows the wood to cure and ensures the treatment chemicals properly bond with the wood fibers.
Applying The Right Pressure Treating Chemicals
Choosing the right pressure treating chemicals is crucial for a successful DIY pressure treating process. Here are a few key factors to consider when selecting the appropriate chemicals for your wood treatment project:
– Intended use and exposure: Determine the end-use of the wood and the specific environmental conditions it will be exposed to. This will help you select chemicals that offer adequate protection against decay, fungi, insects, and other potential hazards.
– Wood species compatibility: Different wood species require different types of treatment chemicals due to variations in their natural characteristics. Research the compatibility of your chosen wood species with various pressure treating chemicals to ensure optimal results.
– Safety and environmental considerations: Prioritize the safety of both yourself and the environment. Choose chemicals that align with safety regulations and have minimal negative impact on the ecosystem.
By considering these factors and understanding the properties of different pressure treating chemicals, you can make informed decisions and achieve superior results in your DIY wood treatment projects.
Ensuring Even Distribution Of Treatment
Achieving an even distribution of treatment chemicals is vital to guarantee the effectiveness and longevity of your pressure treating process. Here are a few tips to ensure an even distribution of treatment:
– Thoroughly soak the wood: Before placing the wood in the pressure-treating tank, ensure it is fully submerged in the treatment solution. This helps to eliminate any potential air pockets that could hinder the even absorption of the chemicals.
– Monitor pressure and duration: Maintain consistent pressure throughout the treatment process and adhere to the recommended treatment duration. This allows the treatment chemicals to penetrate evenly into the wood fibers, providing uniform protection.
– Rotate or rearrange the wood: If possible, periodically rotate or rearrange the wood pieces during the treatment process. This helps to ensure that every section of the wood receives equal exposure and absorption of the treatment chemicals.
– Optimize tank capacity: Avoid overcrowding the pressure-treating tank to allow adequate space for the wood pieces. Overcrowding can restrict the circulation of the treatment solution, resulting in uneven distribution.
By following these guidelines and implementing measures to achieve an even distribution of treatment, you can enhance the overall effectiveness of your DIY pressure treating process.
Now that we have demystified the DIY pressure treating process, you can confidently embark on your wood treatment projects. Remember to prioritize safety, select the right pressure treating chemicals, and ensure an even distribution of treatment for optimal results. With the knowledge gained from this guide, you can effectively preserve and protect your wooden creations for years to come.
Editor’s Pick — Best DIY Wood Preservative
Copper Care Copper Naphthenate Wood Preservative (Oxine Copper)
EPA-registered for DIY use on ground-contact and above-ground wood. Protects fence posts, deck timbers, and structural lumber from rot, fungi, and insects. Apply by brushing, spraying, or end-grain soaking. Penetrates deeply when diluted per label instructions. Ideal for fence posts, landscape timbers, and deck framing where industrial pressure treatment isn’t available.
Check Price on Amazon →Expert Tips For Effective Wood Treatment
Discover expert tips for effectively treating wood yourself in this informative article. Learn how to pressure treat wood using simple techniques that yield long-lasting results. Enhance the durability and longevity of your wood projects with these invaluable DIY methods.
Selecting The Best Treatment Solutions For Durability
Choosing the right treatment solution is crucial for effectively pressure treating wood and ensuring its longevity. There are a variety of treatment options available based on your specific needs and the type of wood you are working with.
- Consider using borate-based treatments for termites and other wood-boring insects, as they are highly effective and safe for humans and animals.
- Oil-based treatments such as creosote or pentachlorophenol are excellent for protecting against rot, decay, and insect infestation.
- If you prefer a more environmentally friendly option, water-based treatments like copper azole or ammoniacal copper zinc arsenate (ACZA) can be effective.
Techniques To Enhance Penetration And Effectiveness
Using the correct techniques will help improve the penetration and effectiveness of the wood treatment, ensuring long-lasting protection:
- Preparation: Start by removing any existing finishes, dirt, or debris from the wood surface using a stiff brush or sandpaper. This will allow the treatment solution to penetrate deeply into the wood.
- Multiple coats: Applying multiple coats of the treatment solution will help enhance penetration and provide added protection. Ensure each coat is completely dry before applying the next.
- Soaking: For smaller pieces of wood, you can soak them in the treatment solution to ensure deep penetration.
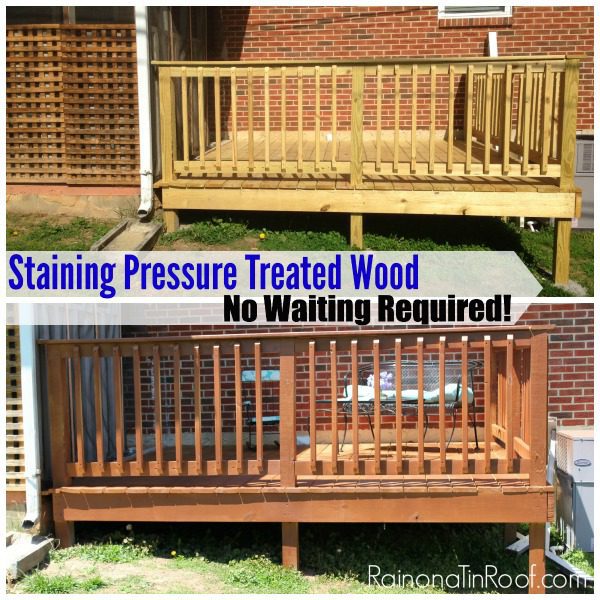
Timing And Environmental Conditions For Optimal Results
The timing and environmental conditions play a critical role in achieving optimal results when pressure treating wood:
- Weather conditions: Choose a day when the weather is dry and sunny, as moisture can interfere with the absorption of the treatment solution.
- Temperature: Ensure the temperature is within the recommended range specified by the treatment product. Extreme temperatures can affect the effectiveness of the treatment.
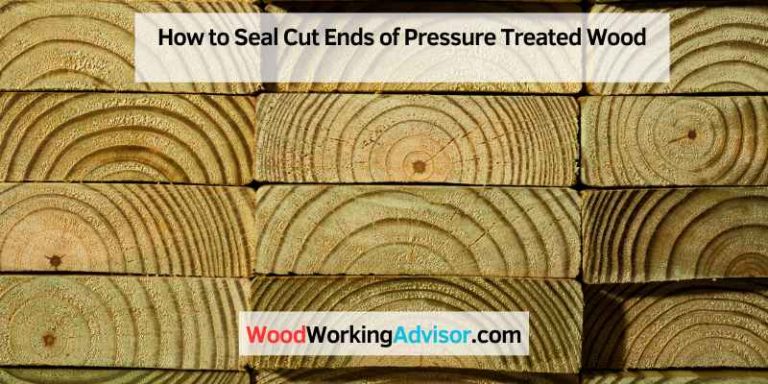
- Application: Apply the treatment solution evenly and thoroughly, covering all surfaces of the wood. Pay special attention to the end grains, as they tend to absorb more solution.
Maintaining Pressure Treated Wood
Proper maintenance is essential to ensure the longevity of your pressure treated wood. Although it naturally has some resistance to rot and decay, regular care will help extend its life and maintain its appearance. In this section, we will provide you with post-treatment wood care advice, tips for regular maintenance, and guidelines on when to retreat your wood.
Post-treatment Wood Care Advice
After pressure treating your wood, it is important to allow it to dry completely before applying any finish or sealant. This will help the treatment chemicals to penetrate deeply into the wood fibers and provide optimal protection. Once the wood is dry, you can follow these post-treatment care tips:
- Inspect the wood for any visible signs of damage or decay. Address any issues promptly to prevent further deterioration.
- Clean the wood using a mild detergent and water. Scrub away any dirt or debris using a soft-bristle brush. Rinse thoroughly and let it dry.
- Apply a high-quality water repellent or sealant to protect the wood from moisture. Make sure to follow the manufacturer’s instructions for the application process.
- Regularly check the sealant or finish on your wood and reapply as needed. This will help maintain its protective properties.
Regular Maintenance To Extend The Life Of Wood
To maximize the lifespan of your pressure treated wood, it is important to perform regular maintenance. Here are some maintenance tips to keep in mind:
- Inspect your wood at least once a year for signs of damage, such as cracks, splintering, or discoloration. Address any issues promptly to prevent further damage.
- Trim shrubs and vegetation around the wood to promote airflow and prevent moisture buildup.
- Regularly clean the wood using a mild detergent and water to remove dirt, mold, and mildew.
- Avoid placing potted plants directly on the wood surface as it can trap moisture and lead to rot.
- Keep the wood away from standing water or areas prone to excessive moisture to prevent decay.
When To Retreat Your Wood
Even with regular maintenance, pressure treated wood might require retreatment over time to sustain its protective properties. Knowing when to retreat your wood is crucial. Here are some indications that it’s time to retreat:
- If you notice signs of decay, such as softening or discoloration, it’s a clear indication that the wood is no longer adequately protected and should be retreated.
- When the wood starts to lose its water repellency, it’s time to consider retreatment. A simple test is sprinkling water on the wood surface. If the water does not bead up and instead absorbs into the wood, it’s time to retreat.
- If you observe a significant increase in the wood’s vulnerability to pests or insects, it’s a sign that the treatment has worn off and retreatment is necessary.
By following these guidelines for post-treatment wood care, regular maintenance, and knowing when to retreat, you can ensure that your pressure treated wood remains durable, attractive, and protected for years to come.
Frequently Asked Questions On How To Pressure Treat Wood Yourself
Can You Treat Lumber Yourself?
Yes, you can treat lumber yourself. Treatment methods include sealing, staining, and applying preservatives to protect against decay and pests. It’s important to follow proper guidelines and use the appropriate products to ensure effective treatment and long-term durability of the lumber.
How Do You Pressure Treat Wood?
Pressure treating wood involves placing the wood in a pressure chamber and saturating it with chemical preservatives. This process helps protect the wood from rot, insects, and decay, extending its lifespan. The pressure forces the preservatives deep into the wood fibers, ensuring effective treatment and durability.
Can I Weather Treat My Own Wood?
Yes, you can weather treat your own wood.
How Deep Does Pressure Treating Go Into Wood?
Pressure treating penetrates the wood’s surface by several millimeters, typically up to 1. 5 inches. The process involves embedding preservatives deep into the wood fibers, protecting it against decay and insect damage. This treatment extends the lifespan of the wood, making it suitable for outdoor use.
What Is The Best DIY Wood Preservative For Outdoor Use?
Copper naphthenate is the best DIY wood preservative for outdoor and ground-contact use. It is EPA-classified for general use, penetrates well when brushed or soaked, and protects against rot, fungi, and insects. For above-ground outdoor wood that stays dry, borate-based preservatives like Tim-bor work well and have lower toxicity. Avoid oil-based preservatives on interior surfaces due to odor.
How Long Does DIY Wood Preservative Treatment Last?
DIY brush-on or soak preservative treatment typically lasts 2–5 years before retreatment is needed, compared to 15–25 years for industrial pressure-treated lumber. Penetration depth for brush application is about 2–3mm versus up to 1.5 inches for industrial treatment. Reapply whenever the wood shows signs of graying, cracking, or water is no longer beading on the surface.
Conclusion
Pressure treating wood is a cost-effective and efficient way to enhance its durability and lifespan. With the right knowledge and equipment, you can undertake this process yourself. By following the steps detailed in this blog post, you can ensure that your wood is protected against rot, decay, and insect damage.
So, why wait? Start pressure treating your wood today and enjoy the benefits of long-lasting, sturdy structures.