How To Safely and Effectively Remove Acrylic Paint From Wood: Expert Tips
To remove acrylic paint from wood, use a mixture of warm water, dish soap, and gentle scrubbing. Painting mistakes are common, but luckily there are simple solutions to remove acrylic paint from wooden surfaces.
By following a few simple steps, you can effectively remove the unsightly paint without damaging the wood. Whether it’s a small spill or larger mistake, this guide will provide the necessary steps to get rid of acrylic paint from wood surfaces.
So, let’s dive in and learn how to remove acrylic paint from wood using common household items and a little bit of elbow grease.
Preparation For Paint Removal
To prepare for paint removal, follow these simple steps to remove acrylic paint from wood. First, gather the necessary materials such as gloves, a scraper, and paint remover. Then, apply the remover to the painted areas and let it sit for a while.
Finally, use the scraper to gently remove the paint, taking care not to damage the wood surface.
Gathering Supplies
Before you start removing acrylic paint from wood, it’s important to gather all the necessary supplies. Having everything on hand will make the process much smoother and efficient.
Here’s a list of supplies you’ll need:
- Protective gloves
- Safety glasses
- Dust mask
- Plastic drop cloths
- Painter’s tape
- Paint scraper
- Putty knife
- Mild soap and water
- Soft bristle brush
- Mineral spirits
- Clean rags or paper towels
Preparing The Work Area
Once you have gathered all the necessary supplies, it’s time to prepare the work area. Taking a few extra minutes to set up the area properly will help protect your surroundings and ensure a safe and efficient paint removal process.
Follow these steps to prepare the work area:
- Start by clearing the space around the wood surface. Remove any furniture, decorations, or other items that could get in the way.
- Lay down plastic drop cloths to protect the floor from any paint chips or debris that may fall during the removal process.
- Secure the drop cloths with painter’s tape to ensure they stay in place.
- Put on protective gloves, safety glasses, and a dust mask to keep yourself safe from any potential hazards.
- If the wood surface is delicate or has intricate details, use painter’s tape to cover any areas that you want to protect from the paint remover.
By following these steps, you will be well-prepared to safely and effectively remove acrylic paint from wood. Having all the supplies within reach and setting up a clean and organized work area will make the process much smoother.
Note: It’s essential to ensure good ventilation in the work area to avoid inhaling any fumes from the paint remover.
Methods For Removing Acrylic Paint From Wood
When it comes to removing acrylic paint from wood, there are several methods you can try. In this article, we will discuss three effective ways to remove acrylic paint from wood: using chemical paint strippers, using heat and scraping, and sanding the paint off. Each method has its own advantages and considerations, so let’s dive right in.
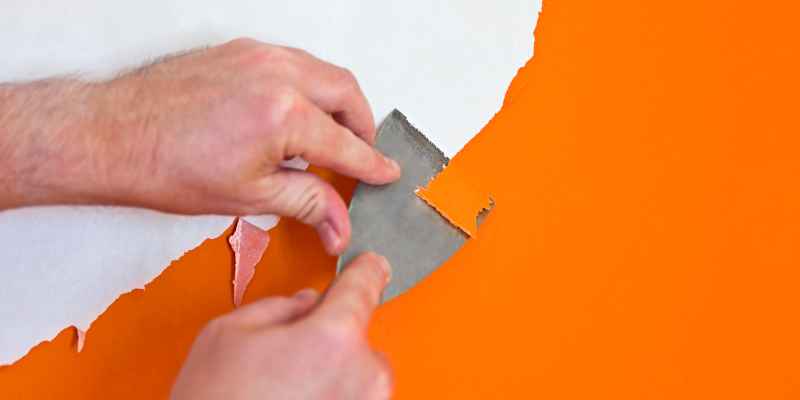
Method 1: Using Chemical Paint Strippers
- Start by gathering the necessary materials for this method:
- Paint stripper gel or liquid
- Protective gloves and eyewear
- Brush or old cloth
- Plastic wrap or garbage bag
- Putty knife or scraper
- Begin by applying a thick layer of paint stripper to the painted surface, ensuring complete coverage.
- Cover the treated surface with plastic wrap or a garbage bag to prevent the stripper from drying out too quickly.
- Allow the paint stripper to sit on the wood for the recommended amount of time specified on the product label.
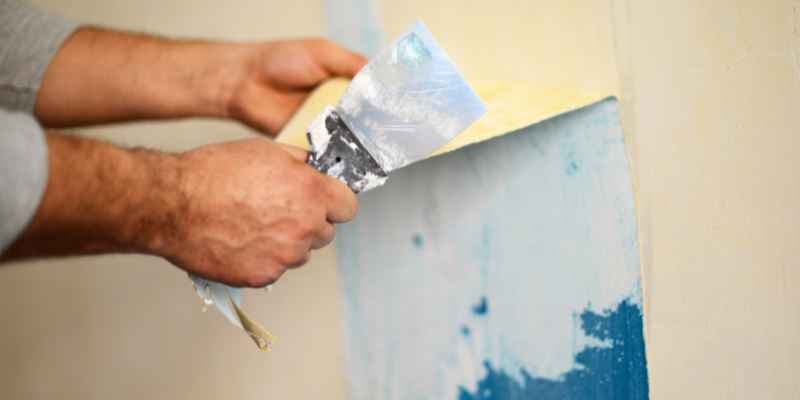
- Once the paint has softened, use a putty knife or scraper to gently remove the loosened paint, being careful not to damage the wood.
- Wipe off any remaining paint stripper residue with a cloth dipped in water and mild soap.
- Inspect the wood to ensure all paint has been successfully removed. If necessary, repeat the process until the wood is clean.
- Finally, rinse the wood surface with clean water to remove any remaining residue and allow it to dry completely.
Method 2: Using Heat And Scraping
- Gather the following materials:
- Heat gun or hairdryer
- Putty knife or scraper
- Protective gloves and eyewear
- Mild soap and water
- Start by heating the painted area using a heat gun or hairdryer set on a low temperature setting. Move the heat source back and forth over the paint to soften it.
- Once the paint has softened, use a putty knife or scraper to gently scrape it off the wood surface.
- Be cautious not to apply too much force, as this may damage the wood.
- Continue the process until all the paint has been removed, periodically cleaning the putty knife or scraper to prevent paint transfer.
- After removing the paint, clean the wood surface with mild soap and water to remove any residue.
- Allow the wood to dry thoroughly before applying any finishes or sealants.
Method 3: Sanding The Paint Off
- Prepare the following materials:
- Sandpaper (medium and fine grit)
- Sanding block or electric sander
- Dust mask and eye protection
- Vacuum or clean cloth
- Choose a medium grit sandpaper and wrap it around a sanding block or attach it to an electric sander.
- Sand the painted surface gently in the direction of the wood grain. Apply consistent pressure to gradually remove the paint.
- Monitor your progress to avoid removing too much wood or creating an uneven surface.
- Switch to a finer grit sandpaper to smooth out any leftover paint residue and restore the wood’s original finish.
- Once all the paint has been sanded off, use a vacuum or clean cloth to remove the dust from the wood surface.
- Inspect the wood to ensure a uniform appearance and consider applying a new finish or sealant to protect the wood.
Using one of these three methods, you can effectively remove acrylic paint from wood surfaces. Choose the method that suits your preferences, available materials, and the condition of the wood. Remember to take necessary safety precautions and protect the surrounding area while working.
Safety Precautions
When removing acrylic paint from wood, it is important to prioritize your safety. By taking a few simple precautions, you can ensure that you complete the task effectively and without any harm to yourself or the environment. Here are some safety measures to keep in mind:
Working In A Well-ventilated Area
Adequate ventilation is crucial when dealing with any type of paint remover or solvent. Acrylic paint can release fumes and volatile organic compounds (VOCs) that may be harmful if inhaled excessively. Therefore, it is highly recommended to work in a well-ventilated area.
Make sure to open windows and doors to promote air circulation. If you’re unable to work outdoors or in a ventilated space, consider using fans or an air purifier to improve the air quality.
Wearing Protective Gear
To protect yourself from potential hazards, it’s important to wear appropriate protective gear. This will help shield you from any accidental contact with the paint remover or any other substances involved in the process.
When handling acrylic paint removers, it is recommended to wear the following protective gear:
| Gloves: | Wear chemical-resistant gloves to safeguard your hands against any skin irritation or potential exposure to the acrylic paint remover. |
| Safety Glasses: | Protect your eyes from splashes or accidental contact with the paint remover by wearing safety glasses or goggles. |
| Face Mask: | Use a mask specifically designed for chemical fume protection to prevent inhalation of any harmful vapors or fumes released during the paint removal process. |
| Apron or Protective Clothing: | Wear an apron or protective clothing to avoid any accidental spills or splashes from coming into direct contact with your skin or clothes. |
By following these safety precautions, you can minimize the risks associated with removing acrylic paint from wood. Remember, your safety should always be a top priority when working with any potentially hazardous substances.
Tips For Effective Paint Removal
Looking for tips on how to remove acrylic paint from wood? Check out these effective methods that will help you strip away the paint and restore the natural beauty of your wood surface.
Removing acrylic paint from wood can be a challenging task, but with the right techniques, you can bring back the natural beauty of your wooden surfaces. In this article, we will discuss some effective tips to help you remove acrylic paint from wood successfully. By following these guidelines, you can ensure a clean and damage-free paint removal process.
Testing A Small Area First
Before diving into the paint removal process, it’s crucial to test a small, inconspicuous area of the wood. This will help you determine the compatibility of the paint remover or heat method with your specific wooden surface. To perform the test, apply a small amount of the paint remover or heat on an inconspicuous area and observe any adverse effects on the wood. If there are no negative reactions, you can proceed with confidence.
Applying The Remover Or Heat In Thin Layers
When removing acrylic paint from wood, it’s important to apply the remover or heat in thin layers. This ensures that the paint is effectively penetrated without causing excessive damage to the wood. Using a brush or a cloth, apply a thin coat of the paint remover or heat onto the painted area. Allow it to sit for the recommended amount of time as mentioned in the product instructions. This will allow the paint to soften and make the removal process easier.
Using The Right Tools
Using the right tools is crucial when it comes to removing acrylic paint from wood. Tools such as plastic scrapers, soft-bristled brushes, and sandpaper with a low grit can help in effectively removing the paint without damaging the wood. Plastic scrapers are gentle enough to avoid scratches on the wood surface, while soft-bristled brushes help in removing any loose paint particles. Sandpaper with a low grit can be used to gently sand away any remaining paint residue.
In Conclusion
Successfully removing acrylic paint from wood requires patience, proper technique, and the right tools. By testing a small area first, applying the remover or heat in thin layers, and using the right tools, you can ensure a smooth and efficient paint removal process. Remember to follow all safety precautions provided by the manufacturer and always wear protective gear when working with paint removers or heat methods. So, roll up your sleeves and say goodbye to unwanted acrylic paint on your wood surfaces!
Post-removal Cleaning And Finishing
Once you have successfully removed the acrylic paint from your wood surface, it is important to carry out post-removal cleaning and finishing steps to ensure the wood is restored to its original condition and protected from further damage. Cleaning the wood surface thoroughly and applying a finishing product will help maintain its appearance and longevity.
Cleaning The Wood Surface
Start by cleaning the wood surface using a mild soap or detergent and warm water. Gently scrub the area using a soft-bristle brush or sponge to remove any remaining traces of paint or residue. Rinse the surface with clean water and pat it dry using a soft cloth or towel.
If there are stubborn paint stains left, you can try using denatured alcohol or acetone on a clean cloth or cotton ball to spot-treat the affected areas. Remember to test these solvents on a small, inconspicuous area first to ensure they don’t damage the wood’s finish.
Applying A Finishing Product
After the wood surface is thoroughly cleaned and dry, it is essential to apply a finishing product to protect the wood and enhance its appearance. The type of finishing product you choose will depend on the type of wood and the desired finish.
Here are a few options for finishing products:
- Varnish: Varnish provides a durable and glossy finish. It is suitable for protecting the wood from moisture, scratches, and UV damage. Apply the varnish evenly using a brush or applicator, following the manufacturer’s instructions for proper drying and curing times.
- Polyurethane: Polyurethane is a popular choice for finishing wood as it offers excellent protection and a clear, shiny finish. Apply the polyurethane using a brush, working with the wood’s grain. Allow it to dry and lightly sand between coats for a smoother finish.
- Shellac: Shellac provides a natural and warm finish to wood surfaces. It is easy to apply and dries quickly. Use a brush or pad to apply thin coats of shellac, allowing each coat to dry before applying the next.
Whichever finishing product you choose, make sure to apply it in a well-ventilated area and follow the recommended application and drying instructions. Multiple coats may be necessary to achieve the desired finish and level of protection.
By following these post-removal cleaning and finishing steps, your wood surface will not only be free from acrylic paint but also well-maintained and ready to showcase its natural beauty once again.
Conclusion
Acrylic paint stains on wood can be a headache, but with these simple and effective methods, you can easily remove them. Whether it’s using household ingredients like vinegar or specialized paint removers, the key is to act quickly and take the right approach.
Remember to test the method on a small, inconspicuous area before applying it to the entire surface. By following these instructions, you’ll be able to restore your wood to its original beauty in no time. Bid farewell to acrylic paint stains and enjoy your pristine wood furnishings once again.