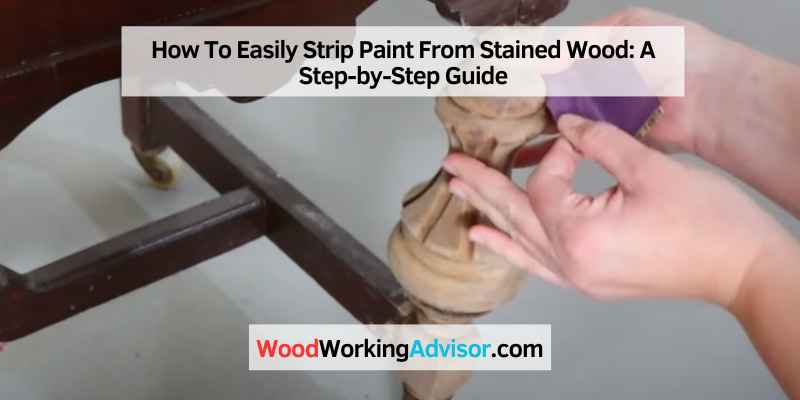
How To Easily Strip Paint From Stained Wood: A Step-by-Step Guide
To remove paint from stained wood, use a combination of sanding and chemical strippers. If you have a piece of stained wood that has been marred by paint stains, it can be a frustrating problem to tackle.
However, with the right tools and techniques, it is possible to remove the paint and restore the natural beauty of the wood. We will discuss a step-by-step process for removing paint from stained wood, including the use of sanding and chemical strippers.
By following these instructions, you can effectively remove the paint and preserve the integrity of the stained wood surface. So let’s get started and learn how to remove paint from stained wood.
Choosing The Right Supplies
With the right supplies, removing paint from stained wood can be a breeze. Follow these tips for a successful paint removal process.
Selecting The Appropriate Paint Stripper
Choosing the right supplies is crucial when it comes to removing paint from stained wood. When selecting a paint stripper, it’s important to consider the type of paint and the condition of the stained wood. Using the wrong paint stripper can damage the wood, so it’s essential to choose one that is safe and effective.
First and foremost, consider whether the painted wood is indoor or outdoor. For indoor surfaces, a less harsh paint stripper is usually sufficient. Look for a paint stripper that is specifically designed for indoor use, as it will be formulated to be less toxic and have a milder odor.
If you’re working with outdoor surfaces, you may need a more heavy-duty paint stripper to effectively remove the paint. Look for a paint stripper that is formulated to withstand outdoor conditions, as it will be better equipped to tackle multiple layers of paint and tougher surfaces.
Beyond considering the location of the stained wood, it’s also important to consider the type of paint that needs to be removed. Some paint strippers are better suited for removing latex paint, while others are designed specifically for removing oil-based paint. Take note of the type of paint you are dealing with, as this will help you select the appropriate paint stripper.
Gathering The Necessary Tools
Once you’ve selected the right paint stripper, it’s time to gather the necessary tools to effectively remove the paint from the stained wood. Having the right tools ensures a smoother and more successful paint removal process.
First, start by protecting yourself. Remember to wear protective gloves, safety glasses, and a face mask to safeguard against any potential harmful chemicals and fumes.
Next, gather a few basic tools to aid in the paint removal process. Here’s a list of essential tools you’ll need:
- Scraper or putty knife: These tools come in handy for gently scraping off the loosened paint after applying the paint stripper. Choose one with a sharp edge but be careful not to scrape too hard, as it can damage the stained wood.
- Wire brush: A wire brush will help you remove any remaining stubborn paint or residue from the wood’s surface. Use it in conjunction with the scraper or putty knife to achieve a smooth and paint-free finish.
- Clean cloth or sponge: After scraping and brushing off the paint, it’s essential to clean the wood’s surface thoroughly. Use a clean cloth or sponge and water to remove any leftover paint stripper, residue, and other debris.
- Paint thinner or mineral spirits: In some cases, the stain may be affected by the paint stripper. If this happens, you can use paint thinner or mineral spirits to remove any discoloration caused by the paint stripper. Always test a small, inconspicuous area before applying to the entire surface.
By selecting the appropriate paint stripper and gathering the necessary tools, you’ll be well-prepared to tackle the task of removing paint from stained wood. Remember to always follow the instructions provided by the manufacturer for the best and safest results.
Preparing The Work Area
Prepping the work area is crucial when removing paint from stained wood. Follow these steps to ensure a clean and safe environment for stripping and refinishing.
Before you begin the process of removing paint from stained wood, it is important to properly prepare your work area. This will not only make the task easier but also help protect furniture and the floor from potential damage. Follow these steps to ensure a smooth and hassle-free paint removal process.
Clearing The Room Of Furniture And Obstacles
To create a spacious and safe work environment, start by removing all furniture and objects that might obstruct your movements. A clutter-free space will provide you with ample room to maneuver and work efficiently. Store the furniture in another room or cover it with a drop cloth to protect it from any accidental spills or splatters.
Laying Down Protective Covering On The Floor
Next, it’s crucial to protect the floor from any potential damage caused by chemical strippers or scraping tools. Lay down a sturdy drop cloth or a tarpaulin to create a protective barrier. Ensure that the entire area you will be working on is covered to avoid accidental paint drips or spills that could stain or damage the flooring.
If you don’t have a drop cloth or tarpaulin, an alternative option is to use thick and durable plastic sheeting. Secure the sheeting with painter’s tape or heavy objects, such as bricks or paint cans, at the corners and along the edges to prevent it from shifting during the paint removal process. This will provide an additional layer of protection for your floor.
Applying The Paint Stripper
To remove paint from stained wood, apply the paint stripper evenly to the surface, allowing it to sit for the recommended time. Then, use a scraper or brush to gently remove the softened paint, revealing the beautiful wood beneath.
Following Safety Precautions
Before you start removing the paint from stained wood, it’s essential to prioritize safety. By taking the necessary precautions, you can ensure a smooth and accident-free process.
- Protective Gear: Put on safety goggles, gloves, and a respiratory mask to shield yourself from any potential harm caused by the paint stripper.
- Ventilation: Work in a well-ventilated area or open all nearby windows and doors to maintain proper airflow.
- Cover Surrounding Areas: Use plastic sheets or drop cloths to cover the floor, furniture, and other items near the stained wood to prevent accidental damage.
Applying The Stripper To The Stained Wood
Now that you’ve taken the necessary safety precautions, it’s time to apply the paint stripper to the stained wood. Follow these steps to achieve the best results:
- Read Instructions: Carefully read and understand the instructions provided with the paint stripper you’re using. Different products may have slight variations in application techniques.
- Test in a Small Area: Before applying the stripper to the entire surface, perform a small patch test on an inconspicuous area of the stained wood. This will help you determine the effectiveness of the stripper and ensure it won’t cause any damage.
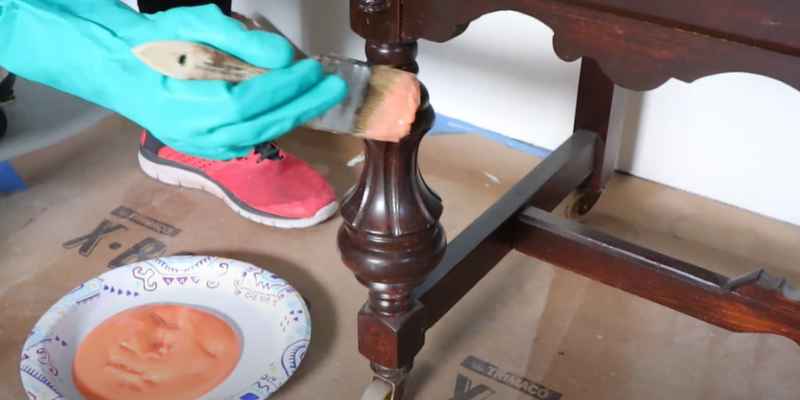
- Apply the Stripper: Using a paintbrush or a paint roller, generously apply the paint stripper onto the stained wood, ensuring even coverage across the entire surface. Make sure to follow the manufacturer’s recommended application thickness.
Allowing The Stripper To Work Its Magic
After applying the paint stripper, it’s important to give it enough time to work its magic and loosen the paint from the stained wood. Follow these guidelines for optimal results:
- Wait: Allow the paint stripper to sit on the stained wood for the recommended duration mentioned in the product instructions. This typically ranges from 15 minutes to an hour, depending on the paint thickness and type.
- Avoid Drying Out: To prevent the stripper from drying out and becoming less effective, cover the surface with plastic wrap or a damp cloth while it’s working.
- Check Progress: After the recommended time has passed, check if the paint has started to bubble or lift. If not, you may need to apply a second coat of the paint stripper and repeat the waiting process.
Following these steps will make the paint removal from stained wood much easier and safer. Remember to always prioritize safety and read the instructions provided by the paint stripper manufacturer. Now, you’re ready to move on to the next step in restoring the natural beauty of your stained wood.
Removing The Paint
To remove paint from stained wood, follow these simple steps: Start by sanding the surface to remove any loose paint, then apply a paint stripper and let it sit for a few minutes. Use a scraper or sandpaper to gently remove the paint, and finish by sanding and staining the wood for a clean and refreshed look.
Using A Scraper Or Brush To Remove The Softened Paint
When it comes to removing paint from stained wood, using a scraper or brush is an effective method. This technique allows you to physically remove the softened paint from the wood surface. To begin, you will first need to soften the paint by applying a heat gun or a chemical paint stripper, following the product instructions carefully. Once the paint has softened, take a scraper or brush and gently scrape away the loosened paint from the surface.
Working In Small Sections
It is essential to work in small sections when removing paint from stained wood. By dividing the surface into manageable portions, you can focus your efforts and ensure a thorough removal. Start by selecting a small area and apply the heat gun or chemical stripper accordingly, softening the paint. Once softened, proceed to scrape away the loosened paint using your scraper or brush. Working in small sections allows for better control and prevents any accidental damage to the wood surface.
Repeating The Process If Necessary
If you find that there are still traces of paint remaining on the stained wood after the initial removal, do not worry. Simply repeat the process until the wood surface is completely free of paint. Apply the heat gun or chemical stripper to the remaining paint, allowing it to soften. Then, using your scraper or brush, carefully remove the remaining paint. Repeat this process as needed until the stained wood is restored to its original paint-free state.
Removing paint from stained wood requires patience and attention to detail. By following these steps and using a scraper or brush to remove the softened paint, working in small sections, and repeating the process if necessary, you can ensure a successful paint removal process. Remember to be gentle when scraping or brushing to avoid damaging the wood surface, and always follow the safety instructions provided by the product manufacturers. With a little effort, you can restore the natural beauty of your stained wood.
Cleaning Up And Finishing Touches
Once you have successfully removed the paint from your stained wood, it’s time to clean up the surface and add a finishing touch to restore its beauty. Follow these steps to ensure a smooth and polished result.
Cleaning The Stripped Wood
To start, you’ll want to clean the wood thoroughly to remove any leftover paint residue or debris. This will help prepare the surface for the next steps. Here’s what you need to do:
- Begin by wiping down the wood with a damp cloth. Make sure the cloth is clean and free from any abrasive materials that could scratch the surface.
- For stubborn paint spots or stains, you can use a paint stripper or an appropriate solvent. Apply it to a clean cloth and gently rub the affected area until the paint starts to loosen.
- Once the paint is removed, wipe away any excess solvent or paint stripper with a new, damp cloth.
- Allow the wood to dry completely before moving on to the next step.
Sanding The Surface
Next, you’ll want to sand the surface of the wood to create a smooth and even finish. Sanding will help remove any remaining traces of paint and prepare the wood for the new finish. Here’s how you can do it:
- Start by selecting a fine-grit sandpaper, such as 120 or 150 grit, to avoid excessive damage to the wood.
- Using a sanding block or sandpaper wrapped around a wood block, sand the surface of the wood in the direction of the grain. This will help prevent any scratches or marks.
- Continue sanding until you have removed all the paint remnants and achieved a smooth and consistent finish.
- Once you’re satisfied with the result, wipe away the sanding dust with a clean, damp cloth.
Applying A New Finish
Now that the wood is clean and sanded, it’s time to apply a new finish to protect and enhance the natural beauty of the stained wood. Follow these steps:
- Choose an appropriate finish for your specific type of wood. This could be a wood stain, varnish, or polyurethane. Refer to the manufacturer’s instructions for the best application method.
- Using a clean brush, apply the finish to the wood surface, working with the grain. Apply thin, even coats to avoid drips or uneven coverage.
- Allow each coat to dry completely before applying the next one. This will typically take a few hours, depending on the type of finish you’re using.
- Once you have achieved the desired depth and shine, let the final coat dry for the recommended time before using or moving the wood.
By following these steps and giving your stained wood the attention it deserves, you can remove paint and restore its natural beauty. Remember to handle the materials with care and work in a well-ventilated area for optimal results.
Conclusion
To summarize, removing paint from stained wood can be a delicate process, but with the right technique and tools, you can restore its natural beauty. Whether you choose to use chemical strippers or heat guns, be sure to take caution and follow the necessary safety steps.
Remember, patience is key when dealing with stubborn paint layers. By following the steps outlined in this blog post, your stained wood will soon look as good as new. Happy renovating!