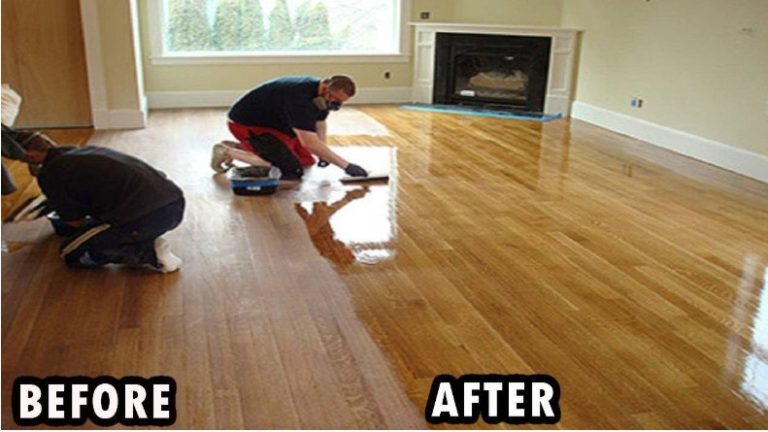
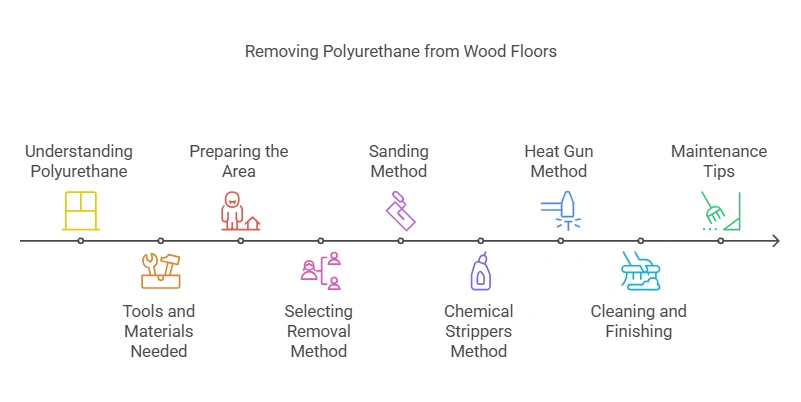
Remove Polyurethane From Wood Floors: 3 Methods Compared
Sanding is the best way to remove polyurethane from a wood floor when refinishing the whole room; a citrus-based chemical stripper works better for detail work or if you want to skip the dust. EPA banned faster-acting methylene chloride strippers for consumer sale in 2019 over fatal fume risk, so modern citrus versions need longer dwell time. This guide compares all three methods, with grit progression, safety gear, and real product picks.
Understanding Polyurethane Coating On Wood Floors
Polyurethane is a clear, plastic-based film finish that forms a hard, glossy layer on top of hardwood — unlike an oil or wax finish, which soaks into the wood grain instead of sitting on the surface. Because it sits on top, full removal always means breaking that film loose with an abrasive, a solvent, or heat — you cannot simply remove polyurethane by cleaning it away.
Understanding Polyurethane Coating On Wood Floors
Polyurethane is a popular coating used on wood floors due to its durability and protective qualities. In this section, we will explore what polyurethane is, why it is used on wood floors, and the pros and cons of having polyurethane coating on your floors.
What Is Polyurethane And Why Is It Used On Wood Floors?
- Polyurethane is a synthetic material that is known for its strength and resistance to wear and tear. It is commonly used as a protective coating on wood floors because of its ability to create a long-lasting barrier against elements such as moisture, stains, and scratches.
Pros And Cons Of Having Polyurethane Coating On Wood Floors:
- Durability: Polyurethane coating provides excellent protection to wood floors and increases their lifespan.
- Easy maintenance: It is relatively easy to clean and maintain wood floors with polyurethane coating.
- Versatility: Polyurethane comes in various finishes, including glossy, semi-gloss, and satin, allowing homeowners to choose the look that best suits their preferences.
- Resistance to wear and tear: Polyurethane coating prevents damage from everyday use, including foot traffic and furniture movement.
- Stain resistance: Polyurethane creates a barrier that resists staining from liquid spills and accidental mishaps.
- UV protection: Some polyurethane coatings offer protection against UV rays, helping to prevent discoloration and fading of the wood.
- On the downside, polyurethane coating is not invincible and has a few drawbacks to consider:
- Vulnerability to scratches: While polyurethane provides good protection against scratches, it can still be damaged by sharp objects or heavy furniture.
- Time-consuming application and drying: Applying polyurethane coating to wood floors requires meticulous preparation, multiple coats, and ample drying time.
- Chemical odor: During the application process, polyurethane emits a strong chemical odor that may linger for a few days until fully cured.
Significance Of Removing Polyurethane From Wood Floors:
Removing polyurethane from wood floors serves several purposes, including:
- Restoration: Over time, polyurethane can become worn or discolored, detracting from the beauty of your wood floors. Removing the old coating allows for a fresh application, rejuvenating the appearance of the wood.
- Repair: If your wood floors have been damaged with deep scratches or stains, removing the polyurethane allows for a more thorough repair process.
- Change in finish: If you desire a different finish, such as switching from a glossy to a matte look, removing the existing polyurethane coating is necessary to achieve the desired result.
- Improving safety: Old polyurethane can become slippery, especially when wet. Removing it can help create a safer environment by reducing the risk of accidents.
By understanding the basics of polyurethane coating on wood floors, its pros and cons, and why removing it is significant, you’ll be better equipped to maintain and enhance the beauty of your wood floors.
Tools And Materials Needed For Removing Polyurethane
To successfully remove polyurethane from wood floors, you’ll need a few essential tools and materials. These include a scraper or putty knife, sandpaper, paint stripper, gloves, goggles, and a well-ventilated area.
Necessary Tools For The Removal Process:
- Putty knife: This tool is essential for gently scraping away the polyurethane layer from the wood floor.
- Paint scraper: Another handy tool for removing the top layer of polyurethane from your floors.
- Fine-grit sandpaper: You’ll need sandpaper to smooth out any remaining residue and prepare the wood for refinishing.
- Sanding block: A sanding block will help you exert even pressure while sanding.
- Dust mask: Protect yourself from inhaling harmful particles by wearing a dust mask.
- Eye protection: Safeguard your eyes from any stray particles or debris with protective goggles.
- Rubber gloves: Use rubber gloves to safeguard your hands while working with chemical solvents.
- Plastic sheeting: Lay down plastic sheeting to protect your surrounding areas from any potential damage or spills.
Choosing The Right Materials For The Task:
- Polyurethane stripper: Select a high-quality polyurethane stripper that is specifically designed for wood surfaces.
- Paint thinner: You’ll need paint thinner to dilute the polyurethane stripper and make it easier to remove.
- Clean rags or cotton cloths: Have clean rags or cotton cloths on hand to wipe away excess stripper and polyurethane.
- Mineral spirits: Use mineral spirits as a final step to clean off any remaining residue from the wood floor.
- Bucket: You’ll need a bucket to mix the paint thinner and polyurethane stripper solution.
Safety Equipment Required For Protection During The Process:
- Ventilation: Ensure that the area where you’re working is well-ventilated to dissipate any fumes or odors.
- Respirator mask: A respirator mask provides extra protection from potentially harmful chemical fumes.
- Protective clothing: Wear long sleeves and long pants to protect your skin from any splashes or spills.
- Closed-toe shoes: Protect your feet by wearing closed-toe shoes while removing polyurethane from your wood floors.
Remember, it’s crucial to follow all safety precautions and manufacturer instructions when working with any chemicals or power tools. Stay safe and take your time with the process to achieve the best results.
Best Polyurethane Removal Tools Pick
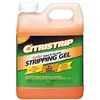
Citristrip Paint and Varnish Stripping Gel, 1-Quart
A citrus-based gel stripper — the type of formula that replaced methylene chloride strippers after the 2019 consumer ban.
- Best for: Detail work, edges, and homeowners who want to avoid sanding dust
- Why we picked it: Low-odor gel clings to horizontal surfaces without dripping, and works on both oil- and water-based polyurethane
- Main drawback: Needs a longer dwell time than older banned formulas, especially on thick or multiple coats
Compare more polyurethane removal tools
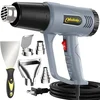 Option 1 Dual-Temperature Heat Gun with Scraper
|
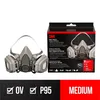 Option 2 3M Professional Half Mask Organic Vapor Respirator
|
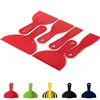 Option 3 Flexible Plastic Putty Knife Set, 6-Pack
|
As an Amazon Associate we earn from qualifying purchases.
Note: a drum sander for whole-room sanding is almost always rented, not bought — most home centers and tool-rental counters carry one by the day.
Preparing The Area For Polyurethane Removal
Preparing the area for polyurethane removal is an essential step in restoring the natural beauty of wood floors. By meticulously following these guidelines, you can effectively remove the polyurethane without damaging the underlying wood surface.
Clearing The Room And Ensuring Proper Ventilation:
- Before starting the polyurethane removal process, it’s crucial to clear the room of any furniture, rugs, or other items that could obstruct your movement or get damaged in the process.
- Remove any unnecessary clutter and create a clear working space.
- Open windows and doors to ensure proper ventilation. This will allow fresh air to circulate and prevent the buildup of fumes from the chemicals used.
Protecting Surrounding Surfaces And Furniture From Damage:
- Cover nearby surfaces, such as walls and baseboards, with plastic sheets or drop cloths to protect them from accidental splatters or spills during the polyurethane removal.
- If there are any valuable or delicate items in the room, move them to a different location temporarily to keep them safe from potential damage.
- Consider using painter’s tape to secure the protective coverings in place and prevent any movement or accidental removal during the process.
Handling And Disposing Of Chemicals Responsibly:
- When removing polyurethane, you may need to use chemical strippers or solvents. It’s crucial to handle these substances with care and follow the instructions provided.
- Wear protective gloves, goggles, and a respirator mask to shield yourself from potential harm.
- Make sure to work in a well-ventilated area to minimize exposure to chemical fumes.
- Avoid pouring chemical substances down the drain or disposing of them in regular trash. Follow the local regulations for proper disposal, and if necessary, consult with your local waste management facility for guidance.
By taking these necessary precautions and preparing the area properly, you can ensure a safe and efficient polyurethane removal process. Remember to prioritize safety and to follow all instructions carefully to achieve the desired results without any mishaps or damage to your floors or surroundings.
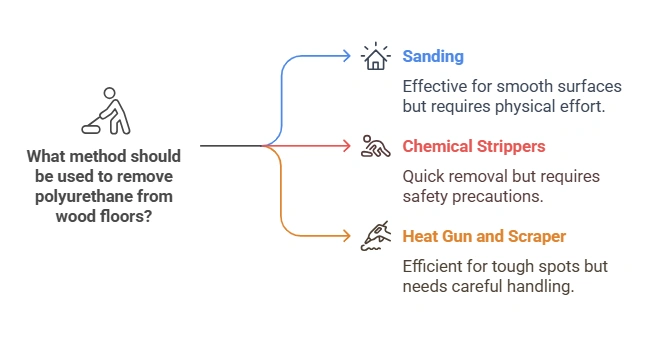
Selecting The Best Method For Polyurethane Removal
When removing polyurethane from wood floors, it is important to select the best method for an effective outcome. By considering factors such as the type of wood and the thickness of the polyurethane coating, you can successfully strip away the old finish and prepare the surface for refinishing.
Polyurethane is a popular finish for wood floors due to its durability and protective properties. However, there may come a time when you need to remove the polyurethane coating to restore or refinish your wood floors. In this section, we compare all three methods side by side. If you’d rather skip sanding altogether, our dedicated guide on how to strip a hardwood floor without sanding covers the chemical and heat-only approach in more depth.
Comparing Different Methods For Removing Polyurethane:
- Chemical strippers: Chemical strippers are often used to remove polyurethane from wood floors. These products contain strong solvents that break down the polyurethane coating, allowing easy removal. However, they can be harsh and potentially harmful if not used with caution.
- Sanding: Sanding is another commonly used method for removing polyurethane. It involves using sandpaper or a floor sander to gradually wear away the polyurethane coating. Sanding is effective but can be time-consuming, especially for larger areas.
- Heat gun: Using a heat gun is a method that involves applying heat to the polyurethane to soften it, making it easier to scrape off. This method requires caution and precision to avoid damaging the wood.
Analyzing The Pros And Cons Of Each Method:
| Method | Time (whole room) | Mess | Skill Level | Best For |
|---|---|---|---|---|
| Sanding | Longest — a full day or more with a rented drum sander plus edging | Heavy dust, needs full room containment | Moderate — practice on scrap first | Whole-room refinishing, floors with dents or deep scratches |
| Chemical Stripper | Slower per coat — 15 min to 1 hour dwell time, often 2+ coats | Minimal dust, but fumes and wet residue | Low — mainly patience and ventilation | Detail work, edges, dust-sensitive homes |
| Heat Gun | Slowest for large areas — section by section | No dust, but scorch risk if held too long | Higher — easy to scorch wood if rushed | Small areas, stubborn spots missed by the first pass |
Determining The Most Suitable Method Based On The Condition Of The Wood Floors:
- If the polyurethane coating is thick and stubborn, chemical strippers may be the best option due to their effective solvent action.
- For floors with minimal imperfections or small areas, a heat gun could provide the necessary precision and control.
- Sanding is a versatile method that works well for larger areas or when the wood itself requires refinishing.
When selecting the best method for removing polyurethane from wood floors, consider the condition of your floors and the level of precision required. Always follow safety guidelines and precautions when using any of these methods.

Method 1: Sanding The Polyurethane Off
To remove polyurethane from wood floors, one effective method is sanding off the coating. This involves using sandpaper to gradually remove the polyurethane until the desired level of bare wood is achieved.
Steps For Sanding The Polyurethane Coating
To effectively remove polyurethane from wood floors, sanding is often the most reliable method. Here are the steps to follow for successful sanding:
- Begin by preparing the area: Before starting the sanding process, make sure the room is well-ventilated to prevent the inhalation of dust particles. Remove any furniture, rugs, or objects that may obstruct your work.
- Choose the right sander: Select a belt sander or a random orbital sander, depending on the size of the floor and the level of polyurethane you wish to remove. Renting the appropriate sander from a hardware store is advisable for larger projects.
- Wear protective equipment: Protect yourself by wearing safety goggles, a dust mask, and earplugs. This will safeguard your eyes, lungs, and ears from potential harm during the sanding process.
- Start with coarse sandpaper: Begin sanding using a coarse-grit sandpaper, such as 40 or 60 grit. This will effectively remove the polyurethane coating from the wood surface.
- Sand in the direction of the wood grain: Always sand in the same direction as the wood grain to achieve an even and smooth result. This will help prevent any scratches or unevenness on the floor.
- Gradually switch to finer grit sandpaper: As you progress, switch to finer grit sandpaper, such as 80 or 100 grit. This will help remove any remaining traces of polyurethane and create a smoother finish.
- Use hand sanding for corners and edges: For areas that the sander cannot reach, use a sanding block or sandpaper to carefully sand the corners and edges of the wood floor.
- Clean the floor thoroughly: Once you’ve finished sanding, use a vacuum cleaner or a damp cloth to remove all dust and debris. This will ensure a clean surface for applying a new finish.
“Jumping straight to 100-grit on a floor with three or four old coats of polyurethane is the most common mistake I see. The coarse 40-60 grit pass has to fully cut through the finish first — otherwise you’re just polishing old poly into the wood instead of removing it. Run the coarse grit until the floor looks matte and dust-dry everywhere, then move up.”
Choosing The Right Sandpaper Grit For Effective Removal
The success of your polyurethane removal largely depends on using the appropriate sandpaper grit. Here are some considerations when choosing the right sandpaper:
- Coarse grit sandpaper (40-60 grit): Ideal for initial removal of polyurethane coating or thick layers.
- Medium grit sandpaper (80-100 grit): Suitable for smoothing the wood surface and removing any remaining traces of polyurethane.
- Fine grit sandpaper (120-150 grit): Used for achieving a smooth finish and preparing the wood for refinishing.
- Extra fine grit sandpaper (180-220 grit): Ideal for final sanding, ensuring the wood is ready for a new protective layer.
Tips For Achieving A Smooth Surface After Sanding
After sanding the polyurethane coating off your wood floors, it’s essential to achieve a smooth surface before applying a new finish. Consider these tips to achieve the desired result:
- Clean the surface thoroughly: Ensure all dust and debris are removed from the floor before proceeding. Use a vacuum cleaner or a tack cloth for best results.
- Fill any gaps or cracks: If you notice any gaps or cracks in the wood, fill them using a wood filler. This will create a seamless appearance and prevent any future issues.
- Test the smoothness by running your hand over the surface: Gently run your hand over the sanded floor to check for any rough patches or inconsistencies. If needed, resand those areas for a smoother finish.
- Progressively use finer grit sandpaper: If the floor still feels rough after initial sanding, continue with progressively finer grit sandpaper until a smooth surface is achieved.
- Remove all sanding dust: Once the surface is smooth, carefully remove all remaining sanding dust using a vacuum cleaner and then wiping it with a damp cloth. This will ensure a clean surface for applying the new finish.
Remember, sanding can be a time-consuming process, but the end result of a beautifully refinished wood floor is worth the effort.
Method 2: Using Chemical Strippers
One effective method for removing polyurethane from wood floors is by using chemical strippers. These strippers dissolve the polyurethane, making it easier to scrape or sand off the surface of the wood.
Overview Of Chemical Strippers For Polyurethane Removal
Chemical strippers are an effective method for removing polyurethane from wood floors. They work by softening the polyurethane, making it easier to scrape off. When choosing a chemical stripper, it’s essential to consider the type of wood and the thickness and condition of the polyurethane coating.
Here are some key points about chemical strippers:
- Chemical strippers typically come in the form of gels or liquids and contain powerful solvents that break down the polyurethane.
- They are designed to penetrate the layers of polyurethane and loosen its bond with the wood.
- Most chemical strippers are suitable for use on both oil-based and water-based polyurethane coatings.
- The effectiveness of the stripper can vary based on the specific brand and formula.
- It’s crucial to choose a stripper that is safe to use on wood floors and does not cause any damage or discoloration.
📊 The EPA banned methylene chloride — the fastest-acting stripper chemical — from all consumer paint and coating removers on November 22, 2019, citing acute lethality risk from its fumes. That is why today’s off-the-shelf strippers are citrus- or soy-based and need a longer dwell time than the old formulas. — Source: U.S. EPA, TSCA Section 6(a) Final Rule, 2019.
Application Process And Safety Precautions
Using chemical strippers to remove polyurethane from wood floors requires careful application and adherence to safety precautions. Here’s an overview of the process and what you need to keep in mind:
- Prepare the area: Start by ensuring proper ventilation in the room and wearing safety goggles and gloves to protect yourself. Open windows or use fans to increase air circulation.
- Test in a small area: Before applying the stripper to the entire floor, it’s important to test it in a small inconspicuous area to ensure compatibility with the wood and to check for any adverse reactions.
- Apply the stripper: Follow the instructions provided by the manufacturer for the specific product you are using. Typically, you’ll need to apply a thick coat of the stripper evenly onto the polyurethane-coated surface. Use a brush or roller to ensure complete coverage.
- Allow the stripper to work: The chemical stripper needs time to soften the polyurethane. Refer to the instructions for the recommended waiting time, which can vary depending on the brand and formula.
- Scrape off the softened polyurethane: Once the polyurethane has loosened, use a scraping tool (such as a putty knife or paint scraper) to gently remove the softened material. Be careful not to damage the wood surface.
- Repeat if necessary: In some cases, multiple applications of the stripper may be required to completely remove the polyurethane. Follow the manufacturer’s instructions for any additional coats or touch-ups.
- Clean the surface: After removing the polyurethane, clean the wood surface thoroughly with a damp cloth to remove any remaining residue or stripper. Allow the floor to dry completely before applying any new finish or sealer.
Remember to always follow the manufacturer’s instructions and take appropriate safety measures when using chemical strippers. Proper ventilation and protective gear are essential to ensure your safety during the removal process.
Method 3: Heat Gun And Scraper Technique
Method 3: Use a heat gun and scraper to remove polyurethane from wood floors. Apply heat to the surface with the heat gun and scrape off the softened polyurethane with a scraper. Be careful not to damage the wood and work in small sections for better control.
Understanding The Heat Gun And Scraper Method
The heat gun and scraper technique is an effective and efficient way to remove polyurethane from wood floors. This method involves using heat to soften the polyurethane, making it easier to scrape off. Here’s what you need to know about this approach:
- Applying heat: A heat gun is used to direct heat onto the polyurethane surface. The heat softens the polyurethane, allowing it to be easily scraped away. It is important to use caution when using a heat gun, as improper handling can lead to injuries or damage to the wood.
- Safety measures: Before starting the polyurethane removal process, it’s essential to take safety precautions. Here’s what you should keep in mind:
- Wear protective gear: Put on safety goggles, gloves, and a mask to protect yourself from heat and any debris that may be generated during the scraping process.
- Ventilation: Ensure there is proper ventilation in the room to avoid inhaling fumes or dust particles.
- Techniques for effective polyurethane removal with heat: The heat gun and scraper method requires some specific techniques to achieve optimal results. Follow these steps:
- Set the heat gun on a low or medium setting to avoid scorching the wood surface.
- Hold the heat gun approximately 6 to 8 inches away from the polyurethane and move it slowly in a back-and-forth motion. The heat will soften the polyurethane without causing damage to the wood.
- Once the polyurethane starts to bubble or blister, use a scraper or putty knife to gently scrape it off. Start at the edges and work your way towards the center.
- Be careful not to gouge or scratch the wood surface while scraping. Apply gentle pressure and use a scraping motion at a shallow angle to avoid any damage.
Removing polyurethane from wood floors can be a challenging task, but the heat gun and scraper technique simplifies the process. By understanding the method, practicing safety measures, and employing effective techniques, you can successfully remove polyurethane and restore the natural beauty of your wood floors.
Cleaning And Finishing After Polyurethane Removal
Cleaning and finishing after removing polyurethane from wood floors is an essential step to restore their original beauty. Follow our expert tips to ensure a seamless process, leaving your floors looking fresh and polished.
Cleaning And Finishing After Polyurethane Removal
Now that you have successfully removed the polyurethane from your wood floors, it’s time to focus on cleaning and finishing the surface. This crucial step will ensure that your wood floors are ready for a new protective coating or refinishing.
Read on to discover the essential tasks involved in this process.
Removing The Leftover Residue After The Main Removal Process
After the main removal process, it’s common to have some leftover residue on the wood floors. This residue can be pesky and might require additional cleaning. Here are the steps to effectively eliminate this residue:
- Start by vacuuming or sweeping the floor to remove any loose debris.
- Dampen a clean cloth or sponge with a mild cleaning solution suitable for wood surfaces.
- Gently scrub the residue using circular motions, ensuring not to apply too much pressure. This will avoid damaging the wood surface.
- Continue until all the residue is completely removed.
- Rinse the area with clean water and dry it thoroughly.
Preparing The Wood For Refinishing Or Reapplying A New Finish
Now that the wood is free from any residue, it’s crucial to prepare it for refinishing or reapplying a new finish. This will ensure a smooth and long-lasting result. Follow these steps to prepare the wood:
- Sand the wood surface using fine-grit sandpaper to even out any imperfections and remove any remaining traces of the previous finish.
- Once the sanding is complete, remove the sanding dust using a vacuum cleaner and a tack cloth.
- Inspect the wood for any deep scratches or dents. If needed, fill them with wood filler and allow it to dry according to the manufacturer’s instructions.
- Lightly sand the filled areas until smooth.
- Vacuum or wipe the surface with a tack cloth once again to remove any residual dust.
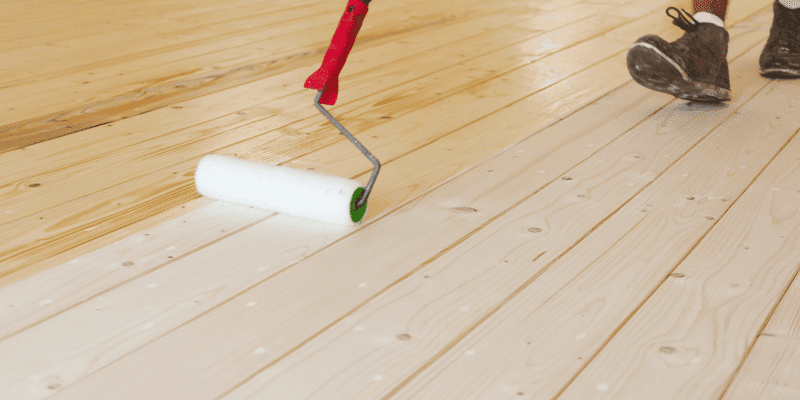
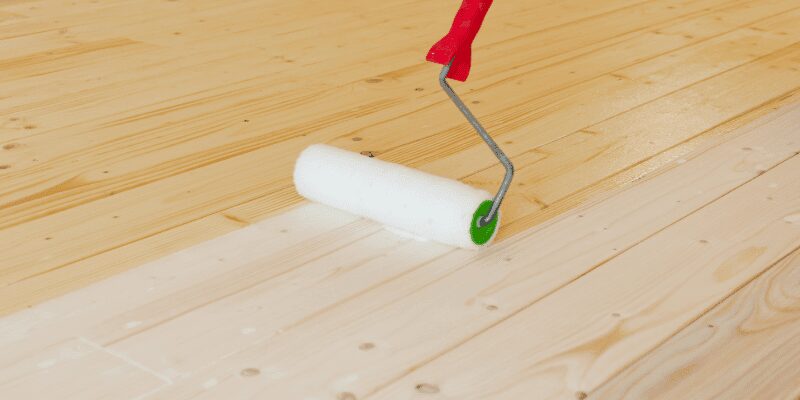
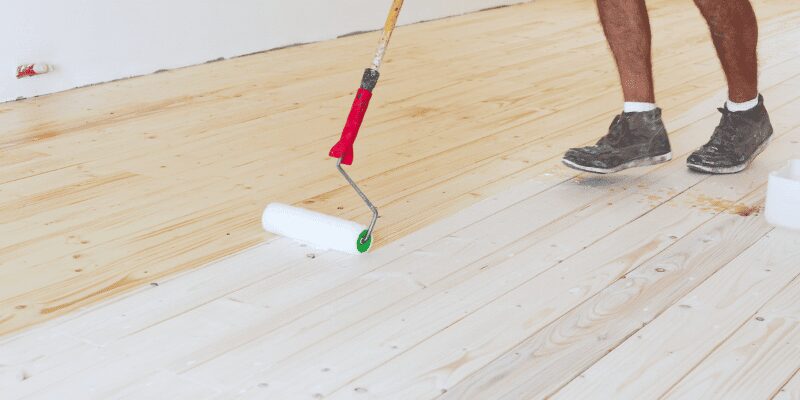
Applying A New Protective Coating To The Wood Floors
With the wood surface fully prepared, it’s time to apply a new protective coating to enhance its beauty and protect it from wear and tear. Follow these steps for a successful application:
- Choose a high-quality wood finish or protective coating that suits your preferences and the specific needs of your wood floors.
- Read and carefully follow the manufacturer’s instructions regarding application, drying times, and recommended tools.
- Use a clean brush or applicator to evenly apply the coating, working with the grain of the wood.
- Apply thin and even coats, allowing sufficient drying time between each layer as instructed by the manufacturer.
- Depending on the product, you may need to lightly sand between coats to ensure optimal adhesion.
- Once the final coat is applied and completely dried, your wood floors will be ready to showcase their new protective and beautiful finish.
Remember, taking proper care of your wood floors is essential to maintain their longevity and appearance. Regular cleaning and maintenance will contribute to their lasting beauty and protect your investment for years to come.
Maintenance And Preventive Measures For Wood Floors
Regular maintenance and preventive measures are crucial for wood floors. If you need to remove polyurethane from your wood floors, follow these steps to ensure a clean and damage-free process.
Tips For Maintaining Wood Floors After Polyurethane Removal:
- Regular cleaning: Sweep or vacuum your wood floors frequently to remove dirt and debris that can scratch the surface. It’s recommended to use a soft-bristle broom or a vacuum cleaner with a floor attachment.
- Damp mopping: To keep your wood floors looking their best, use a well-wrung mop or a microfiber mop with a hardwood floor cleaner specifically designed for polyurethane-finished floors. Avoid excessive water as it can damage the wood.
- Wipe spills immediately: Accidental spills happen, so it’s crucial to wipe them up immediately to prevent any liquid from seeping into the wood and causing damage. Use a soft cloth or paper towel to absorb the spill without rubbing it.
- Use protective pads: Attach felt or rubber pads to the bottom of your furniture to prevent scratches and dents when moving them around. This simple measure can significantly extend the lifespan of your wood floors.
- Avoid high heels and sharp objects: Encourage your household members to remove their shoes or avoid wearing high heels on the wood floors. Sharp objects like heavy furniture or pet claws can also cause damage, so use furniture pads or trim your pet’s nails regularly.
- Maintain consistent humidity levels: Wood floors can contract and expand with changes in humidity, leading to gaps or warping. Use a humidifier in dry seasons and consider a dehumidifier during excessively humid periods to keep the humidity levels balanced.
- Limit exposure to sunlight: Excessive sunlight can fade and damage the wood over time. Consider using curtains, blinds, or UV-resistant window films to protect your wood floors from direct sunlight.
- Regular inspections: Periodically check for any signs of wear or damage on your wood floors. Addressing minor issues promptly can prevent further degradation and expensive repairs down the line.
- Schedule professional maintenance: Reach out to professional wood floor maintenance experts for periodic deep cleaning, buffing, and recoating to keep your wood floors in optimal condition.
Preventive Measures To Avoid The Need For Frequent Polyurethane Removal:
- Use rugs and mats: Place rugs or mats in high-traffic areas or under furniture to provide an extra layer of protection to your wood floors. These barriers can help minimize scratches, scuffs, and wear.
- Practice regular dusting: Dust and tiny particles can act as abrasives on your wood floors, leading to scratches. Regularly dust your floors using a microfiber cloth or a dust mop to prevent unnecessary damage.
- Apply floor protectors: Invest in good-quality floor protectors that can be attached to the legs of chairs, tables, and other furniture pieces. These protectors prevent scratches and dents caused by moving furniture.
- Trim pet nails: Keep your pets’ nails trimmed to prevent them from inadvertently damaging the wood floors. Regular grooming can help minimize scratches caused by their claws.
- Use a doormat: Make it a habit for everyone to wipe their shoes thoroughly on a doormat or to remove them before stepping onto wood floors. This simple step can help prevent the dirt and grit that can scratch the surface.
Best Practices For Keeping Wood Floors In Optimal Condition:
- Regular maintenance routine: Establish a regular cleaning and maintenance routine to keep your wood floors looking their best. Consistency in caring for your floors can help prevent the need for frequent polyurethane removal.
- Follow manufacturer’s guidelines: Always consult the manufacturer’s guidelines and recommendations for cleaning and maintaining your specific type of wood floors. This ensures you are using the appropriate products and techniques for their care.
- Use non-abrasive cleaning products: When selecting cleaning products, opt for those specifically formulated for polyurethane-finished wood floors. Avoid using harsh chemicals, vinegar, or abrasive cleaners, as they can damage the finish.
- Test cleaning products: Before using any new cleaning product on your wood floors, it’s advisable to test it in a small, inconspicuous area. This allows you to ensure it does not cause any adverse reactions or damage to the wood.
- Avoid excessive moisture: Water and wood do not mix well, so avoid excessive moisture when cleaning your floors. Use damp, not wet, cleaning methods to prevent water from penetrating into the wood, which can lead to warping or staining.
- Promptly address spills: Accidents happen, but swift action can prevent lasting damage. Clean up spills immediately using a soft cloth or paper towel to prevent the liquid from seeping into the wood.
- Regularly inspect and address wear: Keep a close eye on your wood floors for any signs of wear, including scratches, dents, or fading. Address any issues promptly to prevent further damage and maintain the beauty of your floors.
- Protect during renovations: If you’re planning any home renovations or room remodeling, take steps to protect your wood floors. Use drop cloths, plastic sheeting, or plywood to shield the floors from dust, debris, and potential damage.
- Seek professional advice when needed: If you are uncertain about how to properly care for your wood floors or encounter more significant issues, consult with professionals who specialize in wood floor maintenance and restoration. Their expertise can ensure you make the best decisions for your floors’ long-term health.
Remember, by implementing these maintenance and preventive measures, you can keep your wood floors in optimal condition, reducing the need for frequent polyurethane removal and enhancing their longevity.
Frequently Asked Questions About Removing Polyurethane From Wood Floors
What Is The Best Remover For Polyurethane?
The best remover for polyurethane is a chemical-based solvent designed specifically for polyurethane removal.
Does Vinegar Remove Polyurethane?
No, plain vinegar will not remove a cured polyurethane finish. Vinegar is a mild acid that can cut through surface grime and light haze, but it does not soften or lift a hardened polyurethane film the way a real chemical stripper does. For actual removal, use a citrus-based stripper, sanding, or a heat gun.
Will Mineral Spirits Remove Polyurethane?
No, mineral spirits will not remove a cured polyurethane finish. Mineral spirits is a solvent used to thin oil-based products and wipe away stripper residue after the finish has already been softened — it does not dissolve hardened polyurethane on its own.
What Grit Sandpaper To Remove Polyurethane From Wood Floor?
To remove polyurethane from a wood floor, use a grit sandpaper between 80 and 120.
Conclusion
The process of removing polyurethane from wood floors may seem daunting at first, but with a little patience and the right tools, it can be accomplished effectively. Start by preparing the area and gathering the necessary supplies. Next, use a chemical stripper or sanding method to remove the polyurethane layer.
Take care to follow safety precautions and work in well-ventilated spaces. Once the polyurethane is removed, you can proceed with cleaning and sanding the wood floor to restore its natural beauty. Remember to apply a new protective finish to ensure its longevity and durability.
There are various options available, such as oil-based or water-based finishes, depending on your personal preference. Taking the time to properly remove and refinish polyurethane from your wood floors will result in stunning, refreshed surfaces that will last for years to come.