How to Remove Tape Residue From Wood (Check Your Finish First)
Test every remover on a hidden spot first, because the right fix for tape residue depends on the wood’s finish more than on the tape. Goo Gone lists finished wood as safe and unfinished wood as a surface to avoid, and alcohol softens shellac. This guide covers a two-minute finish check, a finish-by-finish chart, step-by-step removal, and how to handle raw wood.
Which Remover Is Safe for Your Wood Finish?
Best Tape Residue Pick |
|
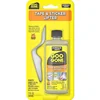 |
Goo Gone Tape and Sticker Lifter, 2 oz ($8.39) Goo Gone lists finished wood as a safe surface for this one, and the plastic lifting tool in the pack is the scraper step in the method below, so you do not have to reach for a metal blade.
|
As an Amazon Associate we earn from qualifying purchases.
Most tape residue advice treats every piece of wood the same, and that is where the damage comes from. The adhesive is rarely the hard part. The hard part is lifting it without softening, dulling or soaking into the surface under it. The chart below sorts the common finishes by what to try first and what to keep off them. If you do not know your finish, our solvent test guide for identifying a wood finish walks through it.
| Finish or surface | Try first | Be careful with | Why |
|---|---|---|---|
| Polyurethane or varnish (hard, clear film) | Warm soapy water, a plastic lifter, then a citrus remover tested on a hidden spot | Leaving any solvent sitting for a long time | Goo Gone lists finished wood as safe, with a pre-test on an inconspicuous area |
| Shellac (older furniture, French polish) | Plastic lifter and mild soapy water; test any remover very briefly | Alcohol and anything alcohol-based | Alcohol softens shellac and can make it sticky or remove it |
| Lacquer | Plastic lifter and soapy water; test any remover briefly | Strong solvents and long contact | Lacquer thinner dissolves lacquer, and Goo Gone warns its product might remove a lacquer coating on brass, so test |
| Wax or oil finish | Plastic lifter, then a tested remover on the residue only | Soaking the area | Solvents can lift the wax or oil with the adhesive, so plan to re-wax or re-oil the spot |
| Raw or unfinished wood | Gentle lifting and dry methods (see the raw wood section) | Citrus removers, oils and soaking products | Goo Gone lists unfinished wood as a surface to avoid because it is porous |
How to Run a Two-Minute Spot Test
Pick a hidden spot, such as the underside of a table edge, the back of a door or the inside of a drawer front. Put a small amount of the remover on a cotton swab, apply it, and leave it for the same time you plan to use on the residue. Wipe it off, then look and touch. A finish that has gone tacky, cloudy, dull or visibly thinner has failed the test, and so has a swab that picks up color. Goo Gone’s own advice is short: test on an inconspicuous area first.
- Wait for the full contact time before judging, since damage often shows up after a few minutes.
- Test where light hits the surface, because dulling is easy to miss in shadow.
- Test again if you switch to a different product, even from the same brand.
How to Remove Tape Residue From Finished Wood, Step by Step
- Wipe the area. Use a soft cloth with warm water and a drop of dish soap to remove dust that the adhesive has grabbed. Dry it.
- Lift what you can. Use a plastic scraper or the lifter tool that comes with some removers. Keep the angle low and push the residue into a roll instead of grinding it in. Never use a metal blade on a finish.
- Apply the tested remover to the residue only. Use a little on a cloth or cotton swab and keep it off the clean wood around the spot.
- Let it work. Goo Gone Original says to allow 5 to 10 minutes for stubborn residue on hard surfaces, and 3M’s citrus cleaner sheet says a few minutes, then repeat if the residue is thick. Check often on a finish and shorten the time if the surface changes.
- Wipe with a clean white cloth. A white cloth shows you if the finish is coming off with the adhesive.
- Wash the spot with hot soapy water. This is the manufacturer’s last step, and it removes the oily film that citrus removers leave. Dry it right away.
- Restore the surface. If the spot looks flat, a coat of furniture polish or paste wax matched to the finish usually evens it out.
Tape that was left on for weeks or months, or that sat in sunlight or heat, tends to be the worst case. If the residue came from painting prep, our guide on when to remove masking tape after painting covers the timing, and removing latex paint from wood helps if paint bled under the edge.
Match the Remover to the Adhesive: What the 3M Data Sheet Says
The usual advice is to try one product on any tape. The manufacturer data suggests that is a coin flip. The 3M technical data sheet for its Citrus Base Cleaner (aerosol) lists how well the cleaner works on different adhesive families. This is an industrial product and 3M did not test individual tape brands, but the pattern is useful for guessing what you are up against.
| Adhesive family (3M test list) | 3M’s reported effectiveness of the citrus cleaner |
|---|---|
| SBR (a synthetic rubber) | Very effective when wet, and very effective in most cases when dry |
| Neoprene | Very effective in most cases, wet or dry |
| Acrylic | Effective in most cases when wet, relatively ineffective in most cases when dry |
| Hot melt | Relatively ineffective |
| Transfer tape and other adhesive-backed tapes | Will aid removal of many tapes, but the cleaner is slow to dissolve tape residue |
Three practical points follow from that. First, dry, aged acrylic residue is the one a citrus remover is least likely to beat, so lifting it mechanically and repeating a short soak works better than one long soak. Second, 3M says outright that this cleaner is slow on tape residue, which is why waiting and re-applying beats pouring on more product. Third, a tape roll does not tell you its adhesive. Masking tapes are made with rubber, acrylic or silicone adhesives, and duct tape has traditionally used a rubber-based adhesive, so treat unknown tape as unknown and go gentle.
If the blob is hardened glue rather than tape adhesive, hot melt is the family on that list that the cleaner handles worst. For that case, see how to remove hot glue, and for other glue types on wood see removing adhesive from wood by glue type.
Household Methods: Heat, Oil, Soap and Alcohol
These are common household approaches rather than manufacturer-tested ones, so test each on a hidden spot. They are in order from gentlest to most aggressive.
- Warm soapy water: Fine for fresh, light residue and the safest first move on any finish.
- Low heat: A hair dryer on a low setting, held a few inches away, can soften some adhesives enough to lift them with a plastic tool. Keep it moving so you do not blister or cloud the finish, and never use heat while a solvent or its vapor is on the surface.
- Cooking or mineral oil on a cloth: Often suggested for delicate finished surfaces. It softens the adhesive slowly, then needs a soapy-water wipe to remove the greasy film. Keep it off raw wood, where it will soak in.
- Rubbing alcohol: Works on some adhesives, but it is the one to avoid on shellac. If you want to compare alcohol with mineral spirits, see denatured alcohol vs mineral spirits, and if it leaves a white mark, see isopropyl alcohol stains on wood.
- Acetone and nail polish remover: Skip these on finished furniture unless you have read what acetone does to wood and finishes first.
Raw or Unfinished Wood: Do Not Soak It
Raw wood is the hardest case because the adhesive and any liquid both go into the grain. Goo Gone lists unfinished wood among the surfaces to avoid, and its own guidance says plywood is too porous. That means the liquid products in this guide are the wrong tool here.
- Lift the surface layer of adhesive with a plastic scraper or an old plastic card, working with the grain.
- Dab, do not soak, with a cloth that is only slightly damp, and let the spot dry fully.
- If a stubborn film remains, light sanding with the grain removes it along with a thin layer of wood. Only do this on a surface you are going to finish or refinish anyway.
- Seal the bare spot afterward so that it does not take up the next spill or stain unevenly.
Special Cases: Tape Type and Surface
| Situation | What to do |
|---|---|
| Masking or painter’s tape left on too long | Lift with a plastic tool, then spot-test and use a tested remover. See the timing guide linked above to avoid a repeat. |
| Duct tape | Peel slowly at a low angle, lift the gummy layer with a plastic tool, then use a tested remover on what is left. |
| Clear or packing tape | The adhesive type is hard to tell, so start gentle, lift mechanically, and repeat short soaks instead of one long one. |
| Double-sided or foam tape | Remove the foam or backing first with a plastic tool, then treat the adhesive layer that is left. |
| Sticker or label | Soak briefly with a tested remover, lift with the tool, and wash. Goo Gone’s Sticker Lifter directions are to apply, wait a few minutes, then lift. |
Safety: Ventilation, Flammable Products and Skin
Some of the products that work best on tape residue are flammable, and the household ones are not harmless either. The 3M data sheet is the clearest number I found:
The 3M Citrus Base Cleaner aerosol lists a flash point of -46 C (-50 F) and a propane propellant. Source: 3M technical data sheet, August 2024
- Ventilate. Goo Gone’s product page says to ensure adequate ventilation, and its formula lists petroleum distillates. Open a window and keep air moving.
- No flames, sparks or heat. Keep pilot lights, space heaters, hair dryers and anything that can ignite away from solvent, aerosol or alcohol until the surface is completely dry.
- Protect your skin. 3M says its citrus cleaner should not be used as a hand cleaner and may cause irritation on prolonged or repeated contact. Wear gloves.
- Follow the label for rags and disposal. Do not pour product down drains. 3M’s sheet says not to rinse it into waterways or sewers.
Test on an inconspicuous area first.
Goo Gone, guidance on using its products on different surfaces
After Care and Preventing Residue Next Time
Once the adhesive is gone, wash the spot with soapy water and dry it so no oily film is left. A citrus product that is left behind can look like a new smear, and the same wipe-down logic applies as in cleaning off citrus stripper residue. Then match the finish: wax a waxed surface, polish a polished one, and refinish a bare patch.
To avoid doing this again, take tape off sooner, and pick a tape made for easy removal on finished surfaces. Gaffer tape, for example, is designed to come off cleanly, unlike duct tape. Always press tape onto a surface that is clean and fully cured, and check it after a day or two instead of leaving it for weeks.
Frequently Asked Questions
Will rubbing alcohol damage a wood finish?
It can. Alcohol softens shellac and can make it sticky or remove it, so on an old shellac finish it can take the finish off along with the adhesive. On a hard film finish such as varnish or polyurethane it is usually gentler, but test a hidden spot first and keep contact short.
Does WD-40 remove tape residue from wood?
It is often used for this, but WD-40 is an oily product and no manufacturer page I read this session approves it for wood. Treat it like any oil: it can soak into raw wood, so keep it off unfinished surfaces, test a hidden spot on finished wood, and wash the area with soapy water afterward.
How do I remove old tape residue without damaging the finish?
Start with the gentlest option: warm soapy water, then a plastic lifting tool. If the adhesive is still there, test a citrus adhesive remover on a hidden spot, apply it only to the residue, leave it for the time on the label, wipe, and wash. Never scrape with metal on a finish.
Can I use Goo Gone on unfinished wood?
No. Goo Gone lists finished wood as a safe surface and unfinished wood as a surface to avoid, and its own guidance calls porous plywood too porous. On raw wood the liquid soaks into the grain instead of sitting on top of a sealed surface.
How long should I leave an adhesive remover on tape residue?
Follow the label. Goo Gone Original says to allow 5 to 10 minutes for stubborn residue on hard surfaces, and 3M’s citrus cleaner data sheet says to wait a few minutes and repeat if the residue is thick. Shorter is safer on a finish, so test the contact time on a hidden spot first.
Conclusion
The reliable order is clean, lift, test, apply, wait, wash. The finish decides how far you can go, so identify it before you pick a remover, and keep solvents off raw wood entirely. A small, patient approach on a hidden-spot-tested product beats a big pour of the strongest one.
Sponsored / affiliate links. As an Amazon Associate I earn from qualifying purchases. I may earn additional commission from eligible campaigns.