How to Repair Cedar Siding: Quick & Effective Solutions
To repair cedar siding, remove the damaged section and replace it with a new piece. Ensure it matches the existing siding.
Cedar siding offers a beautiful and durable exterior for homes. Over time, however, it can suffer from weather-related damage, rot, or insect infestation. Repairing cedar siding promptly helps maintain its aesthetic appeal and structural integrity. Start by identifying the damaged areas.
Use a pry bar to carefully remove the affected sections. Measure and cut a replacement piece of cedar siding to fit the gap. Secure the new piece with galvanized nails, ensuring it aligns perfectly with the existing siding. Finally, apply a suitable finish or stain to protect the new section and blend it seamlessly with the rest of your home’s exterior. Regular maintenance can prevent future issues and prolong the life of cedar siding.
Introduction To Cedar Siding
Cedar siding is a popular choice for homes. It gives a natural and rustic look. Many homeowners love its warm and inviting appearance. Cedar siding is also durable and long-lasting. It can withstand various weather conditions. This makes it a great option for exterior home design.
Cedar siding can face several problems. Moisture damage is a common issue. It can cause the wood to warp and rot. Insects can also be a problem. They can burrow into the wood and cause damage. Another common issue is cracking. Over time, cedar siding can crack and split. This can make it less effective at protecting your home.

Initial Assessment
Start by examining the cedar siding for damage such as cracks, rot, or warping. Identify areas needing repair or replacement.
Identifying The Extent Of Damage
Check your cedar siding for any signs of damage. Look for cracks, holes, or rot. Use a flashlight to see in dark areas. Take notes of all the spots that need fixing. Make sure to check both the inside and outside.
Tools And Materials Needed
| Tool | Purpose |
|---|---|
| Hammer | To remove nails |
| Chisel | To scrape off old paint |
| Wood filler | To fill cracks and holes |
| Paintbrush | To apply new paint |
| Safety goggles | To protect your eyes |
Cleaning The Cedar Siding
Cleaning cedar siding ensures longevity and beauty. Use a soft brush and mild detergent to remove dirt and mildew effectively. Regular maintenance prevents damage and preserves the wood’s natural appearance.
Preparing The Surface
Remove all dirt and debris from the cedar siding. Use a brush or broom to clean it. Make sure to wear gloves and safety glasses. Check for any loose or damaged boards. Repair or replace them before cleaning. This will ensure a smooth and clean surface for the next steps.
Choosing The Right Cleaning Solutions
Use a gentle cleaner for cedar siding. Avoid harsh chemicals. Mix warm water with mild soap. A good ratio is one gallon of water to a few drops of soap. Test the solution on a small area first. Make sure it does not damage the wood. Rinse with clean water after scrubbing.
Simple Fixes For Minor Damage
Cedar siding repair involves simple steps like replacing damaged boards and sealing cracks. Regular maintenance prevents further deterioration and keeps your home looking fresh.
Filling Small Cracks And Holes
Use wood filler to fix small cracks. Apply the filler with a putty knife. Let it dry completely. Sand the area to make it smooth. Paint over the filled area to match the siding. This will help keep water out and stop further damage.
Dealing With Discoloration
Clean the cedar siding with a mild detergent. Use a soft brush to scrub away dirt. Rinse the siding with water. Let it dry. Apply a wood brightener to restore the color. Seal the wood with a clear finish to protect it. This will keep the cedar looking new and fresh.
Replacing Damaged Boards
Use a pry bar to remove the old cedar boards. Be careful not to damage other boards. Start at the bottom and work your way up. Remove any nails that are still in the wall. Clean the area where the old boards were. Make sure the surface is smooth.
Measure the space where the new board will go. Cut the new board to fit the space. Apply a waterproof barrier to the wall. This helps to protect from moisture. Nail the new board into place. Use galvanized nails to prevent rust. Make sure the board is level before securing it fully.
Preventing Future Damage
Repairing cedar siding ensures your home’s exterior remains durable and attractive. Regular maintenance and timely fixes prevent future damage, keeping your siding in excellent condition.
Proper Maintenance Techniques
Regular inspections help catch problems early. Look for cracks or splits in the wood. Clean cedar siding once a year. Use a mild detergent and water. Gently scrub with a soft brush. Rinse thoroughly to remove soap.
Trim trees and bushes near the siding. This prevents moisture buildup and damage. Ensure gutters and downspouts work properly. Water should not pool near the foundation. Keep an eye on the caulking. Replace any damaged or missing sections.
Sealing And Protecting Cedar Siding
Seal cedar siding to protect it from the elements. Use a high-quality sealant. Apply the sealant every 2-3 years. This keeps the wood safe from moisture and UV rays.
Paint or stain the cedar siding. This adds another layer of protection. Choose a product made for cedar wood. Follow the manufacturer’s instructions for application. Proper sealing and protecting extends the life of cedar siding.
Professional Help Vs. Diy
Professional help is needed for big damages. Large cracks and warped boards are signs. If the damage covers a large area, call experts. Special tools and skills are required for tough jobs. Experts can save time and effort. They also give a better finish. For safety, pros are best.
DIY repairs can save money. Basic tools are often enough. Simple fixes like small cracks are easy. If you have time, DIY is good. Learning new skills can be fun. But, mistakes can be costly. Repairing damage incorrectly can make it worse. Think about your skill level and time available before starting.
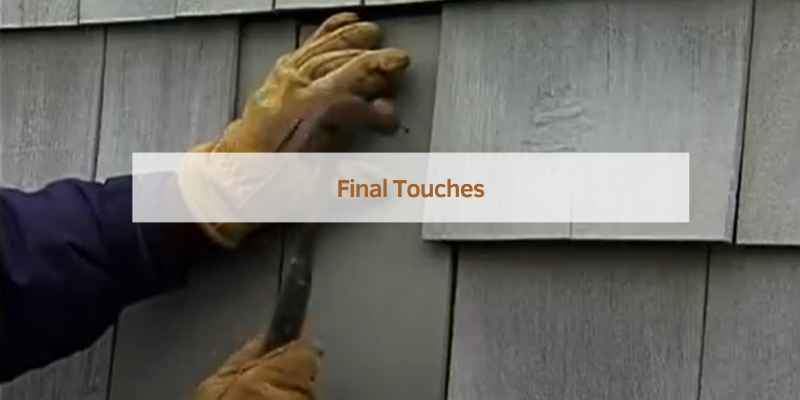
Final Touches
Applying final touches ensures a polished look when repairing cedar siding. Seal gaps with caulk and paint for lasting protection.
Sanding And Finishing
Start by sanding the repaired area with fine-grit sandpaper. Make sure the surface is smooth. Wipe away any dust with a clean cloth. Apply a wood sealer to the sanded area. This helps protect the wood. Let the sealer dry completely. Next, paint or stain the area to match the rest of the siding. Use a high-quality exterior paint or stain. Apply at least two coats for better protection. Allow each coat to dry before applying the next. Inspect the finished area to make sure the color matches. Touch up any spots as needed.
Inspecting Your Work
Carefully inspect the repaired area for any flaws. Check if the surface is smooth and even. Look for any missed spots in the paint or stain. Make sure the color blends well. Inspect the edges to ensure they are sealed properly. Ensure there are no gaps or cracks in the repaired area. Check for any loose nails or screws. Tighten them if necessary. Finally, step back and look at the overall appearance. Make sure it looks good and matches the rest of the siding.
Frequently Asked Questions
What Do You Use To Patch Cedar Siding?
To patch cedar siding, use wood filler or exterior-grade caulk. Apply it to clean, dry areas. Sand and paint afterward for a smooth finish.
Should I Use Caulk Or Wood Filler On Cedar Siding?
Use caulk for sealing gaps or joints in cedar siding. Use wood filler for repairing holes or damaged areas.
How To Repair Weathered Wood Siding?
To repair weathered wood siding, clean the surface with soap and water. Remove loose paint using a scraper. Sand the area to smooth it out. Apply a wood filler to damaged sections. Prime and paint the siding for protection. Regular maintenance helps prevent future damage.
How To Fix Wood Siding That Popped Out?
To fix popped wood siding, remove nails, apply adhesive, reposition the siding, and secure with new nails.
Conclusion
Repairing cedar siding can be straightforward with the right tools and guidance. Follow the steps outlined to ensure lasting results. Regular maintenance will keep your cedar siding looking great. Don’t forget to inspect your siding annually for potential issues. Proper care will extend its lifespan and maintain your home’s charm.