
How To Revitalize Weathered Cedar Siding: Expert Tips & Techniques
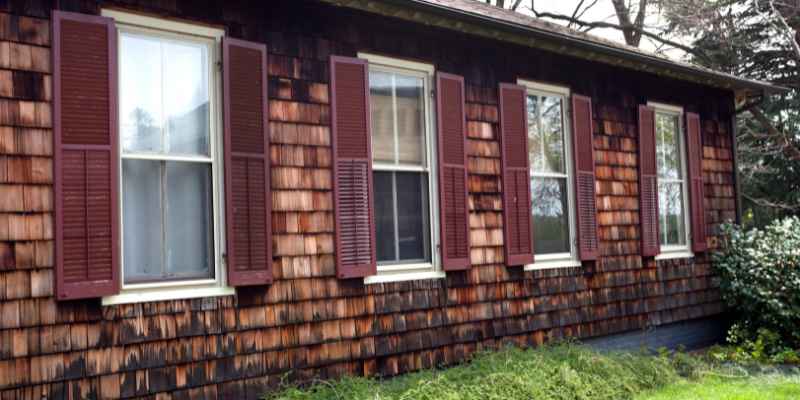
To restore weathered cedar siding, clean the surface thoroughly and apply a protective finish with UV inhibitors. The weathered appearance of cedar siding can affect the overall aesthetic of a home.
Over time, exposure to the elements can cause the wood to fade, discolor, or develop a gray patina. However, restoring weathered cedar siding is possible with the right techniques and products. We will discuss how to bring back the natural beauty of cedar siding by cleaning and protecting it from further damage.
By following these steps, you can rejuvenate your weathered cedar siding and enhance the curb appeal of your home.
Assessing The Condition
Assessing the condition of your weathered cedar siding is an essential first step in the restoration process. By thoroughly examining the siding and identifying any signs of weathering or damage, you can determine the necessary steps to bring back its original beauty and protect it for years to come.
Identifying Signs Of Weathering
It’s crucial to first identify the signs of weathering on your cedar siding. Over time, exposure to the elements can cause several visible changes to the wood surface. Some common signs of weathering include:
- Gray or silver discoloration
- Cracking or splitting
- Warping or bending
- Loss of natural oils
These signs indicate that the cedar has been subjected to moisture, UV rays, and other environmental factors that can degrade its appearance and structural integrity.
Inspecting For Damage
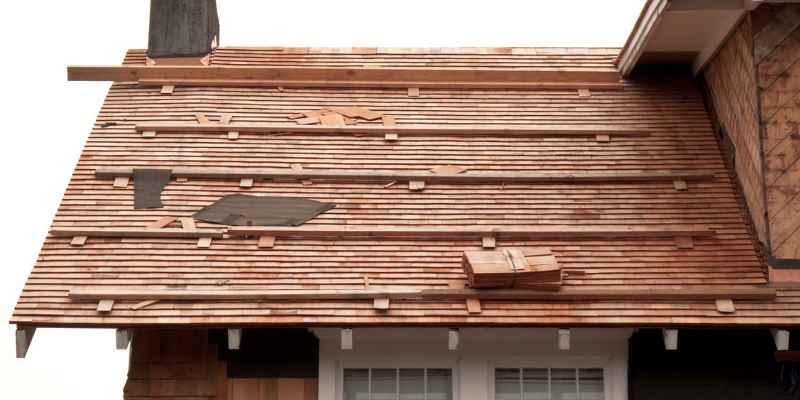
Besides weathering, it’s crucial to inspect your cedar siding for any damage that may require immediate attention. Such damage can compromise the structural integrity of the siding and lead to bigger problems down the line. During your assessment, pay close attention to:
- Rot or decay in the wood
- Insect infestations such as termites or carpenter ants
- Loose or missing boards
- Water damage or mold growth
If you notice any of these issues, it’s essential to address them promptly to prevent further deterioration and ensure a successful restoration process.
Preparation
“Preparation is key when it comes to restoring weathered cedar siding. Taking the time to properly clean, sand, and smooth the surface will ensure that your cedar siding looks beautiful and lasts for years to come. In this section, we will go through the steps you need to take to prepare your cedar siding for restoration.”
Cleaning The Surface
The first step in preparing your weathered cedar siding is to clean the surface. Over time, dirt, grime, and mold can accumulate on the surface, making it look dull and worn. To clean the siding, follow these steps:
- Start by rinsing the siding with a hose to remove any loose dirt and debris.
- Next, mix a solution of warm water and mild detergent in a bucket.
- Using a soft-bristle brush or a sponge, scrub the siding with the detergent solution.
- Pay special attention to areas that are heavily soiled or have mold growth.
- Rinse the siding thoroughly with clean water to remove any soap residue.
- Allow the siding to dry completely before moving on to the next step.
Sanding And Smoothing
Once the surface is clean and dry, it’s time to sand and smooth the cedar siding. This step is essential for removing any roughness or splintering that may have occurred due to weathering. Follow these guidelines to ensure a smooth finish:
- Start by inspecting the siding for any loose or raised boards. Secure them in place using appropriate nails or screws.
- Using a handheld sander or sandpaper, sand the surface of the siding in the direction of the wood grain. This will help to remove any rough spots.
- Focus on areas that have noticeable splintering or roughness. Smooth them out using consistent, gentle strokes.
- After sanding, wipe away any dust or debris using a clean cloth or a tack cloth.
- Inspect the surface for any remaining imperfections. If necessary, repeat the sanding process until the siding feels smooth to the touch.
By following these preparation steps of cleaning the surface and sanding and smoothing the cedar siding, you will ensure a solid foundation for the restoration process. In the next section, we will explore the different methods you can use to restore the weathered cedar siding and bring it back to its former beauty.
Applying Protective Coating
To restore weathered cedar siding, apply a protective coating that will enhance the wood’s appearance and durability. This process involves cleaning the surface, repairing any damage, and applying a high-quality sealant to protect against the elements and UV damage.
Choosing The Right Finish
When it comes to choosing the right finish for your weathered cedar siding, there are a few factors to consider. The finish you choose will not only determine the appearance of your siding but also its durability and longevity.
One option is to go with a clear finish, which will enhance the natural beauty of the cedar while providing some protection against the elements. This is a great choice if you want to maintain the wood’s original appearance.
Another option is a tinted finish, which adds a subtle color to the cedar while still allowing the grain to show through. Tinted finishes can help blend in any discoloration or unevenness in the cedar.
If you prefer a paint-like finish, you can opt for a solid stain. This type of finish provides the most protection against UV rays and moisture, but it will completely cover the natural look of the wood.
Brushing Or Spraying
Once you have chosen the right finish for your weathered cedar siding, you’ll need to decide whether to apply it with a brush or a sprayer. Both methods have their pros and cons, so it’s important to consider your specific needs and capabilities before making a decision.
Brushing is the more traditional method and allows for greater control over the application of the finish. With a brush, you can reach into every nook and cranny of the cedar siding, ensuring complete coverage. However, brushing can be time-consuming and may require more effort.
Spraying, on the other hand, is faster and easier to apply, especially if you have a large area to cover. It provides a more even and consistent finish, but it may not reach all the tight corners and edges as effectively as brushing.
Ultimately, the choice between brushing and spraying will depend on your preference, available equipment, and the condition of your siding. Consider your level of experience and the specific requirements of your project before deciding how to apply the protective coating.
Applying Primer
Before applying the protective coating to your weathered cedar siding, it is essential to start with a primer. The primer will help prepare the surface of the wood and improve the adhesion of the finish.
Choose a primer that is specifically designed for wood surfaces, preferably one that is compatible with the type of finish you have selected. This will ensure optimal compatibility and effectiveness.
Start by thoroughly cleaning the cedar siding to remove any dirt, debris, and loose paint. Apply the primer evenly using a brush or sprayer, following the manufacturer’s instructions. Allow the primer to dry completely before proceeding to the next step.
Pro tip: To achieve a smoother finish, you can lightly sand the primer after it has dried, using a fine-grit sandpaper. This will help to eliminate any rough or uneven spots and create a more polished surface for the protective coating.
Restoring The Color
Restoring the color of weathered cedar siding is an essential step in rejuvenating its appearance and enhancing the overall curb appeal of your home. Over time, exposure to sun, rain, and other elements can cause cedar siding to fade and lose its vibrant hue. However, with the right techniques and products, you can bring back the natural beauty of your cedar siding, making it look as good as new.
Staining The Siding
Staining the cedar siding is a popular and effective method to restore its color while also protecting it from further damage. Stains contain pigments that penetrate the wood, enhancing its natural color and providing an extra layer of defense against sun and water exposure.
Selecting The Appropriate Stain
Choosing the right stain is crucial for achieving the desired results. There are various factors to consider when selecting a stain for your weathered cedar siding:
- Type of stain: There are two main types of stains: transparent and semi-transparent. Transparent stains allow the natural beauty of the wood to show through, while semi-transparent stains offer a bit more color and protection.
- Color: Consider the existing color of your cedar siding and choose a stain that complements or enhances it. Samples or swatches can help you make the right decision.
- Opacity: Opacity refers to the level of coverage the stain provides. If you want a more uniform and solid color, opt for a stain with higher opacity.
- UV protection: Look for a stain that offers UV protection to prevent further fading and discoloration caused by the sun’s rays.
Ensuring A Successful Staining Process
To ensure a successful staining process and achieve an even color restoration, follow these steps:
- Clean the siding: Thoroughly clean the cedar siding to remove any dirt, debris, or mildew. A mixture of mild detergent and water can work wonders in cleaning the surface. Rinse it well and let it dry completely.
- Sand the surface: If your cedar siding has any rough or uneven areas, sanding them down can ensure a smooth finish and help the stain penetrate evenly.
- Apply the stain: Follow the manufacturer’s instructions to apply the stain using a brush, roller, or sprayer. Work in smaller sections to ensure proper coverage and avoid overlapping or drying issues.
- Allow drying time: Let the stain dry completely before applying a second coat, if necessary. This allows the pigment to fully penetrate the wood and provides a more even and long-lasting color.
By following these steps and selecting the appropriate stain, you can revive the color of your weathered cedar siding, transforming it into a vibrant and visually appealing feature of your home.
Maintenance Tips
Maintaining the beauty and durability of your cedar siding is essential to preserving its lifespan and ensuring its protection from the elements. By following these maintenance tips, you can keep your weathered cedar siding looking fresh and vibrant for years to come.
Regular Cleaning And Inspection
Regular cleaning is essential for removing dirt, grime, and other debris that can accumulate on your cedar siding over time. Use a soft-bristle brush or a pressure washer on a low setting to gently scrub away the buildup. It’s important to avoid using harsh chemicals or abrasive cleaners as they can damage the wood.
In addition to cleaning, make it a habit to inspect your cedar siding regularly. Look for any signs of mildew, mold, or rot, which can weaken the wood and compromise its integrity. If you notice any issues, address them promptly to prevent further damage.
Here are a few key points to remember when cleaning and inspecting your cedar siding:
- Start from the top and work your way down to ensure that you don’t miss any areas.
- Pay close attention to seams, corners, and edges where water can seep in and cause damage.
- If you discover any cracks or splits, fill them with an appropriate wood filler and sand them smooth.
- Keep landscaping materials, such as mulch or plants, away from the siding to prevent moisture buildup.
- Consider using a mildew-resistant cleaner or a mixture of bleach and water to remove any existing mildew or mold.
Reapplying Protective Coating
To protect your cedar siding from the effects of weathering, it’s important to reapply a protective coating every few years. This helps to seal the wood and prevent moisture from penetrating the surface.
The process of reapplying a protective coating typically involves the following steps:
- Clean the surface of the siding thoroughly to remove any dirt or old coating.
- Allow the wood to dry completely before applying a new coat of protective finish.
- Choose a high-quality sealant or stain specifically designed for cedar siding.
- Apply the coating evenly using a brush or roller, following the manufacturer’s instructions.
- Allow the coating to dry completely before exposing it to moisture or harsh weather conditions.
By regularly cleaning and inspecting your cedar siding and reapplying a protective coating when necessary, you can extend its lifespan and maintain its natural beauty. Make these maintenance tips a part of your routine and enjoy the lasting benefits of your weathered cedar siding
Conclusion
Reviving your weathered cedar siding doesn’t have to be a daunting task. By following these steps, you can bring back the natural beauty of your home’s exterior. From cleaning and sanding to applying a protective finish, taking care of your cedar siding ensures its longevity and enhances curb appeal.
With the right tools and techniques, you can achieve stunning results and enjoy a refreshed and vibrant home for years to come. Keep your siding looking its best with regular maintenance and attention to detail.