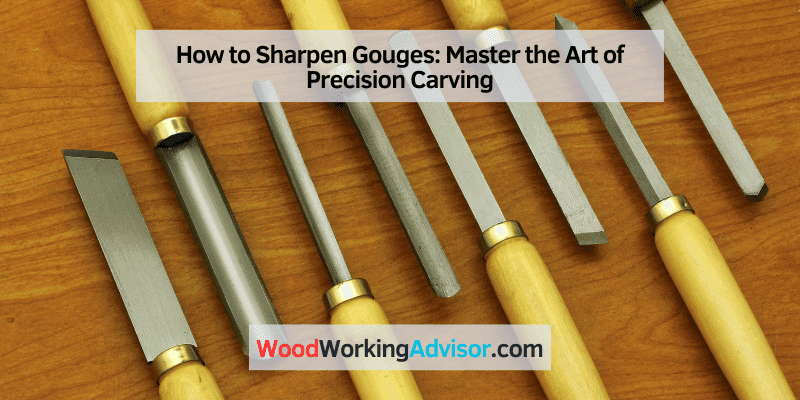
How to Sharpen Gouges (Carving Tools & Bowl/Spindle Turning Gouges)
To sharpen gouges effectively, you can use a sharpening stone or honing guide for optimal results. Using the proper technique and applying consistent pressure, you can achieve a sharp cutting edge on your gouges.
How Gouges Are Essential Tools For Precision Carving
Gouges play a crucial role in precision carving, and proper sharpening is essential for optimal performance. Mastering the art of sharpening gouges ensures clean and accurate cuts, allowing carvers to create intricate details with ease. Gain the precision you need for your carving projects by honing your sharpening skills.
Gouges As Indispensable Tools In Precision Carving
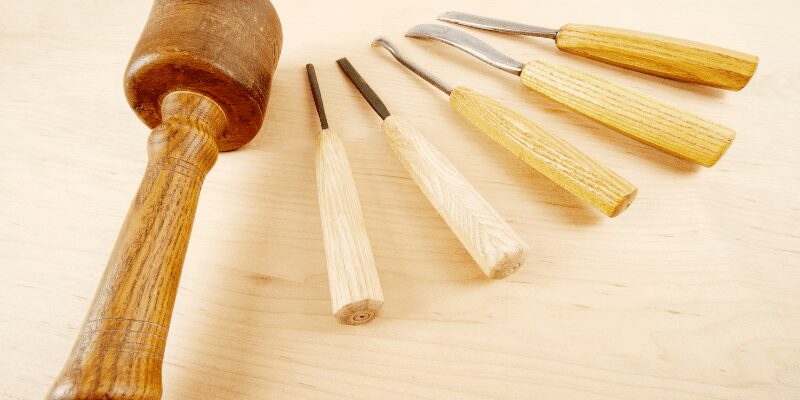
When it comes to precision carving, gouges are an essential tool in any woodworker or carver’s arsenal. These versatile tools are specifically designed to shape and remove wood with precision and accuracy. Gouges are particularly well-suited for creating intricate details, curves, and hollows, making them indispensable for any project that requires fine craftsmanship.
Whether you are a novice or an experienced carver, understanding the different types of gouges and their specific uses will enable you to choose the right tool for the job. Each gouge type comes with a unique shape and curvature, allowing for various cutting and carving techniques. Exploring these different gouge types will help you expand your carving capabilities and achieve the desired results for your projects.
The Different Types Of Gouges And Their Specific Uses
Gouges come in a wide range of shapes and sizes, each serving a specific purpose in precision carving. Here is a breakdown of some common gouge types and their individual uses:
| Gouge Type | Use |
|---|---|
| U-Gouge | Perfect for carving concave shapes, such as bowls and spoon handles. |
| V-Gouge | Ideal for cutting V-shaped grooves, decorative lines, and lettering. |
| Spoon-Gouge | Used for creating shallow hollows, decorative embellishments, and smoothing curved surfaces. |
| Fishtail-Gouge | Designed for accessing tight corners and making precise cuts in hard-to-reach areas. |
| Veiner-Gouge | Perfect for creating delicate details, veining, and intricate patterns. |
By familiarizing yourself with the unique uses of these gouge types, you can effortlessly select the right tool that matches your specific carving needs.
Exploring The Anatomy Of A Gouge For Better Understanding
To fully grasp how gouges work and how they can enhance your precision carving, it’s essential to explore the anatomy of a gouge. Understanding the different components of a gouge will provide you with better control and enable you to achieve desired cuts and shapes.
The basic anatomy of a gouge includes the following:
- Blade: The cutting edge of the gouge, responsible for removing wood.
- Bevel: The sloping surface near the blade that facilitates smooth cutting.
- Shank: The handle end of the gouge where you grip and apply pressure.
- Ferrule: The metal band that secures the blade to the shank, ensuring stability.
With a better understanding of the anatomy, you can make informed decisions when selecting and using gouges for your precision carving projects. This knowledge will empower you to optimize your techniques and achieve the highest levels of craftsmanship.
The Importance Of Sharpening Gouges For Precision Carving
Sharpening your gouges is an essential step in achieving precise and intricate carvings. With a sharp edge, your gouges can smoothly cut through wood, allowing you to have better control and precision over your carving process. In this section, we will explore the impact of dull gouges on the carving process, the importance of achieving precision and control through sharpened gouges, and the relationship between sharpness and detail in carving.
The Impact Of Dull Gouges On The Carving Process
Dull gouges can significantly hinder your carving process, leading to frustrating results. When your gouges are not sharp enough, the wood fibers will tear instead of being cleanly cut. This can create rough surfaces, making it difficult to achieve the desired level of detail in your carvings. Additionally, dull gouges require more force to make cuts, which can result in less control over the carving and increased risk of accidents.
Some of the common problems caused by using dull gouges include:
- Uneven and jagged cuts
- Difficulty in removing wood material
- Limited control over the carving process
By regularly sharpening your gouges, you can ensure that these issues are minimized, allowing you to focus on creating intricate and precise carvings.
Achieving Precision And Control Through Sharpened Gouges
Sharp gouges are essential for achieving the precision and control required in detailed carvings. When your gouges are sharp, they effortlessly glide through the wood, enabling you to create clean and smooth cuts. This level of precision and control allows you to shape and define your carvings with greater accuracy, ensuring that every stroke contributes to the overall desired outcome.
By sharpening your gouges regularly, you can maintain this level of precision and control throughout the carving process, resulting in finished pieces that exhibit superior craftsmanship and attention to detail.
The Relationship Between Sharpness And Detail In Carving
The sharpness of your gouges directly affects the level of detail you can achieve in your carvings. A sharp edge allows you to make fine and intricate cuts, giving your carvings a greater level of intricacy and realism. Sharp gouges are particularly essential for working on delicate areas or adding intricate details to your carvings.
When your gouges are sharp, you have the ability to create smooth and clean lines, which are crucial for capturing even the slightest nuances and textures in your carvings. This level of detail gives your creations a professional and polished finish, setting them apart from amateur carvings.
In conclusion, sharpening your gouges is pivotal for achieving precision and control in the carving process. By understanding the impact of dull gouges, the importance of sharpening for achieving precision and control, and the relationship between sharpness and detail in carving, you can elevate your carving skills and produce exceptional works of art.
Assessing Gouges: Determining When Sharpening Is Needed
Gouges are essential tools for woodworking enthusiasts, but over time, they can lose their sharpness and become less effective. To ensure optimal performance, it is crucial to assess gouges regularly and determine when they need sharpening. By understanding the signs of a dull gouge, the effects of wear and tear on gouge performance, and how to assess gouge quality before sharpening, you can maintain top-notch woodworking results. Let’s delve into each aspect in detail.
Identifying Signs Of A Dull Gouge
Recognizing the signs of a dull gouge is key to maintaining efficient woodworking. Here are some indicators to help you identify whether your gouge requires sharpening:
- Blade Resistance: When a gouge encounters difficulty cutting through wood, it often indicates a lack of sharpness. Increased effort required to push the tool through the material is a clear sign that sharpening is needed.
- Poor Cutting Quality: A dull gouge typically produces rough and uneven cuts, leaving behind visible tear-out or rough edges. If you notice a decline in the quality of your cuts, it’s time to give your gouge a sharpening session.
- Difficulty Shaping Wood: When shaping wood using a gouge becomes challenging, it suggests that the tool has become dull. A sharp gouge should effortlessly carve and shape the wood, so any resistance is a clear indication of the need for sharpening.
- Increased Tear-Out: If you find that your gouge is causing more tear-out than usual, it is likely due to a loss of sharpness. Tear-out occurs when the gouge struggles to cleanly cut through the wood fibers, resulting in unsightly chipping or splintering. Sharpening can help mitigate this issue.
Understanding The Effects Of Wear And Tear On Gouge Performance
Wear and tear can significantly impact the performance of your gouges, causing them to become dull and less efficient. Here are some effects to be aware of:
- Blunt Blade: With regular use, the blade of a gouge gradually loses its sharp edge due to abrasion from the wood fibers. This blunting effect reduces the gouge’s ability to make clean cuts and requires sharpening to restore its cutting power.
- Edge Chipping: When a gouge repeatedly comes into contact with hard surfaces or accidentally hits a foreign object, it can lead to chipping along the cutting edge. These chips can compromise the tool’s performance, necessitating sharpening and reshaping to remove the damaged sections.
- Corrosion and Oxidation: Exposure to moisture and certain wood species can cause corrosion and oxidation on the gouge blade. This can result in reduced cutting efficiency and potential rusting. Regular inspection and proper maintenance can help identify and address these issues.
Assessing Gouge Quality Before Sharpening
Prior to sharpening your gouge, it is crucial to assess its overall quality to determine the best course of action. Perform the following checks:
- Check for Nicks and Dents: Inspect the blade for any noticeable nicks or dents. Minor imperfections can often be sharpened out, but deep or extensive damage may require blade grinding or replacement.
- Verify Handle Integrity: Ensure the gouge handle is securely attached and free from cracks or splintering. A loose or damaged handle can affect your control and lead to accidents during sharpening or usage.
- Evaluate Blade Alignment: Check that the blade is properly aligned with the handle. Misalignment can result in skewed cutting and uneven wear on the gouge edge. Adjust as needed before proceeding with sharpening.
By assessing gouges thoroughly, understanding the signs of a dull gouge, and recognizing the effects of wear and tear, you empower yourself to make informed decisions about sharpening. Regular assessment and maintenance not only extend the lifespan of your gouges but also enhance the quality of your woodworking projects.
The Basic Steps Of Sharpening Gouges
Gouges are essential tools for woodworkers, but like any cutting instrument, they require regular maintenance to perform at their best. Sharpening gouges may seem like a daunting task, but with the right tools and techniques, you can achieve razor-sharp edges that make your carving projects a breeze. In this article, we will guide you through the basic steps of sharpening gouges to ensure a safe and efficient sharpening process.
Gathering The Necessary Tools For Sharpening
Before you start the gouge sharpening process, it is crucial to gather all the essential tools required for the task. Having the right tools at hand not only makes the process more convenient but also ensures that you achieve precise results. Here are the tools you will need:
| Tools | Description |
|---|---|
| Sharpening stones or diamond plates | Used for removing metal and honing the edge |
| Honing compound | Helps to achieve a polished edge |
| Sharpening jig | Ensures consistent and accurate bevel angles |
| Honing guide | Assists in maintaining a consistent sharpening angle |
| Strop | Used for final polishing and refining the edge |
By having these tools within reach, you can streamline the sharpening process and achieve professional-grade results.
Establishing A Stable And Safe Sharpening Setup
Now that you have gathered the necessary tools, it’s time to set up a stable and safe sharpening station. A secure setup is essential to prevent accidents and ensure consistent results. Follow these steps to establish your sharpening setup:
- Find a well-lit and well-ventilated space to work in.
- Place a non-slip rubber mat or a piece of cloth on your workbench to prevent the sharpening stones from moving.
- Securely fasten the sharpening jig onto the workbench to keep it stable during the sharpening process.
- Position the honing guide onto the gouge and lock it into place.
- Ensure there is enough room to move the gouge back and forth without any obstructions.
By following these steps, you can create a safe and sturdy sharpening setup, allowing you to focus on sharpening your gouges effectively.
Understanding The Correct Angle And Bevel For Gouge Sharpening
One of the most critical aspects of sharpening gouges is understanding the correct sharpening angle and bevel. The angle and bevel determine how the gouge cuts through the wood, affecting the final outcome of your carving. To ensure proper sharpening, consider the following:
- Bevel Angle: The bevel angle is the angle at which the bevel meets the wood’s surface. It influences control, cutting ability, and the type of cut. Different gouges may require different bevel angles based on their shape and purpose.
- Bevel Width: The width of the bevel affects the stability and maneuverability of the gouge during carving.
- Micro Bevel: The micro bevel is a small secondary bevel that helps maintain the gouge’s sharpness between sharpenings.
By understanding these aspects, you can achieve optimal sharpening results and enhance your carving experience.
Sharpening gouges may take some practice to master, but by following these basic steps, you can ensure that your carving tools are always sharp and ready to tackle any project that comes your way. So, gather your tools, set up your sharpening station, and get ready to restore those gouges to their original glory!
Popular Methods For Sharpening Gouges
Gouges are essential tools for woodworkers and carvers alike, but like any cutting tool, they require regular sharpening to maintain their cutting performance. There are several popular methods that can be used to sharpen gouges, each with its own advantages and disadvantages. Whether you prefer the traditional honing method, utilizing power sharpening tools, or exploring alternative techniques, we’ve got you covered. In this article, we will delve into these methods and provide you with a comprehensive guide to sharpening your gouges effectively.
The Traditional Honing Method: Step-by-step Guide
If you appreciate the simplicity and precision of traditional methods, then the honing method may be the perfect choice for you. This method involves manually sharpening your gouges using sharpening stones or sandpaper. Here is a step-by-step guide to honing your gouges:
- Securely hold the gouge in a vise or with a sharpening jig to provide stability.
- Start with a coarse-grit sharpening stone or sandpaper and hold it at a consistent angle against the gouge’s bevel. Move the stone or sandpaper back and forth in a controlled motion, maintaining the angle.
- Gradually progress to finer grits to achieve a sharper edge, ensuring to remove any burrs that may have formed during the sharpening process.
- Finish by stropping the gouge on a leather strop to polish and refine the cutting edge.
Utilizing Power Sharpening Tools For Efficiency And Accuracy
If you seek a faster and more efficient method to sharpen your gouges, power sharpening tools can be a game-changer. These tools, such as bench grinders or sharpening systems, utilize rotating wheels or belts to quickly remove material and create a sharp edge. The process typically involves:
- Setting up the power sharpening tool according to the manufacturer’s instructions.
- Ensuring the gouge is securely held in place and properly aligned with the tool.
- Gently pressing the gouge against the rotating wheel or belt, grinding away the dull metal until a sharp edge is achieved.
- Using a honing compound or leather strop to refine and polish the edge further.
Exploring Alternative Techniques And Their Pros And Cons
While honing and power sharpening tools are the most commonly employed methods, there are alternative techniques worth exploring. These techniques include using waterstones, diamond stones, or even specialized jigs. Here is an overview of their pros and cons:
| Technique | Pros | Cons |
|---|---|---|
| Waterstones | – Provide excellent sharpening results – Suitable for a wide range of gouge sizes – Can be easily maintained |
– Require regular flattening – Soaking time for waterstones |
| Diamond stones | – Offer long-lasting durability – Ideal for quickly removing material – No flattening needed |
– Higher cost compared to other stones – May be too aggressive for some users |
| Specialized jigs | – Provide precise and consistent sharpening angles – Suitable for beginners and woodworkers with limited experience |
– Can be more expensive – Limited customization options |
Ultimately, the choice of sharpening method for your gouges will depend on your personal preferences, equipment availability, and the level of precision you desire. By understanding these popular methods and their respective advantages and disadvantages, you will be well-equipped to sharpen your gouges effectively and achieve outstanding cutting performance.
Maintaining Consistency In Gouge Sharpening
Maintaining consistency in gouge sharpening requires attention to detail and precision. By following proper techniques and using the right tools, you can ensure that your gouges are always sharp and ready for use.
Establishing A Regular Sharpening Routine For Optimal Results
When it comes to sharpening gouges, one of the key factors in achieving optimal results is maintaining consistency. One way to do this is by establishing a regular sharpening routine. By setting aside dedicated time to sharpen your gouges at regular intervals, you ensure that they always stay in top condition, ready to perform their best.
The Importance Of Maintaining The Same Angle During Sharpening
When sharpening gouges, it is crucial to maintain the same angle throughout the process. This consistency ensures that the cutting edge retains its proper shape, allowing for clean and precise cuts. By consistently sharpening at the same angle, you develop muscle memory and can easily replicate the desired sharpness each time you sharpen the gouge.
Ensuring Even Wear On The Cutting Edge For Longevity
Another aspect of maintaining consistency in gouge sharpening is ensuring even wear on the cutting edge. Over time, as you use your gouges, the cutting edge will naturally wear down. To ensure longevity and optimal performance, it is essential to maintain an even wear pattern. This means sharpening your gouges in a way that removes an equal amount of material from the entire cutting edge, preventing any uneven wear or loss of balance.
To achieve this, a systematic approach is beneficial. Begin by inspecting the cutting edge and identifying any areas that require more attention. Then, carefully sharpen those specific areas, making sure to remove an equal amount of material from each one. This process will help preserve the overall balance and integrity of the gouge, extending its lifespan.
In conclusion, maintaining consistency in gouge sharpening is crucial for achieving optimal results. By establishing a regular sharpening routine, maintaining the same angle, and ensuring even wear on the cutting edge, you can prolong the lifespan of your gouges and enjoy clean, precise cuts with every use.
Honing Gouges For A Razor-sharp Edge
When it comes to carving intricate designs or shaping wood, having sharp gouges is essential. Honing plays a crucial role in gouge sharpening as it helps achieve a razor-sharp edge, enhancing the carving experience. Honing involves refining the cutting edge of the gouge to ensure it is as sharp as possible. By understanding the role of honing in gouge sharpening, you can achieve precise and clean cuts in your carving projects.
Steps To Achieve A Razor-sharp Edge Through Honing
If you want to achieve a razor-sharp edge on your gouges, following a step-by-step honing process is essential. Here are the key steps to help you achieve a sharp edge through honing:
- Start by selecting the appropriate honing stones. Gouges require different grits of stones to achieve the desired sharpness. Coarser stones help in removing material quickly, while finer stones refine the edge for a polished finish.
- Secure the gouge in a honing guide to maintain a consistent angle throughout the honing process. This ensures an even edge and reduces the risk of over-sharpening or creating an uneven bevel.
- Begin with the coarsest stone and move up gradually to finer grits. Use consistent and light pressure to slide the gouge back and forth on the stone, maintaining the correct angle. Repeat this process several times on each stone, checking the edge regularly for progress.
- Once you have achieved the desired sharpness on the finest stone, remove any burrs or wire edges by lightly stroking the edge along a leather strop or honing compound. This helps refine the edge further and ensures a clean cutting surface.
- Perform a final inspection to ensure the gouge’s cutting edge is sharp and free from any imperfections. If necessary, repeat the honing process to improve the sharpness even further.
The Benefits Of Honing For Precision Carving
Honing your gouges offers several benefits when it comes to precision carving. Keeping your gouges razor-sharp allows for cleaner and more accurate cuts, reducing the chances of rough or jagged edges on your woodwork. This is especially important when working on delicate or intricate designs that require exceptional precision. Honing also increases the longevity of your gouges by reducing the amount of force required for carving, preventing unnecessary wear and tear on the tools. By incorporating honing into your regular sharpening routine, you can ensure that each carving project is executed with the utmost precision and finesse.
Proper Care And Storage Of Sharpened Gouges
proper care and storage of sharpened gouges is essential to maintain their sharpness and longevity. By following these simple tips and techniques, you can ensure that your gouges remain in top condition, ready for use whenever you need them.
Protecting The Sharp Edge When Not In Use
When you’re not using your gouges, it’s important to protect the sharp edge from any potential damage. One way to do this is by using blade guards or edge protectors. These are typically made of durable material such as plastic or rubber, and they fit snugly over the cutting edge to prevent it from getting chipped or dulled. By using these protectors, you can ensure that your gouges stay sharp and ready for use.
Cleaning And Oiling Gouges To Prevent Rust And Corrosion
In addition to protecting the sharp edge, it’s also crucial to clean and oil your gouges regularly to prevent rust and corrosion. After using your gouges, make sure to remove any debris or wood chips that may have accumulated on the blade. You can use a soft brush or cloth to gently clean the surface. Then, apply a thin layer of oil to the blade to provide a protective barrier against moisture and oxidation. This will help to keep your gouges free from rust and corrosion, ensuring that they stay in excellent condition.
Storing Gouges In A Safe And Organized Manner
Proper storage of gouges is essential to prevent accidental damage and ensure easy access when you need them. One effective method is to store gouges in a dedicated rack or tool box. This helps to keep them organized and prevents them from rolling around and potentially causing harm. Additionally, ensure that each gouge has its own designated space to avoid any contact between the blades, which can lead to nicks or dings.
If you don’t have a dedicated rack or tool box, an alternative option is to use individual blade covers. These covers can be made of plastic or fabric and are designed to wrap around the blade, providing protection and keeping them from coming into contact with other tools. Lastly, consider labeling each gouge with its corresponding size and type. This will make it easier to locate the gouge you need quickly, saving precious time during your woodworking projects.
Learn how to sharpen gouges effectively and address uneven sharpening with these helpful tips and techniques. Master the art of sharpening your gouges to achieve precise and smooth carving results.
Addressing Uneven Sharpening
When it comes to sharpening gouges, achieving consistent and even sharpening is crucial for optimal carving performance. However, even the most experienced woodworkers can encounter inconsistencies in gouge sharpening. The good news is that there are techniques to correct these inconsistencies and prevent future unevenness through proper technique. In this article, we will explore effective ways to identify the causes of uneven sharpening, techniques for correcting inconsistencies, and strategies for preventing future unevenness.
Identifying The Causes Of Uneven Sharpening
To address uneven sharpening in gouges, it is essential to first identify the root causes. Understanding the reasons behind the inconsistency will help you determine the appropriate course of action. Here are a few common causes of uneven sharpening:
1. Uneven bevel grinding: Inconsistent grinding of the gouge’s bevel can lead to uneven sharpening. Factors such as uneven pressure or movement during the grinding process can cause variations in the shape and angle of the bevel.
2. Dull or damaged sharpening stone: A worn-out or damaged sharpening stone can hinder the sharpening process and result in uneven edges. It is important to regularly inspect and maintain the condition of your sharpening stone to ensure optimal sharpening performance.
3. Incorrect technique: Improper technique while sharpening gouges can also contribute to unevenness. This includes inconsistent pressure, incorrect angle, or uneven movement during the sharpening process. Developing good sharpening habits and practicing a consistent technique is vital for achieving even results.
Techniques For Correcting Inconsistencies In Gouge Sharpening
Once you have identified the causes of uneven sharpening, it’s time to correct the inconsistencies to restore your gouges to their optimal sharpness. Here are some effective techniques to consider:
1. Reestablish the bevel: If an uneven bevel is the cause of the inconsistency, you may need to reestablish it. Start by removing the old bevel and carefully grind a new one. Ensure that you apply consistent pressure and maintain a steady angle while grinding to achieve an even bevel.
2. Use honing guides: Honing guides can be valuable tools for maintaining consistent bevel angles during the sharpening process. These guides help stabilize the gouge and ensure a consistent angle throughout the sharpening stroke.
3. Consistent stropping: Stropping involves polishing the cutting edge of the gouge on a leather strop to refine the sharpened bevel. By maintaining consistent stropping techniques, you can further enhance the edge and eliminate any remaining inconsistencies.
Preventing Future Unevenness Through Proper Technique
Prevention is key when it comes to maintaining consistent and even sharpening results. By following proper technique, you can minimize the chances of encountering unevenness in the future. Here are some essential tips to consider:
1. Practice consistency: Developing a consistent technique and maintaining it throughout the sharpening process is crucial in achieving even results. Consistent pressure, angle, and movement will help ensure uniform sharpening.
2. Regular maintenance: It is important to regularly inspect and maintain your sharpening tools. Keep your sharpening stones clean and flat, and replace any worn-out or damaged stones. This will help maintain the effectiveness of your sharpening process and minimize the risk of uneven sharpening.
3. Sharpen regularly: Regular sharpening is essential to prevent your gouges from becoming excessively dull or damaged. By maintaining sharp edges, you reduce the need for extensive grinding and increase the likelihood of achieving consistent and even results.
By identifying the causes of uneven sharpening, utilizing effective correction techniques, and following proper technique and maintenance practices, you can sharpen your gouges evenly and enjoy optimal carving performance. Remember, consistency is key in achieving the best results.
Dealing With Chipped Gouge Tips
Learn how to effectively sharpen chipped gouge tips with these simple techniques. Improve your carving skills and restore the sharpness of your tools for smoother and precise results.
Understanding The Causes Of Chipped Gouge Tips
Chipped gouge tips can be a frustrating problem for woodworkers and carvers. Understanding the causes of these chips can help you prevent them from happening and maintain your gouges in optimal condition. Several factors contribute to chipped gouge tips, including:
- Inadequate tool maintenance: Failure to sharpen and hone your gouges regularly can result in dull edges that are more prone to chipping.
- Incorrect use: Applying excessive pressure or using the wrong technique while carving can cause the tips of your gouges to chip.
- Hard or abrasive wood: Working with hardwoods or woods that contain sand or grit can put extra strain on your gouges and lead to chipping.
By recognizing these causes, you can take the necessary steps to prevent future chipping and ensure your gouges remain in top shape.
Repairing And Restoring Chipped Gouges
If you notice chipped tips on your gouges, there are several methods you can employ to repair and restore them:
- Grinding: One option is to use a bench grinder or a sharpening wheel to grind away the chipped section of the tip. Make sure to follow the original shape and angle of the gouge while grinding to maintain its cutting ability.
- Regrinding and reshaping: For more severe chips, you may need to regrind and reshape the entire tip. This process involves removing the damaged portion, grinding a new bevel, and reestablishing the desired cutting profile.
- Sharpening and honing: After repairing the chipped gouge tip, it’s crucial to properly sharpen and hone the edge to restore optimal cutting performance. This can be done using sharpening stones or a honing guide.
Remember, proper technique and patience are key when repairing and restoring chipped gouge tips. Take your time and ensure you maintain the correct angles and shape to achieve the best results.
Preventative Measures To Avoid Future Chipping
Taking proactive steps to prevent future chipping in your gouges can save you time and frustration down the line. Here are some preventative measures you can implement:
- Regular maintenance: Make it a habit to regularly sharpen and hone your gouges. This keeps the edges sharp and reduces the likelihood of chipping.
- Proper technique: Practice the correct carving technique, ensuring you use the appropriate amount of pressure and avoid twisting or torquing the gouge.
- Wood selection: Choose wood that is suitable for the carving project and doesn’t contain excessive grit or debris.
- Avoid metal contact: Be cautious of accidentally hitting metal objects or nails while carving, as these can cause significant damage to your gouges.
By following these preventative measures and being mindful of how you use and care for your gouges, you can greatly reduce the risk of chipped tips and enjoy smoother carving experiences.
Fine-tuning And Final Touches For Sharpened Gouges
Discover the essential steps to sharpening gouges to perfection, including the fine-tuning and final touches needed for optimal results. Master the art of gouge sharpening with these helpful tips and techniques.
Refining The Sharpness Of A Gouge For Optimal Carving Performance
Once you have successfully sharpened your gouge, it’s time to refine the sharpness for optimal carving performance. Fine-tuning the edge will ensure that your gouge cuts through wood smoothly and effortlessly, allowing you to create intricate details and achieve the desired results.
To refine the sharpness, start by honing the cutting edge. This involves using a fine-grit sharpening stone or a honing guide with a stropping compound. Gently swipe the cutting edge along the stone or stropping compound, maintaining a consistent angle. It’s important to be cautious and avoid applying excessive pressure, as this can damage the edge.
As you hone the cutting edge, pay attention to any areas that might need extra attention. If you notice any unevenness or dull spots, focus on those areas to achieve an even, razor-sharp edge. Repeat this process until the entire cutting edge is refined and honed to perfection.
Polishing The Bevel And Cutting Edge For A Smooth Finish
Once you have refined the sharpness of your gouge, it’s time to polish the bevel and cutting edge. Polishing not only adds a smooth finish to your gouge but also helps to prolong its sharpness and prevent premature dulling.
To polish the bevel, use a fine polishing compound or a leather strop with a honing compound. Apply the compound to the strop or a soft cloth and gently swipe the bevel along the compound. This will remove any remaining burrs or roughness, resulting in a polished surface.
Similarly, polish the cutting edge using the same technique. This will remove any microscopic imperfections and create a razor-sharp edge that glides effortlessly through wood. Remember to maintain a consistent angle and apply gentle pressure throughout the polishing process.
Verifying The Sharpness Through Test Cuts And Adjustments
After refining and polishing your gouge, it’s essential to verify its sharpness through test cuts and make any necessary adjustments. Test cuts not only help you assess the sharpness but also allow you to identify any areas that might require further sharpening or honing.
Start by making test cuts on a scrap piece or an inconspicuous area of your workpiece. Observe how the gouge performs and the quality of the cut. If the cut feels smooth and effortless, and the wood fibers are cleanly severed, then your gouge is sharpened to perfection.
However, if you notice any roughness, tearing, or difficulty in cutting, it means further adjustments are needed. In such cases, go back to the sharpening and refining process, focusing on the areas that require improvement. Repeat the sharpening steps until you achieve the desired sharpness and carving performance.
Sharpening Woodturning Gouges: Bowl, Spindle & Roughing Gouge
Everything above applies to hand-carving gouges — but if you turn on a lathe, bowl gouges, spindle gouges, and roughing gouges are a different tool family with their own bevel angles and grinding methods. Here’s how they differ and how to sharpen each safely.

Bevel Angles by Gouge Type
| Gouge type | Typical bevel angle | Common grind |
|---|---|---|
| Bowl gouge (green/wet wood) | 50–60° | Irish/Ellsworth swept-back grind |
| Bowl gouge (dry wood, standard) | 40–50° | Standard grind |
| Spindle gouge | 35–45° | Fingernail grind |
| Spindle roughing gouge | 45° (flat, straight across) | Never swept back |
📊 A spindle roughing gouge should never be used on bowl or faceplate work — its tang is made from thinner flat bar stock than a bowl gouge and can break under the sideways forces of bowl turning, turning the tool into a projectile. Source: American Association of Woodturners (AAW) safety guidelines.
Using a Wolverine Jig for Consistent Grinds
Freehand grinding a swept-back bowl gouge grind is difficult to repeat consistently, which is why most turners use a jig system like the Oneway Wolverine. The base V-arm holds the tool at a fixed angle to the wheel, while the Vari-Grind attachment lets you roll the gouge to shape the side wings of an Irish or Ellsworth grind. The angle of the jig arm controls the bevel angle; the flute is ground first for shape, then the bevel is honed for a keen edge.
“Using a sharpening jig like the Oneway system with the Wolverine Vari-Grind jig maintains consistent sharpening angles at the wheel every time — the angle of the leg sticking out from the bowl gouge holder adjusts the amount of side wings created, while the extension arm position adjusts the front bevel angle.”
Best Gouge Sharpening Jig
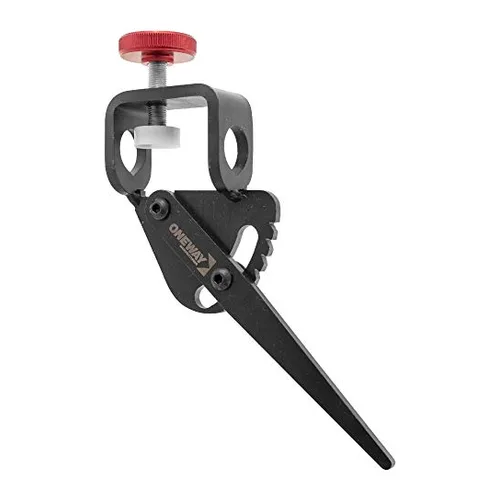
Oneway Wolverine Vari-Grind Attachment
The standard tool turners use for repeatable Irish/Ellsworth swept-back bowl gouge grinds.
- Best for: bowl gouges needing a consistent swept-back grind
- Why we picked it: the industry-standard jig referenced across turning forums and instructors
- Main drawback: requires the base Wolverine V-arm jig to work — sold separately
Compare more gouge sharpening tools
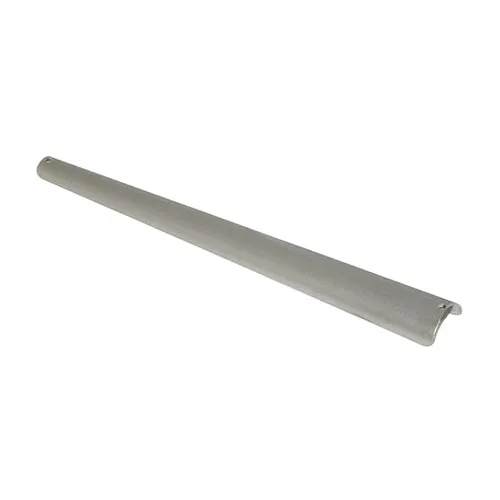
 Option 1 Oneway Wolverine Base Grinding Jig
|
 Option 2 Diamond Honing Cone
|
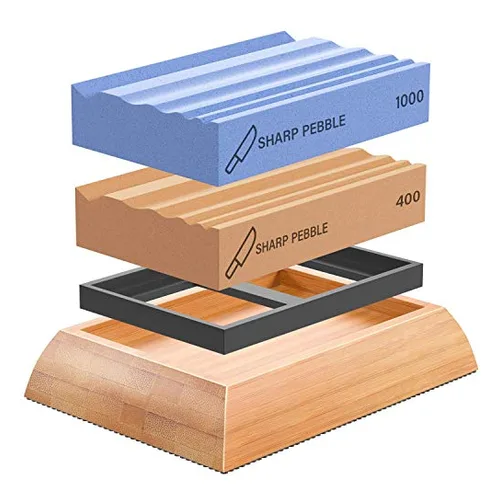 Option 3 Carving Gouge Sharpening Stones
|
As an Amazon Associate we earn from qualifying purchases.
What’s the Difference Between a Bowl Gouge and a Spindle Gouge?
A bowl gouge has a deeper flute and thicker bar stock to handle the sideways forces of faceplate turning, ground with a steeper 40–60° swept-back bevel. A spindle gouge has a shallower flute, a shallower 35–45° fingernail grind, and is meant for spindle work between centers, not bowls.
Can You Use a Roughing Gouge on a Bowl?
No. A spindle roughing gouge’s tang is not built to handle the forces of bowl or faceplate turning and can snap, turning the broken tool into a projectile. Use a bowl gouge for roughing out bowl blanks instead.
Frequently Asked Questions For How To Sharpen Gouges
How Do You Sharpen Wood Gouges?
To sharpen wood gouges, follow these steps:
1. Secure the gouge to a workbench or clamp.
2. Use a sharpening stone or diamond file to shape and sharpen the bevel.
3. Start with coarse grit and work towards finer grit for a smoother finish.
4. Maintain a consistent angle while sharpening.
5. Hone the cutting edge with a leather strop or honing compound.
What Is The Angle Of Sharpening A Gouge?
The angle of sharpening a gouge refers to the bevel angle at the cutting edge. It determines the effectiveness and control of the tool. A typical angle for a gouge is around 30-40 degrees, but it can vary based on the user’s preference and the specific woodturning task at hand.
What Is The Best Method For Sharpening Chisels?
To sharpen chisels effectively, use a sharpening stone or honing guide. Ensure the chisel is secure and maintain a consistent angle while sharpening. Start with a coarse grit and gradually work towards a finer one. Regularly check for sharpness by making test cuts.
What Do You Use To Sharpen Carving Tools?
To sharpen carving tools, use a sharpening stone or a honing guide. Both provide a precise edge for clean and accurate cuts. Ensure that the tools are properly secured and maintain a consistent angle while sharpening to achieve optimal results.
Conclusion
To conclude, maintaining sharpness in your gouges is essential for achieving precise and clean cuts in your woodworking projects. By following the step-by-step guide outlined in this blog post, you can easily sharpen your gouges and extend their lifespan. Remember to use the proper sharpening tools and techniques, and regularly inspect and hone your gouges to ensure optimal performance.
With a well-sharpened set of gouges, you’ll be able to tackle any carving project with confidence and precision. Happy carving!