How to Cut Angles With a Miter Saw: Miter vs Bevel Explained
A miter saw cuts angles by pivoting the table for a horizontal miter angle, tilting the head for a vertical bevel angle, or setting both together for a compound cut — crown molding and picture frames need the combination, not just one. Off by even half a degree, a four-corner picture frame won’t close flush. This guide covers miter vs. bevel settings, the upside-down crown molding method, picture-frame math, and a real angle-setting chart.
Quick Answer
For a basic angled cut, set only the miter gauge (table pivot) to the corner angle. For crown molding or sprung trim, set the miter AND bevel together — a compound cut, not just one adjustment. Always test-cut scrap first: a saw’s 0° mark is actually a 90° square cut, so every other setting is relative to that.
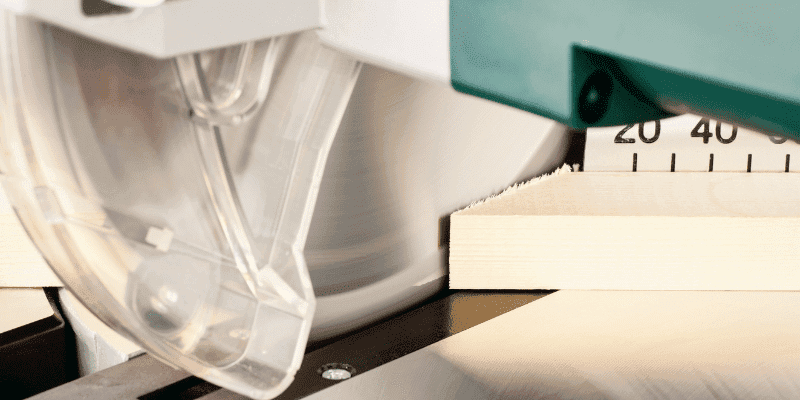
The Miter Saw Controls You’ll Actually Use
Two controls do all the work on an angle cut. The miter gauge pivots the whole table left or right beneath the fence, changing the angle across the face of the board — this is what you use for a picture frame corner or a wall angle. The bevel adjustment tilts the saw head itself, changing the angle through the thickness of the board — this is what tips crown molding into its sprung angle. The fence is what the workpiece registers against for both, so a fence that isn’t square to the blade throws off every angle you cut afterward (if your cuts are drifting even with correct settings, test the fence for square before blaming your math).
Miter Angle vs. Bevel Angle: What’s the Difference?
A miter angle is a horizontal pivot of the saw table that changes the corner angle across the flat of the board — it’s what you set for a picture frame or an angled deck rail. A bevel angle is a tilt of the saw head that changes the angle through the board’s thickness — it’s what you set to make the edge of a board lean instead of stand straight up. A compound cut uses both at once, which is why crown molding (installed at a sprung angle against the wall and ceiling) needs a miter AND a bevel setting, not one or the other.
One number trips up almost everyone the first time: the saw’s 0° mark is actually a 90° square cut. So a 22.5° miter setting doesn’t cut a 22.5° angle on the board — it cuts a 67.5° angle (90° − 22.5°), because the setting measures how far you’ve pivoted away from square, not the resulting angle on the wood. This is also why a 45° setting is the one exception where the saw’s number and the resulting angle line up — 90° − 45° = 45°.
Best Angle-Cutting Saw Pick
Dual-Bevel Sliding Compound Miter Saw
A dual-bevel saw tilts both left and right, so you can cut compound crown-molding angles on either side of a corner without flipping the workpiece.
- Best for: Crown molding, picture frames, and any project needing angles on both sides of center
- Why we picked it: Dual bevel saves the extra setup step of re-clamping mirrored cuts
- Main drawback: Costs more than a single-bevel saw with the same blade size
Compare more angle-cutting essentials
 Option 1 Aluminum Speed Square
|
 Option 2 Picture-Frame Corner Clamp
|
 Option 3 Digital Angle Finder
|
As an Amazon Associate we earn from qualifying purchases.
How to Cut a Basic Angle (Miter Cut)
- Mark the workpiece: Draw the cut line and mark which side of the line is waste, since the blade removes a saw-kerf width of material.
- Set the miter angle: Loosen the miter lock, pivot the table to your target angle, and let it settle into a detent if one exists at that number.
- Position the board: Lay it flat against the table and firmly against the fence — both hands clear of the blade’s path.
- Align the blade to the line: Lower the blade without powering it on to confirm it lines up exactly on the waste side of your mark.
- Make the cut: Power on, let the blade reach full speed, then lower it smoothly through the board in one continuous motion.
- Check the result: Dry-fit the cut against its mating piece before cutting the rest of the run.

How to Cut 45-Degree Angles
A 45° miter is the most common angle cut in woodworking because two 45° cuts joined together make a clean 90° corner — the basis of picture frames, box corners, and most trim returns. Set the miter gauge to the 45° detent (nearly every saw has one, so you’ll feel it lock in), position the board with the finished face up so any small blade tearout lands on the back, and make the cut in one smooth pass. Because 45° is the one setting where the saw’s number matches the resulting angle on the wood, it’s also the easiest angle to double-check with a speed square before you commit to the cut.
How to Cut Custom and Compound Angles
For an angle that isn’t on a detent, measure the actual corner with a speed square or digital angle finder, divide it in half if two pieces will meet there (a 100° corner needs two 50° miters), and dial the miter gauge to that number using the scale’s fine-adjustment screw. A compound angle combines a miter and a bevel setting at once — used any time the molding or trim sits at an angle to both the wall and the surface it’s cut on, which is exactly the situation crown molding creates. Always run a test cut on scrap set up identically to the real piece; a compound setting that’s off by a degree on either axis compounds into a visibly open joint.
Cutting Crown Molding Angles (Upside Down and Backwards)
Crown molding installs at a spring angle — tilted between the wall and ceiling rather than flat — which is why cutting it flat on the saw table would require compound math most DIYers don’t want to do by hand. The standard workaround, sometimes called the nested cutting method, is to cut the molding “upside down and backwards”: place the edge that touches the ceiling flat on the saw table, and the edge that touches the wall against the fence. In this orientation, the molding replicates its installed spring angle on the saw, so you only need to set the miter and bevel numbers from a chart — no trigonometry required.
Most crown profiles sold in the U.S. use a 38° or 45° spring angle, so a chart only needs to cover those two (plus 52° for less common profiles) to handle the overwhelming majority of jobs.
“The first time I cut 52/38 crown nested on the saw, I still got the corner backwards on the first test piece — upside-down-and-backwards is simple in theory but easy to flip in your head. I now mark a small chalk arrow on the ceiling edge of every stick before it goes near the saw, and I haven’t cut a mirrored corner by mistake since.”
Crown Molding Angle Chart: Miter and Bevel by Spring Angle
These are the saw settings for cutting crown molding flat (nested) for a standard 90° inside or outside corner, by spring angle:
| Spring Angle | Common Profile | Miter Setting | Bevel Setting |
|---|---|---|---|
| 38° | 52/38 crown (most common) | 31.6° | 33.9° |
| 45° | 45/45 crown | 35.3° | 30° |
| 52° | 52° spring profile | 38.24° | 25.81° |
📊 52/38 crown (38° spring angle) is the single most common crown profile stocked at U.S. lumberyards — Source: SBE Builders / WoodWeb crown molding geometry tables.
For a corner that isn’t a true 90° (very common in real houses), measure it with a digital angle finder and split the difference between the two walls, then adjust the chart numbers proportionally — or run a printable crown angle calculator for the exact corner reading before you cut.
Common Miter Saw Angle Presets (Detents)
Most miter saws have positive stops — detents — at the angles used most often, so the table clicks into place instead of relying on you reading the scale exactly. Knowing what each detent is actually for saves time hunting for an angle you don’t need to dial in by hand.
| Detent | Typical Use |
|---|---|
| 0° | Standard square crosscut |
| 15° | Hexagon segments, some window trim returns |
| 22.5° | Octagon segments (8 sides × 45° corner = 22.5° per cut) |
| 31.6° | 38° spring-angle crown molding, miter side |
| 33.9° | 38° spring-angle crown molding, bevel side |
| 45° | Picture frames, box corners, standard trim returns |

Cutting Picture Frame Corners: The 45° × 4 = 360° Math
A four-sided picture frame needs each corner to close at exactly 90°, and since two mitered pieces share that corner equally, each piece is cut at half of 90° — 45°. Multiply the four corners by 90° and you get 360°, a full rectangle with no gaps. The math only holds if every one of the four cuts is identical: set the miter gauge once, cut all eight ends (two per side) without moving the fence stop, and the frame closes itself. A single piece cut at 44° instead of 45° throws off that corner by 2° total once both mating angles are added together — small enough to look like a mistake, large enough to leave a visible gap.
Coping vs. Mitering Inside Corners: Which Should You Use?
An inside corner can be closed two ways: mitering (two 45° angled cuts that meet) or coping (one piece cut square, the other shaped with a coping saw to fit over its profile). Real walls are rarely a perfect 90°, and wood moves seasonally — both work against a mitered inside corner, which can open into a visible gap as humidity changes. A coped joint overlaps the profile itself, so it stays tight even if the wall angle is a degree or two off or the wood shrinks slightly.
| Method | Best For | Tradeoff |
|---|---|---|
| Mitering | Outside corners, quick jobs, perfectly square rooms | Faster to cut, but can crack or gap over time on inside corners |
| Coping | Inside corners on crown and baseboard, older or out-of-square houses | Slower to learn, but stays tight through seasonal wood movement |
Most trim carpenters cope every inside corner and miter every outside corner as the default rule — outside corners have no overlapping profile to cope against, so mitering is really the only practical option there.
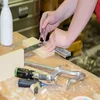
Keeping the Cut Stable: Clamps, Supports, and Long Workpieces
An angled cut has more room to shift than a square crosscut, since the blade meets the board at an angle instead of straight on. Clamp the workpiece to the fence or table whenever both hands can’t hold it firmly on their own, especially on bevel and compound cuts where the board wants to rotate as the blade enters. For boards longer than your saw table can support, add roller stands or an auxiliary table on both sides — an unsupported long end drops as the cut finishes, which twists the last inch of the cut out of square. When you need several identical angled pieces, clamp a stop block to a support at the exact length needed so every repeat cut matches without re-measuring.
Safety Precautions When Cutting Angles
- Wear safety glasses and hearing protection every time the saw is running.
- Keep both hands outside the marked no-hands zone around the blade’s path, especially on angled cuts where the natural hand position shifts closer to the blade.
- Use a push stick or push block on narrow offcuts instead of fingers.
- Let the blade reach full speed before it touches the wood, and let it stop spinning before lifting it back up.
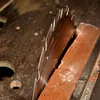
Avoiding Blade Tearout on Angled Cuts
Tearout happens more often on angled cuts because the blade exits the wood at a shallower angle, giving splinters more leverage to lift before the tooth clears. A blade with a higher tooth count (60–80T for trim work) leaves a cleaner edge than a standard 24–40T framing blade. Scoring the cut line with a utility knife before cutting, or backing the cut with painter’s tape, gives the fibers something to shear cleanly against instead of tearing free.
When Your Angle Cuts Aren’t Accurate
If your settings are correct on paper but the cut still doesn’t match, the saw itself is usually the real problem, not your math. A fence that’s not square to the blade, blade runout, or drifted miter and bevel gauges will throw off every angle by the same amount regardless of what you dial in. Rather than re-deriving fixes here, use our dedicated guides: why your miter saw isn’t cutting straight walks through diagnosing fence, blade, and gauge problems with a 2-board test cut, and how to square a miter saw covers the full calibration process step by step.
Frequently Asked Questions About Cutting Angles With a Miter Saw
How do you work out the angle to set on a miter saw?
Measure the actual corner with a speed square or digital angle finder, then divide by two if two pieces will meet there — a 90° corner needs two 45° miters. Remember the saw’s scale reads the angle away from square (90°), not the resulting angle on the wood, except at the 45° mark where the two happen to match.
How do you cut a 45-degree angle with a miter saw?
Lock the miter gauge into its 45° detent, position the board flat against the fence with the finished face up, and cut in one smooth pass once the blade is at full speed. Test the result against a speed square before cutting the rest of the pieces in a run.
Can a miter saw cut any angle?
Most miter saws swing to about 45°–60° in each direction, which covers the large majority of trim and framing angles. For an angle beyond your saw’s swing, clamp a temporary angled fence to the table to effectively shift the zero point, letting you reach angles the saw’s scale doesn’t cover on its own.
Why are my miter saw cuts not accurate even after measuring correctly?
The saw is almost always the cause, not the math: a fence out of square, blade runout, or drifted miter and bevel gauges shift every angle by the same fixed amount. See our full diagnostic guide and 2-board test cut to isolate the exact cause in a few minutes.
Should I miter or cope inside corners on crown molding?
Cope inside corners whenever possible — the overlapping profile stays tight even as the wall angle varies or the wood moves seasonally. Reserve mitering for outside corners, where there’s no profile to cope against.
What miter and bevel settings do I use for crown molding?
For the most common 52/38 crown profile (38° spring angle) cut flat in a standard 90° corner, set a 31.6° miter and a 33.9° bevel. For 45/45 crown, use a 35.3° miter and a 30° bevel. Always confirm with a test cut, since real corners are rarely a perfect 90°.
Conclusion
Cutting angles accurately comes down to knowing which control does what — miter for horizontal angle, bevel for tilt, both together for compound cuts — and confirming every setting with a test cut on scrap before touching the real workpiece. Once the basic angle and 45° cuts feel routine, the crown molding chart and picture-frame math above cover the two situations most woodworkers eventually need. If a saw that’s dialed in correctly still won’t produce a clean angle, the calibration and troubleshooting guides linked above solve that separately from technique. For more angle charts, saw calibration guides, and buying advice, see our full miter saw hub.