How to Sharpen Wood Chisels: Angle, Stones & Paper Test
To sharpen wood chisels, you need to use a sharpening stone and move the blade back and forth until it becomes sharp and polished. Woodworking enthusiasts and professionals alike know the importance of sharpening their chisels to ensure clean and precise cuts.
A dull chisel not only hampers the efficiency of your work but can also cause accidents. Sharpening wood chisels may seem daunting at first, but with the right technique, it becomes a straightforward process that can be easily executed. We will guide you through the steps to sharpen your wood chisels effectively, ensuring optimal performance and longevity.
By following these instructions, you will be able to maintain sharp chisels that will enhance your woodworking skills and deliver impeccable results.
The Art Of Sharpening Wood Chisels
Learn the art of sharpening wood chisels with these expert tips. Achieve precise and clean cuts by following a step-by-step process to sharpen your chisels effectively.
Importance Of Sharp Chisels In Woodworking
When it comes to woodworking, the sharpness of your chisels plays a vital role in achieving high-quality results. A sharp chisel effortlessly cuts through wood, allowing you to make precise and clean cuts. This not only enhances the overall aesthetic appeal of your woodwork but also improves its functionality. Sharp chisels ensure that the wood fibers are cleanly severed without any tearing or splintering. This is particularly important when working with delicate wood pieces or intricate designs.
The Difference Between Sharp And Dull Chisels On Woodwork Quality
The difference between working with sharp chisels and dull ones is like night and day. A sharp chisel allows you to have complete control over your cuts, ensuring smooth and accurate results. On the other hand, using a dull chisel can be frustrating and lead to uneven cuts, rough surfaces, and even damage to your woodwork. Dull chisels tend to tear the wood fibers instead of cleanly slicing through them, resulting in a poor finish and compromised structural integrity.
To better understand the difference, let’s take a look at how sharp and dull chisels affect different aspects of woodwork quality:
| Aspect | Sharp Chisels | Dull Chisels |
|---|---|---|
| Cut precision | Bold, precise, and accurate cuts | Inaccurate and uneven cuts |
| Surface finish | Smooth and clean surface | Rough and torn surface |
| Wood fiber integrity | Cleanly severed fibers | Torn and splintered fibers |
As you can see, sharpening your chisels properly is crucial for achieving the desired woodwork quality.
Now that you understand the importance of sharp chisels and the difference they make in woodworking, let’s delve into the art of sharpening wood chisels.
Recognizing Dull Wood Chisels
Wood chisels are an essential tool for any woodworking enthusiast. Whether you’re a professional carpenter or a DIYer, having sharp chisels is crucial for achieving precise and clean cuts. Over time, however, chisels can become dull and lose their effectiveness. In this section, we will discuss the visual and functional signs of a dull chisel, as well as the negative effects of continued use without sharpening.
Visual And Functional Signs Of A Dull Chisel
Recognizing a dull chisel is the first step towards ensuring that your woodworking projects are executed with efficiency and accuracy. Here are some visual and functional signs that indicate your chisel may be in need of sharpening:
- Blunted Cutting Edge: Observe the cutting edge of your chisel closely. If you notice that it’s no longer sharp and lacks its initial keenness, it’s likely that your chisel has become dull. A dull cutting edge will result in more effort required to cut through wood, and it may even tear the wood fibers rather than cleanly slice through them.
- Nicks and Chips: Inspect the cutting edge for any visible nicks or chips. These imperfections can occur from accidental strikes against hard surfaces or when cutting through tough materials, causing the chisel to lose its sharpness. Nicks and chips can significantly affect the chisel’s performance, compromising the quality of your cuts.
- Lack of Control: When using a dull chisel, you may find it increasingly difficult to maintain control over the tool. Dull chisels tend to slip or wander, making it challenging to make precise and accurate cuts. This lack of control can be frustrating and potentially result in damage to your workpiece.
- Increased Effort: Another sign of a dull chisel is the need for increased physical effort to achieve the desired cutting depth. Dull blades require more pressure to cut through wood, causing fatigue and making your woodworking tasks much more strenuous.
Effects Of Continued Use Without Sharpening
Ignoring the signs of a dull chisel and continuing to use it without proper sharpening can lead to several negative consequences. Here are some effects you may experience:
- Poor Quality Cuts: With a dull chisel, you’ll find it difficult to achieve clean and precise cuts, resulting in rough and jagged edges. This can diminish the overall quality and aesthetics of your woodworking projects.
- Time Wasted: A dull chisel will slow down your progress as you exert more effort into each cut. This prolongs the time it takes to complete your woodworking tasks and can be frustrating when working on tight deadlines.
- Inefficiency: Dull chisels require more force and energy, leading to inefficiency in your woodworking process. Sharpening your chisels, on the other hand, ensures optimal cutting performance and enhances productivity.
- Damage to Workpiece: Using a dull chisel increases the risk of damaging your workpiece. When a chisel slips or loses control due to its dullness, it can result in unintentional gouges or scratches on the wood surface, potentially ruining your project.
Recognizing the signs of a dull chisel is crucial for maintaining the quality of your woodworking projects. By sharpening your chisels regularly, you can ensure clean, precise, and efficient cuts, enhancing both the enjoyment and success of your woodworking endeavors.
Choosing Sharpening Tools And Materials
When it comes to sharpening wood chisels, having the right tools and materials is crucial. This will ensure that you achieve the best possible outcomes and make your chisels razor-sharp. In this section, we will explore the different types of sharpening stones, discuss the pros and cons of honing guides versus freehand sharpening, and take a look at some additional gear that can enhance your sharpening experience.
Types Of Sharpening Stones: Water Stones, Oil Stones, And Diamond Stones
Sharpening stones come in different materials, each with its own unique characteristics. Let’s take a closer look at the three main types:
Water stones
Water stones are popular among woodworkers for their fast cutting action and ability to create a keen edge. They typically require soaking in water before use to prevent excessive wear and heat buildup. Water stones are available in various grits, which determine the level of coarseness or fineness of the stone. They are great for initial grinding and sharpening.
Oil stones
Oil stones, as the name suggests, are lubricated with oil before use. They are known for their durability and ability to maintain a flat surface even after extended use. They come in different grits and provide a consistent and reliable sharpening experience. Oil stones are particularly suitable for honing and polishing an already sharpened edge.
Diamond stones
Diamond stones are a popular choice among professionals due to their exceptional durability and ability to quickly remove material. Made with a diamond abrasive bonded to a metal plate, they offer a long lifespan and consistent performance. Diamond stones are available in various grits and are ideal for fast and efficient sharpening.
Honing Guides Versus Freehand Sharpening
When it comes to sharpening chisels, you have two main options: using a honing guide or sharpening freehand. Let’s examine the pros and cons of each method:
| Honing guides | Freehand sharpening |
|---|---|
|
|
Using a honing guide can be beneficial, especially for beginners, as it eliminates the guesswork and ensures consistent angle control. On the other hand, freehand sharpening allows for more flexibility and control over the sharpening process, but it requires practice and skill development.
Additional Gear: Strops, Honing Oil, And Angle Finders
In addition to sharpening stones and honing guides, there are other tools and materials that can enhance your sharpening experience:
- Strops: Used for the final polishing and refining of the cutting edge.
- Honing oil: Provides lubrication and helps prevent rust during sharpening.
- Angle finders: Aid in achieving precise sharpening angles for different chisels.
These additional gear items can elevate your sharpening process, ensuring that your chisels are honed to perfection. The same coarse-to-fine stone progression also applies if you need to sharpen a wood scraper, another edge tool that dulls with use.
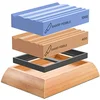
Sharp Pebble Whetstones for Chisels (400/1000 Grit)
A coarse-to-medium water stone pair built specifically for carving and chisel edges, with a non-slip bamboo base.
Best for: starting a dull chisel from scratch and re-establishing the bevel
Why we picked it: the 400/1000 grit combo matches the coarse-to-fine progression this guide walks through
Main drawback: you’ll still want a finer stone or strop afterward for a polished, razor edge
Check Price on Amazon


As an Amazon Associate we earn from qualifying purchases.
Setting Up For Sharpening Wood Chisels
Preparing the workspace and taking safety measures are essential steps to ensure a successful wood chisel sharpening process. By following these steps, you can create an environment that is both comfortable and safe, setting the groundwork for effective chisel sharpening.
Preparing The Workspace And Safety Measures
Before you start sharpening your wood chisels, it’s crucial to have a well-organized workspace that allows for easy access to your tools and materials. Here are some key steps to follow:
- Clear the clutter: Begin by removing any unnecessary items from your workspace. This will provide you with enough room to work efficiently and minimize distractions.
- Set up adequate lighting: Proper lighting is essential for accurate sharpening. Make sure your workspace is well-lit, either through natural light or by using bright overhead lights or a task lamp.
- Secure your workbench: Ensure that your workbench is stable and won’t wobble or move during the sharpening process. This will help you maintain precision and prevent accidents.
- Wear safety gear: Sharpening chisels involves handling sharp tools, so it’s essential to prioritize safety. Wear safety goggles to protect your eyes from flying debris, and use gloves to safeguard your hands from potential injury.
- Organize your sharpening supplies: Gather all the necessary tools and materials required for the sharpening process. This may include sharpening stones, honing guides, lubricants, and a strop. Arrange them in a convenient and orderly manner on your workbench.
Securing The Chisel For Sharpening
Now that your workspace is prepared, it’s time to secure the wood chisel in a proper sharpening position. Follow these steps:
- Clean the chisel: Before securing the chisel, ensure it is clean and free from any dirt or debris. Use a soft cloth or a brush to gently clean the entire surface of the chisel.
- Use a honing guide: A honing guide helps maintain the correct angle while sharpening the chisel. Attach the chisel securely to the honing guide, ensuring it is aligned and centered.
- Secure the honing guide: Place the honing guide on your workbench or in a vise, making sure it is stable and doesn’t move during the sharpening process. This will allow you to maintain consistency and precision.
Angle Setting And Its Importance In Sharpening
The angle at which you sharpen your wood chisel plays a crucial role in achieving a sharp and effective cutting edge. Here’s why angle setting is important:
- Optimal performance: The angle at which the chisel is sharpened affects its cutting ability. By setting the correct angle, you can achieve a sharper edge, allowing for more precise and effective woodworking.
- Durability: The angle setting also impacts the durability of the chisel’s cutting edge. A correct angle helps distribute the force evenly, reducing the risk of chipping or excessive wear.
- Personal preference: Depending on the type of woodworking tasks you undertake, you may have specific preferences for the angle at which your chisel is sharpened. Experimentation and finding the angle that suits your needs best can enhance your woodworking experience.
Remember to consider the type of wood you will be working with and the intended use of the chisel when setting the angle. Always double-check the manufacturer’s recommendations or consult experienced woodworkers for guidance on the optimal angle for your specific chisel.
How To Sharpen Wood Chisels: A Step-by-step Process
Sharpening wood chisels is an essential skill for any woodworking enthusiast. A sharp chisel allows for precise and clean cuts, making your woodworking projects all the more professional. In this step-by-step guide, we will walk you through the process of sharpening wood chisels, from flattening the back of the blade to honing the edge for ultimate sharpness.
Flattening The Back Of The Chisel Blade
To begin our sharpening process, it is crucial to flatten the back of the chisel blade. The back of the blade should be perfectly flat to ensure a consistent and sharp cutting edge. Follow these steps:
- Secure the chisel in a vice, ensuring it is stable and at a comfortable working height.
- Start with a coarse-grit sharpening stone or diamond plate. Hold the chisel at a slightly higher angle than the bevel and slide it back and forth across the stone.
- Continue this back-and-forth motion, gradually reducing the pressure on the chisel to allow the entire back to come into contact with the stone.
- Inspect the back of the chisel blade. Look for consistent contact and a flattened surface. Repeat the process if necessary until the back is flat.
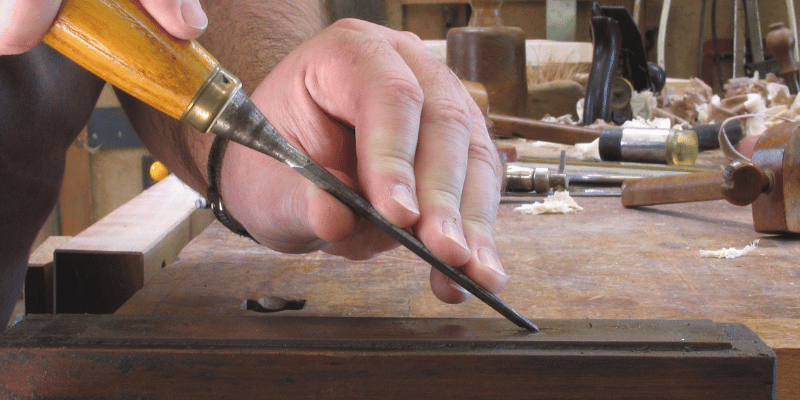
The Proper Technique For Sharpening The Bevel
With the back of the chisel blade flattened, we can now move on to sharpening the bevel. The bevel is the angled cutting edge that allows the chisel to slice through wood. Follow these steps:
- Hold the chisel in your dominant hand and the sharpening stone in your other hand.
- Position the bevel flat on the stone, matching the existing angle.
- Using a controlled motion, slide the chisel along the stone, maintaining the angle and applying even pressure.
- Repeat this process several times, ensuring both sides of the bevel receive equal treatment for a symmetrical edge.
Progressing Through Different Grits Of Stones
Now that the bevel is sharpened, we can refine the edge further by progressing through different grits of stones. This process helps to achieve a fine and polished cutting edge. Follow these steps:
- Start with a medium-grit stone, continuing to sharpen the bevel using the same technique as before. Repeat until you achieve a satisfactory edge.
- Switch to a fine-grit stone and repeat the sharpening process, refining the edge to a higher level of sharpness and polish.
Honing The Edge For Ultimate Sharpness
To achieve the ultimate sharpness, it is essential to hone the edge of the chisel. Honing helps to remove any burrs or imperfections, resulting in a razor-sharp cutting edge. Follow these steps:
- Using a leather strop or honing guide, apply a small amount of honing compound to the surface.
- Hold the chisel at the same angle as the bevel and slide it back and forth on the strop or honing guide.
- Continue honing until the desired sharpness is achieved, periodically checking the edge for smoothness and sharpness.
- Wipe away any residue and test the chisel on a piece of wood to ensure it is razor-sharp and ready for woodworking.
By following this step-by-step process, you can ensure your wood chisels are always sharp and ready for flawless woodworking projects. Take care of your chisels, maintain their sharpness, and enjoy the precision and professional results they will bring to your craft.
Preserving The Chisel’s Sharpness
Keeping your wood chisels sharp is essential for achieving clean and precise cuts. However, sharpening your chisels is not the only aspect of maintaining their sharpness. Proper storage, regular maintenance, and careful handling are equally important to ensure that your chisels retain their edge for a long time. In this section, we will discuss the best practices for preserving the sharpness of your chisels.
Proper Storage Practices For Chisels
To prevent your chisels from getting damaged or dull, it is crucial to store them correctly. Follow these storage practices to maintain the sharpness of your chisels:
- Store your chisels in a dedicated toolbox or rack. This will protect them from accidental bumps, falls, or other external damage.
- Keep your chisels in a dry, clean, and well-ventilated area. Moisture and humidity can cause rusting, which can ruin the sharpness of the chisel’s edge.
- Consider using chisel guards or blade protectors to prevent accidental contact and preserve the sharpness of the cutting edge.
Maintenance Routines Between Sharpening Sessions
Regular maintenance is key to ensuring that your chisels stay sharp even between sharpening sessions. Here are some maintenance routines to follow:
- After each use, clean your chisels thoroughly with a soft cloth or brush to remove any debris or buildup that could affect their performance.
- Inspect the cutting edge for nicks, chips, or dull spots. If necessary, touch up the edge using a honing guide and sharpening stone.
- Apply a thin coat of rust-preventative oil to the metal parts of your chisels to protect them from moisture and potential rust formation.
Tips For Long-term Care And Handling
By following these tips, you can ensure that your chisels remain sharp and effective for a long time:
- Avoid using excessive force or applying sideways pressure when working with your chisels. This can lead to the formation of chips or cracks in the cutting edge.
- Always use the appropriate size and type of chisel for the task at hand. This will minimize the risk of damaging the tool and help maintain its sharpness.
- Regularly check the handles for any signs of wear or damage. Replace any worn or loose handles as they can affect your control and grip, leading to potential accidents.
By incorporating these storage practices, maintenance routines, and handling tips into your woodworking routine, you can preserve the sharpness of your wood chisels and enjoy precise and clean cuts for years to come.
Frequently Asked Questions For How To Sharpen Wood Chisels
How Do You Sharpen A Chisel With A Honing Guide?
To sharpen a chisel with a honing guide, secure the chisel in the guide, set the angle, and move the chisel back and forth across a wet sharpening stone. Maintain a consistent pressure and angle during the process to achieve a sharp edge.
What Grit Stone Is Best For Sharpening Chisels?
The best grit stone for sharpening chisels is usually between 1000 and 3000. Higher grit stones like 4000 or 6000 can be used for finishing touches.
Can I Sharpen A Chisel With A File?
Yes, you can sharpen a chisel with a file. It is a common method to remove dull edges and restore sharpness. Make sure to hold the chisel firmly and move the file in the same direction as the bevel. Maintain a consistent angle and apply even pressure for best results.
What’s The Basic Process To Sharpen A Wood Chisel?
To sharpen a wood chisel, first secure it in a vise. Use a honing guide to maintain the correct angle as you rub the chisel against a coarse sharpening stone. Then switch to a finer stone to polish the bevel.
Finish by honing the back of the chisel using a flat stone.
Conclusion
To conclude, sharpening wood chisels is an essential skill for every woodworker. By following the step-by-step process outlined in this blog post, you can ensure that your chisels are always razor-sharp and ready for use. Remember to take your time, use the right tools, and maintain a consistent angle throughout.
With practice and proper care, you’ll be able to achieve precise and clean cuts in your woodworking projects. Happy chiseling!