How to Cut a 45 Degree Angle With a Circular Saw (Bevel vs Miter)
A circular saw — also called a skill saw, after the Skilsaw brand — cuts a 45-degree angle two different ways: tilt the bevel knob to angle the blade through the material’s thickness, or mark a 45-degree line and guide the saw along it for a miter-style crosscut. Mixing the two up is the #1 reason first-time cuts come out wrong. This guide covers both methods, how a 7-inch speed square squares up the guide cut, and what to check when the bevel comes out loose or the cut wanders off-line.
Quick Answer
To cut a 45-degree bevel (through the edge/thickness), tilt the saw’s base plate to the 45-degree detent and rip or crosscut as normal. To cut a 45-degree miter (across the face, like trim or a picture-frame corner), keep the blade at 90 degrees, mark the line with a speed square, and guide the saw’s shoe along it — a 7-inch square works up to 2×8 lumber, a 12-inch square up to 2×12.
Bevel Cut vs. Miter Cut: Which One Is Your 45-Degree Angle?
Most circular saw manuals only document one adjustment — the bevel knob — which is why so many guides (including earlier versions of this one) describe the miter cut as if it happens through the same mechanism. It doesn’t. A circular saw has no rotating table like a miter saw, so there is no “miter angle” setting to dial in; the miter-style 45-degree cut is made by hand, using a marked line and a guide.
| Cut Type | What Moves | How You Set It | Best For |
|---|---|---|---|
| Bevel cut | The blade tilts inside the base plate | Bevel adjustment knob/lever, 0–45°+ scale | Chamfered edges, angled tabletop edges, deck planter sides |
| Miter cut | Nothing on the saw — you guide the path | Speed square or angle guide clamped to a marked line | Trim ends, baseboard corners, picture-frame joints, deck cleats |
| Compound cut | Both — blade tilted AND path angled | Bevel knob set first, then guide the angled path | Crown molding, angled roof framing, picture frames with sloped sides |
If a search led you here for “how to cut 45 degree angle trim with a circular saw,” you want the miter cut method further down this page. If you’re chamfering an edge or a deck baluster top, you want the bevel cut section right after this one.
Essential Tools And Materials Needed
You need a circular saw with an adjustable bevel base, a tape measure, a speed square, clamps, and a pencil. Safety goggles and hearing protection are not optional — OSHA’s saw guarding rule (29 CFR 1926.304) exists precisely because the point of operation on a tilted blade is less covered than on a flat cut. If you haven’t settled on a saw yet, our tools & saws guide covers what to look for before you buy.
Circular Saw With Adjustable Bevel Settings
Look for a saw with a clearly marked bevel scale and a solid detent at 45 degrees — cheaper saws let the base plate drift a degree or two under pressure, which shows up as a wavy bevel line on a long rip. Check the circular saw’s base plate for flex before buying if you plan to bevel-cut thick stock regularly.
- A locking bevel lever holds the angle better than a simple set-screw under sustained cutting pressure.
- A wide, flat base plate resists tipping mid-cut more than a narrow one.
- Check the circular saw‘s bevel scale against a digital angle finder once — printed scales are occasionally off by a degree from the factory.
Measuring Tools (Tape Measure, Square)
A tape measure sets the cut length; a speed square both marks the 45-degree line and doubles as the saw guide in the miter-cut method below. Keep both tools free of sawdust buildup on the edges — a fraction of a millimeter of debris under the square throws off the angle on a long cut.
Safety Equipment (Goggles, Gloves, Ear Protection)
Goggles protect against flying debris, gloves protect hands during setup (remove them before the cut — loose gloves near a spinning blade are their own hazard), and ear protection matters most on bevel cuts, where the blade’s exposed arc runs slightly louder than a square cut.
📊 Portable circular saws with a blade over 2 inches must have guards above and below the base plate; the upper guard only opens the minimum arc needed to let the base tilt for a bevel cut. — Source: OSHA 29 CFR 1926.304, Woodworking Tools

Setting Up A Stable Workstation
A stable workstation matters more for a 45-degree cut than a square one, because any wobble shows up as an obvious gap once two angled pieces meet. Use a flat, level surface — sawhorses or a workbench — free of clutter that could snag the saw’s cord or shift your footing mid-cut.
Securing Materials For Stability
- Clamp it down: Two clamps minimum on anything shorter than 3 feet — a single clamp lets the far end lift as the blade exits.
- Support long stock: Boards and planks need a second sawhorse or a support arm so the offcut doesn’t drop and pinch the blade.
- Mark before you clamp: Position your 45-degree line, then clamp — clamping first and marking around the clamp invites a crooked line.

Using A Speed Square As A Circular Saw Guide
A speed square is the standard jig for a 45-degree miter cut — no separate guide rail needed for boards. Set the square’s pivot point on the cut mark, rotate the body to the 45-degree scale, and hold the saw’s shoe flush against the square’s edge as you cut. A 7-inch speed square covers boards up to roughly 2×8; a 12-inch “Big 12” style square extends that to 2×12 material.
- Mark the line: Measure the cut length and mark a single point where the 45-degree line should start.
- Set the square: Hook the square’s lip over the board’s edge, pivot it to the 45-degree notch, and hold or clamp it in place.
- Register the shoe: Rest the saw’s base plate flat against the square’s fence — not just close to it.
- Cut in one pass: Let the blade reach full speed, then feed forward smoothly while keeping constant pressure against the square.
On repeat cuts — say, a run of deck cleats or picture-frame sides — clamp the square instead of hand-holding it. A hand-held square shifts by a degree or two under cutting pressure on longer boards; a clamped one doesn’t. Prefer a fixed setup over a hand-held square? Our guide on building your own circular saw guide covers a shop-made version that clamps down the same way.
Best 45-Degree Cutting Guide Pick
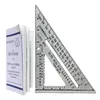
SWANSON 7-Inch Speed Square
The standard reference square most trim carpenters already carry — doubles as a 45-degree marking tool and a saw guide.
- Best for: Boards and trim up to roughly 2×8
- Why we picked it: Aluminum body holds up to repeated saw-shoe contact without the edge rounding over like plastic squares do
- Main drawback: Too small to guide cuts on lumber wider than about 8 inches
Compare more 45-degree cutting guide options
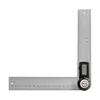
 Option 1 Swanson “Big 12” 12-Inch Square
|
 Option 2 GemRed Digital Angle Finder
|
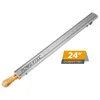 Option 3 POWERTEC 24-Inch Straight Edge Guide
|
As an Amazon Associate we earn from qualifying purchases.
Adjusting The Bevel For A 45-Degree Bevel Cut
This section is specifically for a bevel cut — tilting the blade through the material’s edge. If you’re cutting a miter-style angle across the face of a board (trim, cleats, frame corners), skip to the marking-and-guiding section below instead; the bevel knob plays no part in that cut.
Understanding The Bevel Adjustment Mechanism
Every circular saw with bevel capacity has an adjustable base plate or shoe that tilts relative to the blade. A lever or knob near the front of the saw unlocks this tilt, and most saws have a detent — a small mechanical stop — at common angles like 22.5 and 45 degrees.
- Loosen the bevel lever, tilt the shoe until the angle indicator lines up with the 45-degree mark, then retighten.
- Some saws max out bevel capacity below a true 45 degrees once the blade guard and motor housing are accounted for — check your saw’s spec sheet for its actual maximum bevel capacity before assuming 45 degrees is available.
- Verify the setting with a digital angle finder against the blade itself, not just the printed scale — printed scales can be off by a degree from the factory.

Cutting A 45-Degree Miter Line By Hand
This is the method for trim, baseboard, deck cleats, picture-frame sides, and any other 45-degree cut made across the face of a board — the cut most people searching for “how to cut a 45 degree angle with a circular saw” actually mean. The blade stays at 90 degrees the whole time; only the marked line changes.
- Measure and mark: Determine the finished length, then mark a single point on the board’s edge where the angled line begins.
- Draw the 45-degree line: Hook a speed square over the edge, pivot it to the 45-degree notch, and draw the line across the face with a pencil.
- Position the guide: Realign the square (or a clamped straight edge for a repeat cut) exactly on the drawn line, offset for the saw blade’s kerf width.
- Make the cut: Let the blade reach full speed before it contacts the board, then feed the saw smoothly along the guide in one continuous pass.
- Check the joint: Dry-fit the cut piece against its mating angle before final assembly — a gap at the tip or heel means the guide shifted mid-cut.
For a picture-frame or baseboard corner, both pieces need matching 45-degree miters cut in mirror directions — mark and cut one piece at a time rather than trying to flip a single setup, since a circular saw (unlike a miter saw) has no fence to preserve the angle when the board is flipped.
Proper Positioning And Grip For Stability
Stand with feet shoulder-width apart, one foot slightly forward, positioned so your body lines up with the cutting direction rather than square to the board. Grip the main handle with your dominant hand and the auxiliary handle with the other — this two-handed grip matters more on a bevel cut, where the saw’s balance point shifts as the shoe tilts.
- Stance: Feet shoulder-width apart, knees slightly bent, weight even on both feet.
- Grip: Firm but not white-knuckled — a tense grip transmits every small hand movement straight into the cut line.
- Safety check: Confirm the blade guard retracts and resets freely before starting; a sticking lower guard is a common cause of kickback on bevel cuts specifically, since the guard opens further to clear the tilted blade.
Choosing The Right Blade For The Job
A 45-degree cut exposes more blade to the cut than a square one, so tooth count matters more here. A combination blade handles most general 45-degree work; a fine-tooth crosscut blade gives a cleaner miter joint on trim and plywood edges.
- Combination blade: General-purpose choice for framing lumber and deck cleats.
- Crosscut/fine-tooth blade: Cleanest edge for trim miters and any joint that will be visible — see our breakdown of circular saw blade types for the full lineup.
- Plywood blade: Minimizes splintering on a long bevel or miter cut through sheet goods, the same concern covered in our guide to cutting plywood without splintering.
Whichever blade you choose, a dull one is the fastest way to ruin a 45-degree edge — check our guide on how long a circular saw blade should last if yours has been in service a while.
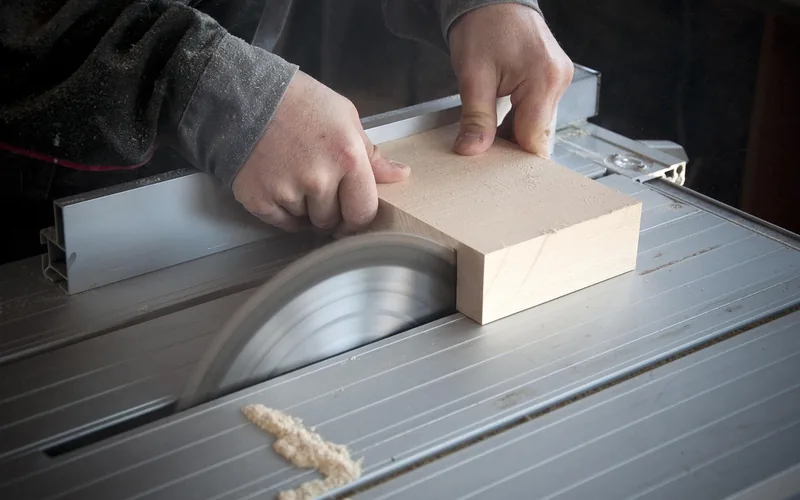
Cutting Trim, Deck Cleats, And Dimensional Lumber At 45 Degrees
Baseboard, casing, and deck cleats are the most common real-world 45-degree miter cuts made with a circular saw instead of a miter saw — usually because the trim is already installed, the lumber is too long to bring to a miter station, or a miter saw isn’t on hand. The method is the same marking-and-guiding process above; only the material changes the blade choice and clamping approach.
- Baseboard/trim: Cut face-up with a fine-tooth blade to avoid tear-out on the visible edge; a speed square guide works well on trim widths.
- 2×4/2×6 dimensional lumber: Deck cleats and angled blocking cut cleanly with a combination blade; mark both faces on thicker stock to catch any drift partway through.
- Pre-beveled lumber: Standard dimensional lumber and trim are not sold pre-cut at 45 degrees — some specialty deck fascia and a few composite trim products come with a factory 45-degree end, but for stock 2×4/2×6/1x trim, cutting it yourself with the method above is the normal route.
No specific tool is required beyond what’s already covered here, but a budget circular saw with a reliable bevel detent is plenty for occasional trim and deck work — you don’t need a premium saw to hold a 45-degree line accurately.
Proper Maintenance Of Your Circular Saw
A saw that’s out of maintenance is the most common cause of a 45-degree cut drifting off-line partway through — not operator error. Two areas matter most: the blade itself, and the bevel/depth adjustment hardware.
Regularly Cleaning And Lubricating The Saw
- Clear dust and debris from the body, blade, and motor housing with a soft brush or compressed air.
- Inspect the blade for dullness or damage; sharpen or replace it before it starts forcing you to push harder, which is what causes drift on an angled cut.
- Clean and lubricate the depth and bevel adjustment mechanisms so they move smoothly and hold their setting under pressure.
- Check the power cord and switch for fraying or loose connections.
Checking For Loose Or Damaged Parts
- Inspect the upper and lower blade guards for cracks — these are the guards required by the OSHA rule cited above, and a cracked guard is a real safety issue, not just cosmetic.
- Check the base plate for flatness; a warped or bent shoe throws off both bevel and miter accuracy.
- Confirm the bevel lock actually holds under cutting pressure — clamp it at 45 degrees and try to force it before starting a real cut.

Fixing Blade Deflection, Wobble, Or Vibration
Blade deflection — the blade flexing sideways under cutting pressure — is the specific cause behind most “why is my 45-degree cut not straight” questions. On a bevel cut, the blade is already exposed at an angle, so deflection shows up as a visibly wavy edge instead of a clean line.
Causes Of Blade Wobble And Deflection
- Loose arbor nut: The nut securing the blade can loosen over time — check and tighten it before each session.
- Thin-kerf blade under heavy feed pressure: Thin blades deflect more easily than standard-kerf blades when pushed too fast through thick stock.
- Damaged or unbalanced blade: A blade with a missing or chipped tooth vibrates unevenly, which shows up worse on an already-tilted bevel cut.
Steps To Address And Eliminate The Issue
- Unplug the saw, remove the blade, and reinstall it, tightening the arbor nut with the correct wrench.
- Inspect the blade for chipped teeth or visible bending; replace it if you find either.
- Slow your feed rate on thick stock or bevel cuts — deflection is largely a function of pushing the blade harder than the tooth count can clear sawdust.
- Make a test cut on scrap at the same angle and thickness before cutting the real workpiece.
Correcting Inaccurate Cuts
If a finished 45-degree cut is off, the cause is almost always one of four things: a misaligned blade, a shifted guide, an unsupported workpiece, or inconsistent feed speed.
- Blade misalignment: Confirm the blade is parallel to the base plate edge — check with a square before assuming the bevel scale is the problem.
- Guide shift: A hand-held speed square is the most common culprit on longer cuts — clamp it instead.
- Unstable workpiece: Re-clamp and re-mark rather than trying to correct a cut mid-pass.
- Inconsistent speed: Rushing the last few inches of a cut is a common way an otherwise-clean line kicks out at the very end.
Avoiding Safety Hazards
Bevel cuts specifically increase kickback risk, because the tilted blade has a shorter engagement with the guard and a different exit angle than a square cut.
- Never stand in line with the blade’s exit path — position your body to the side, not directly behind the cut.
- Confirm the lower guard resets after every cut before setting the saw down.
- Keep both hands on the saw during the cut itself — never brace the workpiece with a hand near the blade’s path.
- Don’t rush the last inch of a bevel cut — that’s where an unsupported offcut is most likely to pinch the blade.
“The cuts that go wrong are almost never the ones where someone forgot how to use a speed square — they’re the ones where the workpiece wasn’t clamped and shifted half a millimeter right as the blade exited. Clamp it, even for a ‘quick’ cut.”
Practicing And Perfecting Your Technique
Practice both cut types on scrap before committing to finished material. Measure and mark the angle, secure the workpiece, make a test cut, and check the result against a square or the mating piece before repeating on the real board. A woodworking community or local class helps if repeat cuts keep coming out inconsistent — that’s usually a stance or guide-pressure habit that’s easier to see from the outside than to diagnose alone.

Frequently Asked Questions For How To Cut 45 Degree Angle With Circular Saw
How Do You Cut A 45 Degree Angle Trim?
Measure and mark the trim’s length, then mark a 45-degree line with a speed square at the cut point. Clamp the square on the line, hold the trim face-up against a stable surface, and guide the saw’s shoe along the square in one smooth pass using a fine-tooth blade to avoid tear-out. Dry-fit the piece against its mating corner before final installation.
How Do You Cut A 45 Degree Angle On A 2X4 Table Saw?
On a table saw, this is a miter-gauge cut, not a circular-saw guide cut: set the miter gauge to 45 degrees, mark the 2×4, and feed it into the blade with the gauge holding the angle — a circular saw doesn’t have a miter gauge, so the equivalent handheld method is the marked speed-square guide described above.
What Is The Best Tool To Cut A 45 Degree Angle?
A miter saw is faster and more repeatable for trim and framing crosscuts because its fence locks the angle for you. A circular saw is the better choice when the workpiece is too long or already installed to bring to a miter station — deck framing, baseboard in place, or sheet goods — and it’s the saw most homeowners already own.
How Do You Cut A 45 Degree Angle On A Wide Board?
Use a 12-inch rafter square instead of a standard 7-inch speed square — the longer fence reaches across boards up to about 2×12. For anything wider, clamp a straight edge guide along the marked line instead of relying on a hand-held square.
Can You Buy Pre-Beveled 2×4 Or 2×6 Lumber For 45-Degree Cuts?
Standard dimensional lumber and trim are sold square-cut, not pre-beveled at 45 degrees. A few specialty deck fascia boards and composite trim products come with a factory-mitered end, but for ordinary 2×4, 2×6, or 1x trim stock, cutting the 45-degree angle yourself with a speed square guide is the normal approach.
What Causes Blade Deflection When Cutting A 45-Degree Bevel?
Blade deflection on a bevel cut usually comes from feeding the saw faster than the blade’s tooth count can clear sawdust, a thin-kerf blade flexing under that pressure, or a loose arbor nut letting the blade wobble. Slowing the feed rate and confirming the arbor nut is tight resolves most cases.
Conclusion
A circular saw handles a 45-degree angle two ways: tilt the bevel for an edge cut, or mark and guide a miter-style line across the face for trim, cleats, and frame corners. Get the workpiece clamped, the guide square registered flush against the saw’s shoe, and the blade at full speed before it touches the material, and both methods produce a clean, repeatable angle — whether you’re building deck cleats or finishing a picture frame. Curious how a corded skill saw stacks up against a modern SKILSAW-branded model? See our Skil vs SKILSAW comparison, or check which way the blade should face before your next cut.