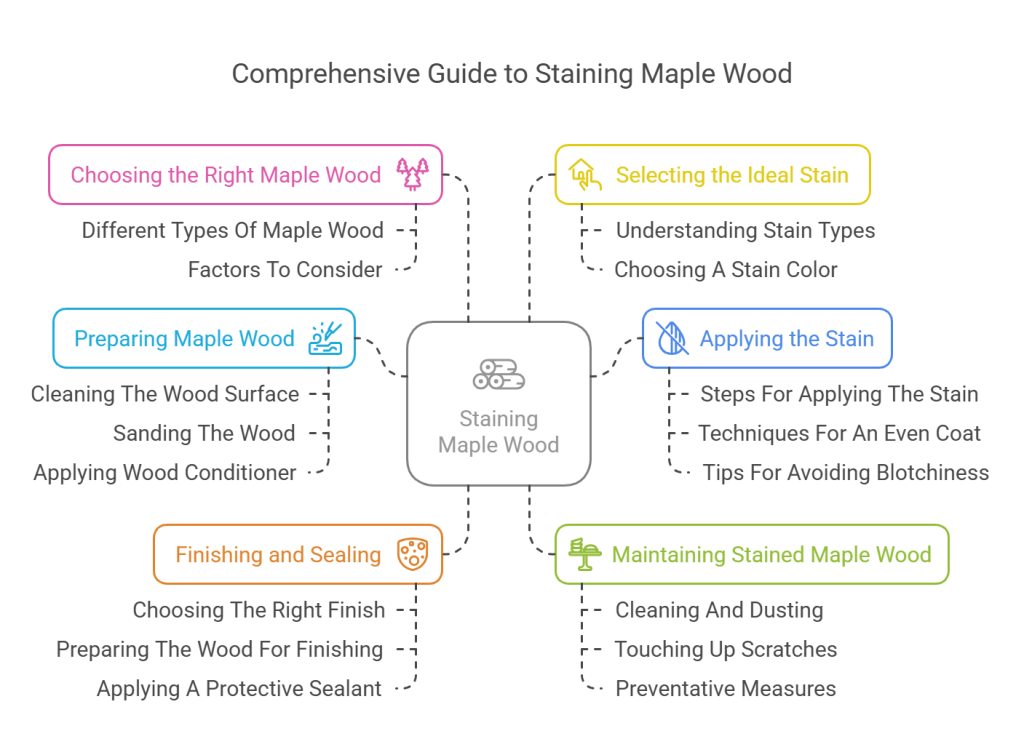
How to Stain Maple Wood: Prevent Blotching & Get Even Results (2026)
Maple wood is one of the hardest woods to stain evenly — its tight, closed grain absorbs stain inconsistently, causing blotchy patches and streaks. The solution is a two-step prep: sand to 180-grit, then apply a pre-stain wood conditioner (Minwax, Varathane) before any stain touches the wood. Gel stains are the best choice for maple because their thick consistency controls penetration depth, reducing blotch risk significantly. With proper preparation, maple stains beautifully and takes dark colors like walnut and ebony especially well.
- Sand to 180-grit, always with the grain
- Apply pre-stain conditioner (Minwax or Varathane) — essential for maple
- Choose gel stain — Old Masters or General Finishes minimize blotching
- Apply stain with a lint-free cloth, wipe excess after 5 min
- Dry 6–8 hours, sand with 220-grit between coats
- Apply 2 coats, then seal with oil-based polyurethane or lacquer
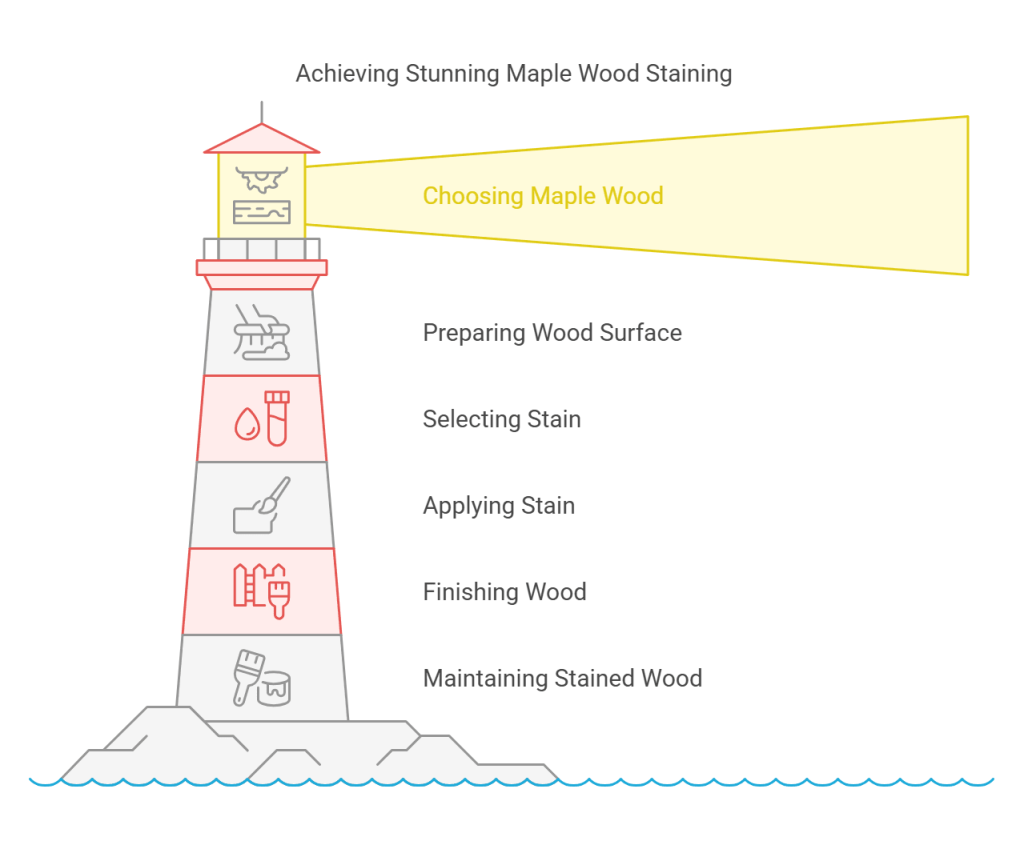
Choosing The Right Maple Wood For Staining
Choosing the right maple wood for staining is crucial in achieving the desired result. Understanding the characteristics of different maple wood varieties enables you to select the type that is most suitable for your staining project.
Maple wood is a popular choice for staining due to its beautiful grain patterns and smooth texture. When selecting maple wood for staining, there are several factors to consider. In this section, we will explore the different types of maple wood and the key considerations for choosing the right one for your staining project.
Different Types Of Maple Wood
Maple wood comes in different varieties, each with its unique characteristics. Here are the main types of maple wood commonly used for staining:
- Hard Maple: Also known as Sugar Maple, Hard Maple is a dense and durable wood with a close, fine grain. It has a light creamy color and lends itself well to staining. Hard Maple is commonly used for furniture, flooring, and cabinetry.
- Soft Maple: Despite its name, Soft Maple is still relatively hard and suitable for staining. It has a straight grain and a light to medium brown color. Soft Maple is often used for decorative trim, molding, and millwork.
- Birdseye Maple: Birdseye Maple is highly sought after for its distinctive, small circular patterns resembling bird’s eyes. It can be more challenging to stain due to its irregular grain, but when done correctly, it showcases a unique and eye-catching appearance.
- Curly Maple: Curly Maple, also known as Tiger Maple or Fiddleback Maple, features wavy or rippled grain patterns. This type of maple wood requires extra care when staining to bring out its figure and enhance the visual appeal.
Factors To Consider When Selecting Maple Wood For Staining
Before starting your staining project, it’s essential to consider the following factors when choosing maple wood:
- Color: Determine the desired staining outcome and select a maple wood type that aligns with your vision. Different variations of maple wood offer distinct colors, from light and creamy to rich and darker tones.
- Grain pattern: Consider the grain patterns of the different maple wood types. Some have tight and uniform grain, while others showcase more irregular patterns. Choose a grain pattern that suits your aesthetic preferences.
- Density: Maple wood varies in density, with some types being harder and more durable than others. Consider the intended use of the stained wood and select a maple variety that provides the appropriate level of strength and resilience.
- Staining compatibility: While maple wood can take stain, some types may require more effort to achieve the desired finish. Be aware of the characteristics and challenges associated with each type of maple wood to ensure successful staining results.
- Budget: Finally, consider your budget when selecting maple wood for staining. Different types of maple wood vary in cost, so choose one that fits within your budget without compromising on quality.
By considering these factors, you can choose the right type of maple wood for your staining project, ensuring a beautiful and durable finish. Happy staining!

Preparing Maple Wood For Staining
Preparing maple wood for staining is essential to achieve a beautiful and even finish. Follow these steps to ensure success: clean the wood, sand it to remove imperfections, apply a wood conditioner, and choose the right stain for maple.
Before you can achieve a beautiful, long-lasting stain on maple wood, it’s essential to properly prepare the surface. This involves cleaning the wood, sanding it, and applying a wood conditioner. Follow these steps to ensure your maple wood is ready for staining:
Cleaning The Wood Surface:
- Remove any dirt, dust, or debris from the wood surface using a soft brush or a cloth.
- Thoroughly clean the wood using a mild wood cleaner or a mixture of water and gentle dish soap.
- Rinse the wood with clean water to remove any cleaner residue.
- Allow the wood to dry completely before proceeding to the next step.
Sanding The Wood:
- Start by using a coarse-grit sandpaper (around 80-100 grit) to remove any rough spots, imperfections, or existing finishes on the wood.
- Sand the wood following the direction of the grain, using long, even strokes.
- Gradually switch to finer-grit sandpaper (around 150-220 grit) to smooth the surface and create a uniform appearance.
- After sanding, clean the wood with a tack cloth or a microfiber cloth to remove any sanding dust.
Applying Wood Conditioner:
- Apply a pre-stain wood conditioner to maple wood to ensure an even absorption of the stain.
- Stir the wood conditioner thoroughly before applying it to the wood.
- Use a clean cloth or a brush to apply the wood conditioner in the direction of the grain.
- Allow the wood conditioner to soak into the wood for the recommended time specified by the manufacturer.
- Wipe off any excess conditioner with a clean cloth.
By following these steps and properly preparing your maple wood, you create an ideal foundation for staining. The cleaning process eliminates any surface impurities, sanding smooths the surface for an even finish, and applying a wood conditioner helps the stain distribute evenly.
Selecting The Ideal Stain For Maple Wood
Maple wood staining requires careful selection of the ideal stain. Achieve desired results by following these steps for successful staining.
Understanding Different Stain Types
- Oil-based stains: Oil-based stains are easy to apply and provide a deep, rich color that enhances the natural beauty of maple wood. They take longer to dry and require adequate ventilation during application.
- Water-based stains: Water-based stains are environmentally friendly and dry quickly. They offer a wide variety of color options and are easy to clean up with water. However, they may not penetrate maple wood as deeply as oil-based stains.
- Gel stains: Gel stains have a thicker consistency, making them ideal for vertical surfaces like cabinets or furniture. They provide even color distribution and are less likely to drip or run. Gel stains are available in various shades, allowing you to achieve the desired look for your maple wood.
Factors To Consider When Choosing A Stain Color
- Wood grain: Consider the natural grain of maple wood when choosing a stain color. Lighter stains tend to highlight the wood’s natural characteristics, while darker stains can create a more dramatic effect.
- Existing color: If the maple wood already has a color or finish, it may affect how the stain appears. Test the stain on a sample piece to see how it interacts with the existing color before applying it to the entire surface.
- Desired outcome: Determine the desired look you want to achieve with your maple wood. Do you prefer a rustic, aged appearance or a modern, sleek finish? Consider the overall style and ambiance you want to create.
- Lighting: Take into account the lighting conditions in the room where the maple wood will be installed. Natural light and artificial lighting can affect how the stain color appears. Test samples in different lighting conditions to ensure the desired outcome.
Remember to always test the stain on a sample piece of maple wood before applying it to your project. This will give you an accurate representation of how the stain will look on the wood and allow you to make any necessary adjustments.
Selecting the ideal stain for maple wood requires careful consideration of different stain types, as well as factors like wood grain, existing color, desired outcome, and lighting conditions.
Applying The Stain To Maple Wood
Discover the art of staining maple wood with our comprehensive guide. Step-by-step instructions and valuable tips ensure a flawless finish to enhance the natural beauty of your maple furniture or flooring.
Steps For Applying The Stain:
Applying a stain to maple wood can enhance its natural beauty and give it a rich, luxurious finish. To ensure a successful staining process, follow these steps:
- Start by preparing the wood surface: Sand the maple wood using a fine-grit sandpaper to create a smooth and even surface. Remove any dust or debris using a tack cloth.
- Choose the right stain: Select a high-quality, oil-based stain that is specifically designed for use on maple wood. Consider the color and shade you want to achieve, keeping in mind that maple wood may result in a slightly lighter final color compared to other woods.
- Test the stain: Before applying the stain to the entire surface, conduct a small test on a discreet area of the wood. This will help you determine the desired color and ensure it is compatible with the maple wood.
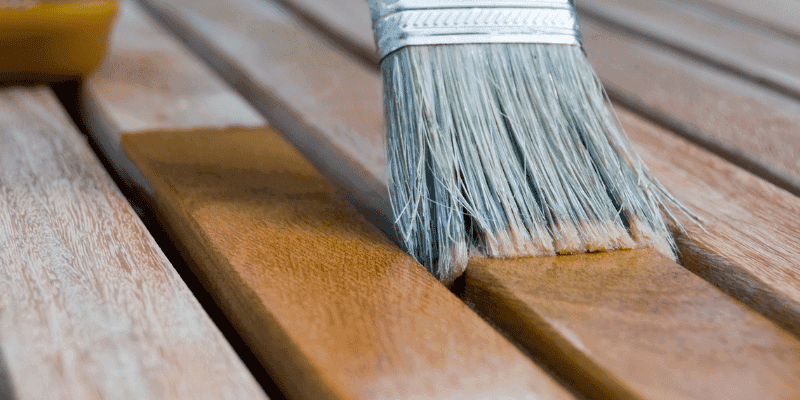
- Apply the stain: Use a clean cloth or brush to apply a thin, even coat of stain to the maple wood. Work in the direction of the wood grain for the best results. Allow the stain to penetrate the wood for the recommended amount of time specified by the manufacturer.
- Wipe off excess stain: After the recommended time has passed, use a clean cloth to gently wipe off any excess stain. Make sure to remove any pooling or uneven areas to achieve a uniform finish.
- Let it dry: Allow the stained wood to dry completely. Follow the manufacturer’s instructions for the drying time, as it may vary depending on the specific stain product used.
- Assess the color: Once the wood is fully dry, evaluate the color and intensity of the stain. If you desire a darker hue, you can repeat the application process by adding another coat of stain. Remember to wipe off excess stain and let it dry between coats.
- Apply a protective finish: To protect the stained maple wood, apply a clear topcoat or finish. This will help preserve the color, add durability, and provide a smooth, glossy appearance. Choose a finish that is compatible with the stain and follow the manufacturer’s instructions for application.
Techniques For Achieving An Even Coat:
Achieving a consistent and even coat of stain on maple wood can be challenging due to its tight and dense grain. Employ the following techniques to ensure an even application:
- Use a pre-stain conditioner: Maple wood is prone to blotches and streaks when stained. Applying a pre-stain conditioner can help minimize these issues by evening out the wood’s absorption of the stain. Follow the manufacturer’s instructions for applying and timing.
- Apply in thin coats: Rather than applying a thick layer of stain, work in thin coats. This allows for better control and reduces the risk of the stain drying unevenly or creating blotchy areas.
- Work in sections: Stain the maple wood in small sections to ensure you can apply and wipe off the excess stain within the recommended timeframe. This prevents the stain from drying too quickly and leaving visible marks.
- Maintain a wet edge: When applying the stain, make sure to maintain a wet edge. This means overlapping each stroke slightly to prevent visible lines or overlaps that can create an uneven appearance.
- Blend any variations: If you notice any variations or uneven areas during the staining process, use a clean cloth to gently blend the stain and create a more consistent look. Be careful not to remove too much stain while doing this.
Tips For Avoiding Blotchiness And Streaks:
Maple wood is notorious for its tendency to develop blotches and streaks when stained. However, with careful preparation and application, you can minimize these issues. Consider the following tips:
- Sand the wood thoroughly: Properly sanding the maple wood surface helps to create a more uniform and evenly absorbent surface, reducing the chances of blotches and streaks.
- Use a pre-stain conditioner: Applying a pre-stain conditioner before staining maple wood can help minimize blotching. The conditioner penetrates and seals the wood, allowing for a more even absorption of the stain.
- Choose a gel stain: Gel stains are often recommended for staining maple wood due to their thicker consistency. This helps to control the absorption and minimize blotches and streaks. Follow the manufacturer’s instructions for application.
- Test the stain: Always conduct a small test on a hidden area of the wood to evaluate how the stain will react to the maple. This allows you to adjust the application technique or explore alternative staining methods if necessary.
- Wipe off excess stain: After applying the stain, be thorough in wiping off any excess. This helps prevent the stain from pooling or drying unevenly, which can contribute to blotchy or streaky results.
Overall, achieving a beautiful and even stain on maple wood requires careful preparation, the right techniques, and attention to detail. By following these steps, employing suitable staining techniques, and implementing tips to combat blotchiness, you can successfully stain maple wood and enjoy its natural elegance in any project.
Finishing And Sealing Maple Wood
Learn how to stain maple wood beautifully with these simple steps. From preparation to application, find out the best techniques for finishing and sealing maple wood for a professional and long-lasting result.
Choosing The Right Finish For Maple Wood:
Maple wood is known for its beautiful grain pattern and smooth texture, making it a popular choice for furniture and cabinetry. However, to truly enhance its natural beauty and protect it from wear and tear, it’s essential to choose the right finish.
Here are some options to consider:
- Oil-based polyurethane: This finish provides a durable and water-resistant coating that highlights the natural color and grain of maple wood. It dries slowly, allowing for a smooth and even finish.
- Water-based polyurethane: If you prefer a finish that dries quickly and has low odor, water-based polyurethane is a great choice. It offers similar protection to oil-based polyurethane while maintaining the wood’s light color.
- Tung oil: Derived from the nut of the tung tree, tung oil is a natural finish that brings out the richness of maple wood. It provides a warm and lustrous look, although it may require more frequent maintenance.
- Lacquer: If you want a high-gloss finish, lacquer is an excellent option. It creates a hard and durable coating that enhances the wood’s color and grain.
- Shellac: Made from the secretions of the lac bug, shellac is a traditional finish that adds a warm amber tone to maple wood. It is easy to apply and dries quickly, but it may not offer as much protection as other finishes.
Remember to consider your desired aesthetic, durability, and maintenance preferences when choosing a finish for your maple wood project.
How To Prepare The Wood For Finishing:
Before applying any finish to your maple wood, proper preparation is crucial for a smooth and professional-looking result. Follow these steps to prepare the wood:
- Sanding: Begin by sanding the wood with progressively finer grits of sandpaper. Start with a coarse grit (around 80-120) and work your way up to a fine grit (around 220-320). Sand in the direction of the wood grain for a smooth finish.
- Remove dust: After sanding, thoroughly clean the wood to remove any dust or debris. Use a vacuum cleaner or a tack cloth to ensure a clean surface.
- Apply a wood conditioner: Maple wood has a dense structure that can sometimes cause uneven absorption of the finish. To prevent this, consider applying a wood conditioner before staining or finishing. It helps the wood absorb the finish more evenly.
- Test the finish: Before applying the finish to the entire piece, perform a test on a small, inconspicuous area of the wood. This allows you to evaluate the color and compatibility of the finish before committing to the entire project.
- Stir the finish: If you’re using a finish that comes in a can, give it a good stir before application. This ensures that any settling or separation is properly mixed, resulting in a consistent finish.
- Protect the surrounding area: To avoid getting the finish on unwanted surfaces, use painter’s tape or plastic sheets to mask off areas that should not be coated.
Following these preparation steps will help ensure an even application of the finish and a professional-looking result.
Applying A Protective Sealant:
To protect your maple wood and prolong its lifespan, applying a protective sealant is crucial. Here’s how to do it:
- Choose the right sealant: Consider using a clear polyurethane or varnish as a protective sealant. These options provide a durable and water-resistant layer that shields the wood from scratches, stains, and moisture.
- Apply the sealant: Using a brush or a lint-free cloth, apply a thin and even layer of the sealant following the direction of the wood grain. Avoid excessive application, as it can lead to drips or bubbles in the finish.
- Let it dry: Allow the sealant to dry completely according to the manufacturer’s instructions. This typically takes a few hours, but it may vary depending on the specific product and environmental conditions.
- Sand lightly (optional): If desired, you can lightly sand the dried sealant with a fine grit sandpaper to achieve a smoother finish. Be cautious not to sand through the protective layer.
- Apply additional coats: Depending on the desired level of protection, you may need to apply multiple coats of sealant. Follow the manufacturer’s instructions for the recommended drying time between coats.
- Final buffing (optional): For an extra smooth and polished appearance, you can gently buff the dried sealant with a soft cloth or a fine abrasive pad.
Following these steps will ensure that your maple wood is well-sealed and protected, enhancing its longevity and maintaining its beauty.
Maintaining And Caring For Stained Maple Wood
Discover the best tips for staining and caring for maple wood. Learn how to maintain the beauty of your stained maple wood furniture by following these easy guidelines.
Maple wood is highly regarded for its beauty and durability, making it a popular choice for furniture and flooring. To ensure that your stained maple wood retains its exquisite appearance for years to come, proper maintenance and care are essential.
By following these simple steps, you can keep your stained maple wood looking pristine and exquisite:
Cleaning And Dusting The Wood:
- Regularly dust the stained maple wood with a soft, lint-free cloth or a feather duster to remove any surface particles.
- For deeper cleaning, use a mixture of mild dish soap and warm water. Dampen a cloth or sponge in the solution, wring out the excess, and gently wipe down the stained wood surface.
- Avoid using abrasive cleaners, as they can scratch or damage the stain finish of the maple wood.
- After cleaning, ensure that you thoroughly dry the wood with a clean, dry cloth to prevent any moisture from penetrating the surface.
Touching Up Any Scratches Or Damage:
- To address minor scratches, use a matching wood stain marker or a touch-up pen specifically designed for stained maple wood. Apply the marker or pen to the affected area and gently blend it in with a soft cloth.
- For deeper scratches or damage, sand the area lightly with fine-grit sandpaper in the direction of the wood grain. Once the scratched surface is smooth, apply a matching stain color using a brush or cloth.
- After applying the stain, allow it to dry completely before applying a protective sealant or topcoat to restore the wood’s original luster.
Preventative Measures For Preserving The Wood’S Appearance:
- Place felt pads or coasters under furniture legs to prevent scratches and dents on the stained maple wood surface.
- Avoid exposing the wood to direct sunlight, as prolonged exposure can cause the stain to fade or discolor over time. Use curtains, blinds, or UV-protective window films to minimize sun exposure.
- Clean up spills immediately to prevent liquid from seeping into the wood, which can lead to staining or warping. Use a clean, absorbent cloth to blot the spill, and then gently wipe down the affected area with a damp cloth.
- Maintain a consistent indoor humidity level of around 40-55% to prevent the wood from drying out or absorbing excess moisture, which can cause swelling or shrinkage.
- Apply a high-quality wood polish or wax regularly to protect the stained maple wood and enhance its natural beauty. Follow the manufacturer’s instructions for proper application and buffing.
By following these care and maintenance guidelines, you can ensure that your stained maple wood retains its timeless beauty and remains a cherished part of your home for years to come. Remember, prevention and regular upkeep are key to preserving the longevity and appearance of your stained maple wood furniture or flooring.
As an Amazon Associate we earn from qualifying purchases.
As an Amazon Associate we earn from qualifying purchases.
Frequently Asked Questions On How To Stain Maple Wood
What Kind Of Stain To Use On Maple?
Use water-based stain on maple for a durable and even finish.
Does Maple Wood Stain Well?
Yes, maple wood stains well due to its natural characteristics and open grain structure.
What Wood Stains Are Best For Maple Wood?
The best wood stains for maple wood are water-based stains, gel stains, and oil-based stains.
What Is The Best Finish For Maple Stain?
The best finish for maple stain is a clear varnish, which enhances the natural beauty and durability of the wood.
Is Maple Hard To Stain?
Yes — maple is one of the most difficult woods to stain evenly. Its tight, closed grain absorbs stain inconsistently, creating blotchy patches and uneven color. Hard maple is more challenging than soft maple. The solution: apply a pre-stain wood conditioner 15–30 minutes before staining, then use a gel stain — its thick consistency limits penetration depth and prevents the dramatic blotching that liquid stains cause on raw maple. With proper prep, maple stains beautifully and holds color well.
Conclusion
To achieve a stunning stain on maple wood, follow these step-by-step instructions and tips. First, make sure to properly prepare the wood by sanding it to create a smooth surface. Next, apply a pre-stain conditioner to prevent blotching and ensure even stain absorption.
Once the wood is ready, use a brush or cloth to apply the stain, working in the direction of the grain for a consistent look. Remember to wipe off any excess stain to avoid uneven drying and streaks. After the stain has fully dried, apply a protective top coat to seal and enhance the wood’s appearance.
Whether you’re staining maple for furniture, cabinets, or flooring, these techniques will help you achieve beautiful results. Experiment with different stain colors and finishes to create the desired look for your project. With a little patience and attention to detail, you can transform maple wood into a stunning centerpiece for your home.