How to Unlock Craftsman Miter Saw: Master the Art in Minutes!
To unlock a Craftsman Miter Saw, locate the release lever on the base of the saw, and push it down or slide it towards the blade guard to disengage the lock mechanism. Unlocking a Craftsman Miter Saw is a straightforward process that can be done by following a few simple steps.
Craftsman Miter Saw, a versatile tool commonly used for precision cutting and joinery tasks, comes with a built-in lock mechanism to secure the saw in place during transportation or storage. By unlocking the saw, you can easily adjust the miter angle or bevel to suit your cutting needs.
In this guide, we will walk you through the steps required to unlock a Craftsman Miter Saw, enabling you to make efficient use of this powerful tool for your woodworking projects.

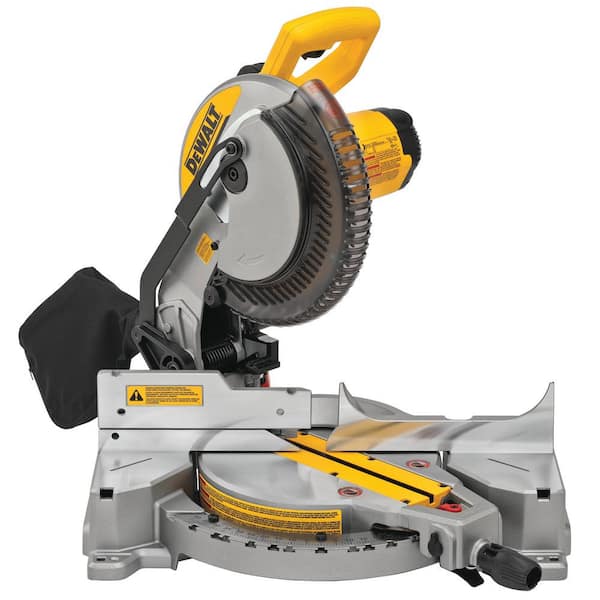
Credit: www.amazon.com
Choosing The Right Miter Saw
To unlock a Craftsman miter saw, locate the locking mechanism and press the release lever. Loosen the adjustment knobs, then slowly raise or lower the blade to the desired position. Ensure the saw is securely locked in place before use.
Familiarize yourself with the saw’s manual for specific instructions.
Understanding The Types Of Miter Saws
Before you begin your journey to unlock your Craftsman Miter Saw, it is important to understand the various types of miter saws available in the market. Different types of miter saws offer different features and functionalities to suit your specific needs. Here are a few popular types of miter saws to help you make an informed decision:
| Type of Miter Saw | Description |
|---|---|
| Basic Miter Saw | A simple and compact miter saw suitable for DIY projects and light-duty woodworking tasks. |
| Compound Miter Saw | A versatile miter saw that allows you to perform bevel cuts in addition to angle cuts, making it ideal for intricate woodworking projects. |
| Sliding Compound Miter Saw | A power-packed miter saw that combines the features of a compound miter saw with the ability to slide along the material, offering increased cutting capacity and versatility. |
| Dual-Bevel Compound Miter Saw | A premium miter saw that allows you to tilt the blade in both directions (left and right) for bevel cuts, eliminating the need to flip the workpiece. |
Understanding these types of miter saws will help you narrow down your options and choose the right one that aligns with your woodworking requirements.
Factors To Consider When Choosing A Miter Saw
Choosing the perfect miter saw involves considering a few essential factors to ensure it meets your specific needs. Here are some key factors to keep in mind before making your purchase:
- Cutting Capacity: Evaluate the cutting capacity of the miter saw to determine if it can handle the sizes and thicknesses of the materials you typically work with.
- Miter and Bevel Range: Check the miter and bevel range of the miter saw to ensure it offers the required angles and bevel cuts for your projects.
- Power and Blade Size: Consider the power rating and blade size of the miter saw to ensure it has enough strength to handle your woodworking tasks efficiently.
- Accuracy and Precision: Look for miter saws with features like laser guides or digital displays to ensure precise and accurate cuts every time.
- Portability and Weight: If you need to move your miter saw frequently or work on different job sites, choose a lightweight and portable option for added convenience.
- Price and Budget: Set a budget for your miter saw purchase and compare different models to find one that offers the best value for your money.
By considering these factors, you can confidently choose the right miter saw that will unlock the full potential of your woodworking projects. Let’s delve into the process of unlocking your Craftsman Miter Saw in the next section.
Understanding The Craftsman Miter Saw
Unlocking the Craftsman Miter Saw is a crucial step to using it effectively. Gain a deeper understanding of the process and learn how to unlock this versatile tool with ease.
Understand The Craftsman Miter Saw
Unlocking the potential of your Craftsman Miter Saw can empower you to tackle a wide range of cutting tasks with precision. But before you jump right into using this versatile tool, it’s crucial to understand its key features and components. In this guide, we’ll walk you through the essential aspects of the Craftsman Miter Saw, providing you with the knowledge you need to unlock its full potential.
Key Features Of Craftsman Miter Saw
1. Accuracy at its Core
One of the standout features of the Craftsman Miter Saw is its exceptional accuracy. With its precise cutting capabilities, this power tool ensures that your cuts are flawless every time. Whether you’re working on wood, metal, or plastic, the Craftsman Miter Saw allows you to achieve professional-level results with ease.
2. Powerful Motor
Equipped with a robust motor, the Craftsman Miter Saw delivers the raw power required to tackle even the toughest cutting jobs. This high-performance motor ensures that you can effortlessly cut through various materials, including hardwood and thick boards, all while maintaining smooth and consistent performance.
3. Versatile Bevel Options
The Craftsman Miter Saw offers a wide range of bevel options, allowing you to make bevel cuts at various angles. Whether you’re working on crown molding, picture frames, or other angled cuts, this versatile tool has got you covered. The bevel options provided by the Craftsman Miter Saw give you the flexibility to create precise cuts at any desired angle, enabling you to unleash your creativity.
Getting Familiar With Craftsman Miter Saw Components
1. Blade
The blade is the cutting component of the Craftsman Miter Saw that rotates to make accurate cuts. It’s essential to choose the right blade for your specific cutting needs, ensuring that it matches the material you’ll be working with. Craftsman Miter Saws typically come with interchangeable blades, allowing you to select the ideal blade for each cutting job.
2. Fence
The fence on the Craftsman Miter Saw provides stability and support for your workpiece. It ensures that the material remains in a secure position throughout the cutting process, preventing any mishaps or inaccuracies. The fence is adjustable, allowing you to position it according to your specific cutting requirements.
3. Miter Gauge
The miter gauge of the Craftsman Miter Saw enables you to make precise angle cuts. By adjusting the miter gauge, you can easily set the desired angle and lock it in place, ensuring accurate and consistent cuts. This component is especially useful when working on projects that require complex angled cuts.
In conclusion, understanding the key features and components of the Craftsman Miter Saw is essential for unleashing its full potential. With its exceptional accuracy, powerful motor, versatile bevel options, and various components such as the blade, fence, and miter gauge, this power tool empowers you to take on any cutting task with confidence and precision.
Setting Up Your Craftsman Miter Saw
Setting up your Craftsman Miter Saw is essential to ensure accurate and efficient woodworking. Proper assembly and calibration are crucial for achieving precise cuts and maximizing the performance of your tool. Let’s go through the process, step by step.
Assembling The Craftsman Miter Saw
Assembling your Craftsman Miter Saw is the first step toward unlocking its full potential. Follow these simple yet important steps to ensure a sturdy and functional setup:
- Unboxing: Carefully unpack all the components of the miter saw and lay them out in an organized manner. Check for any damage or missing parts before proceeding.
- Base Assembly: Attach the base of the miter saw to a stable work surface, ensuring it is level and securely fastened.
- Blade Installation: Install the blade according to the manufacturer’s instructions, making sure it is properly aligned and securely tightened.
- Fence Setup: Adjust and secure the fence to the desired angle and position for accurate and consistent cuts.
- Safety Measures: Familiarize yourself with the safety features of the miter saw, including the blade guard, trigger lock, and emergency stop features.
Calibrating The Craftsman Miter Saw For Accurate Cuts
Calibrating your Craftsman Miter Saw is crucial for achieving precise and reliable cuts. Follow these steps to ensure your saw is calibrated for accurate performance:
- Blade Squareness: Check and adjust the squareness of the blade to the miter table to ensure accurate angle cuts.
- Bevel Angle Calibration: Verify and adjust the bevel angle settings to ensure accurate bevel cuts.
- Miter Scale Alignment: Verify the alignment of the miter scale to ensure accurate and consistent miter cuts.
- Test Cuts: Perform test cuts on scrap wood to ensure the calibration results in accurate and clean cuts.
- Fine-tuning: Make any necessary adjustments to the calibration based on the test cut results to achieve the desired precision.
Mastering Essential Techniques
In order to effectively utilize a Craftsman Miter Saw to its full potential, it is essential to master a range of techniques. Whether you are a beginner or an experienced user, understanding the correct methods of unlocking the saw is crucial for smooth and efficient operation. In this article, we will explore the step-by-step process of unlocking the Craftsman Miter Saw and also delve into the various techniques that can be employed to make basic cuts as well as advanced techniques for precision and efficiency.
Making Basic Cuts With Craftsman Miter Saw
Before diving into the more intricate techniques, it is important to familiarize oneself with the fundamentals of making basic cuts using a Craftsman Miter Saw. By following these simple steps, you can achieve accurate and clean cuts:
- Begin by placing the workpiece securely on the saw’s base or fence, ensuring it is aligned properly.
- Set the desired angle of the cut using the bevel gauge on the saw. Ensure the angle is locked tightly to prevent any deviations during the cutting process.
- Adjust the height of the saw blade according to the depth of cut required. This can be done by raising or lowering the blade using the depth adjustment knob.
- Hold the saw handle firmly with both hands, one on the handle and the other on the trigger, keeping your body positioned to the side for safety.
- Start the saw and smoothly bring down the blade onto the workpiece, allowing the blade to do the cutting while maintaining control and stability.
- Once the cut is complete, release the trigger and wait for the blade to come to a complete stop before removing the workpiece.
Advanced Techniques For Precision And Efficiency
Once you have grasped the basics, it is time to explore advanced techniques that can enhance the precision and efficiency of your cuts with the Craftsman Miter Saw:
- Utilize a stop block or custom jig to ensure consistent lengths for repetitive cuts. This allows for greater accuracy and saves time.
- Employ a laser guide that projects a visible line onto the workpiece, providing a visual reference for precise cuts.
- Make use of clamps or hold-downs to secure the workpiece firmly in place, reducing the chances of slipping or movement during cutting.
- Experiment with different blade choices to optimize the cut quality for specific materials, such as fine-tooth blades for smoother cuts on hardwood.
- Practice the technique of “back-cutting” to prevent tear-out on delicate materials. This involves making a light scoring cut on the backside of the workpiece before making the final cut.
By mastering these advanced techniques, you can elevate your craftsmanship and achieve exceptional results with your Craftsman Miter Saw. Remember to always prioritize safety by wearing appropriate protective gear and following the manufacturer’s guidelines for operation.
Maintenance And Safety Tips
Proper maintenance and adherence to safety measures are crucial when using a Craftsman Miter Saw. By following these guidelines, you can ensure both the longevity of your tool and your personal safety.
Proper Maintenance For Longevity
Regular maintenance is the key to keeping your Craftsman Miter Saw in optimal condition for years to come:
- Clean the saw: After each use, make sure to remove any sawdust or debris from the blade guard, base, and other parts of the saw. Use a brush or compressed air to clean hard-to-reach areas.
- Check for blade sharpness: Inspect the blade regularly and look for signs of dullness or damage. If the blade is worn out or chipped, replace it immediately to avoid any potential accidents or inefficiency.
- Keep the saw lubricated: Apply a small amount of lubricating oil to the moving parts of the miter saw to reduce friction and ensure smooth operation. Consult the user manual for specific lubrication instructions.
- Adjust the saw: Periodically check and adjust the miter and bevel angles of the saw to ensure accurate cuts. Use a reliable square or angle gauge to make precise adjustments.
- Store the saw properly: When not in use, store your Craftsman Miter Saw in a clean and dry area to prevent dust accumulation and potential damage. Use the provided storage case or cover to protect the tool from external elements.
Important Safety Measures When Using Craftsman Miter Saw
Using a miter saw requires strict adherence to safety guidelines to prevent accidents and injuries. Here are some essential safety measures to keep in mind:
- Wear protective gear: Always wear safety goggles, ear protection, and a dust mask to protect yourself from flying debris and excessive noise.
- Secure the workpiece: Before making any cuts, ensure that the workpiece is securely clamped or firmly held in place to prevent movement or slipping.
- Keep hands clear: When operating the miter saw, make sure to keep your hands clear of the cutting path and the blade at all times to avoid any accidental contact.
- Use the blade guard: Never operate the miter saw without a functioning blade guard. The guard provides a protective barrier between the blade and your hands, preventing accidents.
- Wait for the blade to stop: After making a cut, allow the blade to come to a complete stop before lifting it from the workpiece or adjusting the miter saw.
- Disconnect power: When performing maintenance or changing blades, always disconnect the miter saw from the power source to prevent accidental starts.
Frequently Asked Questions On How To Unlock Craftsman Miter Saw
How Do You Unlatch A Miter Saw?
To unlatch a miter saw, locate the latching mechanism on the saw’s arm or base. Push or release the latch to disengage it, allowing you to move the saw and adjust the cutting angle. Ensure you follow the manufacturer’s instructions for your specific miter saw model.
How Do You Adjust A Craftsman Miter Saw?
To adjust a Craftsman miter saw, loosen the bevel lock handle and tilt the blade to the desired angle. Use the miter lock handle to adjust the cutting angle. Tighten the locks and ensure the adjustments are secure before use.
Regular maintenance can help to keep the saw functioning properly.
How Do You Lock A Sliding Miter Saw?
To lock a sliding miter saw, locate the locking mechanism and engage it firmly. This ensures the blade and cutting angle stay secure during operation. Keep safety in mind by referring to the manufacturer’s instructions for your specific model. Always wear appropriate protective gear when using power tools.
Why Is My Craftsman Miter Saw Not Cutting Straight?
Your Craftsman miter saw may not be cutting straight due to several possibilities such as a dull blade, misaligned fence or table, or a worn out or improper blade. Ensure the blade is sharp and properly aligned, and check the fence and table for any issues.
Conclusion
With these simple steps, unlocking your Craftsman miter saw will be a breeze. Remember to always prioritize safety and carefully follow the instructions provided by the manufacturer. By understanding the mechanisms and taking the necessary precautions, you can enjoy a smooth and efficient sawing experience.
Get ready to tackle your DIY projects with confidence and ease!