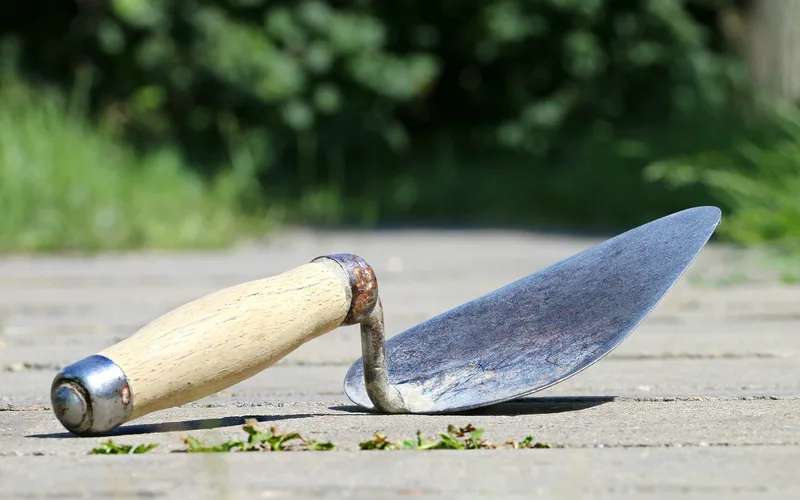
How to Use Wood Hardener on Rotted Wood, Step by Step
To use wood hardener effectively, brush or spray it onto the damaged wood surface, ensuring complete coverage. Allow the hardener to penetrate the wood and cure for the recommended time specified on the product label.
Want to restore the strength and durability of your damaged wood? Wood hardener can be the solution you’re looking for. Whether it’s rotten, cracked, or weakened wood, this product can help strengthen and reinforce it. By brushing or spraying the hardener onto the affected area, you’ll ensure that the wood is fully covered.
Then, simply wait for it to penetrate the fibers and cure according to the instructions. In no time, you’ll have sturdy and long-lasting wood that’s ready for any project or use. Say goodbye to weakened wood and hello to restoration!
Improving Durability And Longevity
Improve the durability and longevity of wood with a wood hardener. This effective solution penetrates deep into the wood, strengthening it and preventing further damage.
Enhancing Wood’S Resistance To Rot And Decay:
- Wood hardener is a powerful solution that can significantly improve the durability and longevity of wooden structures. It achieves this by enhancing wood’s resistance to rot and decay, making it more resilient against the elements and extending its lifespan.
- The wood hardener penetrates deep into the wood, strengthening its fibers and creating a protective barrier against moisture and fungal growth. This prevents rot from setting in and helps the wood withstand environmental factors that contribute to decay, such as humidity and exposure to water.
- By applying wood hardener to your wooden structures, you can ensure that they remain sturdy and intact, even in challenging outdoor conditions. This added resistance to rot and decay not only protects the wood itself but also helps maintain the structural integrity of buildings, decks, fences, and other wooden elements.
- Using wood hardener enhances wood’s resistance to rot and decay, providing long-lasting protection and increasing the lifespan of your wooden structures.
Strengthening Weak Or Damaged Wood Fibers:
- In addition to enhancing resistance to rot and decay, wood hardener is an effective solution for strengthening weak or damaged wood fibers. When wood becomes weakened due to age, weathering, insect infestation, or other factors, it can compromise the structural integrity of the overall wooden structure.
- Wood hardener works by penetrating deep into the wood and binding with the fibers, effectively reinforcing them and restoring strength. This helps fortify weak or damaged areas, preventing further deterioration and potential structural failure.
- By strengthening the wood fibers, wood hardener enables you to reinforce weakened sections, such as rotted or decayed spots. This eliminates the need for complete wood replacement, providing a cost-effective solution for restoring the integrity of your wooden structures.
- Therefore, by using wood hardener, you can effectively strengthen weak or damaged wood fibers, prolonging the lifespan of your wooden structures and avoiding costly repairs or replacements.
Increasing The Overall Lifespan Of Wooden Structures:
- One of the key benefits of using wood hardener is its ability to increase the overall lifespan of wooden structures. By enhancing resistance to rot and decay and strengthening weak or damaged wood fibers, wood hardener adds years of durability to your wooden materials.
- With its deep penetration, wood hardener protects the wood from within, creating a strong and resilient foundation. This significantly extends the lifespan of wooden structures, allowing them to withstand the test of time and various environmental factors.
- By increasing the overall lifespan of wooden structures, wood hardener not only saves you money on potential repairs or replacements but also ensures the longevity of your investment. Whether it’s a deck, fence, furniture, or any other wooden construction, using wood hardener is a proactive approach to maintaining and preserving their integrity.
- By using wood hardener, you can increase the overall lifespan of your wooden structures, providing long-lasting protection and maintaining their value over time.
Remember, wood hardener enhances wood’s resistance to rot and decay, strengthens weak or damaged wood fibers, and increases the overall lifespan of your wooden structures. Embrace this solution for optimum durability and longevity in your woodwork!
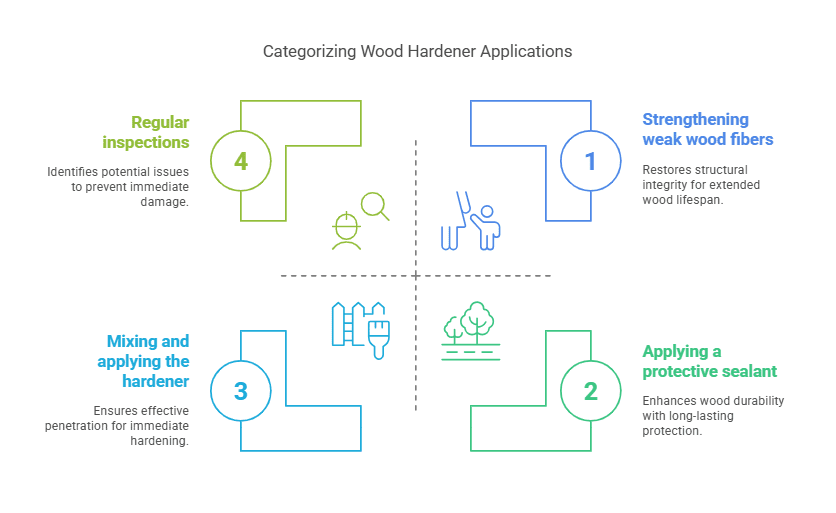
Preventing Future Damage
If you’re wondering how to prevent future damage to wood, using a wood hardener is a smart solution. This effective product strengthens weakened wood, making it resistant to further deterioration.
Wood hardener is an effective solution for repairing damaged wood, but its benefits go beyond just fixing existing issues. By using wood hardener, you can also prevent future damage to your wood. Here are some key ways to protect your wood against pests, minimize the risk of water damage and warping, and preserve its structural integrity.
Protecting Wood Against Pests, Such As Termites And Carpenter Ants:
- Apply wood hardener to all exposed wood surfaces to create a protective barrier.
- Inspect and treat any existing pest-infested areas with wood hardener to eliminate the infestation.
- Regularly check for signs of pests and reapply wood hardener as needed.
- Keep firewood and other wood materials away from your home to prevent attracting pests.
Minimizing The Risk Of Water Damage And Warping:
- Apply wood hardener to the ends of the wood to prevent moisture absorption.
- Seal any cracks or gaps in the wood with wood hardener to prevent water infiltration.
- Regularly inspect the wood for signs of water damage and reapply wood hardener as necessary.
- Avoid placing wood furniture or structures in direct contact with the ground or other moisture-prone areas.
Preserving Wood’S Structural Integrity:
- Apply wood hardener to damaged or weakened areas to strengthen the wood.
- Use wood hardener as a primer before painting or staining to enhance the wood’s durability.
- Ensure proper ventilation to prevent moisture buildup, which can weaken the wood.
- Regularly inspect and maintain the wood to identify and address any potential structural issues.
By following these preventive measures and utilizing wood hardener, you can extend the lifespan of your wood, prevent future damage, and maintain its integrity for years to come.
Understanding Different Types
The use of wood hardener is essential for understanding different types of wood and its strengthening process. Learn how to effectively apply wood hardener to restore and protect damaged wood surfaces, making them more durable.
Using Wood Hardener is a great way to repair and strengthen damaged wood. However, before you start applying this handy product, it’s important to understand the different types of wood hardeners available. Each type has its own unique properties and uses, so let’s take a look at the most common ones:
Epoxy-Based Wood Hardeners:
- Epoxy-based wood hardeners are known for their excellent adhesive properties and ability to reinforce weakened wood fibers.
- They consist of two parts – a resin and a hardener – which are mixed together just before application.
- Once applied, the epoxy mixture penetrates deep into the wood, bonding with the fibers and effectively restoring strength.
- These wood hardeners work well for filling cracks, voids, and large cavities.
Acrylic-Based Wood Hardeners:
- Acrylic-based wood hardeners are water-based solutions that are easy to use and environmentally friendly.
- They are typically milky-white in appearance and dry clear after application, maintaining the natural look of the wood.
- These hardeners penetrate the wood and harden the fibers, enhancing durability and resistance.
- Acrylic-based wood hardeners are ideal for small repairs, sealing pores, and protecting against moisture.
Polyurethane-Based Wood Hardeners:
- Polyurethane-based wood hardeners are known for their exceptional strength and durability.
- They are typically mixed with a solvent before application, allowing for easy penetration into the wood.
- Once applied, they create a strong bond with the wood fibers and provide long-lasting protection against decay and damage.
- Polyurethane-based wood hardeners are suitable for outdoor applications and can handle heavy wear and tear.
Understanding the different types of wood hardeners is crucial in choosing the right one for your specific project. Whether you opt for epoxy-based, acrylic-based, or polyurethane-based wood hardeners, each offers unique benefits to ensure your wood repairs are effective and long-lasting.
Factors To Consider
When using wood hardener, there are several factors to consider in order to achieve optimal results. Proper application techniques, ensuring sufficient drying time, and selecting the right product for the specific wood type are all important considerations. By carefully considering these factors, you can effectively use wood hardener to strengthen and preserve your wooden structures.
When using wood hardener, there are several important factors to consider to ensure optimal results. It’s essential to take into account the compatibility with the type of wood, ease of application, and the drying time and curing process. Let’s delve deeper into each of these factors:
Compatibility With The Type Of Wood
- Different types of wood have varying levels of porosity and absorbency. It is crucial to choose a wood hardener that is compatible with the specific type of wood you are working with to ensure proper penetration and bonding.
- Certain wood hardeners are specially formulated for softwoods, while others are more suitable for hardwoods. Consider the type of wood you are treating and select a compatible wood hardener accordingly.
Ease Of Application
- The application process should be straightforward and hassle-free to ensure efficient usage of the wood hardener.
- Look for a wood hardener that comes with clear instructions and user-friendly application methods.
- Consider factors such as whether the wood hardener requires mixing or dilution before application, and whether specialized tools or equipment are necessary.
Drying Time And Curing Process
- The drying time and curing process of the wood hardener play a crucial role in the effectiveness and longevity of the treatment.
- Opt for a wood hardener that dries relatively quickly to minimize project timelines.
- Additionally, consider the curing process. Some wood hardeners require a specific timeframe for complete curing, during which the wood should be protected from moisture and other environmental factors.
When using wood hardener, it is vital to consider factors such as compatibility with the type of wood, ease of application, and the drying time and curing process. By taking these factors into account, you can optimize the results and ensure the longevity of your wood treatments.
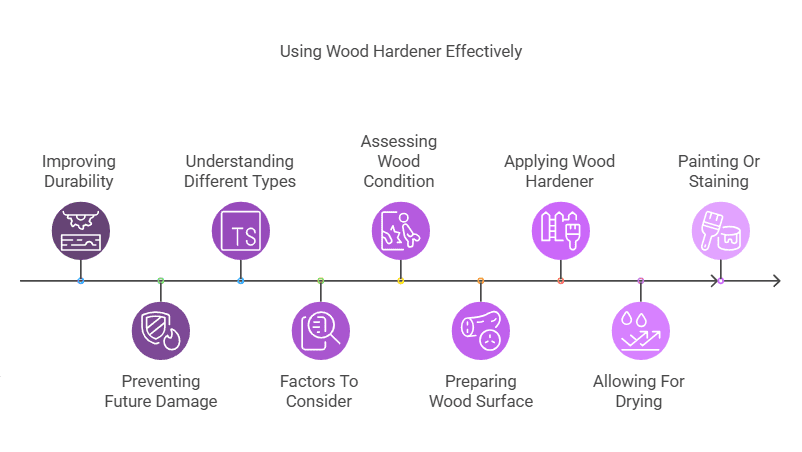
Assessing The Condition Of The Wood
Assess the wood’s condition before using a wood hardener. Examine for signs of rot, decay, or insect damage to ensure effective treatment.
Identifying Signs Of Damage Or Weakness:
Wooden structures can deteriorate over time due to various factors such as weather exposure, age, or insect infestation. Before using a wood hardener, it’s important to assess the condition of the wood to determine if it is necessary. Here are some signs of damage or weakness to look out for:
- Cracks: Check for visible cracks on the surface of the wood as they can indicate structural weaknesses.
- Dry Rot: Look for signs of dry rot, such as a powdery texture or disintegration of the wood. This can weaken the wood and compromise its stability.
- Soft Spots: Press the wood gently with your fingers to identify any spongy or soft areas. These soft spots can be a result of water damage or termite activity.
- Insect Damage: Look for holes or tunnels on the surface of the wood. These can be a sign of wood-boring insects, such as termites or carpenter ants, which can weaken the wood from the inside.
If you notice any of these signs, it’s crucial to address the problem before it worsens. The next step is to determine if using a wood hardener is necessary for the repair.
Preparing The Wood Surface
To properly prepare the wood surface before using wood hardener, you’ll need to start by cleaning the area and removing any loose or damaged wood. Next, apply the wood hardener using a paintbrush, making sure to saturate the entire surface for optimal results.
Allow it to dry completely before moving on to the next step in your woodworking project.
Cleaning the wood:
- Before using a wood hardener, it’s important to ensure that the wood surface is clean and free from any dust, dirt, or debris. Cleaning the wood thoroughly will help the wood hardener to penetrate effectively and provide a strong bond.
Removing loose or flaking paint or varnish:
- If there are any loose or flaking paint or varnish on the wood surface, it’s essential to remove them before applying the wood hardener. This can be done by using a scraper or a wire brush to gently scrape away the loose paint or varnish. Ensure that all the loose particles are removed to create a smooth and even surface for the wood hardener to adhere to.
- Begin by scraping the loose paint or varnish with a scraper or a wire brush. Be gentle to avoid damaging the wood surface.
- Once the loose paint or varnish has been removed, use sandpaper to smooth out any rough edges or uneven areas. Sanding will ensure that the wood hardener can penetrate evenly and create a strong bond with the wood fibers.
- After sanding, wipe away any dust or debris with a clean cloth or rag. It’s important to have a clean and dry surface before applying the wood hardener.
- If there are any stubborn paint or varnish residues that cannot be removed with scraping or sanding, you can use a paint stripper or varnish remover. Follow the manufacturer’s instructions and safety precautions when using these chemicals. Rinse the wood surface thoroughly after using a paint stripper or varnish remover to ensure that no residue is left behind.
By following these steps to clean and prepare the wood surface, you will create an ideal foundation for applying the wood hardener. This will ensure a strong and long-lasting bond between the wood and the hardener, protecting and preserving the wood for years to come.
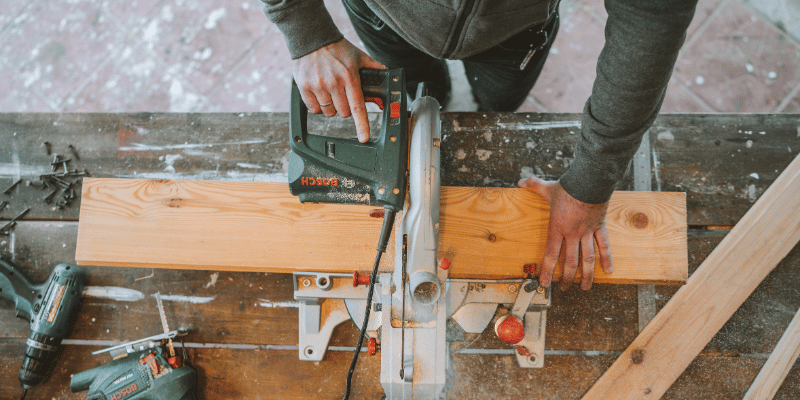
Applying The Wood Hardener
To effectively use wood hardener, first clean and dry the surface, then apply a thin layer of the hardener using a brush or spray. Allow it to dry completely before sanding and finishing the wood for a strong and durable result.
Using wood hardener is a great way to restore damaged or rotted wood. The application process plays a crucial role in ensuring a successful repair. Follow these steps to properly apply wood hardener to your project:
Mixing And Preparing The Hardener According To Instructions:
- Carefully read the manufacturer’s instructions on the bottle of wood hardener.
- Gather all the necessary materials, including the wood hardener, a brush or applicator, and protective gear such as gloves and goggles.
- Shake the bottle well to ensure that the hardener is properly mixed.
- If the hardener needs to be mixed with another substance, follow the specific ratio indicated in the instructions.
- Use a separate container to mix the hardener and any supplementary substances, ensuring a thorough blend.
Using A Brush Or Applicator To Apply The Hardener Evenly:
- Before applying the wood hardener, make sure the damaged area is cleaned and free from dust, debris, and loose wood particles.
- Dip the brush or applicator into the container with the wood hardener.
- Start applying the hardener to the damaged area, beginning at one end and working your way across.
- Use long, even strokes to ensure an even application of the hardener.
- Pay special attention to any deep cracks or crevices, making sure to fully saturate the wood with the hardener.
Ensuring Thorough Coverage Of The Damaged Areas:
- Continue applying the wood hardener until you have achieved complete coverage of all damaged areas.
- Allow the hardener to penetrate the wood for the amount of time specified by the manufacturer.
- Check for any missed spots or areas that may require an additional coat of hardener.
- Apply a second coat if necessary, following the same process as before.
- Let the wood hardener dry completely before moving on to the next step of the repair process.
Remember, proper application of wood hardener is crucial for a successful repair. By following these steps and carefully adhering to the manufacturer’s instructions, you can ensure that your wood project is solid and durable once again.
Allowing For Drying And Curing
Wood hardener is an essential tool for enhancing the durability of wooden structures. By allowing for proper drying and curing, it helps to strengthen weakened areas and prevent further damage.
Once you have applied the wood hardener to your damaged wooden surface, it is essential to give it ample time to work its magic. Allowing for proper drying and curing ensures a strong and long-lasting bond with the wood. Here are the crucial steps to follow:
Waiting For The Hardener To Penetrate And Bond With The Wood
- Give the wood hardener enough time to penetrate the damaged areas of the wood and bond with it effectively. This step is crucial for achieving a strong and stable repair.
- Depending on the type and extent of damage, wait for the hardener to fully soak into the wood. The recommended wait time is typically mentioned on the product label or instructions.
- During this waiting period, it is essential to keep the treated surface protected from any external elements that could hinder the hardener’s effectiveness. Covering the area with a plastic sheet or tarp can help to safeguard it from dust, debris, and excess moisture.
Giving Sufficient Time For The Hardener To Cure And Harden
- After the absorption process, it’s time to allow the wood hardener to cure fully. This step ensures that the bond between the hardener and the wood becomes strong and durable.
- The curing time can vary depending on the product brand and ambient conditions. It is essential to refer to the specific product instructions for the recommended duration.
- Typically, wood hardeners require at least 24 hours to cure. However, certain formulations may require additional time. Patience is key in this step for achieving optimal results.
- Avoid subjecting the treated wood to any stress or heavy use during the curing process. This could compromise the hardener’s effectiveness and weaken the bond.
- Once the prescribed curing period has passed, the wood should become harder and more rigid. You can test it by lightly tapping on the surface with a tool or your fingernail. If there is solid resistance, it indicates successful curing.
By carefully following the process of allowing for drying and curing, you ensure that the wood hardener effectively penetrates, bonds, and strengthens the damaged wood. Remember to consult the product instructions for specific wait and cure times, and always prioritize patience and protection during the process.
Smoothing The Surface
Learn how to effectively use wood hardener to smooth the surface of your wooden projects. Discover the step-by-step process for achieving a professional finish and enhancing the durability of your woodwork.
Woods with cracks, chips, or unevenness can be frustrating to work with. Fortunately, wood hardener can help in restoring the surface to its former glory. After applying the wood hardener and allowing it to dry, the next step is achieving a smooth and even finish.
There are a few techniques that can be utilized to achieve this result:
Using Sandpaper To Remove Any Unevenness Or Roughness
- Start with a lower grit sandpaper, such as 80 or 100, to remove any major imperfections on the surface. This rough grit helps to level out the wood and create a smooth foundation.
- Move the sandpaper in a circular motion or back and forth, depending on the area being worked on. This ensures an even distribution of sanding and prevents the wood from becoming uneven.
- Gradually progress to higher grits, such as 120, 220, or even 400, to refine the surface further. The finer the grit, the smoother the finish will be.
- To ensure an even sanding job, periodically check the surface with a hand or fingertips to detect any remaining rough spots or inconsistencies.
- Pay attention to the edges and corners, as they can be easily overlooked. Use folded sandpaper or sanding sponges to access hard-to-reach areas.
- Remove any wood dust or debris from the sanding process using a tack cloth or a soft brush. This helps to prepare the surface for the next steps.
- If desired, you can continue to sand the surface in even higher grits to achieve an exceptionally smooth finish. However, this step may not be necessary for all projects.
Achieving a smooth and even finish is crucial to the final appearance of the wood. By following these steps and progressively sanding with higher grits, you can ensure that the surface is ready for the next stage of your woodworking project.
Applying Wood Filler (Optional)
Wood filler is an optional step when using wood hardener. Applying wood filler helps to fill any gaps or cracks in the wood surface, creating a smoother finish. It is recommended to apply the wood filler after the wood hardener has fully cured.
If you want to ensure a seamless and cohesive surface, you may choose to fill in any remaining gaps or holes with wood filler. This step is not always necessary, but it can greatly enhance the appearance and durability of your woodwork.
Here are some key points to keep in mind when applying wood filler:
- Start by selecting a high-quality wood filler that is suitable for your project. Look for a filler that matches the color and type of wood you are working with.
- Before applying the wood filler, make sure the surface is clean and free of dust or debris. Use a soft brush or cloth to remove any loose particles.
- Apply the wood filler using a putty knife or a similar tool. Press the filler into the gaps or holes, ensuring that it is evenly distributed.
- Smooth out the excess filler using the edge of the putty knife or a sanding block. This will help create a flush surface.
- Allow the wood filler to dry completely as per the manufacturer’s instructions. This usually takes several hours, but it’s important to be patient and not rush the process.
- Once the filler is dry, use fine-grit sandpaper to smooth and blend it with the surrounding wood. Sand in the direction of the wood grain to avoid leaving any noticeable marks.
- Remember to wipe away any dust or debris before proceeding to the next step in your wood hardening process.
By following these steps, you can achieve a perfectly even and flawless finish on your woodwork.
Painting Or Staining
Wood hardener is a versatile product that helps restore and strengthen damaged and rotted wood. Whether you’re painting or staining, using wood hardener is essential for improving durability and ensuring long-lasting results.
Wood hardener is a fantastic product that can provide tremendous benefits for your wooden surfaces. Once you have stabilized and strengthened your wood using a wood hardener, the next step is to paint or stain it to achieve the desired finish.
In this section, we will explore the key considerations for choosing the right paint or stain and applying multiple coats for optimal protection and aesthetics.
Choosing The Right Paint Or Stain For The Desired Finish:
- Determine the type of finish you envision for your wood surface. Are you looking for a natural wood look or a vibrant, painted appearance?
- For a natural wood finish, consider using a clear or transparent stain. This allows the natural beauty and grain of the wood to shine through while providing protection against the elements.
- If you prefer a colored finish, opt for exterior wood paints or solid stains. These provide a wide range of hues to choose from and offer excellent protection against UV rays and moisture.
- Ensure that the paint or stain you select is suitable for outdoor use and is designed to withstand harsh weather conditions. Look for products specifically labeled as exterior or outdoor paints/stains.
- Consider the level of maintenance you are willing to undertake. For long-lasting protection, choose high-quality paints or stains that offer excellent durability and require minimal upkeep.
Applying Multiple Coats For Optimal Protection And Aesthetics:
- Prep your wood surface before applying the first coat. Sand it lightly to remove any rough spots and ensure a smooth finish.
- Apply the first coat of paint or stain using a high-quality brush or roller, following the manufacturer’s instructions. Ensure thorough and even coverage, paying attention to corners and edges.
- Allow the first coat to dry completely before applying subsequent coats. This drying time may vary depending on the product used, so refer to the instructions on the paint or stain.
- Depending on the desired finish, apply additional coats until you achieve the desired opacity or color intensity. Multiple coats enhance the protection of the wood and result in a more visually appealing final look.
- Take care to minimize drips or runs during the application process. Smooth out any uneven areas immediately and blend them into the rest of the surface while the product is still wet.
- Once you have completed the application of the final coat, allow ample drying time before subjecting the wood to heavy use or exposure to the elements.
Remember, choosing the right paint or stain and applying multiple coats are essential steps to get the best out of your wood hardener treatment. Take your time to select the appropriate product and follow the application instructions carefully for a beautiful and long-lasting finish.
Regular Inspections
Inspecting your wood regularly is crucial for its long-term durability. One effective technique is to use a wood hardener, which strengthens and protects the wood from damage. By following proper inspection and treatment techniques, you can ensure that your wooden structures remain strong and resilient.
Keeping a close eye on the condition of your wood is essential for its long-term durability. Regular inspections allow you to catch any signs of damage or decay early on, ensuring that you can take appropriate action to protect and preserve the wood.
Here are some key points to consider during your inspections:
- Look for visible signs of damage or decay, such as cracks, splits, or soft spots in the wood.
- Pay special attention to areas that are commonly exposed to moisture or pests, as they are more prone to deterioration.
- Check for any signs of fungal growth, including mold or mildew, which can indicate underlying moisture issues.
- Inspect wooden structures for signs of instability, such as sagging or warping, which may be indicative of structural damage.
- Evaluate the overall integrity of the wood by tapping on it lightly; a solid sound suggests good condition, while a hollow sound may indicate decay.
Regular inspections provide valuable insights into the health of your wood and enable you to address any issues proactively. By identifying and addressing problems early on, you can prevent further damage and extend the lifespan of the wood.
Protective Coatings
Wood hardener is an essential component of protective coatings for wood surfaces. This treatment penetrates deep into the fibers, strengthening weakened areas and preventing further damage. Applying wood hardener is a straightforward process that involves saturating the wood with the solution, ensuring long-lasting protection.
Applying A Protective Sealant Or Varnish To Enhance Durability
Wood hardener is a great solution for restoring and strengthening damaged wood. But to truly enhance its durability and longevity, applying a protective sealant or varnish is essential. These coatings create a barrier against moisture, sunlight, and everyday wear and tear.
Below are some key points to consider when applying a protective sealant or varnish to your wood surfaces:
- Clean the Surface: Before applying any protective coating, make sure the wood is clean, free of dirt, dust, and any old coatings. Use a mild soap and water solution or a wood cleaner to remove any contaminants.
- Sanding: Smooth the wood surface by sanding it with fine-grit sandpaper. This helps the protective coating adhere better to the wood and creates a smooth finish. Remember to sand along the grain to avoid any scratches.
- Choose the Right Sealant or Varnish: There are various types of protective coatings available, such as polyurethane, varnish, lacquer, or epoxy. Consider the desired appearance, level of protection, and the type of wood you’re working with to select the appropriate coating.
- Application Method: Apply the sealant or varnish using a brush, roller, or sprayer, following the manufacturer’s instructions. Ensure even coverage and avoid leaving any drips or puddles.
- Multiple Coats: To achieve optimal protection, it’s often recommended to apply multiple coats of the protective coating. Allow each coat to dry thoroughly before applying the next one. Sand lightly between coats to promote adhesion.
- Drying Time: Give the coating ample time to dry and cure completely before subjecting the wood to any heavy use. Follow the instructions provided by the manufacturer for the specific drying time.
- Maintenance: Regularly inspect the wood surface for any signs of wear or damage. Over time, the protective coating may wear off or become compromised. When necessary, reapply the protective coating to maintain the wood’s integrity.
Incorporating a protective sealant or varnish into your wood hardener restoration process ensures added durability and safeguards against potential damage. By carefully choosing the right coating and applying it correctly, you can enjoy the beauty of your restored wood for years to come.
Proper Cleaning Techniques
Learn the proper cleaning techniques for using wood hardener to restore damaged wood surfaces. Discover the step-by-step process to effectively apply wood hardener and enhance the durability and longevity of your wooden furniture and structures.
Wood hardener is a great product to restore and strengthen damaged wood surfaces. However, before you start applying the wood hardener, it is essential to properly clean the wood to ensure maximum effectiveness. Using the right cleaning techniques is crucial to avoid further damage and achieve the desired results.
In this section, we will explore two important aspects of proper cleaning: using mild cleaners and avoiding harsh chemicals, as well as employing gentle cleaning methods to prevent any harm to the wood surface.
Using Mild Cleaners And Avoiding Harsh Chemicals:
- Choose a mild cleaner specifically designed for wood surfaces.
- Avoid using harsh chemicals, such as bleach or ammonia, as they can be too strong and cause additional damage to the wood.
- Opt for cleaners that are environmentally friendly and non-toxic.
- Read the instructions on the cleaner’s label and follow them carefully.
- Dilute the cleaner with water as recommended to ensure its effectiveness without causing any harm to the wood.
- Test the cleaner on a small, inconspicuous area of the wood to check for any adverse reactions before applying it to the entire surface.
Gentle Cleaning Methods To Avoid Damaging Wood Surface:
- Start by using a soft-bristle brush or a sponge to remove any loose dirt or debris from the wood surface.
- Dampen a cloth or sponge with the mild cleaner and gently wipe the wood, following the grain.
- Avoid scrubbing the wood vigorously, as it can lead to scratches and damage the surface.
- Rinse the wood thoroughly with clean water to remove any residue from the cleaning solution.
- Dry the wood completely using a soft cloth or allow it to air dry naturally.
- If necessary, repeat the cleaning process until the wood surface is clean and ready for the wood hardener application.
By adhering to these proper cleaning techniques, you can ensure that the wood surface is thoroughly cleaned and ready for the wood hardener. Remember, using mild cleaners and avoiding harsh chemicals will prevent any further damage to the wood, while gentle cleaning methods will maintain the integrity of the surface.
Take your time to clean the wood properly, and you’ll achieve the best results when applying the wood hardener.
Using Personal Protective Equipment (PPE)
Using personal protective equipment (PPE) is crucial when using wood hardener. Safeguard your eyes, skin, and lungs by wearing goggles, gloves, and a respirator. Stay protected and stay safe.
When it comes to using wood hardener, it is important to prioritize safety. By wearing the right personal protective equipment (PPE), you can protect yourself from potential hazards and ensure a safe working environment. Here are some essential precautions to take:
Wearing Gloves, Goggles, And A Mask When Handling Wood Hardener:
- Gloves: Put on a pair of chemical-resistant gloves before you start working with wood hardener. These gloves will shield your hands from direct contact with the chemicals and prevent skin irritation or allergies.
- Goggles: Safeguard your eyes by wearing protective goggles. This will prevent any splashes or fumes from coming into contact with your eyes and causing potential harm.
- Mask: Protect your respiratory system by wearing a mask. A mask will prevent you from inhaling any airborne particles or fumes that may be released when handling wood hardener.
By following these safety measures, you can minimize the risks associated with wood hardener and focus on your project with peace of mind.
Protecting Skin And Eyes From Potential Irritation Or Allergies:
When working with wood hardener, it’s important to take additional precautions to protect your skin and eyes. Here are some key steps to ensure safety:
- Apply a barrier cream or lotion to your skin before handling wood hardener. This will create a protective layer and reduce the likelihood of skin irritation or allergies.
- Wear long-sleeved clothing and pants to provide extra coverage and minimize skin exposure to the chemicals.
- Avoid touching your face or any other body parts with hands that have come into contact with wood hardener.
- In case of accidental contact with wood hardener, immediately rinse the affected area with water and seek medical attention if necessary.
- If you experience any signs of irritation, such as redness, itching, or swelling, discontinue use and consult a medical professional.
- Use a well-ventilated area or consider wearing a respirator if working with wood hardener in an enclosed space.
Taking these precautions will help protect your skin and eyes from potential irritation, allergies, or other adverse reactions that may occur when handling wood hardener.
Remember, always prioritize safety precautions and wear the necessary personal protective equipment to ensure a safe and successful project. By doing so, you can enjoy the process while keeping yourself protected.
Proper Ventilation
Proper ventilation is essential when working with wood hardener to ensure a safe environment. By allowing fresh air to circulate, you minimize the risk of inhaling harmful fumes and maintain a healthy workspace. Be sure to open windows and use fans to properly ventilate the area.
Working In A Well-Ventilated Area To Avoid Inhaling Fumes
When using wood hardener, it’s crucial to prioritize your safety by working in a well-ventilated area. Here are some important points to consider:
- Open windows or doors: Increase air circulation by opening windows or doors in the space where you’re applying the wood hardener. This will help eliminate any potentially harmful fumes and maintain a fresh atmosphere.
- Use fans or ventilation systems: If opening windows is not sufficient, utilize fans or ventilation systems to further improve air circulation. This will enhance the removal of fumes and ensure a safer working environment.
By adhering to these precautions, you can mitigate the risks associated with inhaling fumes from wood hardener, promoting a healthier and more productive DIY experience.
Remember, safety should always come first.
Disposal Of Unused Or Excess Wood Hardener
Wood hardener is a useful product for strengthening and repairing damaged wood surfaces. However, if you have any unused or excess wood hardener, proper disposal is essential. Follow the manufacturer’s instructions and local regulations to dispose of it safely.
Wood hardener is a versatile product that can greatly enhance the durability and strength of wood surfaces. However, when it comes to disposing of unused or excess wood hardener, it’s important to follow proper guidelines to ensure minimal environmental impact.
In this section, we will explore some recommendations for the proper disposal of wood hardener, focusing on following local regulations and avoiding improper disposal that may harm the environment.
Following Local Regulations For Disposing Or Recycling:
- Research local regulations: Before disposing of wood hardener, it is essential to research and understand the specific regulations in your area regarding its disposal. This information can typically be found on your local government’s official website or by contacting the appropriate authorities.
- Contact hazardous waste facilities: In many cases, wood hardener is classified as a hazardous waste due to its chemical composition. Therefore, it may be necessary to dispose of it at designated hazardous waste facilities. Contact these facilities to learn about their guidelines and procedures for accepting wood hardener.
- Check for recycling options: Some wood hardeners, especially those with more eco-friendly formulations, may be eligible for recycling. Check with recycling centers or organizations in your area to determine if they accept wood hardener for recycling purposes.
Avoiding Improper Disposal That May Harm The Environment:
- Do not pour down drains or toilets: It is crucial to never dispose of wood hardener by pouring it down drains or toilets. This can contaminate water sources and harm both human health and the environment. Always look for alternative disposal methods.
- Do not burn or incinerate: Burning or incinerating wood hardener can release harmful fumes and pollutants into the air. These chemicals can have detrimental effects on air quality and pose health risks. Avoid this method of disposal at all costs.
- Seal and store properly: If you have unused wood hardener that you plan to keep for future use, ensure it is sealed tightly and stored in a cool and dry area away from direct sunlight. This will help maintain its efficacy and reduce the chances of accidental spills or leakage.
- Consult with professionals: If you are uncertain about the proper disposal method for wood hardener, it is advisable to consult with environmental professionals or waste management experts. They can provide guidance specific to your situation and assist in ensuring responsible disposal.
Remember, proper disposal of wood hardener is not only about complying with regulations but also about protecting the environment. By following local guidelines and adopting responsible disposal practices, you can contribute to a healthier and cleaner ecosystem.
Best Wood Hardener Pick
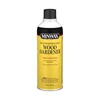
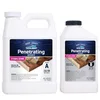
Minwax High Performance Wood Hardener, 1 Pint ($18.35)
Thin, solvent-based resin that soaks deep into punky or rotted softwood and cures in 2-4 hours before you fill the void with epoxy putty.
- Best for: Repairing rotted trim, sills, and door frames before filling
- Why we picked it: Thinnest, deepest-penetrating formula of the major brands, per manufacturer spec
- Main drawback: Solvent-based — needs ventilation and acetone cleanup
Compare more wood hardening options
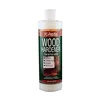 Option 1 PC-Petrifier Water-Based Hardener, 16oz ($10.19)
|
 Option 2 PC-Woody Epoxy Paste, 12oz ($17.29)
|
 Option 3 TotalBoat Penetrating Epoxy, 1.5qt ($59.99)
|
As an Amazon Associate we earn from qualifying purchases.
Frequently Asked Questions On How To Use Wood Hardener
How Does Wood Hardener Work?
Wood hardener penetrates deep into the wood and strengthens it by bonding with the fibers. It consolidates and reinforces the wood structure, making it more durable and resistant to damage. The hardener also prevents further decay, rot, and insect infestation.
Can I Use Wood Hardener On Painted Wood?
Yes, you can use wood hardener on painted wood. Before applying the hardener, remove any loose or flaking paint. The hardener will penetrate through the paint and bond with the underlying wood, strengthening it and preventing further deterioration.
How Long Does It Take For The Wood Hardener To Dry?
The drying time of wood hardener depends on various factors such as temperature, humidity, and the type of wood being treated. Generally, it takes around 24 to 48 hours for the hardener to completely dry and cure. It is recommended to wait for the specified drying time before applying any further treatments or finishes.
Is Wood Hardener Waterproof?
Wood hardener creates a moisture-resistant barrier that helps protect the wood from water damage. While it provides some level of water resistance, it is not completely waterproof. To enhance the waterproofing capabilities, it is recommended to apply a suitable sealant or waterproof coating on top of the hardened wood.
Conclusion
Using wood hardener is a simple yet effective way to restore and strengthen damaged wood surfaces. By following the step-by-step process outlined above, you can revive old furniture, repair rotted wood, and ensure the longevity of wooden structures. The key to successful wood hardening is proper preparation, application, and curing.
Remember to remove any loose or decayed wood before applying the hardener and allow it sufficient time to fully cure. Additionally, using a high-quality wood hardener product will provide the best results. Regular maintenance and protecting the wood from further damage will also help prolong its lifespan.
So, whether you’re tackling a DIY project or undertaking professional repairs, wood hardener can be a valuable tool in your woodworking arsenal. Embrace this technique and enjoy the beauty and durability of restored wood surfaces for years to come.