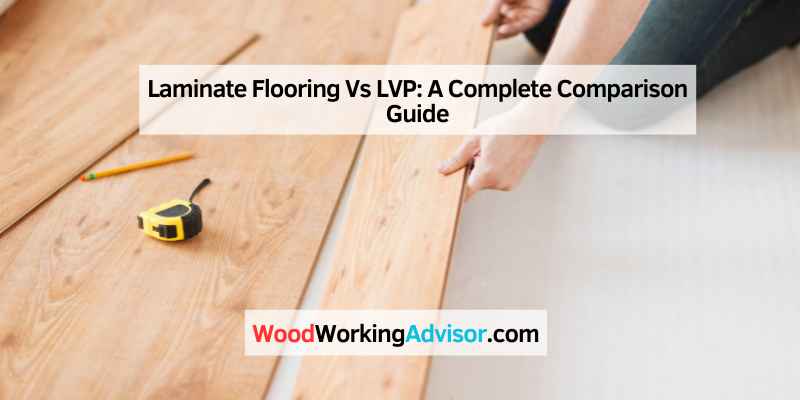
LVP vs Laminate Flooring: Cost, Durability & Key Differences (2026)
Compare all the options in our wood flooring guide.
LVP is generally more durable and suitable for moisture-prone areas, while laminate may be preferable for affordability and sustainability. Consider factors like durability, sunlight exposure, core differences, budget, environmental preferences, and room specifics when choosing between Laminate Flooring and LVP.
Both flooring options have their own advantages and appeal to different needs. LVP offers enhanced durability and water resistance, making it ideal for areas with high moisture levels. On the other hand, laminate flooring is often chosen for its affordability and eco-friendly characteristics.
Understanding these key differences will help you make an informed decision based on your specific requirements and preferences.
LVP vs Laminate Flooring: An Introduction
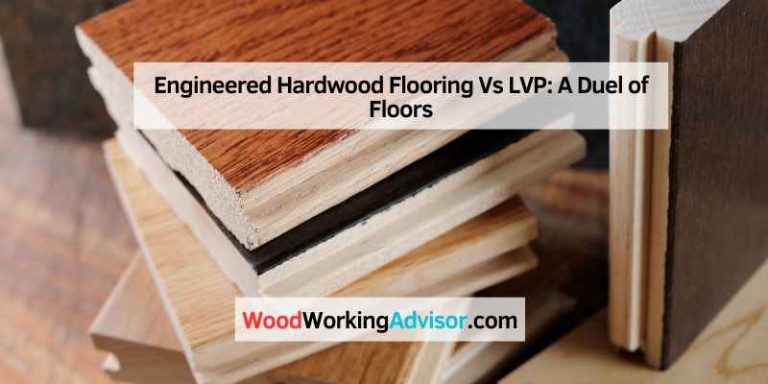
When it comes to choosing the right flooring for your home, it’s essential to consider the various options available in the market. Two popular choices that often come up in discussions are Laminate Flooring and Luxury Vinyl Plank (LVP). Each of these flooring options has its unique characteristics, benefits, and considerations to keep in mind. Let’s explore the basics of Laminate Flooring and the fundamentals of LVP to help you make an informed decision for your space.
Laminate Flooring Basics
Laminate flooring is a synthetic floor covering product that is designed to mimic the look of natural materials such as wood or stone. It consists of multiple layers, including a wear layer, a design layer, an inner core, and a backing layer. The wear layer provides protection against scratches and stains, while the design layer features a high-resolution photograph of the desired material, giving it a realistic appearance. The inner core is typically made of high-density fiberboard, providing stability and strength. Laminate flooring is known for its durability, easy maintenance, and affordability, making it a popular choice for many homeowners.
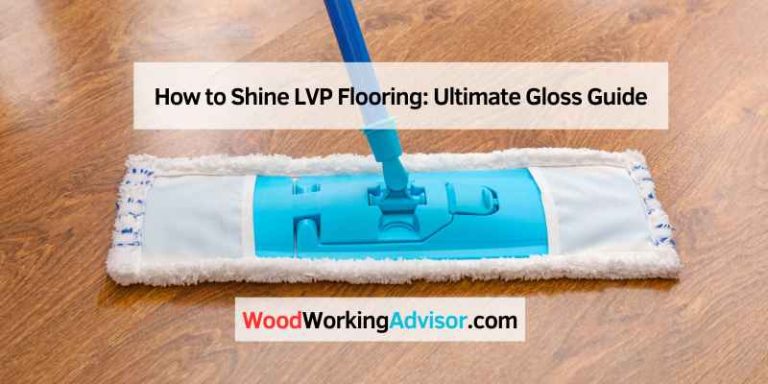
What Is LVP Flooring? (Luxury Vinyl Plank Explained)
LVP flooring — short for Luxury Vinyl Plank — is a multi-layer synthetic flooring product designed to replicate the look and feel of hardwood. It is 100% waterproof, making it suitable for kitchens, bathrooms, and basements where laminate would fail.
A standard LVP plank is built from 4–6 layers:
- UV protective top coat — resists fading from sunlight
- Wear layer — 6–20 mil thick; thicker = more scratch/dent resistant (12 mil+ recommended for high traffic)
- Photographic print layer — high-resolution image of wood or stone grain
- Rigid core — SPC (stone polymer composite) or WPC (wood plastic composite) — provides stability and waterproofing
- Backing layer — foam or cork for underfoot comfort and sound dampening
LVP installs as a floating floor — planks click together without glue and can be laid over most existing floors. This makes it a popular DIY option for homeowners replacing old vinyl plank flooring or carpet.
Laminate’s Core Layers
Laminate flooring is made up of several layers that contribute to its durability and stability. The core layers of laminate flooring are typically composed of high-density fiberboard (HDF) or medium-density fiberboard (MDF). These materials are highly compressed and reinforced with resin to provide strength and stability. HDF or MDF core layers are known for their resistance to moisture, making laminate flooring a suitable choice for areas with moderate moisture exposure.
The core layers of laminate flooring are also responsible for providing dimensional stability, preventing the flooring from warping or expanding due to changes in temperature and humidity. This ensures that laminate flooring maintains its shape and appearance over time.
Lvp’s Core And Wear Layers
Luxury Vinyl Plank (LVP) flooring, on the other hand, has a different composition compared to laminate flooring. LVP consists of several layers that contribute to its durability and performance.
The core layer of LVP is typically made of PVC (polyvinyl chloride) or SPC (stone plastic composite). PVC core layers offer flexibility and resilience, while SPC core layers provide enhanced rigidity and stability. These core layers are designed to withstand heavy foot traffic and resist impacts, ensuring the longevity of the flooring.
In addition to the core layer, LVP also features wear layers. The wear layer is a transparent, protective coating that shields the flooring from scratches, stains, and UV damage. The thickness of the wear layer varies depending on the quality and intended use of the LVP flooring. A thicker wear layer provides better durability and protection against daily wear and tear.
Overall, both laminate flooring and LVP have distinct material compositions that contribute to their unique characteristics and performance. Understanding the core layers and wear layers of each type of flooring can help you make an informed decision based on your specific needs and preferences.

Aesthetic Appeal
When it comes to choosing the right flooring for your space, the aesthetic appeal is a crucial factor to consider. Both laminate flooring and luxury vinyl plank (LVP) offer a wide range of design options, each with its own unique visual appeal.
Visual Quality Of Laminate
Laminate flooring is renowned for its high visual quality, often replicating the look of natural materials such as wood or stone. The advanced printing and embossing technologies used in laminate production create realistic textures and grain patterns, enhancing the overall visual appeal of the flooring.
Realism In Lvp Designs
Luxury vinyl plank (LVP) flooring is celebrated for its exceptional realism in design. The latest advancements in digital imaging and embossing techniques have allowed LVP to closely mimic the authentic appearance of hardwood, tile, and stone. This attention to detail adds an impressive level of realism to the flooring, elevating the aesthetic appeal of any space where it is installed.
Durability And Resistance
When comparing laminate flooring to LVP, durability and resistance are key factors to consider. LVP is generally more durable and suitable for moisture-prone areas, while laminate may be preferable for affordability and sustainability. Both options offer different benefits based on factors such as sunlight exposure, room specifics, and environmental preferences.
Scratch And Dent Resilience Of Laminate
Laminate flooring is highly scratch and dent resistant due to its durable top layer.
Lvp’s Water And Damage Resistance
LVP is known for its exceptional water resistance, making it ideal for areas prone to moisture.
In terms of durability, laminate flooring offers excellent scratch and dent resistance, while LVP excels in water and damage resistance, making it suitable for moisture-prone areas.
Installation Process
Considering factors such as durability, moisture-prone areas, affordability, and sustainability, the choice between laminate flooring and LVP (Luxury Vinyl Plank) depends on individual preferences. LVP is generally more durable and suitable for moisture-prone areas, while laminate may be preferable for its affordability and sustainability.
Each option offers its own advantages and it ultimately comes down to the specific needs and preferences of the homeowner.
Ease Of Laminate Installation
Installing laminate flooring is a relatively straightforward process, making it a popular choice for homeowners looking to take on a DIY project. The ease of installation is one of the major advantages of laminate flooring over other types of flooring options.
The installation process for laminate flooring typically involves the following steps:
- Prepare the subfloor: Before installing laminate flooring, it is essential to ensure that the subfloor is clean, dry, and level. Any imperfections should be addressed, as they can affect the overall appearance and longevity of the laminate flooring.
- Acclimate the laminate planks: Laminate flooring needs to acclimate to the room’s temperature and humidity levels before installation. This helps to prevent the planks from expanding or contracting after installation.
- Underlayment installation: Most laminate flooring requires an underlayment, which provides cushioning and noise reduction. The underlayment is usually rolled out and secured to the subfloor.
- Laminate plank installation: The laminate planks are typically installed in a floating fashion, meaning they are not glued or nailed down. The planks interlock with each other, creating a stable and durable floor.
- Trimming and finishing touches: Once all the planks are installed, any excess material is trimmed, and baseboards or molding are installed to give the floor a polished look.
The ease of installation for laminate flooring makes it a great option for those with basic DIY skills or homeowners looking to save money on professional installation.
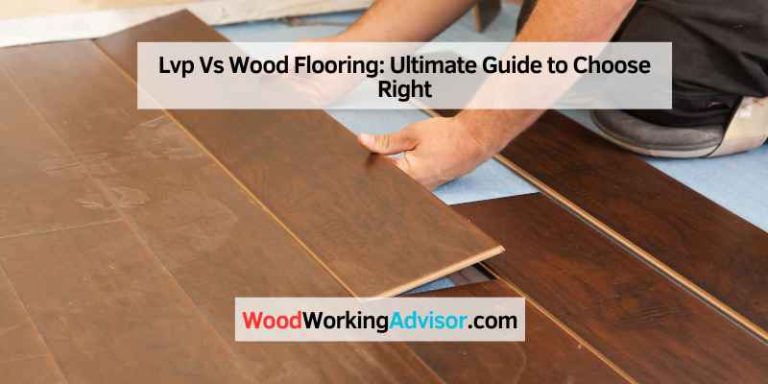
Lvp Installation Techniques
Installing Luxury Vinyl Plank (LVP) flooring also offers relatively simple installation techniques. LVP can be installed using different methods, depending on the specific product and manufacturer’s recommendations. Some common installation techniques for LVP include:
- Peel-and-stick: Some LVP products come with a self-adhesive backing, allowing for a peel-and-stick installation. This method eliminates the need for additional adhesives or glues.
- Click-lock: Similar to laminate flooring, many LVP products feature a click-lock system. The planks are designed to interlock, creating a secure and seamless installation without the need for adhesives.
- Glue-down: In some cases, LVP may need to be glued down to the subfloor. This method provides extra stability and is often recommended for areas with high foot traffic or moisture-prone environments.
Regardless of the installation technique used, proper subfloor preparation and acclimation of the LVP planks are crucial for a successful installation. It is important to follow the manufacturer’s guidelines and recommendations to ensure a long-lasting and visually appealing result.
Cost Comparison
When comparing the costs of laminate flooring vs LVP, several factors come into play. While LVP is more durable and suitable for moisture-prone areas, laminate may be preferred for its affordability and sustainability. Consider factors like durability, sunlight exposure, core differences, budget, environmental preferences, and room specifics.
When it comes to choosing between laminate flooring and luxury vinyl plank (LVP), one of the most important factors to consider is the cost. Laminate flooring is often seen as the more affordable option, while LVP is considered a more premium choice. Let’s take a closer look at the cost comparison between the two options.
LVP vs Laminate Flooring Cost Comparison (2026)
| Cost Factor | Laminate Flooring | LVP (Vinyl Plank Flooring) |
|---|---|---|
| Material cost | $1–$5 per sq ft | $2–$7 per sq ft |
| Installation cost | $2–$4 per sq ft | $2–$4 per sq ft |
| Total installed | $3–$9 per sq ft | $4–$11 per sq ft |
| 500 sq ft room | $1,500–$4,500 | $2,000–$5,500 |
| Lifespan | 15–30 years (dry areas) | 10–20 years |
| Repair cost | Higher (water damage risk) | Lower (waterproof) |
Laminate is generally $1–$2 cheaper per square foot than LVP. But in moisture-prone areas like kitchens or basements, the waterproof advantage of luxury vinyl plank flooring usually justifies the higher cost.
Laminate Flooring Affordability
Laminate flooring is a popular choice for budget-conscious homeowners who want the look of hardwood floors without the high price tag. On average, laminate flooring can cost anywhere from $0.50 to $5 per square foot, depending on the quality and style you choose. The lower end of the price range usually includes thinner, less durable options, while the higher end offers thicker, more realistic-looking planks.
While laminate flooring may be more affordable upfront, it’s important to consider the long-term costs. Laminate flooring is susceptible to water damage, scratches, and dents, which may require repairs or replacement over time. Additionally, laminate flooring may not last as long as other flooring options, which means you may need to replace it sooner than you would like.
Investing In Lvp
Luxury vinyl plank (LVP) flooring, on the other hand, is often seen as a more premium option due to its durability and water resistance. LVP is made from multiple layers, including a wear layer that protects against scratches and dents, making it a great option for high-traffic areas or homes with pets and children. LVP is also water-resistant, which means it can be used in bathrooms, kitchens, and other moisture-prone areas without fear of damage.
While LVP may be more expensive upfront, it can actually save you money in the long run. LVP is more durable than laminate flooring, which means it may last longer and require less maintenance. Additionally, LVP is less likely to need repairs or replacement, which can save you money over time.
In conclusion, while laminate flooring may be more affordable upfront, it may not be the best long-term investment. LVP may be more expensive, but its durability and water resistance can save you money in the long run. Ultimately, the choice between laminate flooring and LVP comes down to your budget and specific needs.
Top picks on Amazon
Laminate Flooring
Scratch-resistant AC4 rating, realistic wood look, great for living rooms and bedrooms
LVP Flooring (Waterproof)
100% waterproof SPC core, perfect for kitchens, bathrooms, and basements
As an Amazon Associate we earn from qualifying purchases.
Environmental Impact And Sustainability
When it comes to choosing the right flooring option for your space, considering the environmental impact and sustainability of the materials is crucial. Both laminate flooring and luxury vinyl plank (LVP) are popular choices, but which one is more eco-friendly? Let’s explore the eco-friendly aspects of laminate and the sustainability of LVP.
Eco-friendly Aspects Of Laminate
Laminate flooring is known for its eco-friendly attributes, making it a sustainable choice for environmentally conscious consumers. Here are some key eco-friendly aspects of laminate:
- Sustainable Materials: Laminate flooring is often made from sustainable materials such as wood fibers and recycled wood, reducing the environmental impact of harvesting new resources.
- Low Emissions: Many laminate flooring products are manufactured with low volatile organic compound (VOC) emissions, contributing to better indoor air quality and environmental preservation.
- Longevity: Laminate flooring is durable and long-lasting, reducing the need for frequent replacements and minimizing waste in landfills.
Sustainability Of Lvp
Luxury vinyl plank (LVP) flooring also has sustainability features that make it a viable option for environmentally conscious consumers. Consider the following aspects of LVP’s sustainability:
- Recyclable Content: Some LVP products incorporate recycled materials, contributing to the reduction of waste and promoting a circular economy.
- Water Efficiency: LVP’s water-resistant properties can prevent water damage, potentially extending its lifespan and reducing the frequency of replacements.
- Energy-Efficient Production: Certain LVP manufacturing processes prioritize energy efficiency, lowering the environmental impact associated with production.
Maintenance And Care
When it comes to choosing between laminate flooring and luxury vinyl plank (LVP), it’s crucial to consider the maintenance and care requirements for each option. Proper upkeep ensures the longevity and aesthetic appeal of your flooring, making it essential to understand the specific care routines for laminate and LVP.
Upkeep Of Laminate Floors
Laminate floors require minimal maintenance, making them an ideal choice for homeowners seeking easy care flooring. Here are some essential tips for keeping laminate floors in top condition:
- Regularly sweep or vacuum the floor to remove dust and debris.
- Use a damp mop with a mild cleaner specifically formulated for laminate floors to remove stains and spills.
- Avoid using excessive water or harsh cleaning agents as these can damage the floor’s surface.
- Place felt pads under furniture legs to prevent scratches and dents on the laminate surface.
- Immediately wipe up any spills to prevent moisture from seeping into the seams of the laminate planks.
Caring For Lvp
LVP, known for its resilience and waterproof properties, requires simple yet effective care routines to maintain its pristine appearance. Here are some key care tips for LVP:
- Regularly sweep or use a soft-bristle vacuum to eliminate dirt and debris from the surface of the LVP.
- Use a damp mop with a mild cleaner specifically designed for LVP to remove stubborn stains or spills.
- Do not use abrasive cleaners or harsh chemicals that could potentially damage the LVP surface.
- Wipe up spills promptly to prevent moisture from penetrating the seams and causing potential issues.
- Consider using doormats at entryways to minimize the tracking of dirt and moisture onto the LVP flooring.
Best Use Scenarios
Laminate flooring and LVP both have their best use scenarios depending on various factors such as durability, moisture-proneness, affordability, and sustainability. LVP is generally more resistant to water damage and suitable for moisture-prone areas, while laminate may be preferable for its affordability and sustainability.
Both flooring options come in a range of styles, colors, and patterns.
Ideal Situations For Laminate
Laminate flooring is a great option for those looking for an affordable and durable flooring solution. It is a good choice for areas with low to medium foot traffic such as bedrooms and living rooms. Laminate flooring is also a great option for those on a budget as it is less expensive than LVP flooring.
If you are looking for a flooring option that is easy to install, laminate flooring is a great choice. It can be installed quickly and easily, and can often be done as a DIY project. Laminate flooring is also available in a wide variety of styles and colors, making it easy to find a look that fits your home decor.
Where Lvp Shines
LVP flooring is a great choice for areas with high foot traffic such as entryways, kitchens, and bathrooms. It is also a good option for those with pets or children, as it is more resistant to scratches and stains than laminate flooring.
One of the biggest advantages of LVP flooring is its durability. It is water-resistant and can withstand moisture, making it a great choice for areas that are prone to spills and accidents. LVP flooring is also available in a wide variety of styles and colors, making it easy to find a look that fits your home decor.
Overall, when deciding between laminate flooring and LVP flooring, it is important to consider the specific needs of your home and the room you are looking to install the flooring in. While laminate flooring may be a great option for those on a budget or looking for an easy DIY project, LVP flooring is a better choice for areas with high foot traffic or moisture-prone areas.
The Verdict
Comparing Laminate Flooring to Luxury Vinyl Plank (LVP) involves considering factors like durability, sunlight exposure, and budget. LVP is more durable and suited for moisture-prone areas, while laminate is cost-effective and sustainable. Each has its advantages depending on room specifics and personal preferences.
Summarizing The Comparison
When it comes to choosing between laminate flooring and luxury vinyl plank (LVP) flooring, several factors need to be considered. These include durability, sunlight exposure, core differences, budget, environmental preferences, and room specifics. LVP is generally more durable and suitable for moisture-prone areas, while laminate may be preferable for affordability and sustainability. Both flooring types offer a range of styles, colors, and patterns, but laminate often features better imagery or embossing for a more realistic look. Laminate floors are more resistant to scratches and dents, while LVP is more resistant to water damage. Additionally, LVP is thicker than standard vinyl flooring and has a wear layer that protects against scratches and dents, while engineered wood floors offer durability along with the look and feel of real wood.
| Feature | Laminate Flooring | LVP (Luxury Vinyl Plank) |
|---|---|---|
| Core material | HDF (high-density fiberboard) | PVC / WPC / SPC rigid core |
| Water resistance | Low — swells when wet; not for bathrooms | 100% waterproof — ideal for bathrooms, kitchens |
| Scratch resistance | High — AC3–AC5 wear layer ratings | Moderate — depends on wear layer thickness |
| Realistic wood look | Very high — photographic layer + embossing | High — improving with newer print technology |
| Cost (installed) | $2–$5 per sq ft material | $3–$7 per sq ft material |
| Comfort underfoot | Harder — underlay required | Softer — built-in foam backing common |
| Subfloor requirements | Flat, dry — sensitive to moisture | Flexible — works over most subfloors |
| Installation | Click-lock floating floor | Click-lock; glue-down option for lower grades |
| Lifespan | 15–25 years | 20–30 years |
| Repair | Plank replacement (boards can crack) | Easier plank replacement; durable |
| Eco-friendliness | Better — wood-based, lower VOCs | PVC content raises environmental concerns |
| Best rooms | Living rooms, bedrooms, low-traffic areas | Kitchens, bathrooms, basements, whole-home |
Making The Right Choice For Your Home
Choosing between laminate flooring and LVP ultimately depends on your specific needs and preferences. If you live in a moisture-prone area or have rooms that are prone to spills or high humidity, LVP may be the better option due to its water resistance. On the other hand, if sustainability and affordability are important factors for you, laminate flooring may be the way to go. Consider the specific requirements of each room in your home and weigh the pros and cons of each flooring type. It’s also helpful to consult with a flooring professional who can provide expert advice based on your unique situation.
In conclusion, while both laminate flooring and LVP have their own advantages, there is no one-size-fits-all answer. The decision ultimately depends on your individual needs, budget, and preferences. Take the time to research and compare the features of each flooring type to ensure you make the right choice for your home.

Frequently Asked Questions
Is Lvp Or Laminate Flooring Better?
LVP is generally better than laminate due to its durability and moisture resistance. Laminate may be preferred for affordability.
Which Looks More Realistic Vinyl Or Laminate Flooring?
Laminate flooring typically looks more realistic than vinyl due to better imagery and embossing for a natural appearance.
Is Lvp Or Laminate More Scratch Resistant?
LVP is generally more scratch-resistant than laminate flooring due to its durable composition.
What Flooring Is Better Than Lvp?
Engineered wood floors are better than LVP as they offer durability along with the look and feel of real wood. They are a popular choice for homeowners who want high-end hardwood floors that can withstand heavy foot traffic. However, when compared with laminate, LVP is generally more durable and suitable for moisture-prone areas, while laminate may be preferable for affordability and sustainability.
It’s important to consider factors like durability, sunlight exposure, core differences, budget, environmental preferences, and room specifics before making a decision.
Conclusion
Both LVP and laminate flooring have their unique advantages based on specific preferences. Consider factors like durability, moisture resistance, budget, and aesthetic appeal when choosing between the two. Ultimately, the decision should align with your lifestyle and needs for long-lasting flooring satisfaction.