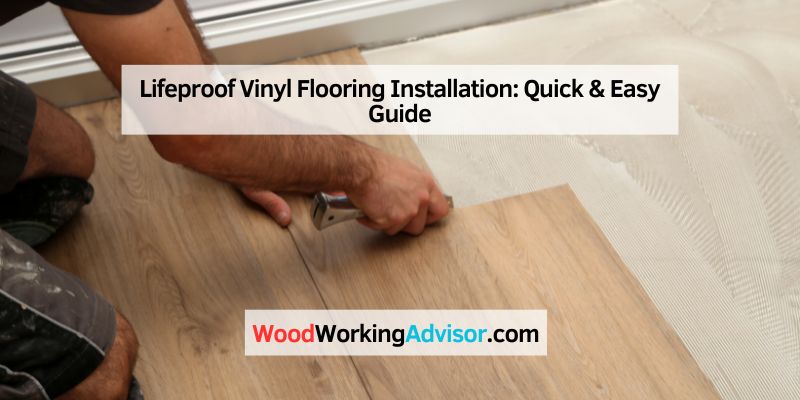
Lifeproof Vinyl Flooring Installation: Quick & Easy Guide
Lifeproof vinyl flooring can be installed without an underlayment, but using a premium underlayment is recommended for optimal acoustic performance and moisture protection. Installing Lifeproof Vinyl flooring is a straightforward process that any home DIYer can accomplish with minimal tools and experience.
Before starting the installation, it’s important to allow the flooring to adjust to the room’s temperature and humidity. Starting in a left-hand corner, lay down the first plank with the tongue facing the wall, and continue assembling the planks in the first row.
This ensures a smooth and successful installation. We’ll explore the essential steps and tips for installing Lifeproof vinyl flooring, providing you with the knowledge and confidence to tackle this project with ease.
Introduction To Lifeproof Vinyl Flooring
Installing Lifeproof Vinyl Flooring is a straightforward process that any DIY enthusiast can easily accomplish with minimal tools and experience. The first step is to allow the product to adjust to the room’s temperature and humidity before laying down the planks, ensuring the tongue is facing the wall.
Lifeproof vinyl flooring is a durable and stylish option for homeowners looking to enhance the aesthetics and functionality of their spaces. With its innovative design and high-performance features, Lifeproof vinyl flooring offers numerous benefits that make it a popular choice among homeowners. From its water resistance to its easy installation process, Lifeproof vinyl flooring is an excellent choice for any room in your home.
Benefits Of Choosing Lifeproof
There are several advantages to choosing Lifeproof vinyl flooring for your home. Here are some key benefits:
1. Durability: Lifeproof vinyl flooring is known for its exceptional durability, making it perfect for high-traffic areas in your home. It can withstand daily wear and tear, including scratches, stains, and dents, ensuring that your floors look beautiful for years to come.
2. Water Resistance: Lifeproof vinyl flooring is 100% waterproof, making it an ideal choice for areas prone to moisture, such as bathrooms, kitchens, and basements. It can withstand spills, pet accidents, and even minor flooding without warping or damage.
3. Easy Maintenance: Lifeproof vinyl flooring is incredibly easy to clean and maintain. Regular sweeping or vacuuming, along with occasional mopping, is usually all it takes to keep your floors looking pristine. Its stain resistance also means that spills can be easily wiped away without leaving any marks.
4. Wide Range of Styles: Lifeproof vinyl flooring offers a wide range of styles and designs, allowing you to find the perfect look for your space. Whether you prefer the natural look of hardwood or the sleek appearance of stone, Lifeproof has options to suit every taste and interior design style.
5. Comfortable Underfoot: Lifeproof vinyl flooring provides a comfortable and cushioned feel underfoot, making it a great choice for areas where you spend a lot of time standing, such as kitchens or laundry rooms. It also helps to reduce noise transmission, creating a quieter living environment.
Suitable Spaces For Installation
Lifeproof vinyl flooring can be installed in various spaces throughout your home. Its versatility and durability make it suitable for the following areas:
1. Living Rooms and Bedrooms: Lifeproof vinyl flooring can add warmth and style to your living room or bedroom. Its comfortable feel underfoot makes it a cozy option for these spaces.
2. Kitchens and Bathrooms: With its water resistance, Lifeproof vinyl flooring is an excellent choice for kitchens and bathrooms. It can withstand spills and moisture without warping or damage.
3. Basements: Lifeproof vinyl flooring is a great choice for basements, where moisture can be an issue. Its water resistance ensures that your floors remain in top condition, even in damp environments.
4. Entryways and Mudrooms: Lifeproof vinyl flooring is perfect for high-traffic areas like entryways and mudrooms. Its durability and stain resistance make it easy to clean, even when subjected to dirt and mud.
In conclusion, Lifeproof vinyl flooring offers numerous benefits, including durability, water resistance, easy maintenance, a wide range of styles, and comfort underfoot. It can be installed in various spaces throughout your home, making it a versatile and practical flooring option. Consider Lifeproof vinyl flooring for your next home improvement project and enjoy beautiful, long-lasting floors that stand up to everyday life.
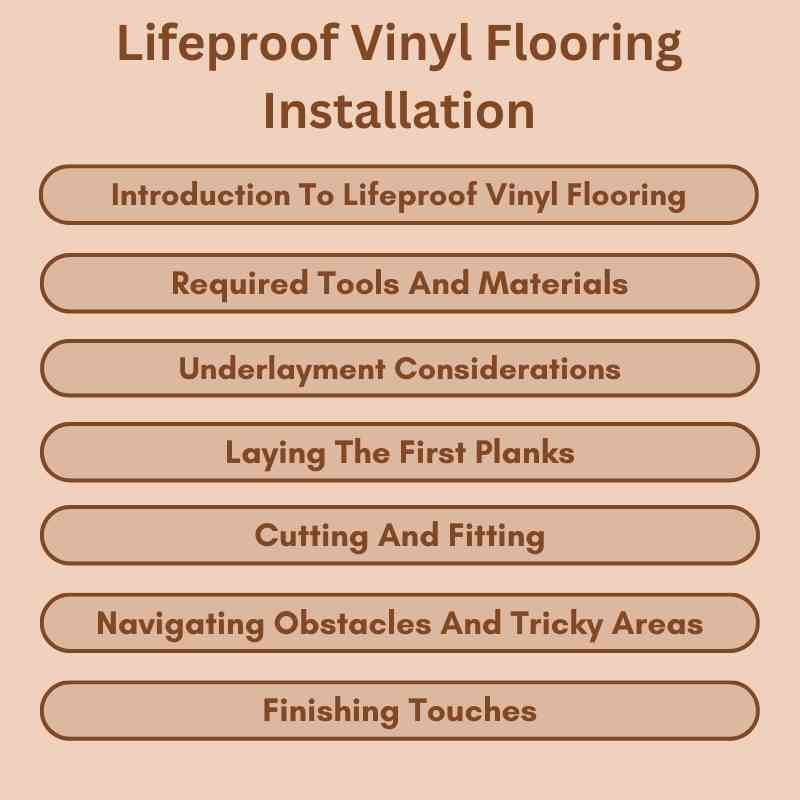
Required Tools And Materials
Installing Lifeproof Vinyl Flooring is a simple and straightforward process that can be accomplished by any DIY enthusiast. However, before you start the installation, it’s important to gather all the necessary tools and materials to ensure a smooth and successful project. In this section, we will outline the essential tools and materials you will need for the job.
Essential Tools For The Job
Here is a list of the essential tools you will need to install Lifeproof Vinyl Flooring:
- Measuring tape
- Pencil or chalk
- Straight edge or T-square
- Utility knife
- Scissors
- Hammer
- Screwdriver
- Notched trowel
- Roller or hand roller
- Tile spacers
- Level
- Safety glasses
- Knee pads
Materials Checklist Before Starting
Before you begin the Lifeproof Vinyl Flooring installation, make sure you have the following materials on hand:
- Lifeproof Vinyl Flooring planks
- Underlayment (if desired)
- Adhesive (if required for your installation method)
- Transition pieces (e.g., T-molding, quarter round)
- Baseboards or trim
- Moisture barrier (if necessary)
- Caulk (for finishing touches)
- Cleaner and maintenance products for vinyl flooring
Having these tools and materials ready before you start the installation will help you work efficiently and ensure a professional-looking result. Now that you have everything you need, let’s move on to the next step: preparing the room for installation.
Pre-installation Preparation
Before you begin the installation of your Lifeproof vinyl flooring, it’s crucial to make sure that you adequately prepare the space to ensure a successful and long-lasting installation. The pre-installation process involves acclimating your flooring, preparing the subfloor, and measuring your space.
Acclimating Your Flooring
Allow your Lifeproof vinyl flooring to adjust to the room’s temperature and humidity by acclimating it before installation. Open the boxes of flooring and place the unopened packages in the room where the installation will occur. This acclimation period should ideally last for at least 48 hours to minimize the potential for expansion or contraction after installation.
Preparing The Subfloor
Prior to installation, it’s essential to ensure that the subfloor is clean, dry, and level. Remove any existing flooring materials and thoroughly clean the subfloor to eliminate any dust, debris, or irregularities. Address any uneven areas by sanding down high spots and filling in low areas to create a smooth and uniform surface for installation.
Measuring Your Space
Accurate measurements of the installation area are crucial for determining the quantity of Lifeproof vinyl flooring needed. Measure the length and width of the space, taking into account any alcoves or irregularities. It’s recommended to add 5-10% to the total square footage to accommodate for cuts and potential errors during installation.
Underlayment Considerations
When installing Lifeproof vinyl flooring, it’s important to consider using a premium underlayment to enhance acoustic performance and moisture protection. The underlayment acts as a layer beneath the flooring, contributing to its overall performance and longevity. Optimal installation ensures a straightforward process for any DIY enthusiast.
When it comes to installing Lifeproof vinyl flooring, one of the most important considerations is the underlayment. While it is possible to install the flooring without an underlayment, it is highly recommended to use one to achieve optimal acoustic performance and moisture protection.
Is Underlayment Necessary?
While it is possible to install Lifeproof vinyl flooring without an underlayment, it is not recommended. The underlayment is designed to provide additional support, insulation, and moisture protection, which can significantly enhance the flooring’s performance and longevity. Therefore, it is highly recommended to use a premium underlayment for the best results.
Choosing the Right Underlayment
Choosing the right underlayment for your Lifeproof vinyl flooring is crucial for achieving the desired performance and durability. There are different types of underlayment available, such as foam, cork, and rubber, each with unique properties and benefits. Some factors to consider when choosing the right underlayment include the type of subfloor, the level of foot traffic, the desired acoustic performance, and moisture protection.
A foam underlayment is the most common type used for Lifeproof vinyl flooring, as it provides good cushioning, sound absorption, and moisture protection. However, if you are looking for superior acoustic performance, a cork or rubber underlayment may be a better option. Cork is a natural insulator that can reduce noise and improve energy efficiency, while rubber provides excellent shock absorption and moisture resistance.
In conclusion, choosing the right underlayment is essential for achieving optimal performance and longevity of your Lifeproof vinyl flooring. By considering factors such as the type of subfloor, foot traffic, acoustic performance, and moisture protection, you can select the best underlayment for your specific needs.
Laying The First Planks
Installing Lifeproof Vinyl Flooring is a simple and straightforward process that can be accomplished with minimal tools and experience with flooring materials. The first step in the process is laying the first planks. This step is crucial as it sets the foundation for the rest of the installation process. In this section, we will discuss the correct way to start laying the first planks.
Starting In The Correct Corner
Before installing the first row of planks, it is essential to determine the correct starting corner. It is recommended to start the installation in a left-hand corner of the room. This will ensure that the installation proceeds in the correct direction and will also make it easier to install the planks along the walls.
Securing The First Row
Once you have determined the correct starting corner, it is time to secure the first row of planks. It is crucial to ensure that the first row is installed correctly as it sets the foundation for the rest of the installation process. Use a tapping block to secure the first row of planks tightly together. Use a saw to trim the last plank in the row to fit the remaining space. It is essential to ensure that the last plank fits correctly to avoid any gaps or unevenness in the flooring.
By following these steps, you can ensure a successful installation of Lifeproof Vinyl Flooring. Remember to take your time and ensure that each step of the process is done correctly to achieve the best results.
Cutting And Fitting
Looking for tips on Lifeproof vinyl flooring installation? Installing Lifeproof vinyl flooring is a straightforward process that can be easily accomplished by any DIYer. With minimal tools and experience, you can achieve a professional-looking result. Start by allowing the product to adjust to the room’s temperature and humidity, then lay down the first plank with the tongue facing the wall.
Assemble the planks in the first row and continue with the rest of the installation. Enjoy your new Lifeproof vinyl flooring!
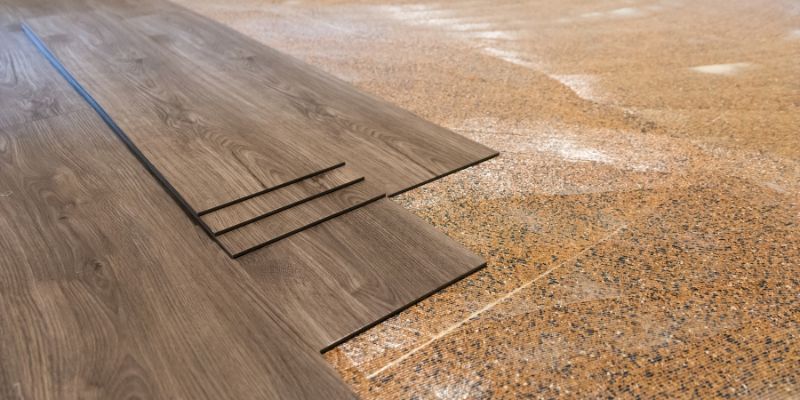
Cutting and fitting the Lifeproof vinyl flooring is an essential part of the installation process. In this section, we will discuss how to measure and mark planks accurately, use a miter saw for precision cuts, and fit the planks seamlessly together.
Measuring And Marking Planks
Before cutting the Lifeproof vinyl flooring, it is essential to measure and mark the planks accurately. You can use a measuring tape and a pencil to mark the length of the plank you want to cut. Ensure that you measure the length of the plank precisely, leaving a little extra space to trim the edges if needed.
Using A Miter Saw For Precision Cuts
To achieve precise and accurate cuts, it’s best to use a miter saw. A miter saw is a valuable tool that can help you cut the planks to the exact size you need. It’s crucial to follow the manufacturer’s instructions while using the miter saw to prevent any accidents and ensure a smooth cutting process.
Fitting The Planks Together
Once you have cut the planks to the correct size, the next step is to fit them together seamlessly. Start by placing the cut plank against the wall, ensuring that there is enough space left for expansion. Then, connect the planks together by interlocking the tongue and groove joints. Ensure that the planks are aligned correctly and are flush with each other.
In conclusion, cutting and fitting the Lifeproof vinyl flooring is a crucial step in the installation process. By following the steps mentioned above, you can ensure that the planks fit together seamlessly, creating a beautiful and long-lasting floor.
When installing Lifeproof vinyl flooring, it’s crucial to navigate obstacles and tricky areas with precision and care. Proper planning and attention to detail ensure a seamless installation process, resulting in a durable and attractive flooring solution for your space.
Navigating Obstacles and Tricky Areas while installing Lifeproof Vinyl Flooring can be daunting, but with proper guidance, you can achieve a flawless installation. Working around Columns and Poles, Fitting around Door Facings, and Installation Under Fixed Objects are some of the challenges you may encounter during the process. Let’s delve into each of these obstacles and how to navigate them seamlessly.
Working Around Columns And Poles
Columns and poles can pose a challenge when installing Lifeproof Vinyl Flooring. However, with the right tools and techniques, you can achieve a perfect fit around these obstacles. Firstly, measure the diameter of the column or pole and mark the center point on the planks. Then, cut the plank along the marked line to fit around the obstacle. Ensure you leave a small gap between the obstacle and the flooring to allow for expansion and contraction. Finally, apply adhesive to the back of the plank and press it into place. Repeat the process until you have covered the entire area.
Fitting Around Door Facings
Fitting Lifeproof Vinyl Flooring around door facings can be challenging, but it is essential for a seamless finish. Start by measuring the width and height of the door facing. Then, cut the plank to the appropriate size and shape using a jigsaw or handsaw. Ensure you leave a small gap between the plank and the facing to allow for expansion and contraction. Finally, apply adhesive to the back of the plank and press it into place.
Installation Under Fixed Objects
Installing Lifeproof Vinyl Flooring under fixed objects such as radiators and cabinets can be tricky, but it is achievable with the right tools and techniques. Firstly, measure the area where you intend to install the flooring. Then, cut the plank to the appropriate size and shape using a jigsaw or handsaw. Ensure you leave a small gap between the plank and the fixed object to allow for expansion and contraction. Finally, apply adhesive to the back of the plank and press it into place.
In conclusion, navigating obstacles and tricky areas when installing Lifeproof Vinyl Flooring requires patience, precision, and the right tools. With the guidelines provided above, you can achieve a seamless finish and transform your space into a beautiful and functional area.
Finishing Touches
When it comes to Lifeproof vinyl flooring installation, paying attention to the finishing touches is crucial for achieving a professional and polished look. From ensuring seamless seams to closing gaps and attaching trim and transitions, these final steps play a significant role in the overall appearance and longevity of your flooring.
Staggering Seams For A Natural Look
Staggering the seams of your Lifeproof vinyl flooring is essential for creating a natural and visually appealing appearance. This technique involves offsetting the end joints of adjacent planks to avoid a repetitive pattern and to mimic the look of natural wood or stone flooring.
Closing Gaps And Sealing Edges
After the main installation is complete, it’s important to inspect the flooring for any gaps or spaces between the planks. These gaps should be carefully closed to ensure a uniform and secure fit. Additionally, sealing the edges with an appropriate sealant will help prevent moisture and debris from penetrating the seams, enhancing the durability of the flooring.
Attaching Trim And Transitions
Completing the installation with the attachment of trim and transitions is the final step in achieving a polished and professional finish. Installing baseboards, quarter round moldings, and transition strips not only enhances the visual appeal of the flooring but also provides protection for the edges and seamless transitions between different types of flooring materials.
Maintenance And Care
Installing Lifeproof vinyl flooring is a hassle-free process that can be easily accomplished by any DIY enthusiast. With minimal tools and experience, you can achieve a seamless installation in your home. Plus, using a premium underlayment will enhance the flooring’s acoustic performance and provide better moisture protection.
Proper maintenance and care are essential to keep your Lifeproof vinyl flooring looking its best and ensuring its longevity. By following these simple guidelines, you can maintain the beauty and functionality of your new floor for years to come.
Cleaning Your New Floor
Regular cleaning is key to maintaining the pristine appearance of your Lifeproof vinyl flooring. Here are some tips to help you keep your floor clean and free from dirt and grime:
1. Sweep or vacuum the floor regularly to remove loose dirt and debris. This will prevent scratches and keep the surface looking clean.
2. Use a damp mop or cloth to clean the floor with a mild detergent or vinyl floor cleaner. Avoid using abrasive cleaners or scrub brushes as they can damage the surface of the flooring.
3. Wipe up spills immediately to prevent staining. Lifeproof vinyl flooring is resistant to most spills, but it’s always best to clean up any liquids promptly.
4. For tough stains or scuff marks, use a non-abrasive cleaner or a mixture of warm water and vinegar. Apply the cleaner to a cloth and gently rub the stain until it disappears.
Remember to always follow the manufacturer’s guidelines for cleaning your Lifeproof vinyl flooring to ensure you don’t void the warranty.
Preventing Scratches and Damage
While Lifeproof vinyl flooring is known for its durability, taking preventive measures can help minimize scratches and damage. Here are some tips to protect your floor:
1. Use furniture pads or felt protectors under the legs of your furniture to prevent scratches when moving or rearranging items.
2. Avoid dragging heavy objects or furniture across the floor. Lift and carry them instead to prevent any potential damage.
3. Place doormats at entryways to trap dirt and debris from shoes. This will prevent abrasive particles from scratching the surface of your vinyl flooring.
4. Use protective mats or rugs in high-traffic areas, such as hallways or in front of sinks, to minimize wear and tear.
By following these simple maintenance and care tips, you can ensure that your Lifeproof vinyl flooring remains beautiful and functional for years to come. Regular cleaning and preventive measures will help protect your investment and maintain the aesthetic appeal of your floor.
Troubleshooting Common Issues
Troubleshooting common issues during the installation of Lifeproof vinyl flooring is essential for a successful and long-lasting result. From choosing the right underlayment to ensuring proper installation techniques, following these guidelines will help you avoid potential problems and achieve optimal performance.
Dealing With Peaking
One common issue that you may encounter during Lifeproof Vinyl Flooring Installation is peaking. Peaking occurs when two adjacent planks push against each other, causing a visible ridge or peak. This can be caused by improper installation or changes in temperature and humidity. Here are some troubleshooting steps you can take to fix this issue:
1. Identify the peaking area: Start by identifying the specific area where the peaking is occurring. This will help you target your efforts more effectively.
2. Inspect the subfloor: Check the subfloor for any irregularities or unevenness. If there are any high spots or dips, you may need to level the subfloor before proceeding with the installation.
3. Remove the affected planks: Carefully remove the planks that are causing the peaking. Start from the edge closest to the peak and work your way towards it.
4. Trim the planks: Using a utility knife or a table saw, trim the edges of the planks that are causing the peaking. Make sure to remove enough material to allow for a proper fit without pushing against the adjacent planks.
5. Reinstall the planks: Once you have trimmed the planks, reinstall them by aligning the edges properly. Make sure there is a slight gap between the planks and the walls to allow for expansion.
6. Secure the planks: Use a tapping block and a rubber mallet to gently tap the planks into place. Make sure they are securely locked together.
7. Check for any remaining issues: Inspect the area to ensure that the peaking has been resolved. If you notice any other issues, such as gaps or unevenness, address them before continuing with the installation.
Fixing Gaps And Bubbles
Another common issue that can occur during Lifeproof Vinyl Flooring Installation is gaps and bubbles. Gaps may occur between planks, while bubbles can form when the adhesive fails to bond properly. Here’s how you can troubleshoot and fix these issues:
1. Identify the problem areas: Start by identifying the areas where gaps or bubbles are present. This will help you focus your efforts on those specific areas.
2. Check the subfloor: Ensure that the subfloor is clean, dry, and level. Any debris or moisture can affect the adhesion of the planks and cause gaps or bubbles.
3. Reinstall the planks: If you notice gaps between the planks, gently lift the affected planks and reposition them to eliminate the gap. Make sure to align the edges properly and ensure a snug fit.
4. Fix bubbles: If you come across bubbles, use a utility knife to carefully make a small incision in the bubble. Apply adhesive or glue underneath the bubble and press it down firmly to remove any trapped air.
5. Secure the planks: Use a tapping block and a rubber mallet to secure the planks in place. Ensure that they are tightly joined together without any gaps or bubbles.
6. Inspect the area: After addressing the gaps and bubbles, inspect the area to ensure that the issues have been resolved. Make any necessary adjustments or repairs before continuing with the installation.
By following these troubleshooting steps, you can overcome common issues such as peaking, gaps, and bubbles during Lifeproof Vinyl Flooring Installation. Remember to take your time and be meticulous in your approach to achieve a flawless and durable flooring installation.
Pros And Cons Of Floating Vs. Glue-down Installation
Lifeproof vinyl flooring is a popular choice for homeowners due to its durability, water resistance, and easy maintenance. When it comes to installation, two common methods are floating and glue-down. Each method has its own set of pros and cons, and it’s important to consider these factors before deciding on the best installation approach for your space.
When To Float Your Floor
Floating installation involves interlocking the vinyl planks, creating a “floating” floor that is not attached to the subfloor. This method is suitable when you need a quick and easy installation, as it does not require adhesive. It’s also a great option for areas with minor subfloor imperfections, as the underlayment can help smooth out small irregularities.
- Quick and easy installation
- No need for adhesive
- Suitable for minor subfloor imperfections
- Can be installed over existing flooring
When To Choose Glue-down Method
The glue-down method involves securing each plank to the subfloor using adhesive. This approach is ideal for high-traffic areas and spaces prone to moisture, as it provides a more permanent and stable installation. Additionally, glue-down installation ensures a quieter floor, as it minimizes the hollow sound that can occur with floating floors.
- Provides a more permanent and stable installation
- Ideal for high-traffic areas and moisture-prone spaces
- Reduces hollow sound
- Ensures a secure bond to the subfloor
Conclusion And Final Review
To conclude, the installation of Lifeproof vinyl flooring is a straightforward process, suitable for DIY enthusiasts with minimal experience. The final review reveals a durable and easy-to-maintain flooring option, perfect for various indoor spaces.
After completing the installation of your Lifeproof vinyl flooring, it’s time to inspect your work and ensure everything is in place. Inspecting your work is crucial to identify any potential issues and make necessary adjustments. Additionally, it is important to know how to enjoy and maintain your Lifeproof flooring to maximize its longevity.
Inspecting Your Work
Once the installation is complete, take a few moments to carefully inspect your Lifeproof vinyl flooring. Look for any visible gaps, misalignments, or imperfections in the planks. Make sure that each plank is securely attached and that there are no loose or raised edges.
Walk across the entire floor and pay attention to any areas that feel uneven or unstable. This will help you identify any potential issues that may require further attention. If you notice any problems, take the time to address them before moving on.
Inspecting your work ensures that your Lifeproof flooring looks seamless and professional. It also helps to avoid any future problems or damage that may arise from improper installation.
Enjoying Your Lifeproof Flooring
Now that your Lifeproof vinyl flooring is installed and inspected, it’s time to enjoy the benefits it brings to your space. Lifeproof flooring is known for its durability, water resistance, and easy maintenance, making it an excellent choice for any room in your home.
To keep your Lifeproof flooring in top condition, follow these simple tips:
- Regularly sweep or vacuum the floor to remove dirt and debris.
- Wipe up spills and stains immediately to prevent any potential damage.
- Use a damp mop with a mild cleaner specifically designed for vinyl flooring to keep it clean and fresh.
- Avoid using harsh chemicals or abrasive cleaners that may cause damage to the surface.
- Place felt pads under furniture legs to prevent scratching or indentations.
By following these maintenance guidelines, you can ensure that your Lifeproof flooring remains beautiful and functional for years to come.
In conclusion, Lifeproof vinyl flooring installation is a straightforward process that can be accomplished by any home DIYer. By inspecting your work and properly maintaining your Lifeproof flooring, you can enjoy a durable, water-resistant, and visually appealing floor that will enhance the beauty of your space.
Frequently Asked Questions
Do You Put Anything Under Lifeproof Flooring?
Although Lifeproof flooring can be installed without an underlayment, it’s recommended to use a premium underlayment for optimal acoustic performance and moisture protection. Flooring underlayment is a layer placed underneath flooring to enhance performance and longevity. So, it’s better to use an underlayment under Lifeproof flooring for better results.
Is Lifeproof Vinyl Flooring Easy To Install?
Yes, Lifeproof vinyl flooring is easy to install. The process is straightforward and can be accomplished by any home DIYer with minimal tools and experience with flooring materials. However, it is recommended to use a premium underlayment for optimal acoustic performance and moisture protection.
Which Way Do You Lay Lifeproof Flooring?
When installing Lifeproof flooring, start by laying the first row with the tongue facing the wall in a left-hand corner. Continue laying the planks in the first row either left to right or right to left. Make sure to acclimate the product to the room’s temperature and humidity before installation.
Is It Better To Glue Or Float Vinyl Plank Flooring?
It depends on the subfloor and environment. If the subfloor is unsuitable for adhesives or the environment has inconsistent temperatures or an uneven substrate, a direct glue installation is best. Otherwise, a floating floor is a good option. Both methods have their advantages and disadvantages, so it’s important to choose the one that fits your specific needs.
Conclusion
Lifeproof vinyl flooring installation is a straightforward and easy process that can be accomplished by any DIY enthusiast. It is important to use a premium underlayment for optimal acoustic performance and moisture protection. Whether you choose to glue or float the vinyl planks depends on the suitability of the subfloor and the environmental conditions.
By following the proper installation techniques and allowing the product to adjust to the room’s temperature and humidity, you can achieve a durable and beautiful Lifeproof vinyl flooring in your home.