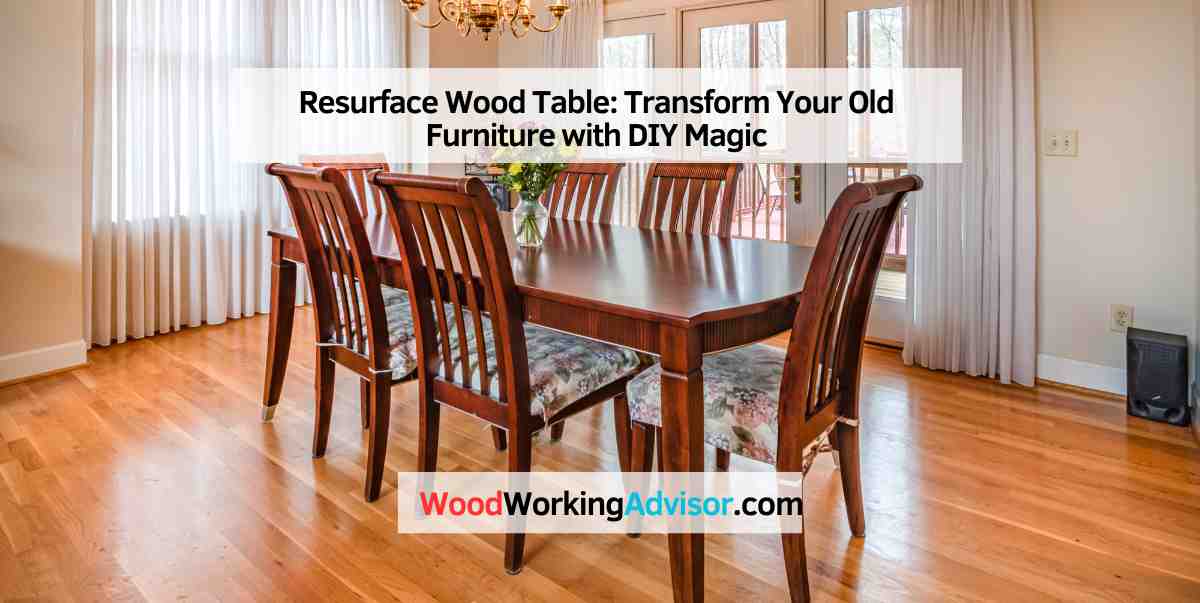
How to Resurface a Wood Table: Strip, Sand, and Refinish
To resurface a wood table, start by sanding the surface to remove old finish and smooth imperfections. Then, apply a wood stain or paint for a fresh look and protection.
Do you have a worn-out wood table that needs a new lease on life? Resurfacing your wood table is a cost-effective way to breathe new life into your furniture. Whether you want to repair scratches, water damage, or simply update the appearance, resurfacing a wood table can make a significant difference.
With just a few simple steps and some elbow grease, you can transform your tired table into a stunning focal point for your space. In this guide, we’ll explore the process of resurfacing a wood table, including helpful tips and tricks to achieve professional results. Whether you’re a DIY enthusiast or a complete beginner, resurfacing your wood table is a project that anyone can tackle with the right tools and know-how.
Choosing The Right Wood Table
When choosing the right wood table for your home, it’s crucial to consider several factors that will ensure you make the best decision. The condition of the table and the type of wood it’s made from are two key aspects you should carefully assess before making a purchase or embarking on a resurfacing project.
Consider The Table’s Condition
Before deciding to resurface a wood table, evaluate its current condition. Look for any visible damage, such as scratches, dents, or watermarks. Additionally, check for any signs of warping or splitting. Understanding the table’s condition will help determine whether a simple refinish or a more extensive restoration is needed.
Assess The Type Of Wood
When it comes to resurfacing a wood table, it’s essential to take into account the type of wood it’s constructed from. Different types of wood require specific restoration techniques and finishes. Consider the hardness, grain pattern, and durability of the wood to ensure the chosen resurfacing method will effectively enhance its natural beauty and longevity.
Preparing The Wood Surface
Selecting The Right Resurfacing Technique
When it comes to revitalizing your worn-out wood table, selecting the right resurfacing technique is crucial. The choice you make will not only determine the final appearance of your table but also its durability and longevity. There are several options to consider, each with its unique benefits and considerations. In this section, we will explore three popular resurfacing techniques: staining the wood, painting the wood, and applying varnish or polyurethane. Let’s take a closer look at each one.
Strongstaining The Wood/strong
Staining the wood is an excellent option if you want to enhance the natural beauty of the wood grain while adding a touch of color. By applying a wood stain, you can achieve a variety of shades and finishes, from light and subtle to dark and dramatic. Staining the wood also helps to protect it from moisture and UV damage, extending the life of your table.
When staining the wood, it is essential to prepare the surface properly. Start by sanding the table to remove any existing finish and create a smooth, even surface. Clean the wood thoroughly to remove any dust or debris before applying the stain. Use a brush, cloth, or sponge to apply the stain evenly, following the grain of the wood. Allow the stain to penetrate for the recommended time, and then wipe off any excess stain with a clean cloth. Finally, seal the stained wood with a clear protective finish to ensure longevity.
Strongpainting The Wood/strong
If you’re looking to completely change the look of your wood table, painting might be the ideal option. Painting allows you to add bold colors, create unique designs, or transform an outdated piece into a modern masterpiece. With a wide range of paint types and finishes available, you can achieve any desired effect, from smooth and glossy to distressed and rustic.
To paint your wood table, start by preparing the surface by sanding and cleaning it thoroughly. Primer is essential when painting wood, as it helps the paint adhere better and prevents stains or discoloration. Choose a high-quality paint suitable for wood surfaces, and apply it evenly using a brush or roller. Allow each coat to dry completely before applying the next one, ensuring smooth and flawless coverage. Once you’re satisfied with the paint job, protect your newly painted table by applying a clear topcoat or sealant.
Strongapplying Varnish Or Polyurethane/strong
If you want to preserve the natural look and feel of your wood table while providing maximum protection, applying varnish or polyurethane is the way to go. Varnish and polyurethane create a clear, hard finish that not only enhances the wood’s natural beauty but also shields it from scratches, stains, and spills.
To apply varnish or polyurethane, start by ensuring the wood surface is clean and smooth. Apply the first coat using a brush or foam applicator, following the grain of the wood. Allow the coat to dry completely, and then lightly sand the surface with fine-grit sandpaper. Remove any dust, and apply subsequent coats following the same process. Depending on your desired level of protection, two to three coats should be sufficient. Once the final coat has dried and cured, your wood table will be ready to withstand daily use and retain its charm for years to come.
Adding Decorative Touches
Welcome back to our blog series on how to resurface wood tables! In this post, we will explore the exciting world of adding decorative touches to your newly resurfaced table. These simple yet effective techniques can elevate the aesthetic appeal of your table and transform it into a work of art. So, let’s dive right in and explore some creative ways to bring your wood table to life!
Applying Stencils Or Decals
Applying stencils or decals is a fantastic way to add a personalized touch to your resurfaced wood table. Whether you prefer intricate patterns or bold designs, stencils and decals offer endless possibilities. Here’s how you can easily achieve this:
- Choose a stencil or decal that complements your table’s style and your interior decor.
- Place the stencil or decal on the desired spot of the table.
- Secure it in place using painter’s tape or adhesive.
- Apply paint or a wood-safe marker over the stencil or decal, using gentle strokes.
- Allow the paint to dry, following the manufacturer’s instructions.
- Carefully remove the stencil or decal to reveal your beautifully decorated table.
Incorporating Wood Inlays
If you’re looking to enhance the natural beauty of your wood table, incorporating wood inlays is an excellent choice. These decorative elements can add a touch of elegance and sophistication to your resurfaced table. Follow these simple steps to incorporate wood inlays:
- Select the type of wood and design for the inlay that suits your table’s style.
- Using a chisel, gently carve a groove on the surface of the table where the inlay will be placed.
- Apply a small amount of wood glue to the groove.
- Place the wood inlay carefully into the groove, ensuring it fits securely.
- Wipe away any excess glue with a damp cloth.
- Allow the glue to dry completely before using your table.
By incorporating wood inlays, you can create a visually stunning centerpiece that will surely impress your family and guests.
Finishing And Sealing
The finishing and sealing process is crucial in resurfacing a wood table to ensure durability and enhance its appearance. Choosing the right finish and properly applying sealant are essential steps to protect and beautify your table. Let’s explore these key aspects in detail.
Choosing The Right Finish
When selecting a finish for your wood table, consider factors such as desired aesthetics, level of protection, and ease of maintenance. Polyurethane is a popular choice for its durability and resistance to scratches and moisture. Varnish enhances the natural beauty of wood, while oil-based finishes offer a rich, warm look.
Applying Sealant
Prep the surface by sanding the table to remove any imperfections and ensure smoothness. Use a clean cloth to wipe off dust before applying the sealant. Apply thin, even coats of sealant with a brush or cloth, following the wood grain. Let each coat dry completely before applying the next for optimal results.
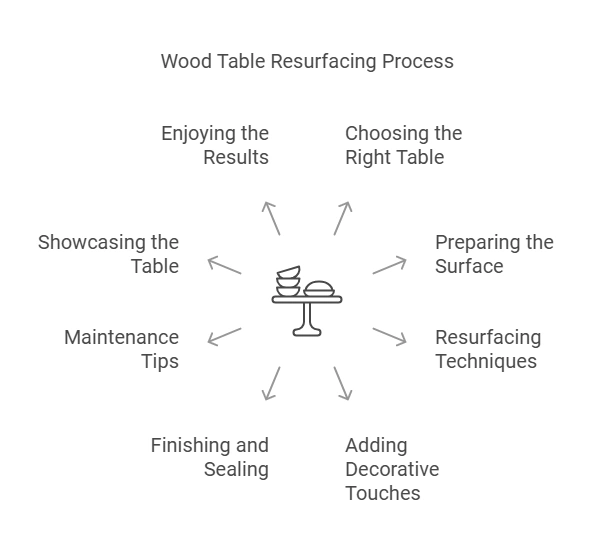
Maintaining The Resurfaced Table
To properly maintain a resurfaced wood table, regular dusting and cleaning with a mild solution are essential. Avoid placing hot or wet objects directly on the surface and use coasters and tablecloths for added protection.
Cleaning And Dusting Tips
When cleaning resurfaced wood tables, it’s important to use gentle cleaning methods to prevent damage. Start by dusting the table regularly with a soft cloth to remove any surface dirt. Use a microfiber cloth or a feather duster to gently wipe away dust and debris without scratching the surface. Avoid using abrasive cleaners or harsh chemicals that can strip away the protective coating.
Regularly clean the table with a mild solution of water and gentle dish soap. Mix a few drops of dish soap with warm water, dampen a soft cloth, and gently wipe the surface in the direction of the wood grain. Dry the table immediately to prevent water damage. Remember to test any new cleaning products in an inconspicuous area first to ensure they won’t cause damage to the finish.
Preventive Maintenance Measures
To maintain the resurfaced wood table, implementing preventive maintenance measures can help extend its lifespan. Consider placing coasters, placemats, or trivets under hot dishes, glasses, and vases to protect the surface from heat and moisture. Avoid placing sharp or heavy objects directly on the table to prevent scratches and dents.
Regularly inspect the table for any signs of wear or damage. Address any issues promptly to prevent further damage and maintain the table’s appearance. Reapply a protective finish as needed to keep the wood well-sealed and protected. Lastly, consider rotating decorative objects and furniture to prevent uneven wear and sun exposure.
By following these cleaning and preventive maintenance tips, you can keep your resurfaced wood table looking beautiful and extend its longevity for years to come.
Showcasing Your Transformed Table
Transforming an old wood table can breathe new life into your interior space. Once you’ve refinished and resurfaced your table, it’s time to showcase the beauty of your transformation. Whether it’s a family heirloom or a thrift store find, your table deserves to take center stage in your home. Here are some creative ways to showcase your transformed table and make it the focal point of your space.
Incorporating In Interior Design
Using your resurfaced wood table as a statement piece in your interior design can completely change the look and feel of a room. Whether it’s being used as a dining table, a coffee table, or an accent piece, the newly transformed table can bring warmth and character to any space. Consider complementing it with coordinating decor, such as a vibrant table runner, elegant place settings, or unique centerpiece to draw attention to its newfound beauty.
Sharing With Others
Share the joy of your resurfaced wood table by inviting friends and family over for gatherings. Whether it’s a dinner party or a casual get-together, your transformed table can serve as a conversation starter. Explain the process of refinishing it and share the story behind the piece. By showcasing your table in social settings, you can inspire others to revitalize their own furniture and unleash their creative flair in the world of interior design.
Enjoying The Results
Enjoy the stunning results of restoring your wood table’s surface. Transform its appearance with a professional resurfacing, giving it a fresh and polished look.
Taking Pride In Your DIY Project
but creating a piece of beauty to enjoy.
Utilizing The Table
Enhance your space
meals, or simply as a focal point.
Display items
decorative pieces or plants.
Taking Pride In Your DIY Project
Personal touch
transforming the table with your effort.
Share your creation
and share your DIY success.
Frequently Asked Questions For Resurface Wood Table
How Can I Best Protect My Wood Table From Scratches?
To protect your wood table from scratches, consider using felt pads under items, using coasters, and avoiding dragging heavy objects across the surface.
What Is The Best Way To Maintain The Shine Of A Resurfaced Wood Table?
Maintain the shine of your resurfaced wood table by regularly cleaning with a damp cloth, using wood polish specifically for the type of finish, and avoiding harsh cleaners.
Can I Resurface A Wood Table Myself Or Should I Hire A Professional?
You can resurface a wood table yourself if you have the necessary skills and tools. Hiring a professional is recommended if you’re unsure about the process.
How Long Does It Take To Resurface A Wood Table?
The time to resurface a wood table depends on the size, current condition, and complexity of the project. Typically, it can take a few hours to a few days for the entire process.
Conclusion
Revive the beauty of your wood table with our resurfacing tips. Enhance durability and aesthetics effortlessly. Transform your space with a revived table that shines. Get ready to enjoy a stunning centerpiece in your home. Take action and bring new life to your beloved wood table today.