Unlock the Mystery: Where Does the Washer Go on a Screw?
The washer goes between the screw head and the surface being fastened. The washer acts as a cushion and distributes the pressure evenly.
Washers are commonplace hardware used in various construction, mechanical, and DIY projects. While they may seem small and insignificant, washers play a vital role in improving the integrity and effectiveness of screw fastenings. The primary purpose of a washer is to create a smooth surface between the screw head and the material being secured.
By doing so, it acts as a buffer, preventing damage to the surface and improving the overall stability of the connection. This concise guide will delve into the significance of washers, explaining where exactly they go on a screw and how they contribute to the longevity and reliability of various applications. By understanding the importance of washers, you can enhance your DIY skills and ensure the durability of your projects.
Credit: www.weaverleathersupply.com
The Basics Of Washers And Screws
When it comes to assembling objects or fixing things together, screws and washers play a crucial role. While screws are widely used to hold things in place, washers are small, yet indispensable components that go hand in hand with screws. In this article, we will explore the basics of washers and their relationship with screws.
Different Types Of Washers
Washers come in various shapes and sizes, each designed for specific purposes. Let’s take a closer look at different types of washers:
- Flat Washers: These thin and flat washers have a round shape with a hole in the center. They help distribute the load and prevent damage to the surface.
- Lock Washers: These washers have a unique design with teeth or ridges that bite into the surface, providing resistance against loosening due to vibrations or rotation.
- Spring Washers: These washers are shaped like a coiled spring and are ideal for applications where tension needs to be maintained. They offer excellent resistance against loosening.
- Split Washers: Also known as helical spring washers, these washers have a split design that allows them to exert pressure against the bolt and prevent loosening.
- Wave Washers: Wave washers are wavy in shape and provide axial load compensation and shock absorption.
Function Of A Washer
The function of a washer might seem simple, but it serves an important purpose in various applications. Here are the key functions of a washer:
- Distributing Load: Washers help distribute the load evenly over a larger area, reducing the pressure on the surface and preventing damage.
- Preventing Loosening: By providing a consistent and tight connection, washers add stability to the assembly, preventing screws from loosening over time due to vibrations or movement.
- Surface Protection: Washers create a barrier between the screw head or nut and the surface, protecting it from scratches, marks, or other forms of damage.
- Tension Maintenance: Certain types of washers, such as spring washers, are designed to maintain tension and prevent slippage or loosening under dynamic conditions or heavy loads.
Understanding the types and functions of washers can help you choose the right washer for your specific application, ensuring a secure and long-lasting connection. So, the next time you pick up a screw, remember to give its companion, the washer, its due importance!
Placement Of Washers On Screws
When it comes to fastening two objects together using screws, washers play a crucial role in ensuring a secure and long-lasting joint. But where exactly does the washer go on a screw? In this article, we will discuss the correct positioning of washers on screws and the effect it has on joint tightness.
Correct Positioning
The correct positioning of a washer on a screw can significantly impact the overall effectiveness of the joint. The washer is typically placed between the screw head and the surface of the object being fastened. This ensures that the washer spreads the load evenly across the surface, preventing any damage or deformation.
However, there are instances where a washer may be positioned between the nut and the surface. This is commonly seen in applications where the screw goes through an object and is secured with a nut on the other side. In such cases, the washer acts as a cushion, reducing friction and providing stability.
Effect On Joint Tightness
The placement of the washer on a screw can also impact the tightness of the joint. The proper positioning ensures that the washer prevents the screw from loosening over time, improving the overall strength and stability of the joint.
When the washer is placed between the screw head and the surface, it creates a larger bearing surface, distributing the load across a wider area. This helps in preventing the screw from sinking into the surface and losing its grip. Additionally, the washer acts as a barrier, reducing the risk of corrosion between the screw and the surface.
In situations where the washer is positioned between the nut and the surface, it serves to create a more secure connection. The washer acts as a lock washer, applying pressure to the nut and preventing it from unintentionally loosening.
It is important to note that the thickness and material of the washer can also influence joint tightness. Thicker washers generally provide more support and better load distribution. Furthermore, using a washer made of a material resistant to corrosion, such as stainless steel, can enhance the longevity and durability of the joint.
In conclusion, the proper placement of washers on screws plays a critical role in achieving a strong and secure joint. Whether positioned between the screw head and the surface or between the nut and the surface, the washer ensures even load distribution, prevents loosening, and provides stability. Choosing the right thickness and material further enhances the effectiveness of the joint.
Common Mistakes And Misconceptions
When it comes to assembling a screw and washer, there are often misunderstandings about where the washer should go. These misconceptions can lead to errors in assembly, causing potential issues down the line.
Misunderstandings About Washer Placement
One common mistake is placing the washer on top of the screw head rather than beneath the screw head. This misunderstanding can lead to an insecure connection, as the washer should be positioned between the screw head and the surface being fastened.
Another misconception is omitting the washer entirely. Some may assume that the washer is optional, but it serves a crucial purpose in distributing the load and preventing damage to the surface being fastened. This mistake can compromise the integrity of the connection.
Impact Of Incorrect Washer Placement
Incorrect washer placement can lead to a range of issues. Stripped threads, reduced clamping force, or surface damage are common consequences of improper washer positioning. Additionally, omitting the washer altogether can compromise the joint’s durability and stability, leading to potential failure over time.
Choosing The Right Washer For The Job
To ensure the proper function of a screw, it’s crucial to place the washer on the screw before inserting it. The washer is positioned between the screw head and the surface to distribute the load and prevent damage. Understanding where the washer goes is essential for choosing the right washer for the job.
Matching Washer Size To Screw Size
Choosing the right washer is crucial for the smooth operation and durability of any screw. It is essential to match the washer size to the screw size to ensure a secure and robust fastening system. Using a washer that is too small can lead to a loose connection while using a washer that is too large can cause unnecessary stress on the screw and even damage the material it is being fastened into. Therefore, it is essential to know the proper washer size for the screw you are working with.
When selecting a washer, familiarize yourself with the screw’s diameter and length. These measurements will help you identify the appropriate washer size to use. It is worth noting that washers typically come in standard sizes that correspond to the screw dimensions. For instance, if you are working with a ¼-inch diameter screw, you would need to choose a washer specifically designed for that size.
Specialized Washers For Specific Applications
In addition to the standard washers that match screw sizes, there are also specialized washers available for specific applications. These washers serve unique purposes and offer additional benefits beyond the typical flat washer. Here are a few examples:
1. Lock Washers: These washers are designed to prevent loosening or rotation of fasteners. They have serrations or teeth on one side, which dig into the material and provide added resistance to loosening under vibrational or load conditions.
2. Spring Washers: Spring washers, also known as Belleville washers, are designed to provide tension and prevent loosening or disassembly of fasteners under vibration or movement. They are shaped like a small spring, adding flexibility and resilience to the connection.
3. Cup Washers: Cup washers have a curved design, resembling a cup or dome shape. They are commonly used in conjunction with countersunk screws and provide a finished and aesthetically pleasing appearance.
4. Neoprene Washers: Neoprene washers are made from a durable synthetic rubber material and are specifically designed to provide a watertight seal. They are commonly used in plumbing, outdoor fixtures, and other applications where water or moisture resistance is crucial.
By understanding the specific requirements of your project, you can select the most suitable washer type. These specialized washers offer enhanced functionality and can significantly improve the performance and longevity of your fastening system.
In conclusion, choosing the right washer for the job is essential for achieving optimal results. Matching washer size to screw size ensures a secure connection while considering specialized washers for specific applications can provide added benefits and functionality. By understanding the different types of washers and their unique purposes, you can confidently select the perfect washer to accompany your screws, ensuring a sturdy and reliable fastening solution.
Tips For Proper Washer And Screw Usage
When it comes to proper installation, maintenance, and inspection of washers and screws, understanding their importance is crucial. This ensures the durability and effectiveness of your project. This section will provide valuable insights into the proper usage of washers and screws, covering the importance of their proper installation and the need for regular maintenance and inspection.
Importance Of Proper Installation
Proper installation of washers and screws is paramount for the success of any project. Incorrect installation can result in loose connections or even complete failure. Here are a few factors to consider:
- Selection of the Right Washer: Ensure that the size and type of washer you choose match the specifications of the screw. This compatibility ensures a snug fit and prevents any unwanted movement.
- Alignment: Make sure the washer is centered on the screw’s shank. A misaligned washer may not provide the necessary support or distribute the load evenly, compromising the stability of the joint.
- Tightening: To achieve optimal performance, tighten the screw gradually and evenly, avoiding over-tightening. Excessive force can damage the washer or distort the components, leading to structural weakness.
Maintenance And Inspection
Regular maintenance and inspection of washers and screws ensure their longevity and reliability. Follow these guidelines to keep your hardware in top condition:
- Periodic Checks: Perform routine inspections to identify any signs of wear and tear, corrosion, or looseness. Timely detection and resolution prevent further damage or complete failure.
- Cleanliness: Keep the washers and screws clean by removing any accumulated dirt, debris, or rust that may hinder their functionality. Use a suitable solvent or cleaning agent for effective results.
- Replace Damaged Washers: If a washer shows signs of damage, such as cracks or deformations, replace it immediately. Using compromised washers can compromise the integrity of the connection.
- Lubrication: Apply a thin layer of lubricant to the washer and screw threads to reduce friction during installation. This enhances the ease of tightening and prevents unnecessary wear.
By adhering to proper washer and screw usage, including installation, maintenance, and inspection, you ensure a secure and long-lasting connection. Follow these tips to improve the quality and reliability of your projects, whether you’re a DIY enthusiast or a professional.

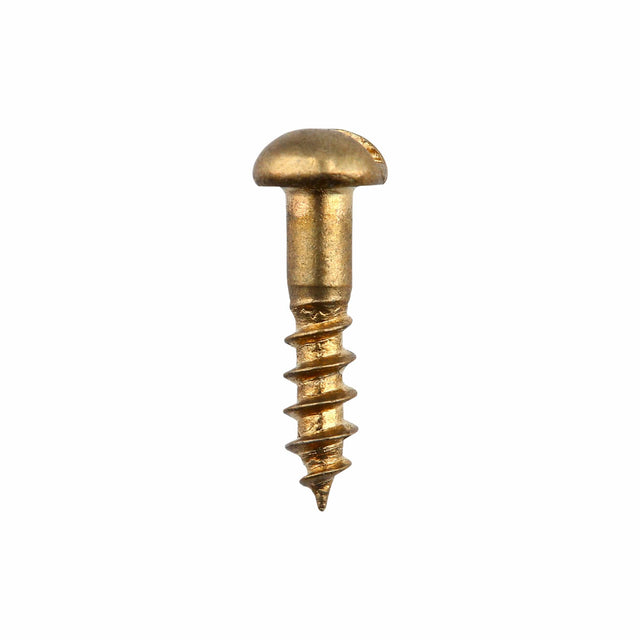
Credit: www.amazon.com
Frequently Asked Questions Of Where Does The Washer Go On A Screw
Does The Washer Go On The Screw First?
Yes, the washer goes on the screw first.
Does The Washer Go Behind The Nut Or Bolt?
The washer usually goes behind the nut to help distribute pressure evenly.
Where Does The Lock Washer Go On Bolt?
A lock washer goes on a bolt between the nut and the surface to provide extra security.
Which Side Of The Washer Goes Down?
The flat side of the washer goes down and should be in direct contact with the surface.
Conclusion
Understanding the placement of a washer on a screw is essential. It ensures a secure and stable connection. By following the correct installation process, you can avoid potential issues. With this knowledge, you can confidently tackle various projects, knowing the washer is in the right place.
Master this technique and enhance your DIY skills.