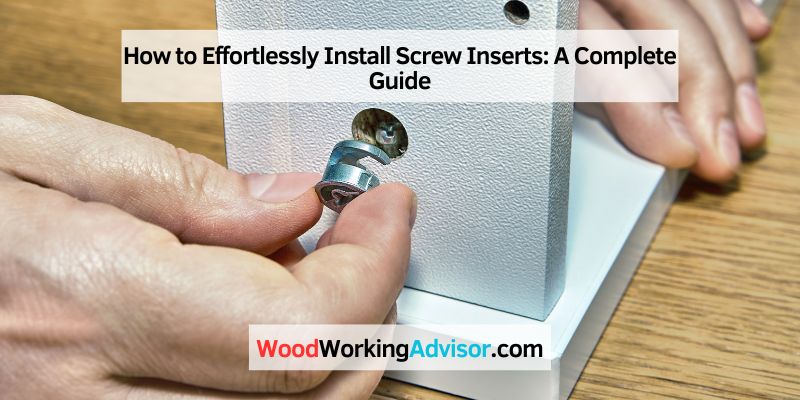
How to Install Screw Inserts
To install screw inserts, first drill a hole of the appropriate size in the material. Then, insert the screw insert into the hole and use a threaded insert tool to secure it in place.
Choosing The Right Screw Inserts
When it comes to installing screw inserts, choosing the right type is crucial to ensure a strong and durable connection. Understanding the different types of screw inserts and considering the material you are working with will help you make an informed decision. In this section, we will explore the various types of screw inserts and the factors you should consider before making your selection.
Understanding Different Types
There are several types of screw inserts available, each with its own unique features and advantages. By understanding the different options, you can choose the most suitable screw insert for your application.
- Threaded Inserts: These inserts have internal threads that match the threads of the screw you are using. They can be self-tapping or require pre-drilled holes for installation.
- Press-Fit Inserts: These inserts are designed to be press-fit into a pre-drilled hole, providing a secure anchoring point for screws.
- Thread-Locking Inserts: These inserts, also known as helical inserts or thread repair inserts, are used to repair damaged or worn-out threads. They feature internal threads coated with a thread-locking adhesive for added strength.
Considerations For Material
Before selecting a screw insert, it is essential to consider the material you are working with. Different materials require different types of inserts to ensure a secure and long-lasting connection. Here are some considerations to keep in mind:
- Metal: For metal materials, such as steel or aluminum, threaded inserts or thread-locking inserts are often the preferred choice. They provide excellent strength and stability.
- Plastic: When working with plastics, press-fit inserts or threaded inserts specifically designed for plastic materials are recommended. These inserts prevent the plastic from cracking or deforming during installation.
- Wood: For wood applications, threaded inserts or wood inserts are commonly used. They provide a strong and reliable connection while reducing the risk of splitting or damaging the wood.
By considering the material you are working with, you can select the appropriate screw insert that will optimize the strength and durability of your connection.
In conclusion, choosing the right screw insert is essential for a successful installation. Understanding the different types available and considering the material you are working with will guide your decision-making process. By selecting the appropriate screw insert, you can ensure a secure and long-lasting connection for your project.

Essential Tools And Equipment
To install screw inserts, you will need essential tools and equipment such as a screwdriver, drill, screw inserts, and a tap set. Begin by drilling the hole for the insert, then use the tap to create threads. Finally, utilize the screwdriver to secure the insert firmly into place.
Types Of Insertion Tools
Installing screw inserts requires the use of specific tools that allow for precise and efficient insertion. Here are some of the most common types of insertion tools that you can use for this task:
- Manual Screwdriver: A manual screwdriver is a basic tool that can be used for inserting screw inserts. It is ideal for smaller-scale projects and provides good control over the insertion process.
- Handheld Insertion Tool: A handheld insertion tool is a more specialized tool designed specifically for inserting screw inserts. It usually features a handle and a spring-loaded plunger, making the insertion process faster and easier.
- Electric Screwdriver: An electric screwdriver can also be used for installing screw inserts, especially when dealing with larger projects or a high volume of inserts. It provides more power and speed, making the insertion process quicker and more efficient.
Safety Gear And Equipment
Safety should always be a top priority when working with any tools, including those used for installing screw inserts. To ensure your safety during the installation process, it is important to have the following safety gear and equipment:
- Safety Glasses: Safety glasses protect your eyes from any potential flying debris or particles during the installation process. It is crucial to wear them to prevent eye injuries.
- Gloves: Wearing gloves can provide extra protection for your hands, especially when handling sharp tools or materials. They also offer a better grip, ensuring better control during the installation process.
- Ear Protection: In some cases, the installation process may involve loud noises that can damage your hearing. Wearing ear protection, such as earplugs or earmuffs, can help minimize the risk of hearing damage.
By having the necessary tools and safety gear, you can ensure a smoother and safer installation process when it comes to screw inserts. Remember to always follow the instructions provided by the manufacturer for proper installation techniques.
Preparation And Planning
Installing screw inserts requires thorough preparation and careful planning to ensure a successful outcome. Proper inspection and determination of insert placement are crucial to the overall effectiveness of the installation. By following the essential steps in the preparation and planning stage, you can guarantee a secure and long-lasting screw insert installation.
Inspecting The Installation Area
Before beginning the installation process, it’s imperative to inspect the area where the screw inserts will be installed. Look for any potential obstructions or irregularities that may hinder the installation. Ensure that the surface is clean and free from any debris that could affect the performance of the screw inserts. This step is essential to avoid any complications during the installation process.
Determining Insert Placement
Once the area has been inspected, the next step is to determine the precise placement of the screw inserts. Take into account the weight and size of the object that will be attached and ensure that the inserts are strategically positioned to provide optimal support. By carefully planning the insert placement, you can prevent any future issues with the installed screw inserts.
Step-by-step Installation Process
Installing screw inserts may seem like a daunting task, but with the right tools and a clear step-by-step process, it can be done easily and efficiently. In this guide, we will walk you through the installation process, covering everything from preparing the installation tool to properly inserting the screw inserts.
Preparing The Installation Tool
Before you start installing screw inserts, it’s crucial to ensure that you have the necessary tools ready. Here’s what you’ll need:
- An installation tool, preferably a screwdriver or a drill with an appropriate-sized chuck
- A hammer or mallet
- Safety goggles to protect your eyes from any potential debris
- A marker or pencil for making precise markings on the surface
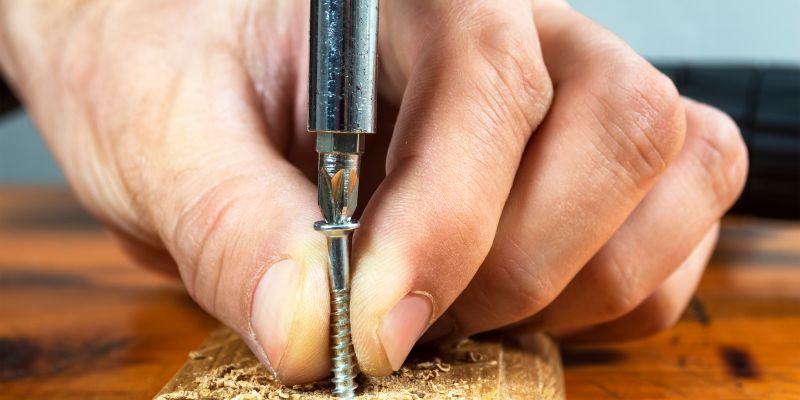
Inserting The Screw Inserts
Now that you have all the required tools, it’s time to proceed with inserting the screw inserts following these simple steps:
- Step 1: Begin by marking the desired locations for the screw inserts on the surface where you want them to be installed. Use a marker or pencil to make precise markings.
- Step 2: Ensure the surface is clean and free from any dust or debris. Use a damp cloth to wipe away any dirt or contaminants.
- Step 3: Position the installation tool, such as a screwdriver or drill, over the marked spot on the surface.
- Step 4: Using a hammer or mallet, gently tap the installation tool to create a small pilot hole in the surface at the marked location. This step is crucial for guiding the screw insert during installation.
- Step 5: Insert the installation tool, along with the screw insert, into the pilot hole. Make sure the screw insert is properly aligned and fully seated in the hole.
- Step 6: Apply firm and steady pressure while turning the installation tool clockwise to drive the screw insert into the surface. Ensure that the screw insert is securely embedded in the material.
- Step 7: Repeat the above steps for each desired location until all screw inserts are properly installed.
By following these step-by-step instructions, you can easily and efficiently install screw inserts for a secure and stable fastening solution. Remember to always wear safety goggles and take necessary precautions while performing any installation tasks.
Troubleshooting And Tips
In the previous sections, we covered the step-by-step process of installing screw inserts. However, even with careful execution, installation issues can occur. In this section, we will address some common problems you may encounter and provide pro tips to ensure a smooth installation.
Common Installation Issues
If you come across any of these issues during the installation of screw inserts, don’t worry! They are quite common and can be easily resolved:
- Inserts not fitting properly: In some cases, screw inserts may not fit snugly into the material. This could be due to a mismatch in sizes or improper positioning. Ensure that you are using the correct size of screw inserts for your material, and align them properly before installation.
- Difficulty turning the insert: If you find it challenging to turn the screw insert into the material, it could be due to the density of the material or insufficient pre-drilling. Use a drilling guide and ensure the hole is properly sized and centered to allow for smooth insertion.
- Inserts coming out: If the screw inserts come loose or fall out after installation, it may be due to inadequate engagement with the material. Double-check that the inserts are securely seated and consider using an adhesive or epoxy for extra stability.
- Damage to the material: Sometimes, the material can get damaged during screw insert installation. This often occurs if excessive force is applied or if the drilling process is not done correctly. Be gentle and take your time while installing the inserts to minimize any potential damage.
Pro Tips For Smooth Installation
Follow these pro tips to ensure a hassle-free installation process:
- Use lubrication: Applying a small amount of lubrication, such as soap or wax, to the screw insert can ease the insertion process and reduce the chances of cross-threading.
- Pre-drill pilot holes: Always pre-drill pilot holes before screw insert installation. This helps prevent cracks or splintering in the material, ensures accurate placement, and facilitates easier screw insert insertion.
- Apply consistent pressure: While turning the screw insert into the material, apply steady and even pressure. Avoid excessive force as this can damage the material or strip the threads.
- Consider using specialized tools: Depending on the type and size of the screw inserts you are using, there are specialized tools available that can make the installation process easier and more efficient. Research and invest in the right tools for your project.
- Test the strength: Once the screw inserts are installed, test their strength by applying gentle pressure. This will help ensure that they are securely embedded in the material and will function properly.
By troubleshooting common installation issues and following these pro tips, you can confidently install screw inserts and achieve durable and reliable connections in your projects.
Frequently Asked Questions For How To Install Screw Inserts
How Do You Install A Screw Thread Insert?
To install a screw thread insert, follow these steps: 1. Drill a hole that matches the diameter of the insert. 2. Use a tap to create threads in the hole. 3. Insert the screw thread insert into the hole using an installation tool.
4. Use a wrench to turn the insert clockwise until it is flush with the surface. 5. Test the insert to ensure it is secure and functioning properly.
Do Threaded Inserts Need To Be Glued?
No, threaded inserts do not need to be glued. These inserts are designed to provide a secure and stable connection without the need for adhesive. It is important to follow the manufacturer’s instructions and properly install the inserts to ensure a reliable fastening solution.
Are Threaded Inserts Stronger Than Screws?
Threaded inserts are generally stronger than screws due to their ability to distribute the load more evenly. This makes them ideal for applications requiring a sturdier connection. Additionally, they provide a more durable and long-lasting fastening solution.
How Big Of A Hole Do You Drill For Threaded Inserts?
Drill a hole for threaded inserts that match the diameter of the outer threads. Make sure it is deep enough to accommodate the entire length of the insert.
Conclusion
Installing screw inserts is a simple yet effective way to strengthen fastening in materials like wood, metal, and plastic. By following the step-by-step guide, you can ensure a secure and durable result. These inserts provide versatility and longevity for various applications, making them a valuable addition to any DIY or professional project.