Best Way To Stack Firewood: Proven & Essential
The best way to stack firewood involves creating open, crisscrossed piles (like log cabins or crosshatch) that allow maximum air circulation and prevent moisture buildup, elevating the wood off the ground on skids or pallets for superior seasoning and rot prevention.
Stacking firewood seems simple, right? Grab logs, pile them up. But if you’ve ever wrestled with damp, moldy wood come winter, you know the frustration. Wet wood smokes, burns inefficiently, and won’t heat your home well. As a woodworker who loves a roaring fire, I’ve learned a few tricks over the years. Seasoning your wood properly is the secret ingredient! This guide will show you the easiest, most effective ways to stack your rounds so they dry fast, stay dry, and keep your fire going strong all season long. Let’s make your firewood stack look good and dry perfectly!
Why Proper Firewood Stacking Matters: The Science of Seasoning
Before we get to the ‘how,’ let’s briefly cover the ‘why.’ Firewood needs to be properly seasoned—meaning its moisture content is below 20%—to burn cleanly and efficiently. A poorly stacked pile acts like a sponge, trapping moisture from the ground and the air.
Good stacking accomplishes three main goals:
- Drying (Seasoning): Airflow is everything. Stacks need exposure to sun and wind to pull moisture out of the wood fibers.
- Preventing Rot and Pests: Wood sitting directly on the damp ground quickly succumbs to mold, fungus, and even termites.
- Safety and Stability: A messy pile can collapse, which is dangerous, especially when fetching wood in the dark or snow.
Think of your log stack not just as storage, but as an outdoor drying rack. Giving your wood the best conditions speeds up this process tremendously.
Step 1: Location, Location, Location—Choosing Your Stacking Site
Where you put your wood pile is arguably more important than how you stack it. Even the best stacking method fails if the spot is soggy or shaded all day.
Ideal Site Characteristics
Look for a spot that offers protection from rain but maximum exposure to the elements that dry the wood:
- Good Drainage: Never stack wood in a ditch or low spot where water pools after a storm. The ground needs to drain well.
- Sun Exposure: A south-facing location (in the Northern Hemisphere) typically gets the most sun, which helps bake moisture out.
- Wind Flow: Choose an area that catches a prevailing breeze. Air movement is crucial for wicking away dampness.
- Keep it Away from the House: Stacking wood right against your home’s siding or foundation invites moisture transfer and gives spiders, mice, and carpenter ants a cozy bridge directly to your walls. A gap of at least 12 to 18 inches between the stack and any structure is recommended.
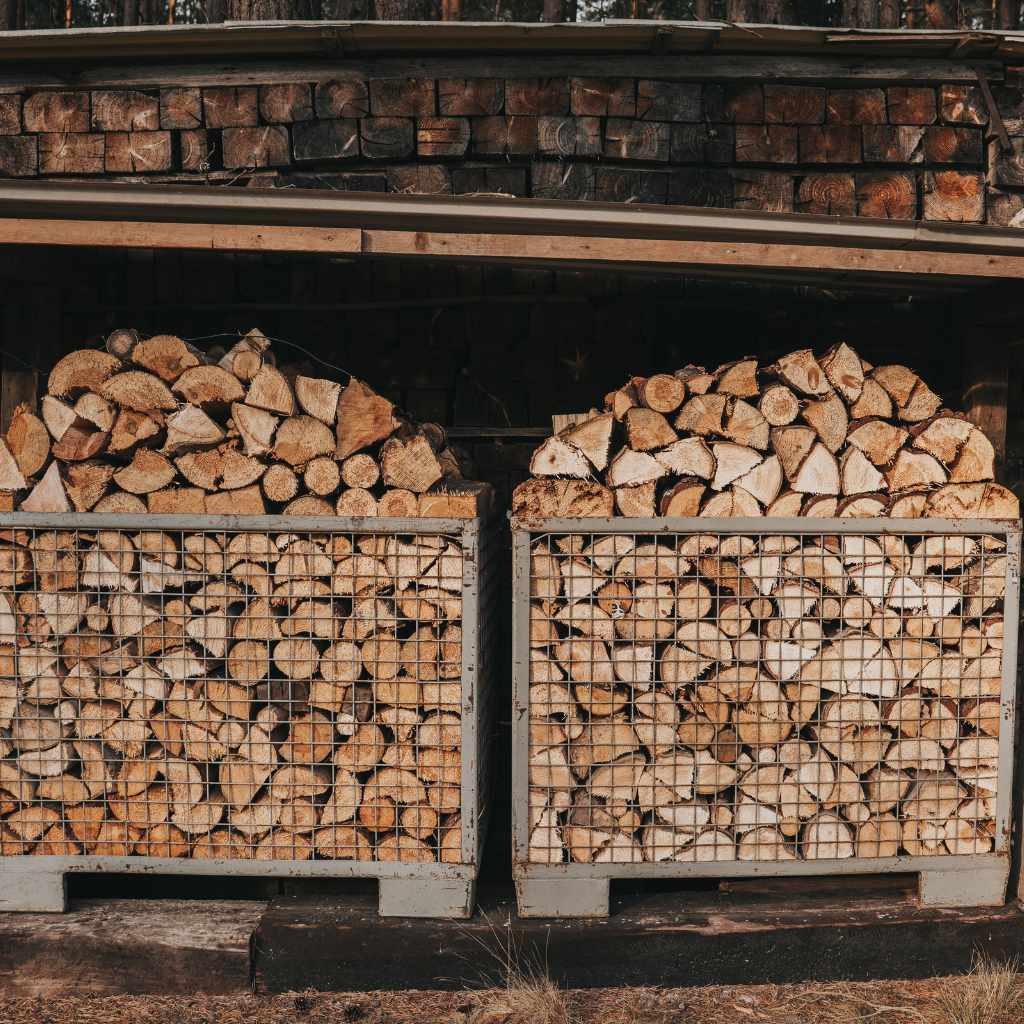
Step 2: Building the Foundation—Getting Wood Off the Ground
This is the most commonly skipped, yet most essential, step for preserving your hard-earned wood supply. Wood touching the soil will wick up moisture continuously, no matter how well you stack the top layers. You need an elevated base.
Foundation Options
You have a few great, budget-friendly options here:
- The Simple Skid Base: Use untreated scrap lumber (4x4s or 2x6s) laid perpendicular to whatever direction you plan on stacking. Make sure this base is level. This is cheap and works well for smaller piles.
- Concrete Blocks or Pavers: These are durable and readily available. Space them every few feet along the length of your planned stack. This creates excellent airflow underneath.
- Pallets: If you can source used, heat-treated (HT stamped) pallets, they make fantastic, pre-built, raised platforms. Avoid chemically treated (MB stamped) pallets for anything near your home or fire area.
Expert Tip: If using wood for your base, use rot-resistant options like cedar or locust if possible, or simply plan to replace the base every few years. For long-term storage, concrete or stone is the winner.
Step 3: Mastering the Stacking Patterns (The Best Ways to Stack)
Once your foundation is set, it’s time to stack! The goal is creating voids—open spaces—within the pile to allow air movement throughout. Here are the top two proven methods favored by forestry professionals and seasoned homeowners.
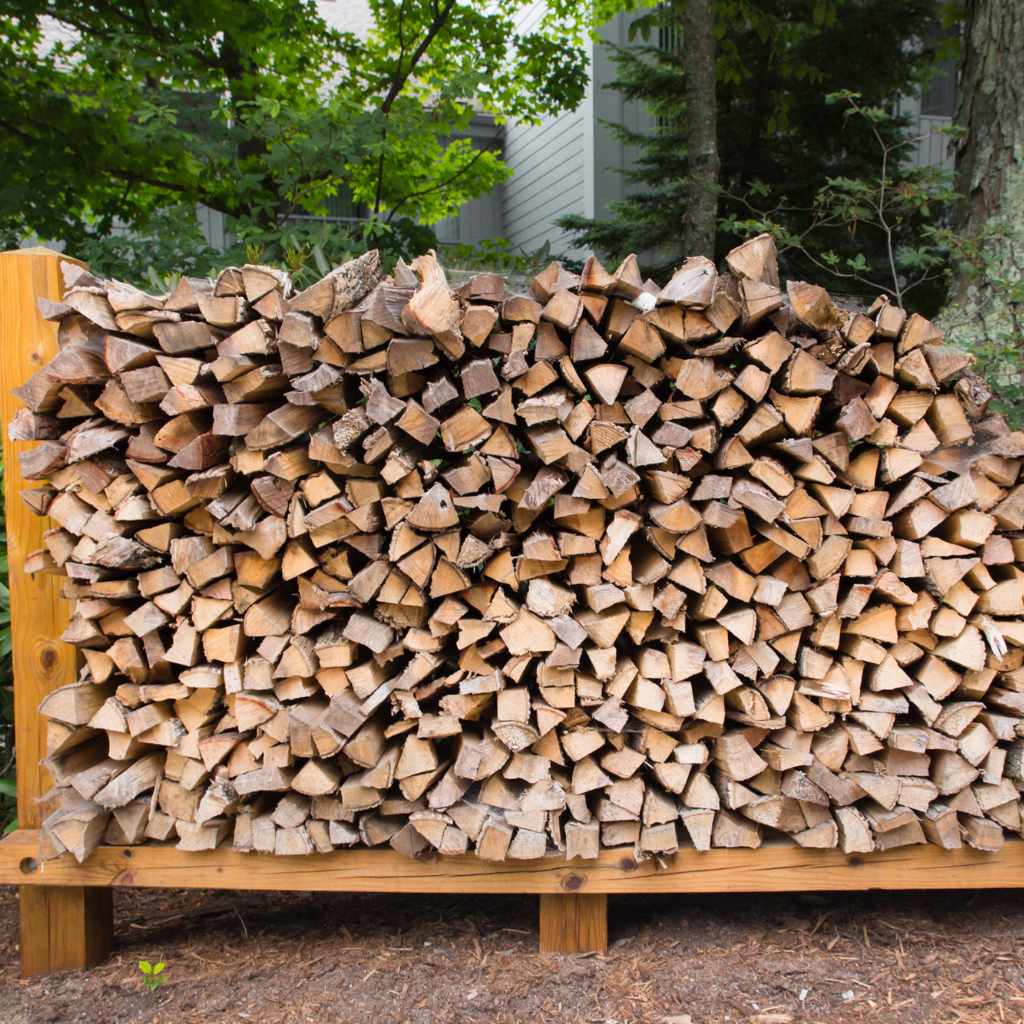
Method 1: The Crisscross or Cordon Method (The Standard Best Practice)
This is the most popular choice because it is self-supporting and maximizes airflow between layers. It utilizes the concept of a “log cabin” structure.
- Lay the Base Row: Place your first layer of logs directly onto your raised foundation, running them parallel to the back wall (or structure you are stacking against). Keep them tight together.
- Create the Crossbar: Lay your second row of logs perpendicular (at a 90-degree angle) on top of the first row, near the ends of the bottom logs.
- Continue the Pattern: Alternate directions for every row—one layer running North/South, the next layer running East/West.
- Keep it Stable: Continue building upward, ensuring the perpendicular layers lock the stack together. If you are building very high (over 5 feet), you may need to gently stagger the cross-layer placement to maintain stability.
This method naturally creates vents everywhere the logs touch, promoting excellent air drying from all angles. It is incredibly stable once built correctly.
Method 2: The Back-to-Back Pitched Stack (For Maximum Sun Exposure)
If you have a lot of space and want faster drying, consider stacking two single-depth rows back-to-back, leaning them against a structure or a dividing post.
- Define Your Back Wall: This might be a fence, a shed wall, or a sturdy vertical post structure you build specifically for support.
- Stack the First Row: Stack the first layer tightly against the support structure, ensuring the cut ends face the sun (usually the south or west direction).
- Stack the Second Row: Stack an identical, tightly packed row parallel to the first row, leaving one log-length of space between them.
- The Critical Gap: The space between the two rows MUST be maintained. This gap allows air to flow right through the middle of the stack, drying both sides simultaneously.
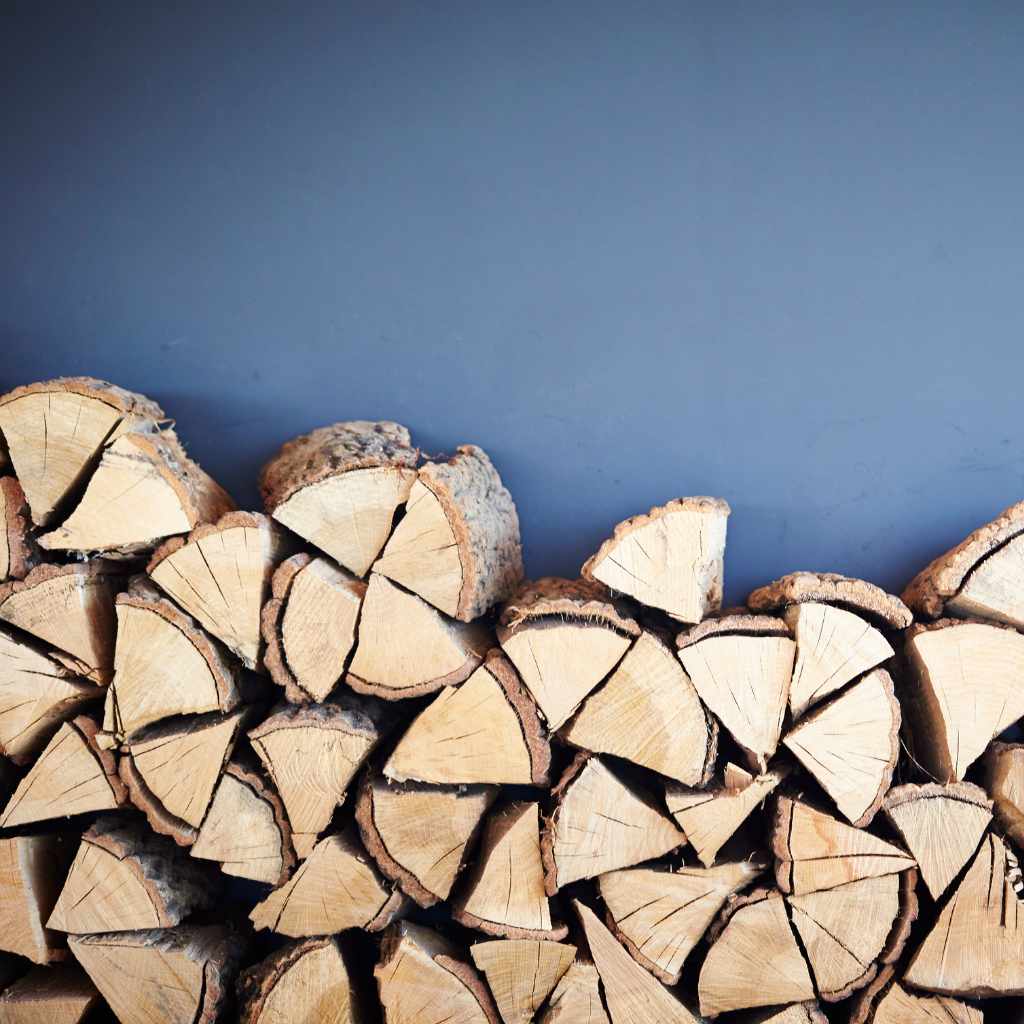
This method requires more space but exposes more log ends to the drying elements, speeding up the seasoning process dramatically. Remember, the cut ends of the logs (the cross-section) lose moisture fastest—aim to expose these as much as possible!
Optimizing Airflow: Tips for Faster Seasoning
Stacking in a crisscross pattern is the foundation, but airflow optimization turbocharges the seasoning process. Here are the key ways to maximize air movement, whether you are stacking in the open or under a shelter.
The Importance of Log Orientation
When stacking, the orientation of the cut ends dictates drying speed. You need to decide if you are stacking for maximum stability (crisscross) or maximum end-exposure (pitched).
- Facing the Cut Ends: If possible, angle the cut ends of the logs toward the prevailing wind or the sunniest part of the day. Burning seasoned wood is infinitely easier when it gets a head start on drying before winter hits.
- Do Not Cover the Pile Completely: This is a classic rookie mistake. Covering the top of the stack with a tarp or roof is necessary to shed rain, but if you wrap the sides, you trap humidity. Air must be able to move into the stack from the sides.
Managing the Roof/Cover
If you build a rack or shed for your wood, the roof is essential, but the roof needs to breathe.
A good wood shed structure should have:
- Overhang: The roof structure should extend significantly past the stack itself (at least 12 inches on the front) to keep rain sheeting off the logs.
- Open Sides: Two sides should be completely open, or at least contain large gaps (lattice work works well) to allow cross-ventilation.
- Height Clearance: Ensure there is space between the top of the highest log and the underside of the roof. Trapped hot, moist air needs room to escape.
Safety First: Building a Stack That Won’t Topple
Unstable wood piles are a major hazard. Not only can they injure someone, but a collapsing stack can damage property or block access when you need wood most.
Structural Stability Guidelines
| Factor | Recommendation | Why It Matters |
|---|---|---|
| Height Limit | Keep stacks under 5 feet tall unless reinforced. | Taller stacks lean faster due to uneven settling. |
| Width to Height Ratio | Aim for a base width at least 2/3 the final height. | A wider base provides better lateral support (prevents swaying). |
| End Supports | For very long rows, use vertical posts every 4–6 feet. | Prevents long piles from bowing out in the middle. |
| Gaps | Maintain small, intentional gaps during stacking. | Prevents an entire section from shifting simultaneously if one log rolls. |
For homeowners stacking against a wall, ensure the wall itself is sturdy enough to handle the outward pressure developed over time. Wood naturally settles and pushes outward.
Storage Comparison: Comparing Common Stacking Styles
Not all stacking methods are created equal, especially when it comes to seasoning speed. Here is a comparison to help you decide based on your space constraints.
| Stacking Style | Airflow Potential | Stability | Space Efficiency | Best Use Case |
|---|---|---|---|---|
| Crisscross (Crib/Cabin) | High | Very High (Self-supporting) | Moderate | General, mixed seasoning. |
| Single Lean-To (Against a Wall) | Medium (Ends dry fast, sides slower) | Low (Needs supports or short piles) | High (Utilizes vertical space well) | Quick drying of ends, limited space. |
| Back-to-Back Pitched | Very High | High (If supports are used) | Low (Requires wide footprint) | Maximizing drying speed with ample space. |
| Random Pile (Just dumped) | Very Low | Low | High (Takes up least ground space initially) | Emergency use only; terrible for seasoning. |
A crucial resource for understanding wood moisture content, essential for determining when your stack is truly “best” seasoned, can often be found via state extension offices. For example, Pennsylvania State University Extension offers excellent, science-backed guidelines on biomass drying.
Managing Different Wood Types and Sizes
Not all wood seasons at the same rate. Dense hardwoods like oak or maple take significantly longer to dry than softer woods like pine or poplar. Your stacking strategy might need minor adjustments based on what you are storing.
Size Matters for Drying
The smaller the piece of wood, the faster it dries because it has more surface area exposed relative to its volume.
- Large Rounds (Over 8 inches in diameter): These need the most air exposure possible. Use the crisscross stacking method and ensure the ends are facing the sun. They may take 18–24 months to season fully.
- Standard Splits (4–6 inches): These are the easiest to manage. Good airflow from crisscrossing is usually sufficient for one season drying (6–12 months).
- Small Kindling/Stove Length: This should always be stored under cover after seasoning, as it dries incredibly fast and absorbs ambient humidity just as quickly. Stack it tightly inside a shed once dry.
The Final Touches: Protecting the Stack from Weather
Once stacked well, the final layer of protection ensures longevity, especially if you have a long winter ahead.
Protecting the Stack Top
You want to shed rain and snow, but never trap humidity inside. If you use a tarp, follow these guidelines:
- Cover Only the Top: Drape the tarp or plastic over the top layer only, overlapping the sidewalls by just a few inches.
- Secure It Loosely: Do not strap the tarp down tight against the sides. Let the edges hang loose so air can flow up and out from beneath the edges. If you stretch it tightly around the entire pile like a cocoon, you’ve created a sauna, and mold is guaranteed.
- Use a Solid Roof if Possible: A permanent structure (shed or overhang) is always superior to temporary plastic sheeting.
The Importance of the Next Cut
As you burn wood from the bottom and front of your stack, the stability of the remaining pile decreases. Always try to burn from the stack that is most seasoned first (usually the oldest wood you stacked). When you remove a bottom layer, immediately assess the logs above it. If you notice a sag or lean, restack that section right away before taking more wood.
FAQ: Quick Answers for New Firewood Stackers
What is the ideal moisture content before burning firewood?
The ideal moisture content for burning is typically below 20%. Wood under this level burns hotter, cleaner, and produces much less creosote buildup in your chimney.
How long does firewood need to season?
It depends on the wood species and climate, but generally, most hardwoods (like oak) require at least 9–12 months of good seasoning. Softwoods (like pine) might be ready in 6 months. Always test with a moisture meter for accuracy.
Should I split the wood before stacking?
Yes, absolutely. Splitting exposes the inner, wetter wood core to the air, speeding up drying by months compared to stacking rounds (un split logs). Small pieces dry faster than large ones.
Can I stack firewood directly against a brick chimney or stone wall?
No, it is strongly discouraged. Brick and stone absorb and retain moisture. Stacking wood tight against them traps moisture against the wood and can lead to damp walls or chimney issues. Maintain an air gap of at least 12 inches.
How do I know if my wood is seasoned enough?
Seasoned wood looks grayish, cracks (checks) appear on the ends, and should sound hollow when two pieces are knocked together. The most reliable way is using an inexpensive digital moisture meter—it should read 20% or lower.
Is it okay to stack wood under a tarp indefinitely?
No. Long-term storage under plastic traps too much humidity, encouraging mold and rot. Use a proper roof structure or a dry shed for long-term storage, keeping the sides open for airflow.
Conclusion: Enjoying the Fruits of Your Labor
You’ve learned that stacking firewood isn’t just about tidiness; it’s about smart resource management. By prioritizing a raised, dry base, utilizing the stabilizing and airflow-promoting crisscross pattern, and ensuring adequate ventilation under your roof system, you are guaranteeing superior fuel for your stove or fireplace. Remember, a little extra effort on the front end—chopping, splitting, and stacking it right—saves you immense frustration come the first cold night. Your smoke-free, efficient fire awaits. Now that your wood is stacked perfectly, you can focus on enjoying that warm, crackling blaze, knowing you’ve done the job right, built to last and built to burn beautifully.