Burnt Plywood Floor: Real Cost, Shou Sugi Ban Safety Tips
A burnt plywood floor chars the plywood surface with a torch — the shou sugi ban technique — then seals it with several coats of polyurethane or epoxy, for roughly $4 to $10 per square foot in materials, far less than solid hardwood. Shou sugi ban was originally developed for exterior siding, not floors, so an unsealed or under-coated floor will not hold up to foot traffic. This guide covers real cost, the burn-and-seal process, topcoat choice, and the safety steps torching indoors requires.
Introduction To Burnt Plywood Flooring
Best Torch Pick
 |
Bernzomatic JT850 Self-Igniting 20,000 BTU Outdoor Torch – $49.05 A self-igniting 20,000 BTU outdoor torch — wide, adjustable flame that chars plywood evenly instead of scorching one spot, which is what causes the uneven black patches this guide’s safety section warns about.
|
As an Amazon Associate we earn from qualifying purchases.
The Rise Of Alternative Flooring Solutions
As sustainability and uniqueness become increasingly important in interior design, alternative flooring solutions have been gaining popularity. Homeowners and designers are constantly seeking innovative and eco-friendly options to enhance the aesthetic appeal of living spaces. One such alternative that has been making waves in the design world is burnt plywood flooring.
Burnt Plywood: The Basics
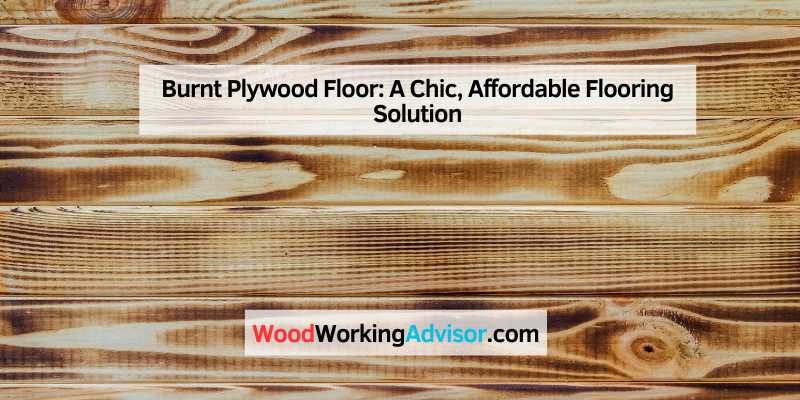
Burnt plywood flooring, also known as torched plywood flooring, involves the application of heat to plywood sheets to create a distinctive and visually striking surface. This technique not only adds a touch of rustic charm to the floors but also brings out the natural grain patterns of the wood, resulting in a one-of-a-kind look. The process is relatively simple and can be a cost-effective way to achieve a unique flooring solution.
Benefits Of Choosing Burnt Plywood
Choosing burnt plywood for your floor offers a unique and rustic look, adding character and warmth to your space. It’s an eco-friendly option that allows you to repurpose materials, making it both stylish and sustainable. Plus, the burnt finish provides added durability and resistance to wear and tear over time.
When it comes to flooring options, burnt plywood may not be the first choice that comes to mind. However, this unique and unconventional flooring solution offers several benefits that make it worth considering. From its cost-effectiveness to its aesthetic appeal, durability, and longevity, burnt plywood floors have a lot to offer. Let’s explore these benefits in more detail:
Cost-effectiveness
Burnt plywood flooring is a cost-effective option compared to traditional hardwood or tile floors. Plywood itself is an affordable material, and the process of burning the top layer creates a unique look without the need for expensive finishes or coatings. This makes it an excellent choice for those on a budget or looking for a more economical flooring solution.
Aesthetic Appeal
One of the main attractions of burnt plywood floors is their distinctive and rustic aesthetic. The burning process brings out the natural grain patterns and colors of the wood, creating a visually appealing and unique floor. The charred finish adds character and depth to any space, making it a popular choice for those seeking a bold and unconventional flooring option.
Durability And Longevity
Despite its unconventional appearance, burnt plywood flooring is surprisingly durable and long-lasting. The charring process helps to strengthen the wood, making it more resistant to wear and tear. Additionally, plywood is known for its structural stability, making it less prone to warping or shrinking over time. With proper care and maintenance, burnt plywood floors can withstand heavy foot traffic and remain in excellent condition for years to come.
In conclusion, choosing burnt plywood flooring offers several benefits, including cost-effectiveness, aesthetic appeal, durability, and longevity. Whether you’re looking to make a statement with a unique floor or seeking a budget-friendly option without compromising on style and durability, burnt plywood floors are definitely worth considering.
Design And Style Options
Burnt plywood floors offer a unique and customizable aesthetic that can elevate the design and style of any space. The design and style options for burnt plywood floors are diverse, ranging from customizable patterns and textures to color finishing techniques and styling for various room types.
Customizable Patterns And Textures
When it comes to burnt plywood floors, the potential for customizable patterns and textures is virtually limitless. From intricate geometric designs to organic, free-form patterns, the technique of burning plywood allows for the creation of unique and visually striking textures that can complement any interior style. Whether you prefer a modern, minimalist look or a more rustic, natural aesthetic, the ability to customize patterns and textures makes burnt plywood floors a versatile and appealing option for homeowners and designers alike.
Color Finishing Techniques
The color finishing techniques for burnt plywood floors can further enhance the visual appeal of the flooring. With the use of different finishing methods such as staining, whitewashing, or clear sealing, it is possible to achieve a wide spectrum of colors and tones, from rich, deep hues to light, airy shades. This versatility in color finishing allows for seamless integration of burnt plywood floors into various design schemes, adding depth and character to the space.
Styling For Various Room Types
Styling burnt plywood floors to suit different room types is essential for creating cohesive and harmonious interior designs. Whether it’s a cozy living room, a sleek modern kitchen, or a tranquil bedroom retreat, burnt plywood floors can be styled to complement the unique characteristics of each space. The adaptability of burnt plywood floors makes them suitable for a wide range of interior design styles, providing a distinct and visually captivating flooring option for any room in the home.
Installation Process
Installing a burnt plywood floor can add a unique and rustic touch to any space. The process involves several steps, including preparing the subfloor, cutting and fitting plywood, using the burning technique, and sealing and protecting the floor. Let’s take a closer look at each step.
Preparing The Subfloor
Before starting the installation, it is essential to ensure that the subfloor is clean, dry, and level. Any existing flooring should be removed, and the subfloor should be swept and vacuumed to remove any debris. If necessary, make any repairs or adjustments to ensure a smooth surface for the plywood.
Cutting And Fitting Plywood
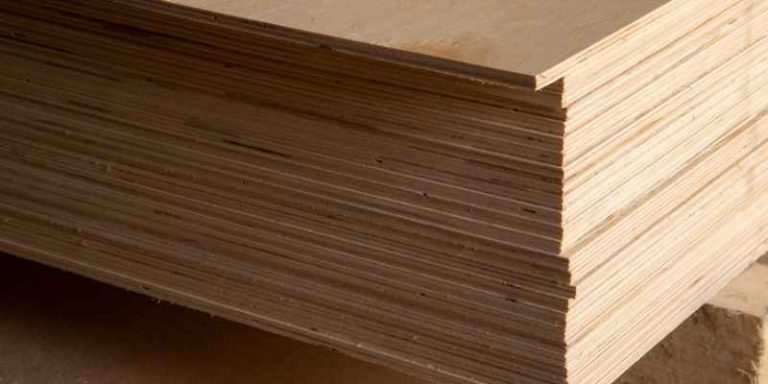
Once the subfloor is ready, it’s time to cut and fit the plywood sheets. Measure the dimensions of the room and cut the plywood accordingly, leaving a small gap around the edges for expansion. Lay the plywood sheets in a staggered pattern, ensuring they fit snugly together. Use a nail gun or screws to secure the plywood to the subfloor, ensuring it is tightly fastened.
The Burning Technique
The burning technique is what gives the burnt plywood floor its distinctive appearance. To achieve this effect, use a torch or a heat gun to burn the surface of the plywood. Move the torch or heat gun in a sweeping motion across the wood, creating a charred and textured look. Be cautious and maintain a safe distance to prevent any accidents or damage to the wood.
Sealing And Protecting The Floor
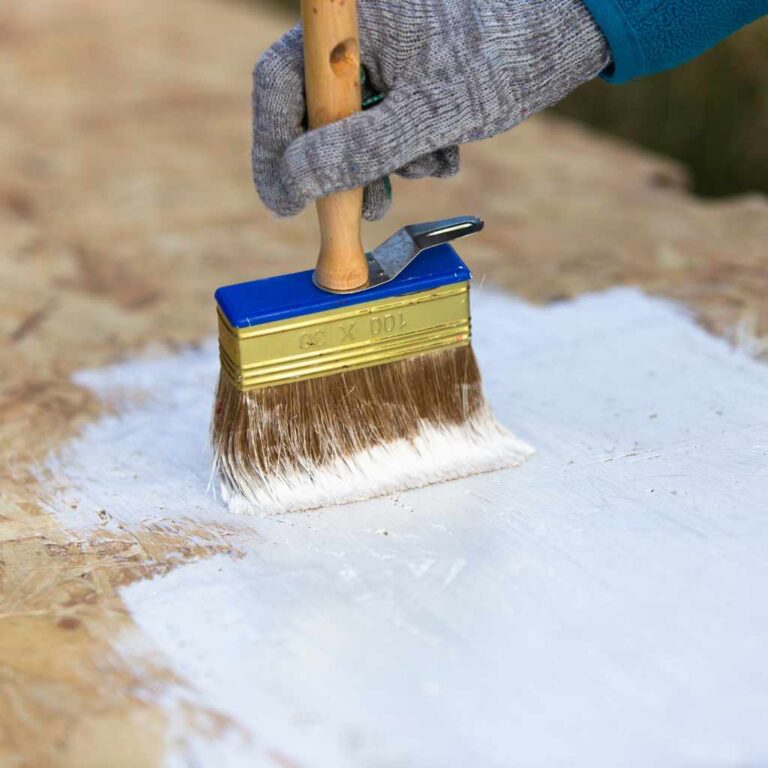
After the burning process, it’s important to seal and protect the burnt plywood floor. Start by applying a wood sealer or primer to the charred surface, ensuring it penetrates into the wood. This step helps to protect the floor from moisture and adds durability. Once the sealer is dry, apply multiple coats of polyurethane or a clear finish to enhance the appearance and provide additional protection.
By following these steps, you can create a stunning burnt plywood floor that adds warmth and character to any space. With proper installation and maintenance, this unique flooring option can last for years to come.
Maintenance And Care
Maintaining and caring for a burnt plywood floor is crucial to preserve its appearance and longevity. To fix burn marks, sand or scrape out the burned wood, apply tung oil, and patch the spot with epoxy. For water damage, identify and resolve the source of the water, remove damaged sub-flooring, reinforce floor joists, and install new sub-flooring.
Regular cleaning and sealing with a water-resistant finish will help protect the floor from further damage.
Regular Cleaning Tips
Keeping your burnt plywood floors clean is essential to maintain their appearance and longevity. It is recommended to sweep or vacuum the floor regularly to remove dirt and debris that can cause scratches. You can also use a damp mop to clean the floor, but make sure to avoid using excess water as it can damage the wood. Instead, use a mild cleaning solution specifically designed for wood floors and follow the manufacturer’s instructions.
Repairing Scratches And Dents
Despite your best efforts, scratches and dents can still occur on your burnt plywood floors. Luckily, minor scratches can be easily fixed by applying a wood filler that matches the color of your floor. For deeper scratches and dents, you may need to sand the affected area and apply a new protective finish.
Reapplying Protective Finishes
Protective finishes help to preserve the burnt plywood floor’s beauty and make it more durable. Over time, the protective finish may start to wear off, leaving the floor vulnerable to damage. Therefore, it is recommended to reapply a protective finish every few years to keep your burnt plywood floor in top condition. You can use various finishes such as polyurethane, varnish, or wax, depending on your preference.
In conclusion, taking proper care of your burnt plywood floor is essential to maintain its appearance and longevity. Regular cleaning, repairing scratches, and reapplying protective finishes are some of the maintenance tasks you need to perform. By following these tips, you can enjoy the beauty of your burnt plywood floor for many years to come.
Environmental Impact
The burnt plywood floor can have a significant environmental impact due to the release of harmful chemicals and pollutants. Proper disposal and replacement with eco-friendly flooring options can help reduce the impact and improve indoor air quality.
Sourcing Sustainable Plywood
When it comes to installing a new floor, choosing a sustainable material is becoming increasingly important. Burnt plywood flooring is not only a stylish option, but it can also be eco-friendly. However, it’s important to ensure the plywood used is sourced sustainably. This means that the wood is harvested in a responsible and environmentally friendly way.
One way to ensure the plywood is sustainable is to look for certification from organizations such as the Forest Stewardship Council (FSC) or the Sustainable Forestry Initiative (SFI). These certifications guarantee that the wood has been responsibly harvested and that the forest it comes from is being managed in a sustainable way.
Comparing To Traditional Flooring Options
When comparing burnt plywood flooring to traditional flooring options, the environmental impact is significant. Traditional flooring materials like hardwood are often sourced from clear-cut forests, which can lead to deforestation and habitat destruction. In contrast, plywood is made from small pieces of wood that are glued together, reducing the amount of wood needed and minimizing waste.
Additionally, burnt plywood flooring can be a sustainable choice because it can be made from reclaimed wood. This means that the wood used for the flooring has been salvaged from old buildings or structures that would otherwise be discarded. By repurposing this wood, it reduces the need for new trees to be cut down.
In conclusion, choosing burnt plywood flooring can have a positive impact on the environment, but it’s important to ensure the plywood is sourced sustainably. By doing so, you can enjoy a beautiful and eco-friendly floor in your home.
Common Challenges And Solutions
When it comes to burnt plywood floors, there are a few common challenges that homeowners may face. However, with the right solutions, these challenges can be overcome to restore the beauty and functionality of your floor. In this article, we will discuss three common challenges and their respective solutions: dealing with burn marks and stains, addressing water damage, and fixing uneven surfaces.
Dealing With Burn Marks And Stains
If you have burn marks or stains on your plywood floor, don’t worry! There are several effective ways to fix this issue. Here are some solutions:
- Sand or scrape out the burned wood: For hardwood floors, such as ash, oak, or beech, sanding or scraping out the burned wood is the best approach. This will help remove the damaged area and prepare it for further treatment.
- Apply tung oil: After sanding or scraping, applying tung oil to the affected area can help restore the natural shine and color of the wood.
- Patch the spot with epoxy: Finally, patching the spot with epoxy will provide a durable and seamless finish, ensuring that the burn marks or stains are effectively covered.
Addressing Water Damage
Water damage can be a common issue for plywood floors, but it can be resolved with the following steps:
- Stop the water source: Before taking any steps to fix the floor, it’s crucial to resolve the source of the water damage. Whether it’s a leaking appliance or a plumbing issue, addressing the root cause is essential.
- Expose the sub-floor and examine: Once the water source is resolved, expose the sub-floor and thoroughly examine the extent of the damage. This will help determine the necessary repairs.
- Remove damaged sub-flooring: If the water damage has affected the sub-flooring, it needs to be removed and replaced with new sub-flooring. This will ensure a stable and durable foundation for the plywood floor.
- Reinforce floor joists and install new sub-flooring: To further strengthen the floor structure, reinforce the floor joists if necessary and install new sub-flooring. This will provide a solid base for the plywood floor installation.
Fixing Uneven Surfaces
If your plywood floor has uneven surfaces, here are some solutions to consider:
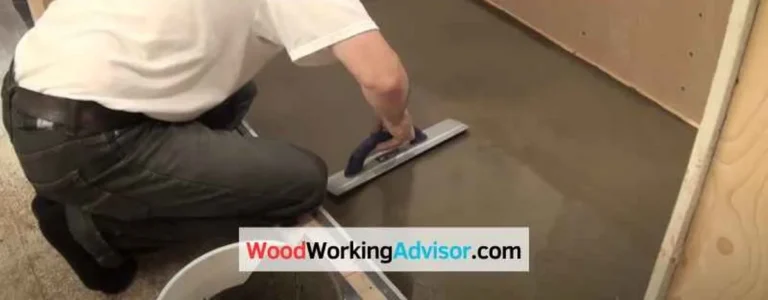
- Level the floor: Use a leveling compound to even out any noticeable unevenness on the plywood floor. This will create a smooth and flat surface for further treatment.
- Install underlayment: If the unevenness is more significant, consider installing an underlayment before laying the plywood floor. This will provide additional support and help achieve a level surface.
- Secure loose or damaged plywood: In case of loose or damaged plywood, make sure to secure or replace it before proceeding with any leveling or underlayment installation. This will prevent further issues down the line.
By addressing these common challenges and applying the appropriate solutions, you can restore your burnt plywood floor to its former glory. Whether it’s dealing with burn marks and stains, addressing water damage, or fixing uneven surfaces, following these steps will help you achieve a beautiful and functional floor that you can enjoy for years to come.
Epoxy Vs Polyurethane: Which Topcoat Actually Holds Up
The topcoat, not the char itself, is what determines whether a burnt plywood floor survives foot traffic. Epoxy builds a thicker, harder film and resists standing water better, but it yellows under UV light and is far less forgiving to re-coat once scratched. Water-based polyurethane stays clear longer and is easy to re-coat in high-wear spots, but needs 3–4 coats for the same durability as 2 coats of epoxy. For a floor (versus siding), most installers use at least 3 coats of oil-based or water-based polyurethane over the sealed char.
| Topcoat | Durability | Best For |
|---|---|---|
| Polyurethane (3–4 coats) | Good, easy to spot re-coat | Living rooms, bedrooms, low-moisture areas |
| Epoxy (2 coats) | Excellent, but yellows in direct sun | Basements, mudrooms, spill-prone areas |
Cost Analysis
When it comes to renovating your home, one of the most important factors to consider is the cost. Budgeting for your project and comparing prices with other flooring options are crucial steps in determining if burnt plywood floors are the right choice for you.
Budgeting For Your Project
Before diving into any home improvement project, it’s essential to establish a budget. Budgeting allows you to have a clear understanding of your financial limitations and helps you prioritize your expenses. When considering burnt plywood floors, you’ll need to account for the cost of materials, labor (if hiring professionals), and any additional tools or equipment needed.
Here is a breakdown of the estimated costs for a typical burnt plywood flooring project:
| Expense | Estimated Cost |
|---|---|
| Plywood Sheets | $XX per sheet |
| Wood Burning Tools | $XX |
| Sanding Equipment | $XX |
| Stain and Sealant | $XX |
| Additional Supplies | $XX |
| Labor (optional) | $XX per hour |
Keep in mind that these costs may vary depending on your location, the quality of materials, and whether you choose to hire professionals or take the DIY route.
Price Comparison With Other Flooring
Comparing the cost of burnt plywood floors with other flooring options can help you make an informed decision. Here’s a quick price comparison between burnt plywood floors and two popular alternatives:
- Carpet: On average, carpet installation costs around $XX per square foot, including materials and labor. Burnt plywood floors, on the other hand, can cost approximately $XX per square foot, making it a more affordable option.
- Hardwood Flooring: Hardwood flooring installation can range from $XX to $XX per square foot, depending on the type of wood and the complexity of the installation. Burnt plywood floors offer a budget-friendly alternative, with costs averaging around $XX per square foot.
While burnt plywood floors may not have the same aesthetic appeal as traditional hardwood or the comfort of carpet, they provide a unique and affordable flooring option that can add character to your space.
In conclusion, budgeting for your burnt plywood flooring project is essential to ensure you stay within your financial means. Comparing the cost of burnt plywood floors with other flooring options allows you to make an informed decision based on your budget and preferences.
Health And Safety Considerations
When considering the health and safety implications of a burnt plywood floor, it is important to address the potential release of harmful chemicals and the risk of fire. Proper ventilation and monitoring should be implemented, and any damaged areas should be repaired or replaced to prevent further hazards.
Use exterior-rated (CDX or marine) plywood, not interior-grade. Interior plywood is bonded with urea-formaldehyde glue, which off-gasses more when torched; exterior-grade plywood uses phenol-formaldehyde glue, which is more heat-stable. Always torch outdoors or in a well-ventilated space — once the char is sealed under a fully cured topcoat, the finished floor is not off-gassing the way the raw burning process does.
Is Burning Plywood Hazardous?
Burning plywood can release hazardous chemicals and fumes, including formaldehyde and volatile organic compounds (VOCs). These emissions can pose serious health risks when inhaled, causing respiratory irritation and potential long-term health effects.
Ensuring Proper Ventilation
Proper ventilation is crucial when burning plywood to minimize the exposure to harmful emissions. Ensure that the area is well-ventilated with open windows, fans, or exhaust systems to disperse the fumes and maintain good indoor air quality.
Frequently Asked Questions
Is Shou Sugi Ban Durable Enough For A Floor?
Yes, but only with enough topcoat. Shou sugi ban was designed for exterior siding, so a floor needs at least 3 coats of polyurethane or 2 coats of epoxy over the char to survive foot traffic — an unsealed or thinly sealed char will wear through quickly.
How Much Does Burnt Plywood Flooring Cost?
Materials run roughly $4 to $10 per square foot for plywood, torch fuel, and topcoat when done as a DIY project — significantly less than solid hardwood, which typically starts around $8 to $14 per square foot installed.
Is It Safe To Burn Plywood Indoors?
No — always torch the plywood outdoors or in a well-ventilated space, since burning releases smoke and VOCs. Once the char is sealed under a fully cured topcoat, the finished floor does not continue off-gassing the way the raw burning process does.
Do You Have To Seal Burnt Plywood Floors?
Yes. An unsealed char will rub off on socks and shoes and won’t survive cleaning. Seal with several coats of polyurethane or epoxy — the topcoat, not the char, is what makes the floor durable.
Conclusion
Burnt plywood floors offer a unique and eco-friendly flooring option that can add character and warmth to any space. By carefully torching the plywood, you can create a beautiful and rustic look. However, it’s important to take proper precautions and seal the floor with multiple coats of water-resistant sealant to ensure durability.
With some creativity and DIY skills, you can achieve stunning results with burnt plywood flooring. So why not consider this affordable and stylish flooring option for your next home renovation project?
Sponsored / affiliate links. As an Amazon Associate I earn from qualifying purchases. I may earn additional commission from eligible campaigns.