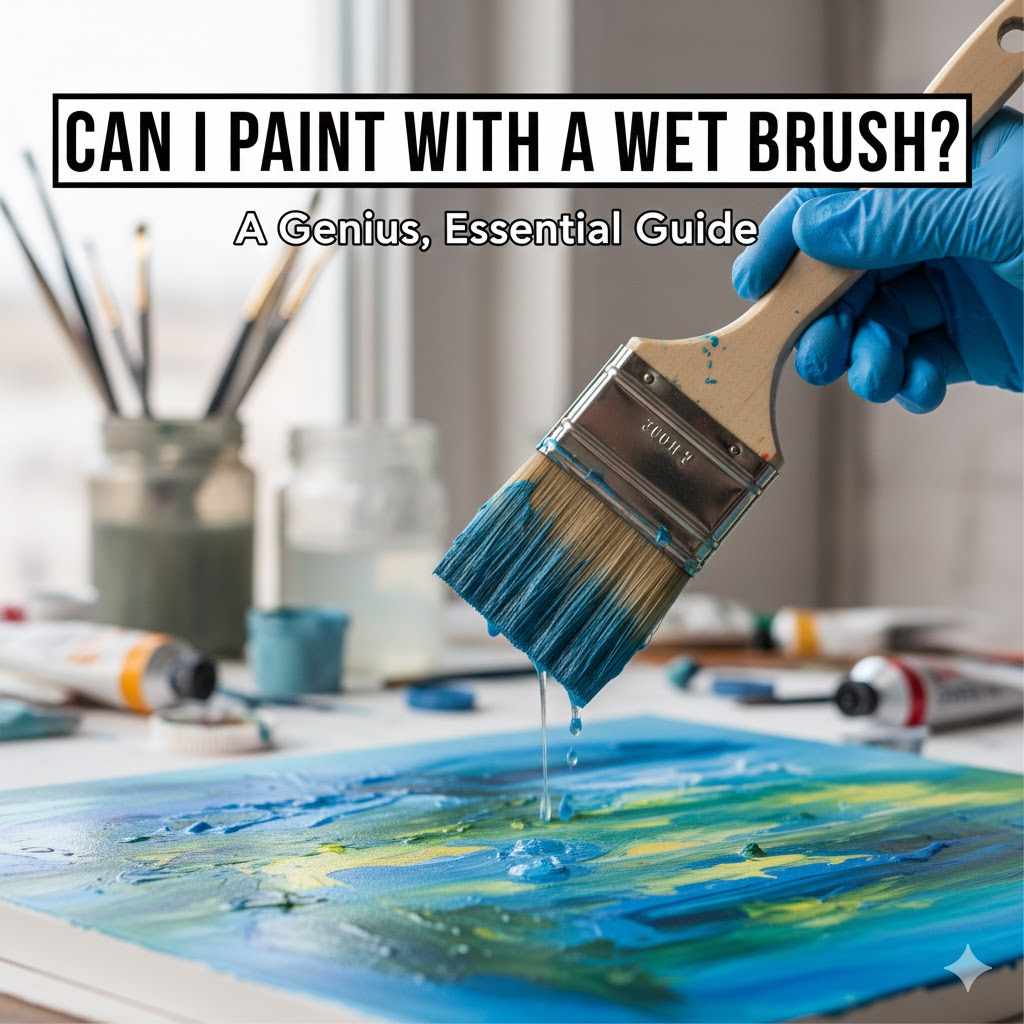
Can I Paint With A Wet Brush? A Genius, Essential Guide
Yes, you can and often should paint with a wet (damp) brush when using water-based paints like latex or acrylic. This technique helps the paint flow smoothly, eliminates brush marks, and makes cleanup easier. However, you should never use a water-wet brush with oil-based paints, as it will ruin the finish.
Hello there! It’s Md Meraj, your friend in the workshop. I see this question pop up all the time: “Can I paint with a wet brush?” It’s a great question, and the answer can completely change the quality of your finished project. You might worry about drips, runs, or ruining your paint job. I get it! A beautiful, smooth finish feels like a pro-level skill.
But what if I told you that a little bit of water could be your secret weapon? It’s true! Used correctly, a damp brush can make all the difference between a streaky, frustrating finish and a stunning, professional one. In this guide, I’ll walk you through exactly when to wet your brush, how to do it right, and when to keep it dry. Let’s get painting!
Understanding the “Why”: Why Use a Wet Brush at All?
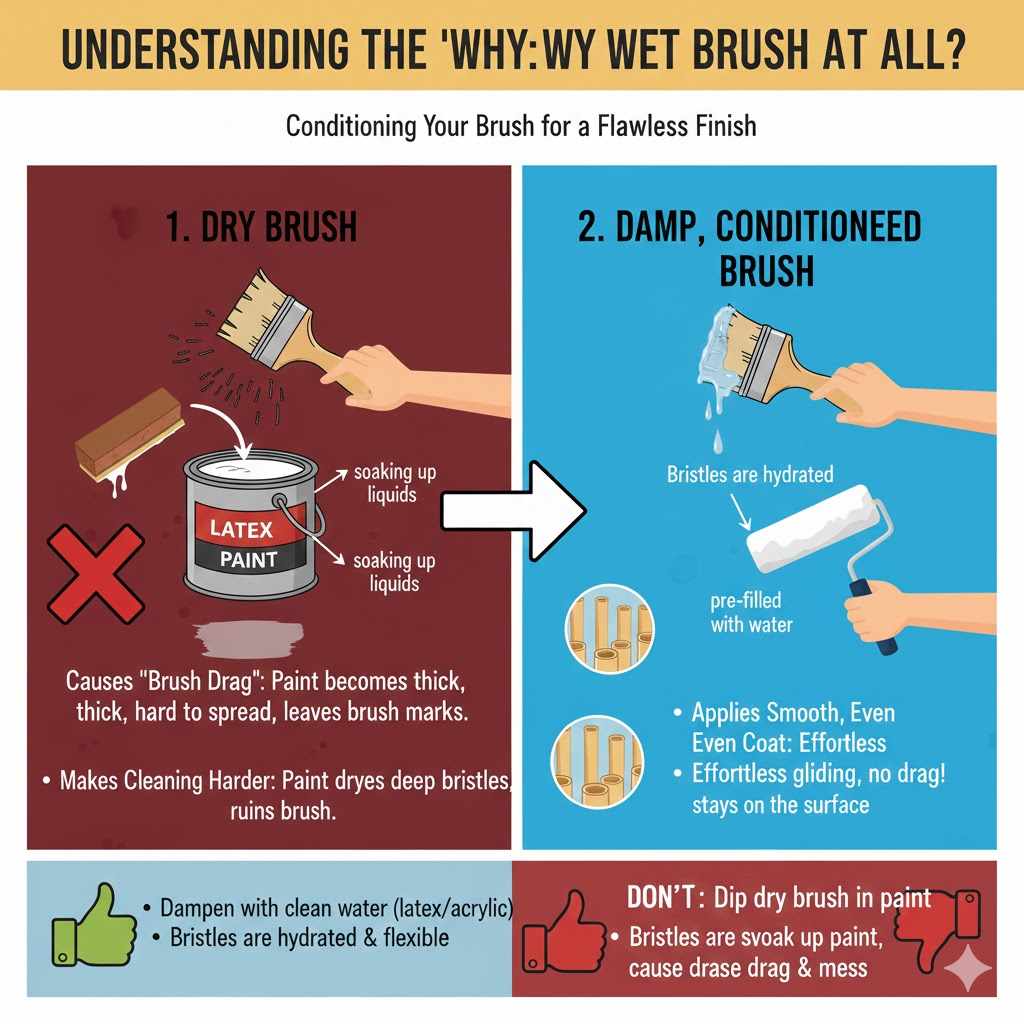
Before we dive into the “how,” let’s talk about the “why.” Why would you want to introduce water to your paintbrush? It seems a bit backward, right? The magic lies in preparing, or “conditioning,” your brush before it ever touches the paint.
Imagine your paintbrush bristles are like a bundle of tiny, thirsty straws. When you dip a bone-dry brush into paint, those dry bristles immediately start soaking up the liquids in the paint. This does a couple of not-so-great things:
- It Causes “Brush Drag”: The dry bristles suck moisture from the paint, making it thicker and harder to spread smoothly. This creates resistance, or “drag,” forcing you to push harder and leaving visible brush marks.
- It Makes Cleaning Harder: Paint gets drawn deep into the base of the bristles, near the metal ferrule. Once it dries there, it’s incredibly difficult to remove, leading to stiff, splayed bristles and a ruined brush.
By dampening the bristles with water before you start, you’re pre-filling those tiny straws. The bristles are already hydrated, so they don’t try to steal moisture from your paint. Instead, the brush becomes a perfect tool for laying down a smooth, even coat. This simple trick is a cornerstone of professional painting.
Water-Based vs. Oil-Based Paint: The Golden Rule
Here is the most important thing you need to remember: the type of paint you are using determines whether you should use a wet brush. It’s a simple rule, but it is not one you can break. Think of it like cooking—you don’t mix oil and water, and the same applies here.
Painting with Water-Based Paints (Latex, Acrylic, Chalk Paint)
For any paint that cleans up with soap and water, the answer is a big YES! Using a damp brush with water-based paints is not just okay; it’s recommended. These paints have water as their base, so adding a little more won’t cause any chemical problems.
Benefits of Using a Damp Brush with Water-Based Paints:
- Smoother Application: The paint glides off the bristles instead of clinging to them. This makes your brushstrokes longer, more even, and feel almost effortless.
- Eliminates Brush Marks: Because the paint flows better, it has more time to level out before it starts drying. This self-leveling action is key to hiding those pesky brush marks.
- Prevents Paint from Drying on the Brush: Especially on warm, dry days, paint can start to dry on your brush while you’re working. A damp brush helps keep the paint workable for longer.
- Easier Cleanup: Since paint can’t get deep into the pre-moistened bristles, washing your brush later is much faster and more effective.
Painting with Oil-Based Paints (Alkyd, Enamels, Varnishes)
For any paint that requires mineral spirits or paint thinner for cleanup, the answer is a firm NO. Never introduce water to your brush when using oil-based paints.
As you know, oil and water do not mix. If you dip a water-wet brush into oil-based paint, the water on the bristles will repel the paint. This leads to a disastrous finish filled with:
- Streaking and Separation: The paint will not load or release evenly, creating ugly streaks.
- Bubbling or Blistering: Trapped water can cause the paint to bubble as it tries to escape.
- Poor Adhesion: The paint won’t stick properly to the surface, which can lead to peeling and flaking down the road.
What to Do Instead for Oil-Based Paints?
You can still “condition” your brush! Instead of water, you’ll use the appropriate solvent. Dip the tips of the bristles into a small amount of mineral spirits or paint thinner, then blot the excess on a rag. This achieves the same goal: it pre-loads the bristles, preventing paint from drying deep inside and promoting a smoother application.
Quick-Reference Guide: Wet Brush or Dry Brush?
Feeling a little overwhelmed? No worries. Here’s a simple table you can save or screenshot for your next project.
| Paint Type | Can I Use a Water-Wet Brush? | Best Practice |
|---|---|---|
| Latex Wall Paint | Yes! | Dampen with clean water before starting and as needed. |
| Acrylic Craft/Furniture Paint | Yes! | Essential for a smooth, brush-mark-free finish. |
| Water-Based Polyurethane | Yes! | Helps apply thin, even coats to prevent cloudiness. |
| Oil-Based Enamel | NO | Use a dry brush or condition it with a small amount of paint thinner. |
| Oil-Based Varnish/Stain | NO | Always start with a completely dry brush. |
| Shellac | NO | Condition brush with denatured alcohol, its solvent. |
How to Perfectly Dampen Your Brush: A Step-by-Step Guide
Okay, you’re convinced. You’re using a water-based paint, and you’re ready to get that flawless finish. The key is to make the brush damp, not soaking wet. A dripping brush will dilute your paint too much, causing runs and poor coverage. Here’s how to get it just right every single time.
Step 1: Start with a Clean, Dry Brush
This method works best when you start fresh. Make sure your brush is free of any dried paint flakes or dust from storage. If it’s a brand new brush, flick the bristles with your hand a few times to shake out any loose ones.
Step 2: Wet the Bristles Thoroughly
Hold the brush under a running faucet of cool water. Let the water run through the bristles for about 15-20 seconds. Make sure the water penetrates all the way to the core of the brush. Don’t be shy here; you want every bristle to be fully saturated.
Step 3: Remove All the Excess Water (The Crucial Step!)
This is the most important part. You need to remove almost all the water you just added. A soaking wet brush is your enemy. You have a few options:
- Squeeze It Out: Gently squeeze the bristles between your thumb and forefinger, pushing the water out from the ferrule (the metal part) toward the tips.
- Spin It Out: If you have a paintbrush spinner, now’s the time to use it. A few quick pumps will use centrifugal force to fling out the excess water.
- Blot It Out: Take a clean, dry rag or sturdy paper towel and blot the bristles. Press them against the towel until it stops absorbing a lot of water.
Your goal is a brush that feels cool to the touch and slightly damp, but not wet. If you flick your wrist, no water droplets should come off the brush.
Step 4: Load Your Brush with Paint
Now, dip your perfectly dampened brush into the paint. You’ll notice an immediate difference! The paint will load smoothly onto the tips. Dip only about the first one-third of the bristles into the paint. Tapping off the excess on the inside of the can is better than scraping it on the rim, which can create a messy buildup.
Step 5: Apply the Paint and Enjoy the Glide!
As you apply the paint to your surface, you’ll feel how smoothly it glides. The brush will release the paint evenly, allowing you to make long, controlled strokes. Your work will look better and you’ll feel more in control of the process. If you’re working on a long project, you might need to re-dampen the brush occasionally by quickly rinsing and drying it as described above.
Common Mistakes to Avoid
This technique is simple, but a few common mistakes can trip up beginners. Keep these in mind to ensure your project goes smoothly.
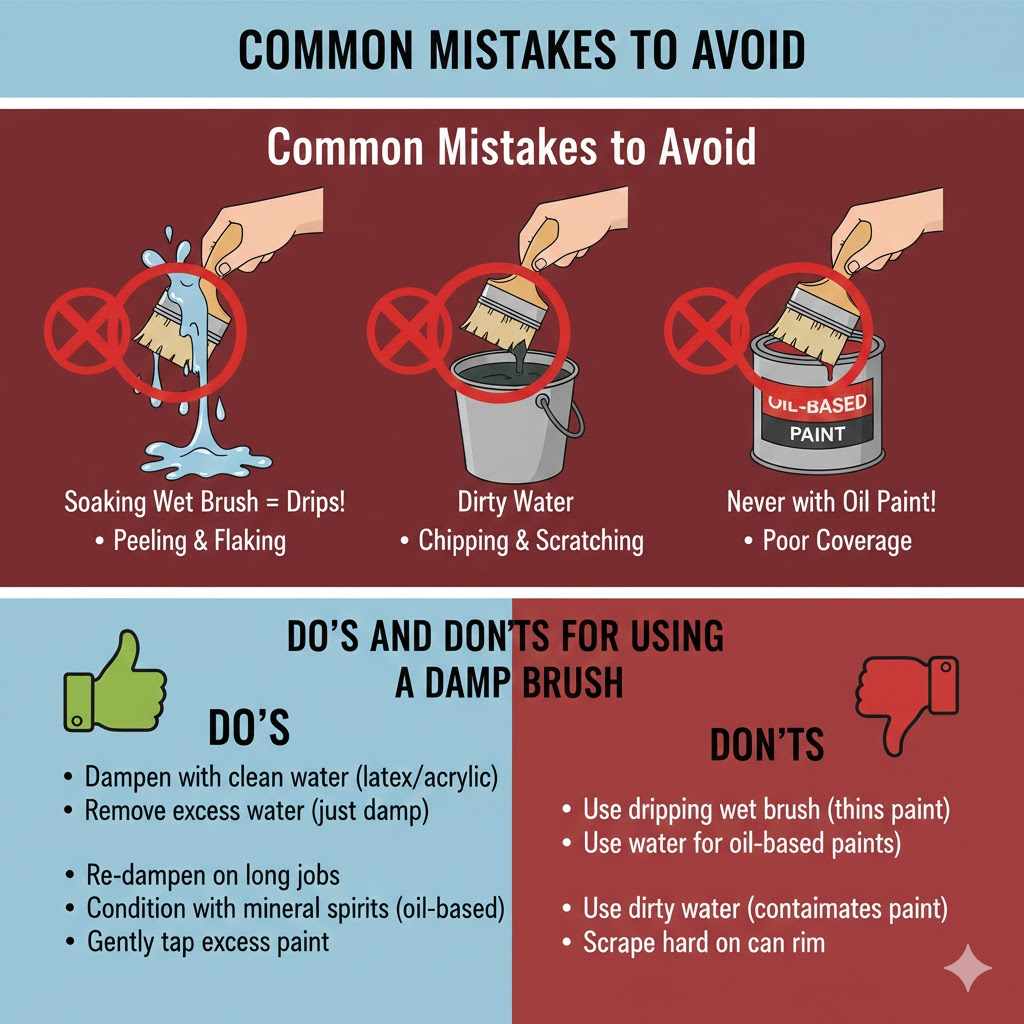
- The Soaking Wet Brush: As mentioned, this is the biggest mistake. Too much water dilutes the paint, making it thin and runny. This weak paint won’t cover well and can lead to drips. Remember: DAMP, not WET.
- Using Dirty Water: Always start with clean, cool water. Using old, murky paint water from a previous project will transfer contaminants into your fresh paint.
- Forgetting About Oil-Based Paint: It’s worth saying one more time. Do not do this with oil paint. You will spend more time trying to fix the mess than you ever would have spent painting.
- Not Re-Dampening on Long Jobs: If you’re painting for hours on a hot day, the water in your brush will eventually evaporate. If you feel the brush starting to drag again, it’s time to rinse it out, remove the excess water, and start fresh.
For more great tips on avoiding common painting mistakes, a resource like the EPA’s guide for DIY painters offers valuable advice, especially concerning safety with older paint.
Do’s and Don’ts for Using a Damp Brush
| Do 👍 | Don’t 👎 |
|---|---|
| Do dampen your brush with clean water for latex and acrylic paints. | Don’t use a dripping wet brush that will thin out your paint. |
| Do thoroughly remove excess water until the brush is just damp. | Don’t ever use water to dampen a brush for oil-based paints or stains. |
| Do re-dampen your brush during long painting sessions if it starts to feel dry or stiff. | Don’t use dirty water to wet your brush, as it will contaminate your paint. |
| Do condition your brush with the appropriate solvent (like mineral spirits) for oil-based paints. | Don’t scrape the brush hard on the can rim; gently tap it instead. |
Frequently Asked Questions (FAQ)
Can I use a wet brush on wood?
Yes, absolutely! As long as you are using a water-based paint or primer, using a damp brush is an excellent technique for painting wood. It helps you get a smooth finish on everything from furniture and cabinets to trim and doors.
How do I know if my brush is too wet?
A good test is to flick the brush firmly with your wrist. If water sprays or drips from the bristles, it’s too wet. Squeeze or blot it some more. The bristles should feel cool and moist but not visibly wet or heavy with water.
Does a wet brush use more or less paint?
This is a great question. Initially, it might feel like you’re using less paint because it glides so easily, but the technique primarily affects the application, not the volume. A damp brush helps you apply a more consistent, even coat, which means you’re using the paint more efficiently and avoiding wasteful, thick layers. So, in the end, it often helps you use the right amount of paint for proper coverage.
What happens if I accidentally use water with oil-based paint?
If you catch it immediately after dipping the brush, stop. Clean the brush thoroughly with mineral spirits until all paint is gone, let it dry completely, and then start over. If you’ve already applied it to the surface, you will likely need to scrape off the messed-up paint, sand the area smooth, and then repaint it correctly once the surface is clean and dry.
Does this technique work for both synthetic and natural bristle brushes?
Yes, but you should always match your brush type to your paint type. Synthetic brushes (like nylon and polyester) are best for water-based paints, and dampening them works perfectly. Natural bristle brushes (like hog hair) are meant for oil-based paints. Natural bristles can get soft and lose their shape when wet with water, so you should only use them with oil paints and condition them with solvent, not water.
Should I dampen my brush when using a primer?
Yes, if you are using a water-based primer (which most modern primers are). Following the same “damp, not wet” technique will help you apply the primer smoothly, creating a perfect base for your top coat of paint. For oil-based primers, keep the brush dry or use solvent.
Can I just add water directly to my paint can?
You can, but it’s risky. This is called thinning the paint. While some situations (like using a paint sprayer) require thinning, it’s generally not recommended for brushing. Adding water to the can is permanent and can void the paint’s warranty. Wetting the brush gives you more control and doesn’t permanently alter your expensive can of paint.
Conclusion: Your New Secret to a Flawless Finish
So, can you paint with a wet brush? You now know that the answer is a confident “Yes, but only with the right paint!” This simple, genius trick of dampening your brush for water-based paints is one of those small things that makes a huge difference. It separates frustrating projects from fantastic ones.
You’ll save your brushes from getting ruined, you’ll fight less with brush drag and streaks, and you’ll achieve that smooth, satisfying finish that makes a project truly shine. The next time you grab a can of latex or acrylic paint, take that extra 30 seconds to properly dampen your brush. Your finished project will thank you for it.
Happy building, and happy painting!