Can You Paint Over Varnished Wood?
Yes, you can paint over varnished wood. Varnish needs to be sanded and primed before painting to ensure adhesion.
Painting over varnished wood is a popular way to update and transform the look of furniture or wood surfaces. Whether you want to change the color or simply freshen up the existing finish, painting can provide a cost-effective solution. However, before you start painting, it’s essential to properly prepare the varnished wood surface.
This involves sanding down the varnish to create a rough texture, which allows the paint to adhere better. Additionally, applying a primer helps to seal the wood and provide a smooth and even base for the paint. By following these steps, you can successfully paint over varnished wood and achieve the desired results.
Preparing Varnished Wood For Painting
If you’re looking to breathe new life into your varnished wood, painting is a cost-effective and transformative option. However, before you begin, it’s essential to prepare the surface properly to ensure a smooth and long-lasting finish. In this section, we will discuss three crucial steps for preparing varnished wood for painting: cleaning the surface, sanding the varnish, and priming the wood.
Cleaning The Surface
Before you can begin painting over varnished wood, it’s crucial to clean the surface thoroughly. Start by removing any loose dirt and debris using a soft cloth or a gentle brush. For more stubborn dirt or grease stains, a mild detergent mixed with warm water can be used. Avoid using harsh chemicals as they can affect the adhesion of the paint.
Once you’ve removed all visible dirt, rinse the surface with clean water and allow it to dry completely. This step is vital, as any remaining moisture can compromise the paint’s adhesion.
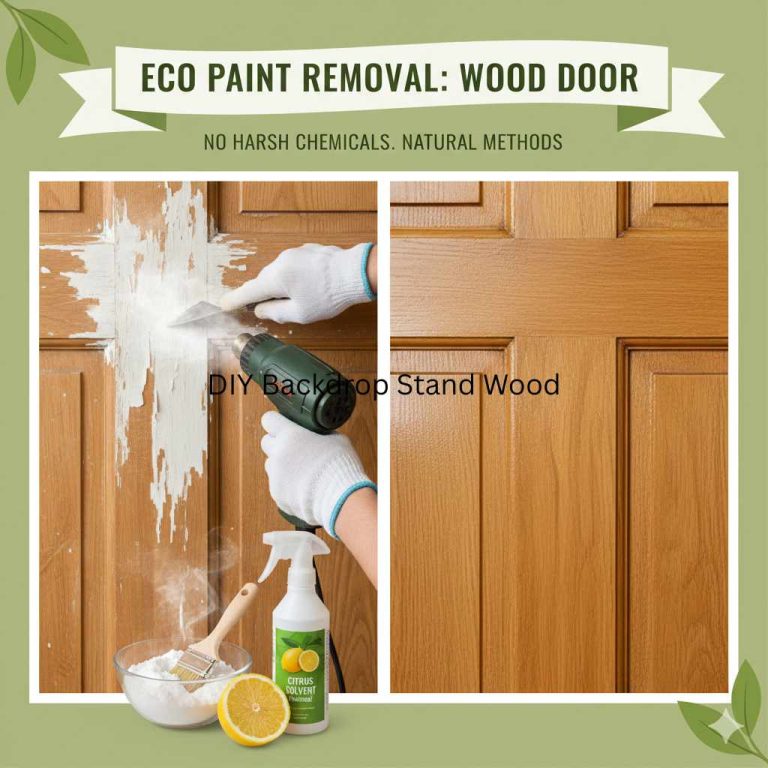
Sanding The Varnish
After cleaning the surface, the next step is to sand the varnish to create a textured surface that promotes paint adhesion. Start by using a medium-grit sandpaper (around 120-150 grit) to lightly sand the entire varnished wood surface. Sanding in the direction of the wood grain will help prevent unnecessary scratches.
Once you’ve sanded the surface, wipe away any dust using a clean cloth or a tack cloth. It’s essential to remove all dust particles to ensure a smooth and even finish when painting.
Priming The Wood
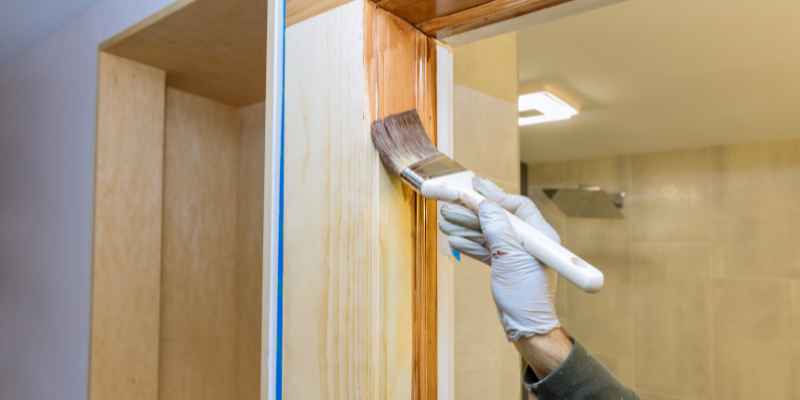
Now that the surface is clean and smooth, it’s time to apply a primer. Priming the wood is crucial as it helps the paint adhere better and ensures a uniform finish. Choose a good quality wood primer that is suitable for your specific project and follow the manufacturer’s instructions for application.
Using a paintbrush or roller, apply an even coat of primer to the entire surface, covering the varnished wood completely. Allow the primer to dry according to the manufacturer’s recommended drying time before moving on to the actual painting process.
By following these three essential steps – cleaning the surface, sanding the varnish, and priming the wood – you’ll create an ideal foundation for painting over varnished wood. Taking the time to prepare the surface properly will not only ensure a successful paint job but also help the paint adhere better and last longer.

Choosing The Right Paint And Primer
Choosing the Right Paint and Primer is crucial when it comes to painting varnished wood. A high-quality paint and primer combination not only ensures a smooth finish but also improves the adhesion of the paint to the surface, enhancing its durability. In this section, we will delve into the key considerations for selecting the appropriate paint type and using primer for better adhesion. Let’s dive in!
Selecting The Appropriate Paint Type
When it comes to choosing the right paint for varnished wood, there are a few factors to consider to ensure a long-lasting and beautiful finish. Here are some key points to keep in mind:
- Choose an Acrylic or Latex Paint: Acrylic or latex paints are excellent choices for painting over varnished wood. They offer good adhesion, durability, and are available in a wide range of colors and finishes.
- Opt for a Satin or Semi-Gloss Finish: Satin or semi-gloss finishes are highly recommended for painting varnished wood. These finishes provide a nice balance between durability and aesthetics, offering a subtle shine while camouflaging imperfections.
- Consider a Paint + Primer Combination: If you prefer a more efficient and time-saving option, you can opt for a paint that includes a built-in primer. These products are formulated to adhere well to various surfaces, including varnished wood, providing excellent coverage and adhesion.
Using Primer For Better Adhesion
Priming the varnished wood surface before applying paint plays a crucial role in ensuring better adhesion and durability. Here’s why using a primer is important:
- Promotes Adhesion: Primer creates a bonding surface that helps the paint adhere securely to the varnished wood, preventing it from chipping or peeling off easily.
- Improves Paint Coverage: Applying a primer to varnished wood helps create a smooth and even base, allowing the paint to adhere uniformly and minimizing the number of coats required for full coverage.
- Blocks Stains: Primer also helps in blocking any stains or discoloration on the varnished wood, ensuring that the final paint color appears true and vibrant.
When choosing a primer for varnished wood, opt for a high-quality bonding primer specifically designed for difficult surfaces. Make sure to follow the manufacturer’s instructions regarding the application and drying time before proceeding with the paint.
Applying Paint To Varnished Wood
Can you paint over varnished wood? The answer is yes, you can! Applying paint to varnished wood is a great way to give your furniture or wooden surfaces a fresh new look. However, it’s important to follow the right steps to ensure a successful and long-lasting finish.
Applying The First Coat Of Paint
When applying the first coat of paint to varnished wood, it’s crucial to prepare the surface properly. Start by cleaning the wood with a mild soap and water solution to remove any dirt, dust, or grime. Once the surface is clean and dry, lightly sand it with fine-grit sandpaper to create a rough texture that allows the paint to adhere better.
After sanding, it’s recommended to apply a primer before the first coat of paint. The primer helps to create a smooth and consistent base for the paint, ensuring better coverage and adhesion. Choose a primer specifically designed for use on varnished wood and apply it evenly using a brush or roller.
Allowing Sufficient Drying Time
After applying the first coat of paint, it’s essential to allow sufficient drying time before proceeding with additional coats. Check the manufacturer’s instructions on the paint can for the recommended drying time. Remember that factors like humidity and temperature can affect drying time, so it’s important to allow for extra time if needed.
During the drying process, ensure proper ventilation in the area to help expedite drying and prevent any unpleasant odors. Avoid touching or placing objects on the freshly painted surface to prevent smudges or blemishes.
Applying Additional Coats
To achieve a smooth and professional-looking finish, it’s often necessary to apply multiple coats of paint. After the first coat is completely dry, lightly sand the surface again to remove any imperfections or rough spots. Wipe away the dust with a clean cloth or tack cloth before applying the next coat.
When applying additional coats, make sure to use thin and even layers of paint. This helps to prevent drips, runs, and a heavy buildup of paint, which can lead to an uneven and less desirable finish. Always follow the manufacturer’s instructions for drying time between coats, allowing the paint to fully cure for the best results.
Repeat the process of sanding and applying coats until you achieve the desired color and coverage. Remember, patience and diligence in the painting process will yield the best outcome for your varnished wood project.
Achieving A Smooth Finish
When it comes to painting over varnished wood, achieving a smooth finish is essential. Sanding between coats plays a crucial role in getting that seamless, polished look. By using a fine-grade sandpaper, you can ensure your painted surface is flawless.
Sanding Between Coats
Sanding between coats is a vital step in the process of painting over varnished wood. It helps to create a smooth canvas for the next layer of paint, ensuring a professional-looking finish. It’s important to remember that sanding should be done gently, avoiding too much pressure which could damage the underlying wood.
Using A Fine-grade Sandpaper
To achieve a smooth finish, it’s crucial to use a fine-grade sandpaper. This type of sandpaper is specifically designed to remove any imperfections on the surface, such as brush marks or uneven spots. By using a fine-grade sandpaper, you can ensure that the subsequent layers of paint will adhere evenly, resulting in a flawless finish.
When sanding, make sure to move in the direction of the grain, as this helps to maintain the natural look of the wood. Take your time, allowing the sandpaper to do its job and smoothing out any rough spots. Always wipe away any dust or debris before applying the next coat of paint.
Using a fine-grade sandpaper will not only give you a smooth finish but will also help the paint adhere better to the varnished surface. This ensures that your painted wood will be more resilient and less likely to chip or peel over time.
So, when looking to achieve a flawless finish when painting over varnished wood, don’t forget to sand between coats using a fine-grade sandpaper. This simple step will make all the difference in the final result, leaving you with a beautifully painted surface that is both durable and aesthetically pleasing.
Maintaining The Painted Surface
Yes, you can paint over varnished wood by following these steps to maintain the painted surface. Prepare the wood by sanding it down, applying a primer, and then painting with your desired color. Make sure to properly clean and maintain the painted surface for longevity.
Regular Cleaning and Maintenance
Keeping the painted surface of your varnished wood in good condition requires regular cleaning and maintenance. Dust and dirt can accumulate over time, dulling the appearance of the paint and potentially causing damage. To prevent this, it is important to clean the surface regularly using a soft cloth or feather duster. Avoid using abrasive or harsh cleaning agents, as these can strip the paint and damage the varnish. Instead, opt for a mild cleaner, such as a mixture of warm water and mild dish soap.
To clean the painted surface, simply dip the cloth or duster into the cleaning solution and gently wipe away any dirt or dust. Be sure to dry the surface thoroughly after cleaning, as excess moisture can cause the paint to peel or bubble. Additionally, it is a good idea to avoid placing hot or moist items directly on the painted surface, as this can also damage the paint and varnish.
Touching up Any Damaged Areas
Over time, the painted surface of your varnished wood may sustain small chips or scratches. To keep the surface looking its best, it is important to touch up any damaged areas. Thankfully, this is a relatively simple process that can be done without the need for professional help.
First, clean the damaged area using the mild cleaning solution mentioned earlier, and make sure it is completely dry. Next, lightly sand the damaged area with fine-grit sandpaper, being careful not to damage the surrounding paint or varnish. Once the area is smooth, remove any dust with a soft cloth.
Before applying touch-up paint, shake the can thoroughly to ensure proper mixing of the paint. Using a small brush, apply the touch-up paint in thin, even layers, allowing each layer to dry before applying the next. Be patient, as it may take several coats to achieve the desired coverage.
Once fully dry, check the touch-up area against the surrounding painted surface. If necessary, lightly sand the touch-up area to blend it in with the rest of the paint. Finally, apply another coat of varnish to protect the touch-up area and maintain a consistent finish.
By following these simple steps for maintaining the painted surface of your varnished wood, you can ensure that it remains looking fresh and vibrant for years to come. Regular cleaning and occasional touch-ups will help to preserve the beauty of the painted surface and protect it from further damage. With proper care, you can enjoy the aesthetic appeal of your varnished wood furniture or decor for a long time.
Conclusion
To summarize, painting over varnished wood is indeed possible with the right preparation and techniques. By following the steps outlined in this blog post, you can transform your varnished wood surfaces into beautifully painted finishes. Remember to clean, sand, prime, and choose the right paint for the job.
With a little effort and patience, you can achieve a fresh look for your varnished wood furniture or surfaces. So, go ahead and give it a try!