Can You Put Vinyl Flooring Over Wood Floors? (3/16in Rule)
Vinyl flooring can go directly over wood floors — but only if the surface is flat within 3/16 inch over 10 feet, dry, and free of squeaks or loose boards. Skipping that check is the #1 cause of vinyl planks separating or bouncing later. This guide covers prepping the wood floor, choosing floating vs glue-down installation, and when a moisture barrier is required.
Before You Install: Wood Floor Prep Checklist
- Flat within 3/16″ over 10 ft (1/8″ over 6 ft for LVP) — sand high spots, fill low spots
- No active squeaks, loose boards, or protruding nails
- No visible warping, rot, or decay in the wood
- Clean, dry, and free of wax or sealant residue
- Moisture-tested if the room is a kitchen, bathroom, or basement
Preparation
Best Underlayment Pick For Vinyl Over Wood
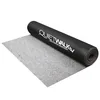
QuietWalk LV Flooring Underlayment for Luxury Vinyl
A dedicated LVP underlayment with built-in sound and moisture protection, made for floating installs over wood subfloors.
- Best for: floating LVP over an existing wood floor in living areas
- Why we picked it: combines sound dampening with a moisture layer, covering the two most common wood-floor prep gaps in one product
- Main drawback: not rated as a full vapor barrier for wet-area installs (bathrooms, basements)
Compare more wood-floor prep options
 Option 1 AMERIQUE 3-in-1 Underlayment with Vapor Barrier
|
 Option 2 DAP Flexible Floor Patch and Leveler
|
 Option 3 REXBETI LVP Installation Kit
|
As an Amazon Associate we earn from qualifying purchases.
You can install vinyl flooring over wood floors, but preparation decides whether it lasts. The wood floor must be clean, smooth, and level before laying vinyl — skipping this step is what causes bumps, buckling, or a hollow feel underfoot later.
Checking The Condition Of The Wood Floors
Before installing vinyl flooring over wood floors, it is crucial to assess the condition of the existing surface. This step ensures a long-lasting and durable installation. Carefully inspect the wood floors for any signs of damage, such as cracks, warping, or decay. These issues, if present, can compromise the structural integrity of the vinyl flooring. See our full wood flooring guide for a broader look at flooring types and installation basics.
Additionally, check for any protruding nails that may need to be hammered down or replaced, and walk the floor listening for squeaks or movement — a wood floor that shifts underfoot will telegraph that movement straight through vinyl planks. A smooth and level surface is essential for proper installation. Addressing any existing problems with the wood floors ensures a solid foundation for the vinyl flooring, preventing future issues.
Cleaning The Wood Floors
Once you have confirmed that the wood floors are in good condition, it’s time to thoroughly clean them. Remove any debris, dust, or dirt that may have accumulated over time, as these can affect the adherence of the vinyl flooring.
Start by sweeping the floors with a broom to remove loose particles. Use a vacuum cleaner to get rid of smaller debris that may be trapped in crevices or corners. For a deep clean, consider using a damp mop with a mild wood floor cleaner. Ensure that the wood floors are completely dry before proceeding to the next step.
Preparing The Wood Floors For Installation
In addition to checking and cleaning the wood floors, there are a few more steps to take to prepare them for vinyl flooring installation. First, remove any baseboards or trim that may be in the way, as these can interfere with the installation process. It is also essential to ensure that the subfloor is level and even. Any areas that are uneven can cause the vinyl flooring to buckle or warp over time.
If necessary, use a leveling compound or self-leveling underlayment to create a smooth surface. Allow ample time for the compound to dry or settle before proceeding with the vinyl flooring installation.
Lastly, to promote a better bond between the wood floors and the vinyl flooring, it is recommended to roughen the surface slightly using sandpaper. This process helps ensure maximum adhesion, enhancing the longevity and stability of the installation.
How Flat Does A Wood Subfloor Need To Be For Vinyl?
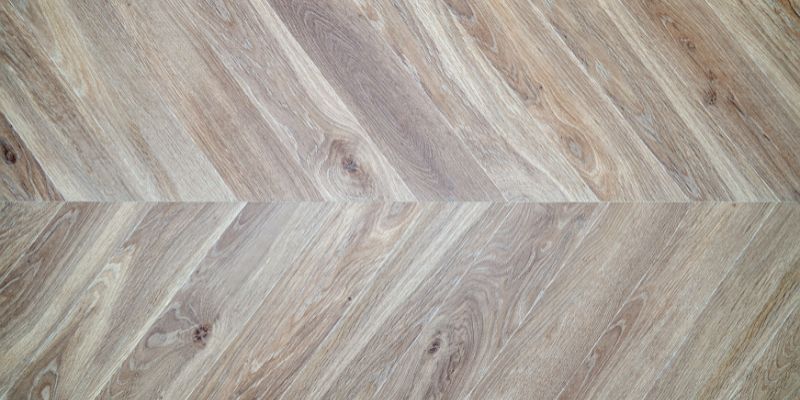
Subfloor flatness is the single most-cited cause of vinyl plank problems reported by installers. Per the National Wood Flooring Association’s technical guidelines, a wood subfloor for glue-down or mechanically-fastened flooring should be flat within 3/16 inch over a 10-foot span, or 1/8 inch over 6 feet — the same tolerance most vinyl plank manufacturers print in their own install instructions. Sand down high spots and fill low spots with a leveling compound rated for use under resilient flooring before you lay a single plank.
“For wood subfloors receiving glue-down or mechanically-fastened flooring, flatness should be within 3/16 in. in 10 ft., or 1/8 in. in 6 ft. Out-of-tolerance areas should be sanded or filled with an approved leveling compound before installation.”
Does A Wood Floor Need A Moisture Barrier Under Vinyl?
Yes, in some cases — moisture isn’t only a concrete-slab problem. Over an existing wood floor, add a 6-mil poly sheet or an underlayment with a built-in vapor barrier in any room prone to humidity or spills: kitchens, bathrooms, laundry rooms, and anywhere near an exterior door. In dry upper-floor rooms with no history of moisture issues, a standard foam underlayment is usually sufficient. When in doubt, run a moisture test on the wood floor first and compare the reading to your vinyl manufacturer’s published limit.
Underlayment
When it comes to installing vinyl flooring over wood floors, one important factor to consider is the underlayment. The underlayment acts as a cushioning layer between the vinyl and the wood floor, providing stability, moisture protection, and enhanced sound insulation. By selecting the right underlayment and installing it correctly, you can ensure a smooth and durable vinyl flooring installation.
Selecting The Right Underlayment
Choosing the appropriate underlayment is crucial to ensure the longevity and performance of your vinyl flooring. Here are some factors to consider:
- Moisture Protection: Look for underlayment with moisture barrier properties to prevent any water damage that may come from below the wood floor.
- Subfloor Imperfections: If your wood floor has any imperfections like cracks or uneven areas, select an underlayment that can provide extra cushioning and help level the surface.
- Sound Insulation: If reducing noise transmission is a concern, opt for underlayment with sound insulation properties to minimize sound transfer between floors.
- Thickness: The thickness of the underlayment plays a role in supporting the vinyl flooring. The manufacturer’s recommendations for thickness should be followed for optimum performance.
Installing The Underlayment
Proper installation of underlayment is essential for a successful vinyl flooring installation. Follow these steps to ensure a smooth process:
- Clean and Prepare the Wood Floor: Remove any debris, dust, or adhesive residue from the wood floor to create a clean and smooth surface for the underlayment.
- Roll Out the Underlayment: Begin by unrolling the underlayment across the entire floor, leaving enough excess material along the walls for trimming.
- Secure the Underlayment: Use adhesive or tape recommended by the underlayment manufacturer to secure the underlayment in place. Follow the manufacturer’s instructions for the appropriate application method.
- Trim Excess Underlayment: Once the underlayment is secured, trim any excess material along the walls using a utility knife or scissors.
- Ensure Proper Coverage: Make sure the underlayment covers the entire wood floor area, including corners and edges, without any gaps or overlaps.
By carefully selecting the right underlayment and installing it correctly, you can ensure a solid foundation for your vinyl flooring over wood floors.
Vinyl Flooring Installation
Vinyl flooring can be easily installed over wood floors once prep is done, using either a floating (click-lock) or glue-down method. See our step-by-step LVP installation guide for the full walkthrough, or how to lay vinyl wood plank flooring for plank-specific layout tips.
Choosing The Vinyl Planks Or Tiles
Before starting the installation, choose between vinyl planks and tiles. Consider the overall look and feel you want to achieve. Vinyl planks give the appearance of hardwood floors, while tiles offer a more traditional aesthetic.
Laying The Vinyl Flooring
Ensure the wood floors are clean and free from any debris or damage. Use a self-leveling compound if there are any imperfections. Lay the vinyl flooring in the direction of the longest wall to create a more spacious appearance. Carefully measure and cut the planks or tiles to fit the space.
Floating Vs Glue-Down: Which Installation Method Over Wood?
Both methods work over a properly prepped wood floor, but they suit different situations:
| Method | Tolerates Minor Unevenness? | Best For |
|---|---|---|
| Floating (click-lock) | Yes — more forgiving | DIY installs, living rooms, bedrooms |
| Glue-down | No — needs a flatter surface | High-traffic areas, kitchens, rooms near moisture |
Floating LVP is the more common choice over an existing wood floor because it doesn’t require the same near-perfect flatness as glue-down, and individual planks can be replaced later without disturbing the rest of the floor. Glue-down offers a more solid, stable feel and resists shifting in high-traffic or higher-moisture rooms, but any subfloor imperfection telegraphs through the adhesive bond, so the prep bar is higher.
Finishing Touches
Trim And Molding Installation
Trim and molding installation is the key to achieving a professional and refined appearance when installing vinyl flooring over wood floors. By using the appropriate trim and molding, you can create smooth transitions between the vinyl flooring and adjacent surfaces, such as walls and doorways. Here are a few essential tips to guide you through this stage:
- Measure and cut the trim or molding pieces according to the length required for each section. Be sure to use a miter saw or other suitable cutting tool for accurate and clean cuts.
- Apply adhesive to the backside of the trim or molding, following the manufacturer’s instructions. This will ensure a secure bond and prevent any movement over time.
- Align the trim or molding with the edges of the vinyl flooring, carefully pressing it into place.
- Use finishing nails or brad nails to further secure the trim or molding. Remember to countersink the nails slightly below the surface and fill the holes with wood filler for a seamless finish.
- If necessary, repeat the process for any additional trim or molding required to complete the desired look.
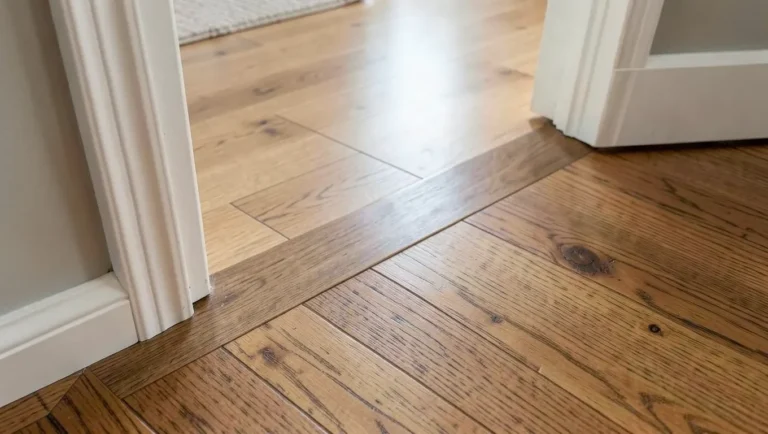
Do You Need Transition Strips When Adding Vinyl Over An Existing Wood Floor?
Often, yes. Vinyl plus underlayment adds height — typically 1/8″ to 1/4″ combined — on top of the existing wood floor, which can create a step at doorways or where the new floor meets tile, carpet, or an unmodified room. Measure the height difference at each threshold and choose the matching transition type: a T-molding for two floors of equal height, a reducer for a taller-to-shorter transition, or a threshold at exterior doors. Skipping this creates a trip hazard, not just a cosmetic gap.
Final Inspections And Touch-ups
Final inspections and touch-ups play a crucial role in ensuring the success of your vinyl flooring installation. Taking the time to carefully inspect and make any necessary touch-ups will result in a durable, long-lasting flooring solution. Here are a few final steps to consider:
- Closely examine the entire surface of your vinyl flooring for any visible defects, scratches, or imperfections.
- If you notice any blemishes, use appropriate touch-up products that match the color and texture of your vinyl flooring. Carefully follow the instructions provided by the manufacturer for best results.
- Once touch-ups are complete, use a soft cloth or mop to gently clean the entire floor, removing any dust, debris, or excess touch-up products.
- Double-check all edges, corners, and transitions to ensure they are smooth and firmly in place.
Maintenance And Care
Keeping your vinyl flooring in excellent condition requires regular cleaning and proper maintenance. By following some simple tips, you can prolong the lifespan and beauty of your vinyl flooring, even if it’s installed over wood floors.
Cleaning And Maintenance Tips
Regular cleaning is essential for maintaining the shine and cleanliness of your vinyl flooring. Here are some cleaning and maintenance tips to keep in mind:
- Sweep or vacuum the floor regularly to remove dust, dirt, and debris.
- Use a damp mop or cloth to clean spills and stains immediately. Avoid using excessive water to prevent damage to the wood floor beneath.
- For more stubborn stains, use a mild cleaning solution specifically formulated for vinyl flooring. Avoid using abrasive cleaners or brushes as they can cause scratches.
- Avoid using steam cleaners on vinyl flooring as they can potentially damage the adhesive that holds the flooring in place.
Protecting The Vinyl Flooring
To protect your vinyl flooring and ensure its longevity, here are some measures you can take:
- Place doormats at entryways to keep dirt and moisture from being tracked onto the vinyl floor.
- Use furniture pads or coasters under heavy furniture to prevent indentations or scratches.
- Avoid dragging heavy objects across the floor. Instead, lift and place them carefully.
- Consider using rugs or mats in high-traffic areas to minimize wear and tear.
- Close curtains or blinds during peak sunlight hours to prevent excessive fading or discoloration.
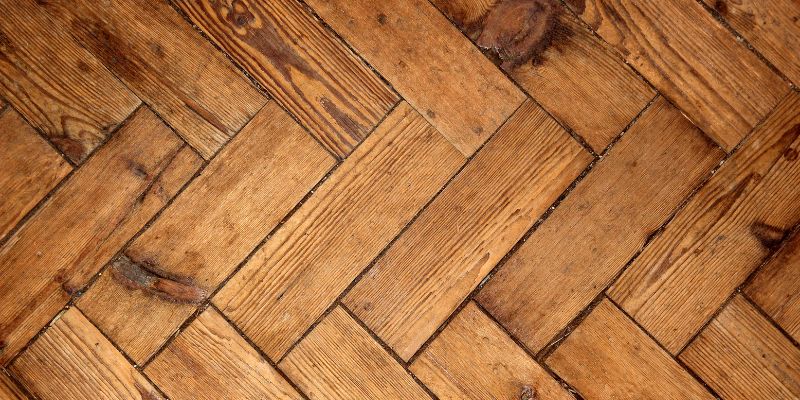
By following these cleaning, maintenance, and protection tips, you can ensure that your vinyl flooring remains in top-notch condition, even when installed over wood floors. Regular care will help keep your vinyl flooring looking its best for years to come.
Frequently Asked Questions On Can You Put Vinyl Flooring Over Wood Floors
Should I Remove Hardwood Floors Before Installing Vinyl Plank Flooring?
No — removal is not required. As long as the existing hardwood is flat within 3/16″ over 10 feet, structurally sound, and free of squeaks or moisture issues, vinyl plank flooring can be installed directly over it. Removal only becomes necessary if the wood floor is severely uneven, rotted, or actively moving underfoot.
Do I Need Underlayment For Vinyl Plank Flooring Over Hardwood?
Yes, underlayment is recommended for vinyl plank flooring over hardwood to provide cushioning, sound absorption, and a moisture barrier.
What Is The Best Flooring To Put Over Hardwood Floors?
The best flooring to put over hardwood floors is engineered wood or laminate. These options are durable, easy to install, and won’t damage your existing hardwood. They also come in a variety of styles and finishes to match any decor.
Will Vinyl Floor Stick To Wood?
Yes, the vinyl floor can stick to wood with proper installation. As long as the wood subfloor is clean, smooth, and free of any imperfections or moisture issues, vinyl flooring can adhere well to it. Make sure to follow the manufacturer’s recommendations for installation to ensure a secure and long-lasting bond.
Do You Need A Moisture Barrier Under Vinyl On A Wood Subfloor?
Only in moisture-prone rooms. Over a dry wood floor in a normal living space, a standard foam underlayment is enough. In kitchens, bathrooms, basements, or laundry rooms, add a 6-mil poly sheet or an underlayment with a built-in vapor barrier to keep trapped moisture from damaging either floor.
Does Adding Vinyl Over Wood Floors Require New Transition Strips?
Usually, yes. Vinyl plus underlayment typically adds 1/8″ to 1/4″ of height over the old wood floor, which can create a step at doorways or thresholds. Measure the height difference and install a T-molding, reducer, or threshold strip to match.
Conclusion
Vinyl flooring can go over wood floors without removing the existing surface, as long as it passes the flatness, structural, and moisture checks covered above. Follow manufacturer guidelines, choose floating or glue-down based on the room, and add transition strips where the floor height changes for a durable, professional-looking result.
Sponsored / affiliate links. As an Amazon Associate I earn from qualifying purchases. I may earn additional commission from eligible campaigns.