Can You Sand Pressure Treated Wood? Discover the Best Techniques!
Yes, you can sand pressure-treated wood. Pressure-treated wood can be sanded to remove imperfections or prepare it for painting or staining.
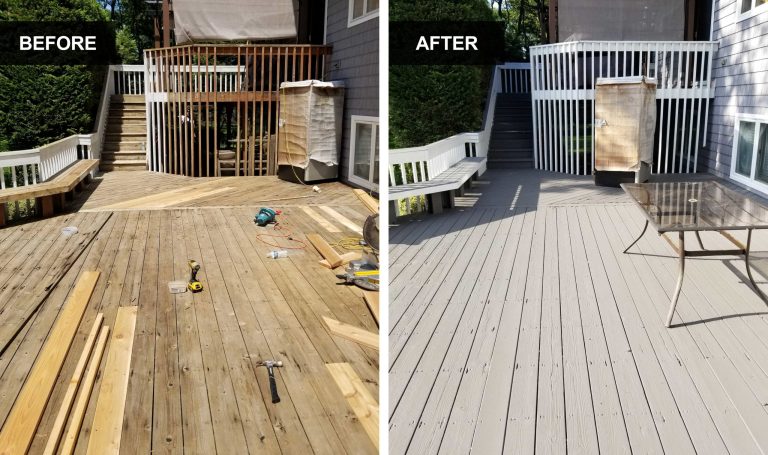
Pressure-treated wood is a popular choice for outdoor projects due to its resistance to weather and insect damage. However, it often has a rough surface that may need to be smoothed before applying a finish. Sanding pressure-treated wood can help achieve a smoother surface and improve the overall appearance of the wood.
We will discuss how to properly sand pressure-treated wood and the precautions you should take to ensure your safety.
Understanding Pressure Treated Wood
Pressure-treated wood can be sanded to remove roughness and improve its appearance. Sanding pressure-treated wood helps in maintaining its quality and ensures a smooth finish. However, it is essential to follow safety precautions and use proper equipment when sanding this type of wood.
What Is Pressure Treated Wood?
Pressure-treated wood is a type of lumber that has been treated with chemicals to enhance its durability and resistance to rot, decay, and insect damage. This treatment involves placing the wood in a pressurized tank and forcing chemicals into its fibers, ensuring that the entire piece is well-protected.
Why Is Pressure Treated Wood Used?
Pressure-treated wood is commonly used in outdoor construction projects where the wood is exposed to the elements. It is often utilized for building decks, fences, gazebos, and other outdoor structures. The treatment process improves the wood’s ability to withstand moisture, sunlight, and insect infestation, making it ideal for long-lasting outdoor installations.
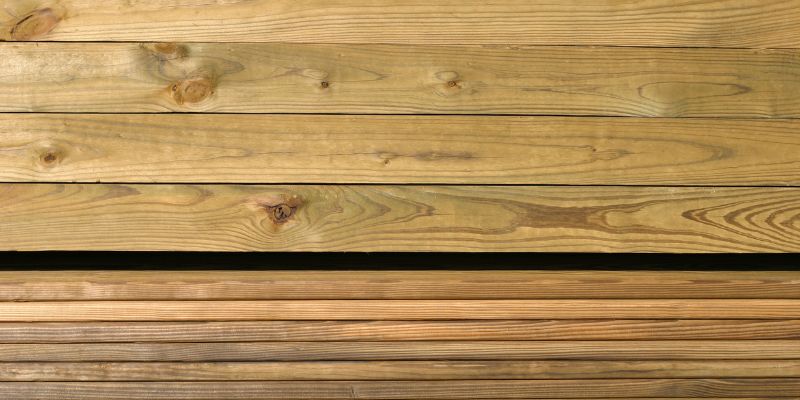
Types Of Pressure-Treated Wood
There are different types of pressure-treated wood available, each with its own distinct properties and uses:
1. Above Ground Contact (AG)
The above-ground contact type of pressure-treated wood is designed for applications where the wood is not in direct contact with the ground. This wood is ideal for decks, fences, and other above-ground outdoor structures.
2. Ground Contact (GC)
Ground contact pressure-treated wood is specially treated to withstand direct contact with the ground. It is commonly used for posts, joists, and beams in decking projects to ensure longevity and protect against soil moisture.
3. Marine Grade (MG)
Marine-grade pressure-treated wood is the highest quality option for water-related projects. It is specifically treated to resist rot, decay, and damage from saltwater exposure, making it ideal for docks, piers, and other marine applications.
Can You Sand Pressure Treated Wood?
Pressure-treated wood is a popular choice for outdoor projects due to its durability and resistance to rot and decay. However, if you’re considering sanding pressure-treated wood, there are a few things you need to know. In this article, we will explore the sanding dilemma, the necessary safety precautions, and the correct sanding technique for pressure-treated wood.
The Sanding Dilemma
Many people wonder whether it’s safe to sand pressure-treated wood. The answer is yes, you can sand pressure-treated wood, but it requires extra caution. Pressure-treated wood is typically treated with chemicals to protect it from insects and fungal decay. These chemicals can be harmful if inhaled or come in contact with your skin. Sanding pressure-treated wood can release these chemicals into the air, making proper safety precautions essential.
Safety Precautions
Before you begin sanding pressure-treated wood, it’s crucial to follow these safety precautions:
- Wear appropriate personal protective equipment (PPE) such as a dust mask, safety goggles, and gloves to protect yourself from the chemicals and sawdust.
- Sand the wood outdoors or in a well-ventilated area to minimize exposure to harmful fumes.
- Avoid sanding too close to the ground or other surfaces that may come into contact with the sawdust, as this can contaminate the surrounding area.
- After sanding, ensure proper disposal of the sawdust and debris in accordance with local regulations.
Sanding Technique For Pressure Treated Wood
Now that you are aware of the safety precautions, let’s discuss the correct sanding technique for pressure-treated wood.
To achieve the best results:
- Start by using a coarse grit sandpaper, such as 60 or 80, to remove any rough surfaces or splinters.
- Work in the direction of the wood grain to avoid causing any damage or scratches.
- Gradually move to finer grit sandpaper, such as 120 or 150, to smoothen the surface and achieve the desired finish.
- Remember to clean the surface thoroughly after sanding to remove any remaining sawdust.
Sanding pressure treated wood can be challenging, but by following these safety precautions and using the correct technique, you can achieve a smooth and polished finish.
Best Techniques For Sanding Pressure Treated Wood
When it comes to outdoor projects, pressure-treated wood is a popular choice due to its durability and resistance to rot and insects. However, sanding pressure-treated wood can be a bit trickier than regular wood due to the chemicals used in the treatment process. In this blog post, we will explore the best techniques for sanding pressure-treated wood, including choosing the right sandpaper, preparing the wood for sanding, the sanding process itself, and the finishing touches to complete your project.
Choosing The Right Sandpaper
Before you start sanding pressure-treated wood, it’s important to select the right sandpaper for the job. Due to the chemicals in pressure-treated wood, it’s recommended to use a medium-grit sandpaper, such as 80 grit or 100 grit, to avoid sanding off the treatment. This will allow you to smooth out any rough spots or imperfections without compromising the wood’s protective properties.
Preparing The Wood For Sanding
Prior to sanding, it’s crucial to properly prepare the pressure-treated wood. Start by cleaning the wood surface to remove any dirt, debris, or loose particles. You can use a gentle detergent and water solution, followed by a thorough rinse and drying process. This step will ensure that your sanding process is more effective and that the sandpaper doesn’t get clogged with dirt, resulting in an inconsistent finish.
Sanding Process
Once the wood is clean and dry, you can begin the sanding process. To do this, firmly grip the sandpaper and move it back and forth along the grain of the wood. Apply even pressure to avoid creating uneven surfaces. It’s recommended to start with a low grit sandpaper, such as 80 grit, and progressively move to a higher grit, such as 120 or 150, for a smoother finish. Remember to wipe away any dust or debris between the sanding stages.
If you’re working with intricate designs or hard-to-reach areas, you can use sanding sponges or sanding blocks for better control and precision. These tools will help you navigate corners, edges, and other challenging areas without compromising the quality of your sanding.
Finishing Touches
Once you’ve achieved your desired smoothness, it’s essential to apply a finish to protect the wood from the elements. You can choose between paint, stain, or sealant, depending on your preference and the overall look you want to achieve. Applying a finish will not only enhance the appearance of the pressure-treated wood but also provide an extra layer of protection against moisture, UV rays, and wear and tear.
Before applying the finish, make sure to clean the wood surface thoroughly to remove any sanding dust. Follow the manufacturer’s instructions for application and allow sufficient drying time. Once the finish is dry, your pressure-treated wood will be ready to withstand whatever nature throws at it.
Remember, when sanding pressure-treated wood, it’s essential to follow these techniques to ensure a smooth and lasting finish while retaining the wood’s protective properties. By choosing the right sandpaper, preparing the wood properly, following the right sanding process, and applying a suitable finish, you’ll have a project that not only looks great but also stands the test of time.
Alternative Methods To Sanding
When it comes to working with pressure treated wood, sanding may not always be the best option. Whether it’s because of the wood’s resistance to abrasion or simply to save time and effort, there are alternative methods that can effectively prepare pressure-treated wood for painting, staining, or sealing. In this blog post, we will explore some alternative methods to sanding that can give you great results without the need for sandpaper.
Using Chemical Strippers
Chemical strippers are a popular alternative to sanding pressure-treated wood. These products, available in gel or liquid form, work by breaking down the surface layer of the wood and dissolving any old paint, stain, or sealant. To use a chemical stripper, follow these steps:
- Clean the wood surface by removing any loose debris or dirt.
- Apply the chemical stripper using a brush or sprayer, following the manufacturer’s instructions. Make sure to wear protective gloves and eyewear.
- Allow the stripper to sit on the wood surface for the recommended amount of time, usually indicated on the product’s packaging.
- Using a scraper, remove the softened paint or stain. Be careful not to apply too much pressure to avoid damaging the wood surface.
- Rinse the wood with water to remove any residue from the chemical stripper.
Pressure Washing
Another effective method for preparing pressure-treated wood is pressure washing. This method uses high-pressure water to remove dirt, grime, and any loose materials from the wood surface. Here’s how to properly pressure wash pressure-treated wood:
- Clear the area around the wood to ensure there are no obstacles or objects that may get damaged.
- Adjust the pressure washer to a suitable setting, taking care not to set it too high to avoid damaging the wood.
- Position the pressure washer nozzle approximately 1-2 feet away from the wood surface.
- Start pressure washing the wood using sweeping motions, moving with the grain of the wood.
- Be thorough but gentle, applying consistent pressure to ensure all surface areas are cleaned.
- Allow the wood to dry completely before applying any paint, stain, or sealant.
Bristle Brushes Or Wire Brushes
If you prefer a more hands-on approach, using bristle brushes or wire brushes can be an effective alternative to sanding pressure-treated wood. These brushes can remove dirt, stains, and loose materials from the wood surface without damaging the wood itself. To use bristle or wire brushes:
- Clean the wood surface by removing any loose debris.
- Select a bristle brush or wire brush suitable for the task. Bristle brushes are great for general cleaning, while wire brushes are more effective at removing tough stains or dried paint.
- Scrub the wood surface using the brush, applying firm but controlled pressure.
- Work in sections, moving with the grain of the wood to avoid creating visible brush marks.
- Wipe down the wood surface with a clean, damp cloth to remove any residue.
By utilizing these alternative methods to sanding, you can effectively prepare pressure-treated wood for your desired finish. Whether you choose to use chemical strippers, pressure washing, or bristle brushes, make sure to follow the appropriate safety precautions and take your time to achieve the best results. With these techniques, you can achieve a smooth and clean wood surface that is ready for painting, staining, or sealing.
Pros And Cons Of Sanding Pressure Treated Wood
When it comes to working with pressure-treated wood, sanding is a common task that can help improve the appearance and smoothness of the wood. However, it’s important to consider both the benefits and drawbacks before grabbing your sandpaper. In this section, we will explore the pros and cons of sanding pressure treated wood.
Benefits Of Sanding
1. Enhanced Aesthetics: One of the major benefits of sanding pressure-treated wood is the ability to enhance its overall appearance. Sanding helps to remove rough spots, splinters, and uneven surfaces, resulting in a smoother finish that can be more visually appealing.
2. Improved Stain or Paint Application: Sanding pressure treated wood not only improves its appearance but also helps to prepare the surface for better stain or paint application. By removing surface imperfections and opening up the pores of the wood, the application of stain or paint can be more effective and result in a more even finish.
3. Reduced Risk of Splinters: Pressure-treated wood can sometimes have rough edges or splinters that can be uncomfortable and even hazardous. Sanding the wood can help eliminate these rough spots, reducing the risk of splinters and making the wood safer to handle and use.
4. Smooth Texture: Sanding pressure treated wood creates a smooth texture that not only feels good to the touch but also makes the wood easier to work with in subsequent steps of your project. Whether you’re building a deck, a fence, or any other wooden structure, a smooth surface can make installation and maintenance smoother as well.
Drawbacks Of Sanding
1. Health Concerns: Sanding pressure-treated wood can release fine dust particles containing chemicals used in the treatment process, such as copper and arsenic. These chemicals can be harmful if inhaled or if they come into contact with the skin. It is crucial to wear protective gear, such as a dust mask, goggles, and gloves while sanding pressure-treated wood to reduce exposure.
2. Reduced Longevity: Pressure-treated wood is specifically treated to resist rot and decay, making it highly durable outdoors. However, sanding the protective layer of the surface can reduce its longevity by exposing the untreated wood to moisture and other outdoor elements. It’s essential to weigh the aesthetic benefits against the potential reduction in durability.
3. Time and Effort: Sanding pressure-treated wood can be time-consuming and require physical effort, especially if the wood has significant roughness. Depending on the project size and the condition of the wood, sanding may require multiple sanding sessions and the use of increasingly finer grit sandpaper, which can add to the overall time and effort required.
4. Additional Maintenance: While sanding pressure-treated wood can provide immediate aesthetic benefits, it’s important to note that maintaining the smooth finish may require periodic sanding and refinishing over time. Without proper maintenance, the wood may weather and lose its smooth texture.
Before undertaking any sanding project with pressure-treated wood, it’s wise to evaluate the specific needs of your project and consider both the benefits and drawbacks. With proper precautions and conscious consideration, sanding can be a valuable step in achieving a beautiful and appealing final product.
Preventing Issues With Pressure-Treated Wood
Pressure-treated wood is a popular choice for outdoor projects due to its durability and resistance to rot and insects. However, if not properly maintained, this type of wood can develop issues over time. By following a few key steps, you can prevent common problems with pressure-treated wood and ensure its longevity.
Sealing The Wood
To protect pressure-treated wood from the elements, one of the most important steps is to seal it properly. Applying a quality sealant helps to prevent moisture penetration, which can lead to warping, splitting, and decay.
When selecting a sealant, make sure it is specifically designed for pressure-treated wood and provides adequate UV protection. Apply the sealant evenly using a brush or roller, and make sure to cover the entire surface of the wood, including the edges and ends. Allow the sealant to dry thoroughly before applying any other finishes or exposing the wood to moisture.
Regular Maintenance
Regular maintenance is crucial for preserving the appearance and structural integrity of pressure-treated wood. Check the wood periodically for any signs of damage, such as cracks or loose boards. If you notice any issues, address them promptly to prevent further damage.
Regularly cleaning the wood with a mild detergent and water can help remove dirt, grime, and mold. Rinse thoroughly and allow the wood to dry completely before applying any treatments or finishes. Additionally, it’s important to inspect any hardware or fasteners used in the project regularly and replace any that show signs of rust or corrosion.
Avoiding Common Mistakes
When working with pressure-treated wood, there are a few common mistakes that you should avoid to ensure its longevity. One of the most common mistakes is failing to let the wood dry properly after installation. Pressure-treated wood contains chemicals that need time to evaporate, so it’s crucial to follow the manufacturer’s recommendations for drying time.
Another common mistake is using the wrong type of fasteners or hardware. Pressure-treated wood requires corrosion-resistant fasteners to prevent damage to the wood and ensure long-term stability.
Lastly, avoid using pressure-treated wood for applications where it will come into direct contact with food or drinking water. The chemicals used in the treatment process may not be safe for consumption and can leach into the surrounding environment.
| Mistake | Prevention |
|---|---|
| Failing to let the wood dry properly | Follow the manufacturer’s recommendations for drying time |
| Using the wrong type of fasteners or hardware | Use corrosion-resistant fasteners |
| Using pressure-treated wood for food or drinking water contact | Avoid direct contact with consumables |
By taking the necessary precautions, sealing the wood, performing regular maintenance, and avoiding common mistakes, you can prevent issues with pressure-treated wood and enjoy its benefits for years to come. Remember, proper care and attention will ensure your outdoor projects stay in top shape, no matter the weather or environment they face.
Protective Measures When Working With Pressure-Treated Wood
The use of pressure-treated wood in various construction projects is widespread due to its durability and resistance to decay and insect damage. However, it’s important to take proper precautions when working with this type of wood to ensure your safety. In this section, we will discuss the essential protective measures that should be taken when working with pressure-treated wood.
Wearing Protective Gear
Protective gear is crucial when handling pressure-treated wood to minimize potential health risks. The chemicals used in the treatment process can release harmful fumes and come in contact with your skin. Here are some key pieces of protective gear you should wear:
- Safety goggles: Protect your eyes from dust, debris, or wood particles.
- Respirator mask: Prevent inhalation of harmful chemical vapors or dust particles.
- Gloves: Shield your hands from direct contact with the wood and the chemicals it contains.
- Long-sleeved shirt and pants: Cover your skin to avoid direct contact and reduce the risk of irritation.
- Steel-toed boots: Protect your feet from potential injury caused by heavy objects or tools.
Controlling Sawdust
When sanding pressure-treated wood, it’s essential to take measures to control and minimize the amount of sawdust produced. The sawdust from pressure-treated wood can contain hazardous chemicals, so it’s crucial to prevent inhalation and unnecessary exposure. Here are some steps to control sawdust:
- Use a dust collection system: Attach a dust collector or vacuum to your sanding equipment to collect the sawdust as you work.
- Work in a well-ventilated area: Open windows or use fans to improve air circulation and reduce the concentration of sawdust in the workspace.
- Wear a respirator: Protect yourself from inhaling sawdust particles by wearing a respirator mask.
Safely Disposing Of Waste
Proper waste disposal is essential to prevent environmental contamination and adhere to safety guidelines. Here are some measures to safely dispose of pressure-treated wood waste:
- Do not burn: Never burn pressure-treated wood as it releases toxic fumes into the air.
- Check local regulations: Follow local guidelines for waste disposal, as some regions have specific rules for handling pressure-treated wood waste.
- Use a landfill: Dispose of pressure-treated wood waste in designated landfills that can handle this type of material.
By following these protective measures, you can ensure your safety and minimize potential health risks associated with working with pressure-treated wood. Investing in the right protective gear, controlling sawdust, and properly disposing of waste are critical steps in creating a safe work environment.
Frequently Asked Questions Of Can You Sand Pressure Treated Wood
What Should Never Be Done With Pressure Treated Wood?
Never burn pressure-treated wood as it releases toxic chemicals. Avoid using it for cutting boards or countertops since the chemicals can contaminate food. Do not use pressure-treated wood for children’s play equipment or in areas where it may come into direct contact with skin.
Lastly, do not use pressure-treated wood for indoor applications, as the chemicals can be harmful when inhaled.
Should You Sand Pressure Treated Wood Before Painting?
Yes, sanding pressure-treated wood before painting is recommended. It helps remove any roughness, splinters, or imperfections, allowing the paint to adhere better and provide a smoother finish. Additionally, sanding opens up the pores of the wood, enabling better absorption of the paint.
Can You Refinish Pressure Wood?
Yes, you can refinish pressure-treated wood. Ensure the wood is clean and dry before applying a new coat of stain or paint. Sanding can help improve the overall finish. Regular maintenance will help extend the lifespan of the wood.
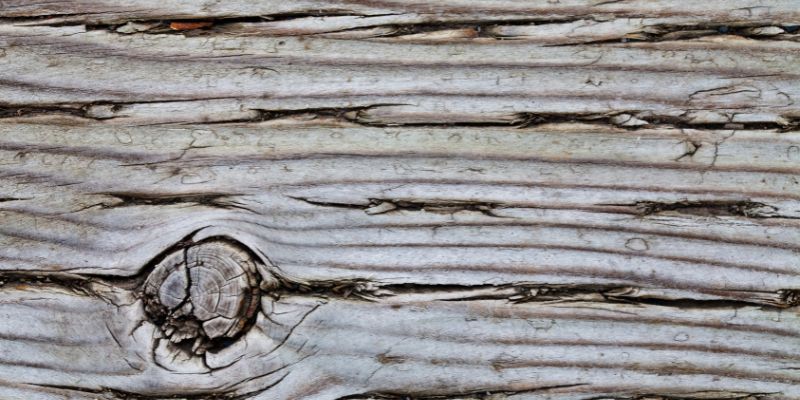
What Destroys Pressure-Treated Wood?
Pressure-treated wood can be destroyed by factors such as excessive moisture, exposure to sunlight, and insect infestations. These elements can weaken the integrity of the wood over time, leading to rot, decay, and structural damage. Regular maintenance and protection measures can help prolong the life of pressure-treated wood.
Conclusion
Sanding pressure-treated wood is possible, but it requires caution and proper safety measures. By following the guidelines outlined in this blog post, you can effectively remove imperfections, enhance the wood’s appearance, and prepare it for staining or painting. Just remember to wear protective gear, work in a well-ventilated area, and dispose of the dust properly.
With careful execution, sanding pressure-treated wood can be a successful endeavor for any DIY enthusiast or professional woodworker.