
Can You Stain Green Wood? Explore the Possibilities Today!
Yes, you can stain green wood. Green wood will need to be properly dried before staining to ensure optimal results.
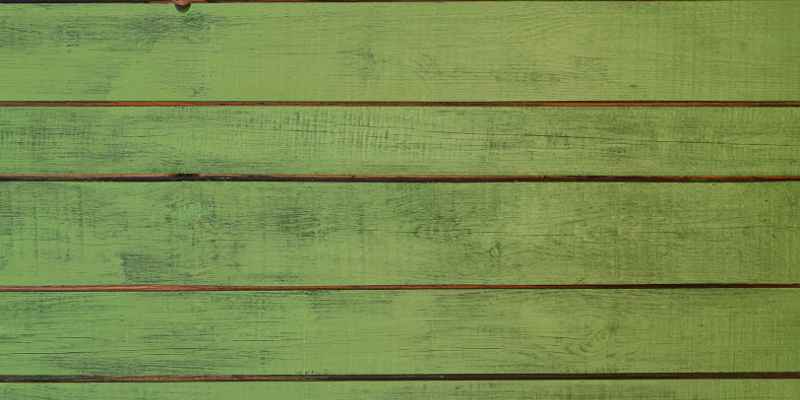
Staining green wood is possible, but it requires proper drying before the staining process. Green wood, also known as freshly cut wood, contains a high moisture content, which can affect the staining process. To achieve the best results, it is essential to allow the wood to dry before staining.
This will ensure that the stain is absorbed evenly and that the final result is satisfactory. We will explore the steps you need to take to stain green wood effectively, providing you with a beautiful and long-lasting finish.
Why Wood Turns Green
Wood turning green is a common occurrence that can be attributed to natural weathering, mold, and algae growth. Understanding why wood changes color and what causes this transformation can help you make informed decisions when it comes to staining green wood. In this section, we will explore the reasons behind this phenomenon and shed light on whether it is possible to stain green wood effectively.
Natural Weathering
When it comes to outdoor wood structures, natural weathering is the primary culprit behind the green color transformation. Over time, exposure to sunlight, rain, and other elements causes wood to undergo chemical changes. The green color is a result of the wood’s reaction to UV radiation and its exposure to moisture.
Natural weathering occurs due to the breakdown of lignin, which is the component responsible for the strength and structure of wood. During this process, the lignin oxidizes and breaks down, triggering a chemical reaction that causes wood to turn greenish in color.
Mold And Algae Growth
In addition to natural weathering, mold and algae growth can also contribute to wood turning green. Moisture, combined with warm temperatures, creates an ideal environment for mold and algae to thrive. These microorganisms can grow on the surface of the wood, leaving behind greenish stains.
Mold and algae can be particularly prevalent in shaded areas or places with poor air circulation. Their growth not only affects the appearance of the wood but can also lead to structural issues if left untreated.
To summarize, wood turns green primarily due to natural weathering, mold, and algae growth. Understanding these factors is crucial when considering staining green wood. In the next section, we will explore whether it is possible to effectively stain green wood and provide you with some tips on how to approach this process.

Challenges Of Staining Green Wood
Staining green wood presents significant challenges due to its high moisture content and tendency to absorb unevenly. Achieving a consistent and desired color requires proper drying, sanding, and conditioning before applying the stain.
Challenges of Staining Green Wood
Staining wood is a common way to enhance the natural beauty of the material, but when it comes to staining green wood, there are some unique challenges to consider. Green wood, which is freshly cut and still contains high levels of moisture, presents difficulties that can affect the final outcome of your staining project. In this article, we will explore two main challenges associated with staining green wood: uneven absorption and color variation. Understanding these challenges will help you achieve beautiful and consistent results that will bring out the best in your green wood projects.
Uneven Absorption
The high moisture content of green wood can result in uneven absorption of the stain. This is because the excess moisture within the wood can prevent the stain from penetrating evenly, leading to blotchy and inconsistent coloration. The densest parts of the wood, such as the end grain or knots, might absorb less stain compared to the surrounding areas, creating a noticeable difference in color intensity. To tackle this challenge and ensure even absorption, several steps can be taken:
- Begin by allowing the green wood to dry for a certain period of time. This will help reduce its moisture content and allow the stain to penetrate more evenly.
- Pre-treat the wood with a water-based wood conditioner. Applying a conditioner helps to seal the wood and promote more uniform stain penetration.
- Apply multiple thin coats of stain rather than a single heavy coat. This will prevent excessive pooling of the stain and promote better absorption.
- Give the stain enough time to dry and cure. Patience is key in ensuring that the stain fully absorbs and adheres to the green wood.
Color Variation
Another challenge when staining green wood is the potential for color variation. The natural color of green wood can vary greatly depending on the tree species, age, and growth conditions. Additionally, the color of the stain itself can also be affected by the high moisture content of the wood. This means that even if you apply the same stain to multiple pieces of green wood, you may end up with different shades and tones. To minimize color variation, consider the following tips:
- Choose a stain color that complements the natural undertones of your green wood. Consider doing a test patch on a hidden area to see how the stain reacts with the wood’s natural color.
- Apply the stain evenly, using smooth and consistent strokes. This will help create a more uniform appearance despite any natural color variations.
- Consider using a stain with a higher concentration of pigments. This can help compensate for any color changes caused by the excess moisture in the wood.
- Allow the stain to fully dry before making any judgments about the final color. Stains can darken or lighten as they dry, so don’t be alarmed if the initial color looks different.
Successfully staining green wood requires careful consideration of the challenges it presents. By addressing the issues of uneven absorption and color variation, you can achieve stunning results that bring out the natural beauty of the wood. Remember to allow the wood to dry, pre-treat it with a wood conditioner, apply multiple thin coats of stain, and be mindful of the color variation. With these tips in mind, you’ll be able to tackle the challenges of staining green wood and create impressive projects that will stand the test of time.
Preparation Steps For Staining Green Wood
Staining green wood can be a challenging task, but with proper preparation, you can achieve beautiful and long-lasting results. Before diving into the staining process, it is important to take some essential steps to ensure the wood is ready to absorb the stain effectively. In this post, we will discuss the crucial preparation steps for staining green wood.
Cleaning The Surface
To start with, it is crucial to clean the surface of the green wood thoroughly. This will remove any dirt, dust, or debris that may hinder the stain’s penetration. Use a soft brush and clean, warm water to scrub the wood’s surface gently. Avoid using any harsh chemicals or abrasive materials that can damage the wood. After scrubbing, rinse the wood surface with clean water and allow it to dry completely.
Drying The Wood
Before applying the stain, it is essential to ensure that the green wood is completely dry. Moisture content in the wood can prevent the stain from adhering properly and may result in an uneven finish. One effective way to determine if the wood is dry enough is to use a moisture meter. This handy tool will give you an accurate reading of the wood’s moisture content. Ideally, the moisture content should be below 15% for effective staining. If the wood is still too wet, it is recommended to let it air dry naturally or use a dehumidifier to speed up the process.
Choosing The Right Stain For Green Wood
When it comes to staining green wood, it’s crucial to choose the right stain that will enhance the natural beauty of the wood while also providing protection against the elements. With a variety of stain options available, it can be overwhelming to decide which one is most suitable for your project. This article will break down the different types of stains and help you make an informed decision.
Transparent Stains
Transparent stains are a great choice if you want to preserve the natural grain and color of your green wood. These stains contain a minimal amount of pigment, allowing the wood’s characteristics to shine through. They provide a subtle hint of color while still allowing the wood’s natural beauty to be the focal point. Transparent stains are easy to apply and provide moderate protection against UV rays and moisture.
Semi-transparent Stains
Semi-transparent stains are an excellent option if you want to add a bit more color to your green wood while still maintaining some of its natural appearance. These stains contain a higher concentration of pigments compared to transparent stains, providing a richer color and a bit more coverage. They are ideal for enhancing the wood’s natural variations and are available in a wide range of shades. Semi-transparent stains offer moderate UV protection and help repel moisture.
Solid Stains
Solid stains are the most opaque option for staining green wood. They cover the wood’s natural grain and color, providing a uniform and consistent finish. Solid stains are perfect if you prefer a solid, painted-like appearance. They offer maximum color coverage and can be used to completely transform the look of the wood. Solid stains also provide excellent protection against UV rays and moisture, making them suitable for high-traffic areas and outdoor use.
In conclusion, when staining green wood, choosing the right stain is essential to achieve the desired look and protection. Transparent stains highlight the wood’s natural beauty, while semi-transparent stains add more color while still maintaining the wood’s characteristics. Solid stains offer maximum coverage and protection but cover the wood’s natural grain and color. Consider your preferences, the wood’s condition, and the level of protection needed to select the appropriate stain for your green wood project.
Tips And Tricks For Successful Staining
Staining green wood can be a rewarding way to enhance its natural beauty and preserve it for years to come. However, achieving a smooth, flawless finish can be challenging if you don’t follow the right techniques. In this section, we will share some valuable tips and tricks to help you successfully stain your green wood projects.
Test On A Small Area First
Before diving into staining your entire green wood project, it’s always wise to test the stain on a small, inconspicuous area. This will allow you to see how the stain interacts with the wood, ensuring that you achieve the desired color and effect.
Here’s a simple process to follow when conducting a test:
- Clean the small area you will be testing with a mild detergent and water solution.
- Apply a small amount of stain to the area using a brush or cloth, following the manufacturer’s instructions.
- Allow the stain to dry completely.
- Observe the color and consistency of the stain. If you’re satisfied with the result, you can proceed to stain the rest of your project. If not, you may need to adjust the stain color or try a different brand.
Apply Multiple Coats
One coat of stain may not be sufficient to achieve the desired depth of color on green wood. It’s often necessary to apply multiple coats to enhance the richness and vibrancy of the stain. However, it’s essential to ensure that each coat is properly dried before applying the next one.
Here are a few pointers to keep in mind when applying multiple coats:
- Allow each coat to dry fully before proceeding. This can take anywhere from a few hours to a few days, depending on the type of stain and the environmental conditions.
- Use light and even brush strokes to ensure an even application of the stain.
- Inspect the wood between coats to identify any areas that may need additional attention or touch-up.
- Remember that adding more coats can intensify the color, so be mindful of the desired result.
Proper Application Techniques
The success of your staining project relies heavily on using the right application techniques. Here are some key tips to help you achieve a professional finish:
- Clean the wood surface thoroughly before staining to remove any dirt, dust, or debris that could affect the final result.
- Apply the stain in the direction of the wood grain for an even and natural-looking finish.
- Use a brush, cloth, or sponge applicator depending on the type of stain and the surface area you’re working with.
- Wipe off any excess stain with a clean cloth to avoid blotches and uneven coloring.
- Always follow the manufacturer’s instructions on drying time, reapplication, and cleaning up.
Conclusion
Staining green wood is possible but requires proper preparation and patience. By allowing the wood to cure and dry thoroughly, applying a sealant or primer, and choosing a stain specifically formulated for green wood, you can achieve a beautiful and lasting finish.
Remember to always follow the manufacturer’s instructions and test the stain on a small, inconspicuous area before applying it to the entire piece. With the right techniques and products, you can transform green wood into a stunning addition to your project or home.