Can You Stain Wet Wood? Discover the Surprising Truth!
Yes, you can stain wet wood, but it will result in a less effective and uneven finish. Staining wet wood can cause the stain to not adhere properly and may lead to blotchy or streaky results.
It is always recommended to wait until the wood is completely dry before applying any stain for the best outcome. Staining wood is a popular way to enhance its natural beauty and protect it from the elements. However, knowing the right time to stain is essential for achieving the desired results.
Many homeowners wonder if it’s possible to stain wood that is still wet, as they may be eager to finish a project or unaware of the drawbacks. This article will explore the feasibility of staining wet wood, explaining why it may lead to a less effective finish and providing guidance on the suitable timing for staining. Following these recommendations will ensure a smooth and blemish-free finish that will enhance the aesthetics and durability of your woodwork.
Staining Wet Wood
Staining wood is a popular choice for enhancing the natural beauty of any woodworking project. But what happens when you want to stain wet wood? Can you apply stain to wood that hasn’t had a chance to fully dry? In this article, we’ll dive into the world of staining wet wood to answer your burning questions.
Is It Possible?
Many people wonder if it’s possible to stain wet wood, and the answer is both yes and no. While it is technically possible to apply stain to wet wood, it may not be the best idea. Staining wet wood comes with its own set of challenges and potential issues that you should be aware of before attempting the process.
Potential Issues
While staining wet wood may seem convenient, it can lead to several potential issues that may negatively affect the final result. Here are a few things to consider:
- Inconsistent Penetration: When wood is wet, the stain may not penetrate evenly, resulting in blotchy or spotty coloration.
- Longer Drying Time: Wet wood takes longer to dry, which means you’ll have to wait even longer for the stained wood to fully cure.
- Increased Risk of Mold or Mildew: Moisture in the wood can create a favorable environment for mold or mildew growth, which can ruin the appearance and integrity of the stained wood.
- Warping or Distortion: Applying stain to wet wood may cause the wood to warp or distort as it dries, resulting in an uneven or misshapen final product.
Overall, while staining wet wood may be possible, it’s typically recommended to wait until the wood has had a chance to fully dry before attempting to apply stain. This ensures a more consistent and reliable outcome, avoiding potential issues such as uneven coloration or mold growth.
Understanding Wet Wood
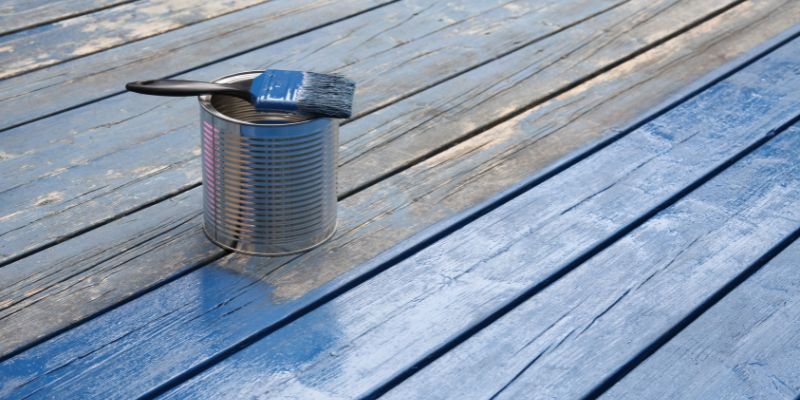
Staining wet wood can lead to poor results as the moisture content affects the absorption and adhesion of the stain. It’s important to let the wood thoroughly dry before attempting to stain it for optimal results.
Why Wood Is Wet
Understanding why wood becomes wet is crucial when it comes to staining. Wood is a porous material, meaning it naturally absorbs and retains water. This can occur due to various reasons, such as exposure to moisture in the environment, rainfall, or accidental spills. Regardless of the cause, wet wood poses challenges when it comes to staining it effectively.
Effects Of Wet Wood On Staining
Staining wet wood can yield undesirable results due to a few key factors:
- Inadequate Absorption: Wet wood lacks the ability to absorb stains properly. Instead of penetrating the wood fibers and creating a uniform color, the stain may sit on the surface, resulting in an uneven and blotchy appearance.
- Poor Adhesion: Moisture on the surface of the wood can prevent the stain from adhering securely. This leads to potential issues such as peeling, flaking, or premature fading of the stain.
- Color Variation: When staining wet wood, the moisture content impacts the color outcome. The presence of moisture can dilute the stain, resulting in a lighter or washed-out color compared to what was intended.
- Mold and Mildew: Wet wood provides a conducive environment for mold and mildew growth. Staining the wood without addressing these issues can result in an unsightly appearance and potential health hazards.
Therefore, it is crucial to ensure that wood is sufficiently dry before attempting to stain it. This ensures optimal absorption, adhesion, color consistency, and minimizes the risk of mold and mildew growth.
Preparing Wet Wood For Staining
Staining wet wood may seem like a challenging task, but with the right approach, it is possible to achieve beautiful and long-lasting results. The key lies in properly preparing the wood before applying the stain. In this article, we will discuss three essential steps to prepare wet wood for staining: drying the wood, sanding, and cleaning.
Drying The Wood
Before staining wet wood, it is crucial to ensure that it is completely dry. Wet wood can prevent the stain from penetrating the surface evenly, leading to uneven color and poor adhesion. To dry the wood effectively, follow these steps:
- Place the wet wood in a dry and well-ventilated area
- Elevate the wood using sawhorses or blocks to allow air circulation around all sides
- Utilize fans or dehumidifiers to speed up the drying process
- Regularly check the moisture levels of the wood using a moisture meter
- Wait until the moisture content is below the recommended level for staining
Sanding
Sanding wet wood is necessary to create a smooth and even surface for the stain to adhere to. Follow these steps to sand the wood effectively:
- Start with a rough-grit sandpaper (around 80 to 100 grit) to remove any roughness or splinters
- Gradually progress to finer-grit sandpapers (around 180 to 220 grit) to achieve a smooth finish
- Sand the wood along the grain, applying even pressure
- Clean the wood surface using a brush or tack cloth to remove any sanding residue
Cleaning
Cleaning the wood is essential to remove any dirt, debris, or contaminants that could interfere with the staining process. Follow these steps to clean wet wood effectively:
- Prepare a cleaning solution by mixing warm water with mild soap or wood cleaner
- Scrub the wood surface gently using a soft bristle brush or sponge
- Rinse the wood thoroughly with clean water to remove any soap residue
- Allow the wood to dry completely before proceeding with staining
By following these three steps – drying the wood, sanding, and cleaning – you can ensure that your wet wood is properly prepared for staining. Taking the time to prepare the wood correctly will result in a beautiful finish and enhance the longevity of the stain. Remember, patience is key when dealing with wet wood, so allow sufficient time for each step to ensure optimal results.
Staining Techniques For Wet Wood
Staining wet wood requires special techniques to ensure proper adhesion and durability. With careful preparation and the right products, you can effectively stain wet wood for a beautiful, long-lasting finish.
Choosing The Right Stain
When it comes to staining wet wood, the first step is to choose the right stain for the job. Not all stains are suitable for wet or moisture-treated wood, so it’s crucial to select a product specifically formulated for this purpose. Look for stains labeled as “water-based” or “water-repellent” as these types are designed to withstand moisture and adhere to wet surfaces effectively.
To ensure the best results, consider the type of wood you’ll be staining. Hardwoods, such as oak or mahogany, typically require a different type of stain than softwoods like pine or cedar. Keep in mind that the stain’s color will also impact the final appearance of the wood, so take the time to test samples on a small section before proceeding with the entire project.
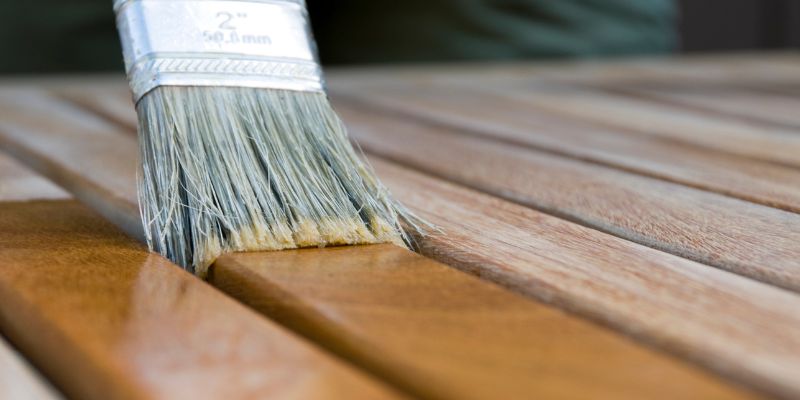
Applying The Stain
When applying stain to wet wood, it’s crucial to follow the proper techniques to ensure long-lasting and even coverage. Here’s a step-by-step guide to help you achieve the best results:
1. Clean the surface: Before staining, make sure the wood is clean and free from any dirt, debris, or existing stain. Use a brush or broom to remove loose particles, and consider using a wood cleaner or sandpaper for more stubborn stains.
2. Start with a small area: Begin staining in a small, inconspicuous section of the wood to test the color and absorption. This will allow you to make any necessary adjustments before proceeding with the entire surface.
3. Apply the stain: Using a brush or roller, apply a thin and even layer of stain, working in the direction of the wood grain. Avoid applying too much stain, as it may result in a blotchy or uneven finish. Allow the stain to penetrate the wood for the recommended amount of time specified by the manufacturer.
4. Wipe off excess stain: After the appropriate drying time, use a clean cloth or rag to wipe off any excess stain from the surface. This step helps to even out the color and remove any build-up that may affect the final appearance.
5. Allow for drying time: Give the stained wood ample time to dry before subjecting it to any moisture or foot traffic. Follow the manufacturer’s instructions for the specific drying time required.
Additional Considerations
When staining wet wood, keep these additional considerations in mind to ensure a successful and long-lasting finish:
– Temperature and humidity: Staining wet wood in extreme temperatures or high humidity can affect the drying process and the final outcome. Ideal conditions are typically between 50-90°F (10-32°C) with humidity levels below 70%.
– Repeat applications: Depending on the desired color intensity and wood’s absorption rate, multiple coats of stain may be necessary. Allow each coat to dry completely before applying subsequent layers.
– Protective finish: To enhance the longevity and protect the stained wood, consider applying a clear topcoat or sealer. These products help seal in the stain and provide an additional layer of protection against moisture, UV rays, and daily wear and tear.
– Regular maintenance: Stained wood requires regular maintenance to retain its beauty and protect it from the elements. This may include periodic reapplication of stain or topcoat, as well as cleaning and inspecting the wood regularly.
With the right stain, proper application techniques, and these additional considerations in mind, you can confidently stain wet wood and achieve a beautiful and enduring finish that enhances the natural beauty of the wood while protecting it from moisture and other potential damage.
Alternative Options For Wet Wood
When it comes to staining wood, waiting for it to dry completely is usually the best option. However, there are alternative methods that can be used to help preserve and stain wet wood if time is a constraint. Read on to explore two alternatives for staining wet wood: waiting for the wood to dry and using wood preservatives.
Waiting For The Wood To Dry
If you have the time and patience, waiting for the wet wood to dry naturally is the recommended approach. This allows the wood to reach its optimal moisture content before staining, ensuring better absorption and color consistency. It’s important to note that wet wood can take a significant amount of time to dry, depending on several factors such as the type of wood, thickness, and environmental conditions.
Factors affecting drying time include:
- Wood species: Different types of wood have varying densities and moisture retention characteristics.
- Wood thickness: Thicker pieces of wood will require more time to dry than thinner ones.
- Humidity: High humidity levels slow down the drying process, while lower humidity speeds it up.
- Air circulation: Proper airflow can expedite the drying process by allowing moisture to evaporate more quickly.
Before initiating the staining process, ensure the wood has reached its recommended moisture content. You can use a moisture meter to measure and determine if the wood is adequately dry.
Using Wood Preservatives
Another option for staining wet wood is to use wood preservatives. These products are specifically designed to penetrate the wood and protect it from moisture, decay, fungi, and insect damage. Applying wood preservatives to wet wood can help seal the moisture inside, preventing further absorption and potential warping or cracking.
Here are some popular wood preservatives:
| Product | Description |
|---|---|
| Oil-based wood preservatives | These products deeply penetrate the wood fibers, providing long-term protection against moisture and UV damage. |
| Water-based wood preservatives | These products are eco-friendly alternatives to oil-based preservatives and offer effective protection against moisture and rot. |
| Copper-based wood preservatives | These preservatives contain copper compounds that act as an effective barrier against fungi, decay, and insect infestation. |
Remember, using wood preservatives does not eliminate the need for the wood to eventually dry before staining. It simply helps preserve the wood’s structural integrity and prevents further damage.
Now that you have a better understanding of alternative options for staining wet wood, you can choose the approach that fits your timeline and requirements. Whether you decide to wait for the wood to dry or use wood preservatives, always ensure you follow the manufacturer’s instructions for the best results.
Conclusion
Staining wet wood can be a challenging task due to the excess moisture present. However, with proper preparation and patience, it is possible to achieve satisfactory results. By following the correct techniques and using the right products, you can enhance the natural beauty of wet wood while ensuring long-lasting protection.
Remember to thoroughly dry the wood and choose a suitable stain that is designed for this specific purpose. With careful consideration and attention to detail, you can successfully stain wet wood and achieve the desired outcome for your project.